Beans and Sardines

  • Home
  • About
  • Recipe of the week
  • Recipes
  • Wines
  • Contact

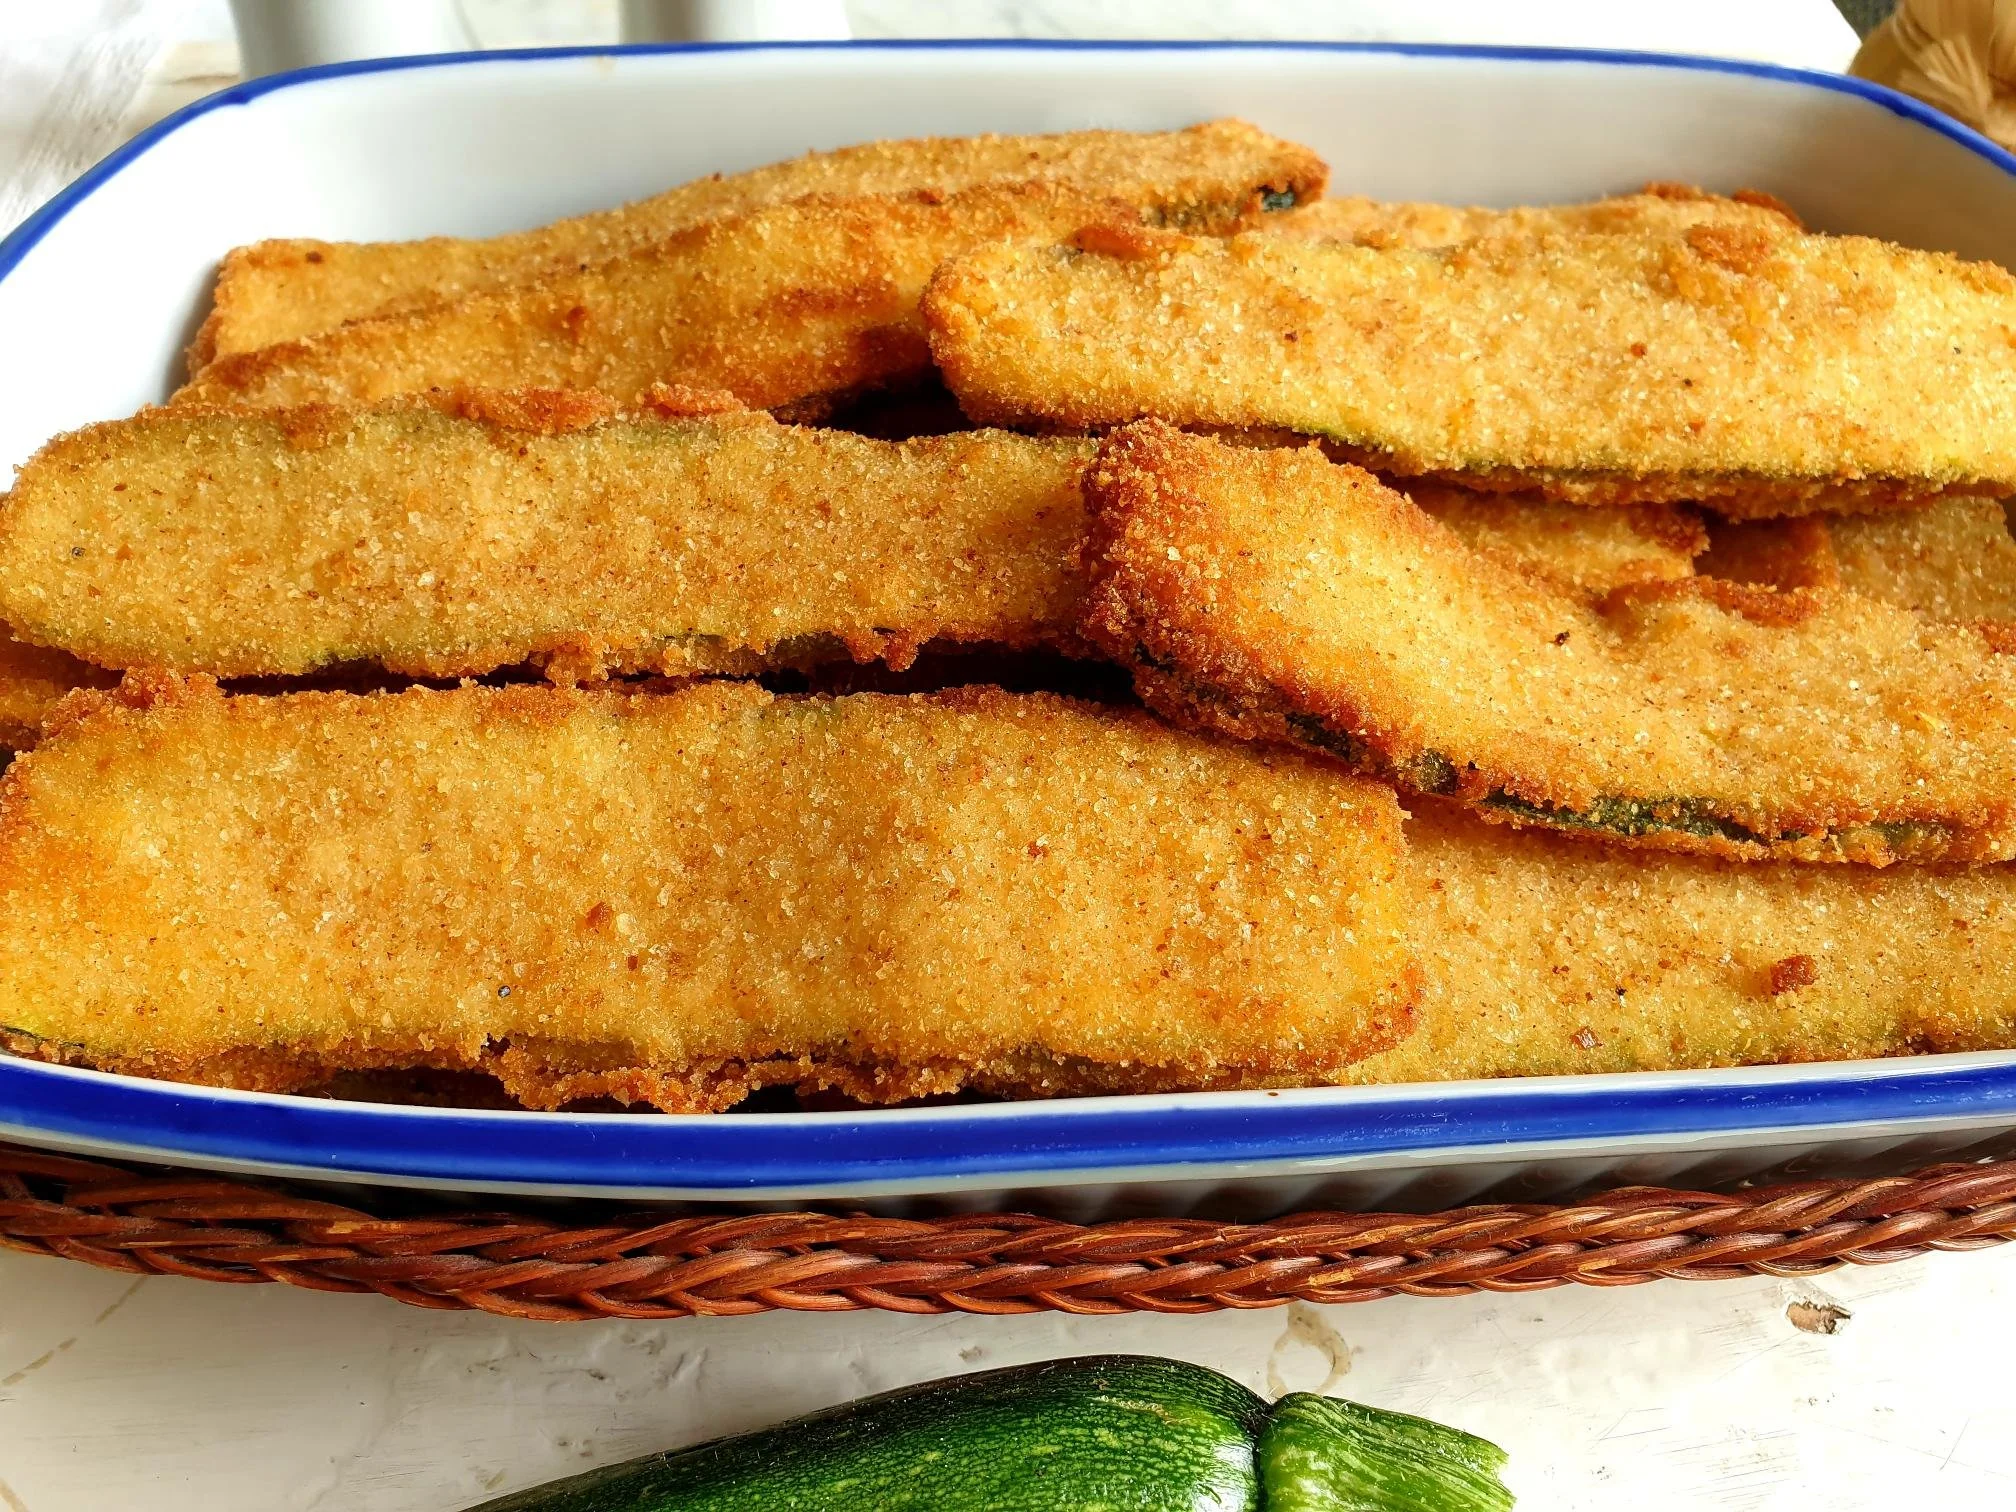
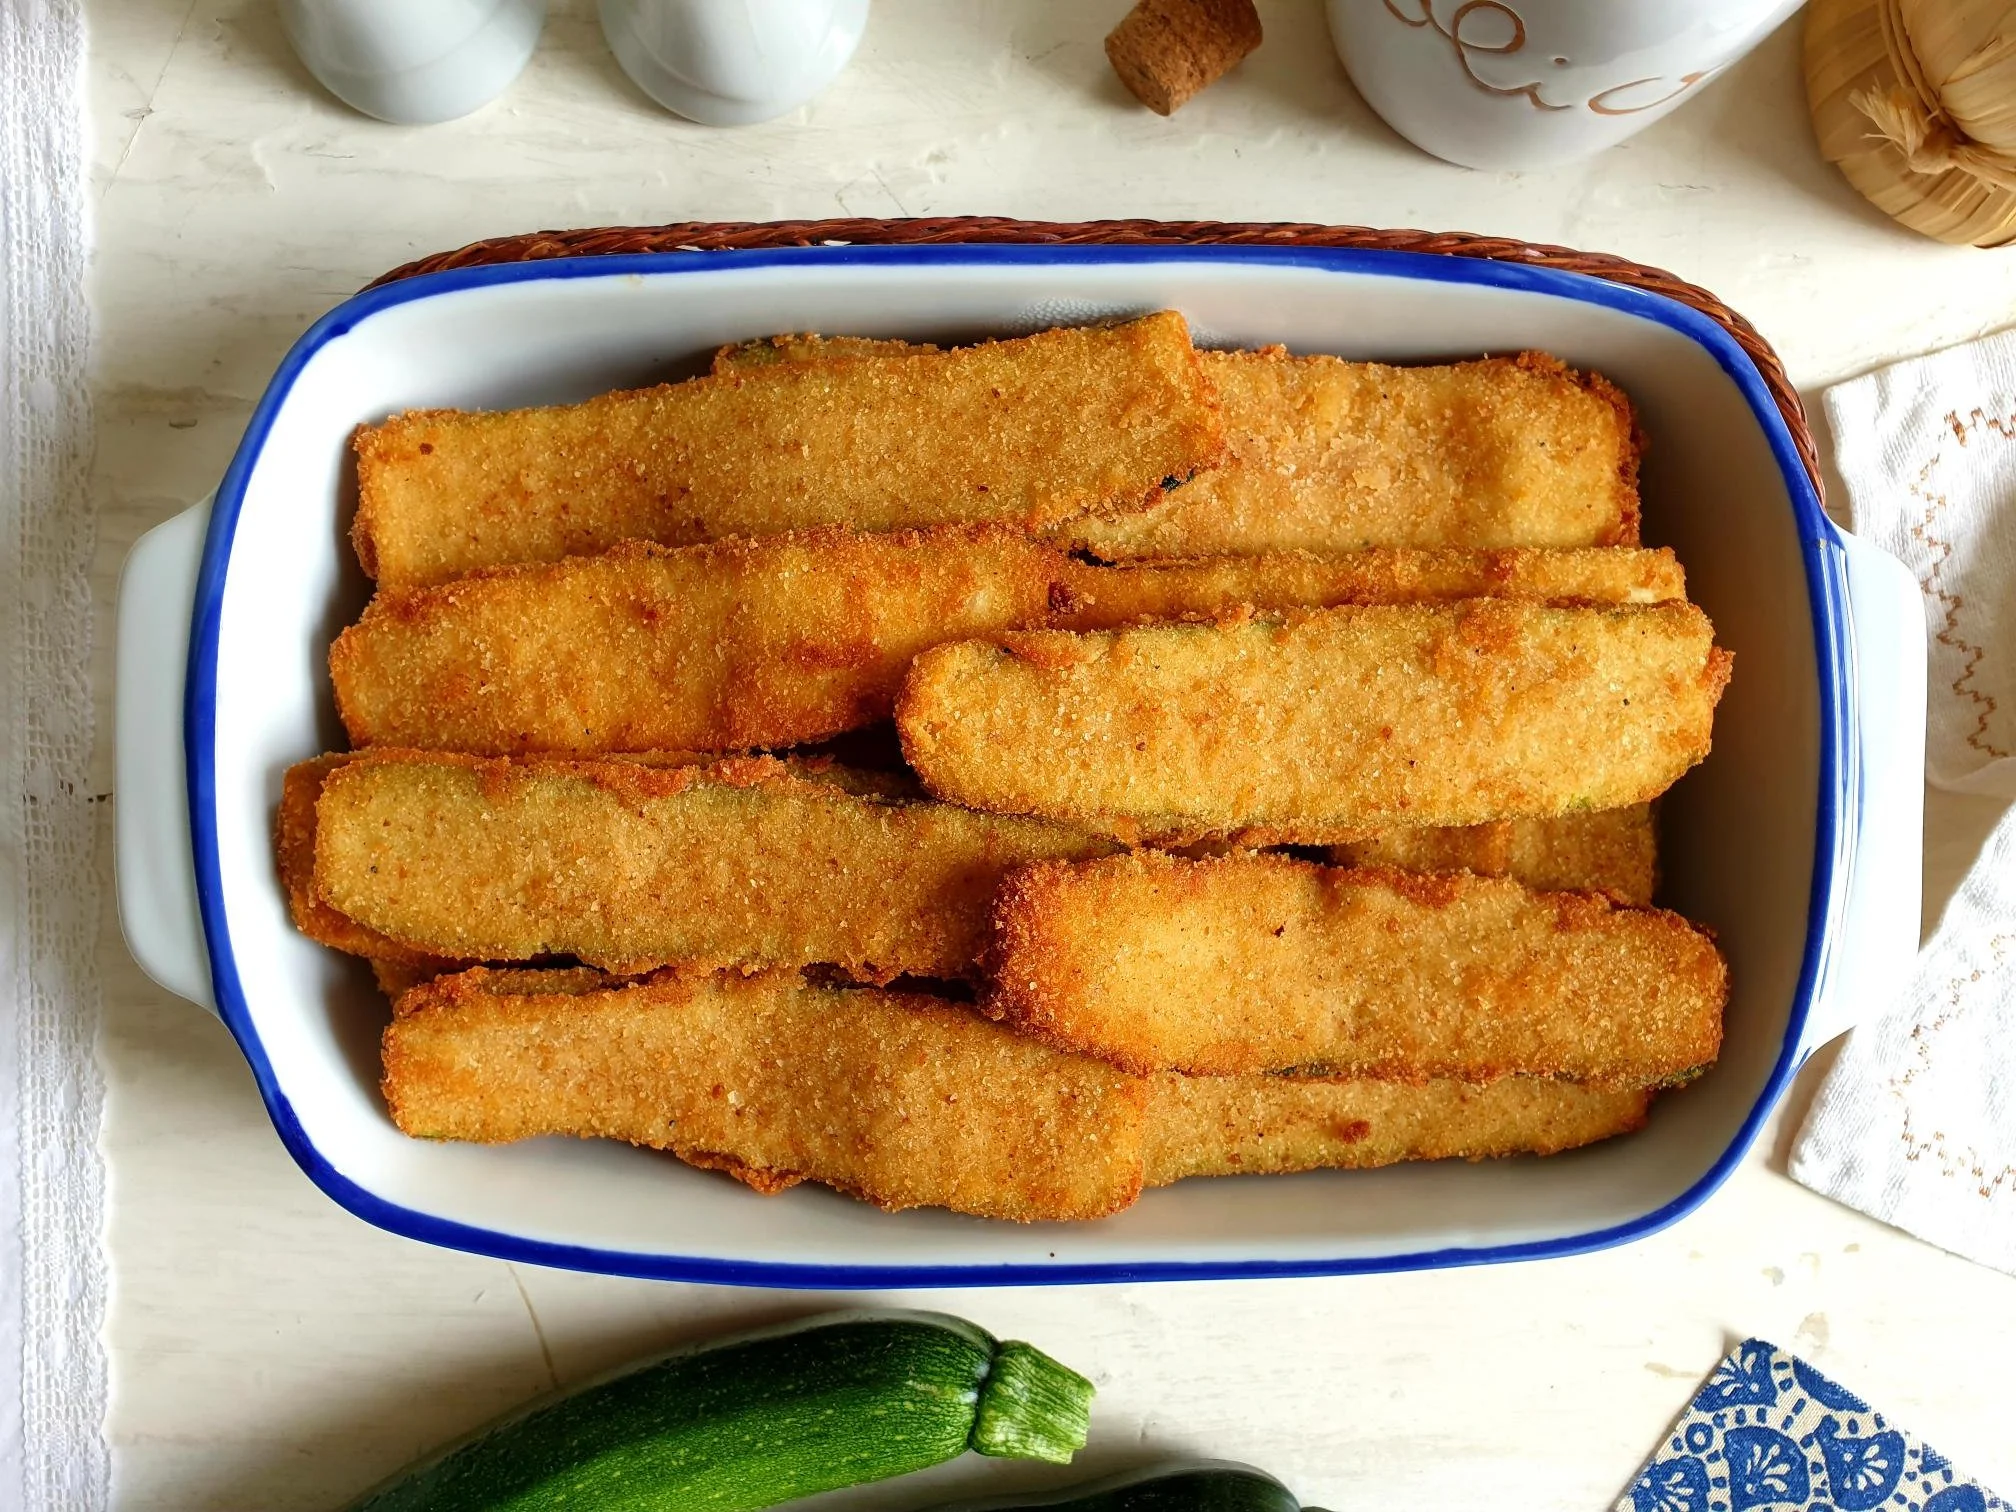
Crispy Breaded Courgettes Istrian Recipe

Beans and Sardines
August 03, 2022 by tina oblak in Adriatic Recipe, Appetizers, bite-sized nibbles, brunch, child friendly dish, child friendly meal, dinner, Easy recipe, entrée course, family friendly dish, family friendly meal, Finger food, first course, first course dish, first course meal, Istrian cuisine, Istrian dish, Istrian food, Istrian gastronomy, main course, main dish, main vegetarian course, main vegetarian meal, main vegetarian dish, Rustic dish, Side Dishes, simple recipe, Slovenian cuisine, Slovenian food, Slovenian gastronomy, Small bites, Spring dish, Spring recipe, Starters, summer dish, summer recipe, supper, savory nibbles, Vegetable side dish, Vegetables, Vegetarian

Crispy breaded courgettes is one of the most most loved dishes and a total crowd pleaser. It consists of slicing the courgettes, dredging them into a flour, then dipping them into whisked eggs, coating them with breadcrumbs and quickly shallow fried them until golden and crispy, which makes them utterly delicious, irresistible and scrumptious, you just cannot stop eating them! This dish will become an instant hit and breaded courgettes will disappear from the serving plate in no time!

Try to prepare courgettes this way when they are in full season and abundant, I can almost guarantee you, that the most reluctant courgette eaters will be converted in eating this summertime vegetable with delight.

This dish is also fun to make, and if you have children, try to involve them in the breading process, they will absolutely love it, but make sure they are as far away as possible, in a nicest way, during frying.

Breaded courgettes are ideally eaten hot as soon as they are fried with some mashed potatoes, a seasonal salad, but also incredibly delicious at the room temperature and offered as a part of a buffet, great used as a filler in a sandwich (add a bit of fresh rocket salad and spread a slice of bread with a bit of mayonnaise, basil or vegetarian pesto, and you will have a sandwich that is to die for).

This dish can be made ahead and stored which makes it an ideal picnic food, you bring this dish with you on a picnic, and you will stand out from the crowd and have no chance to bringing back home any leftovers...

I am sharing here my mother's recipe for crispy breaded courgettes, one of whole family's absolute favourite plates of food.

I simply adored this dish as a child, and nothing much has really changed since...
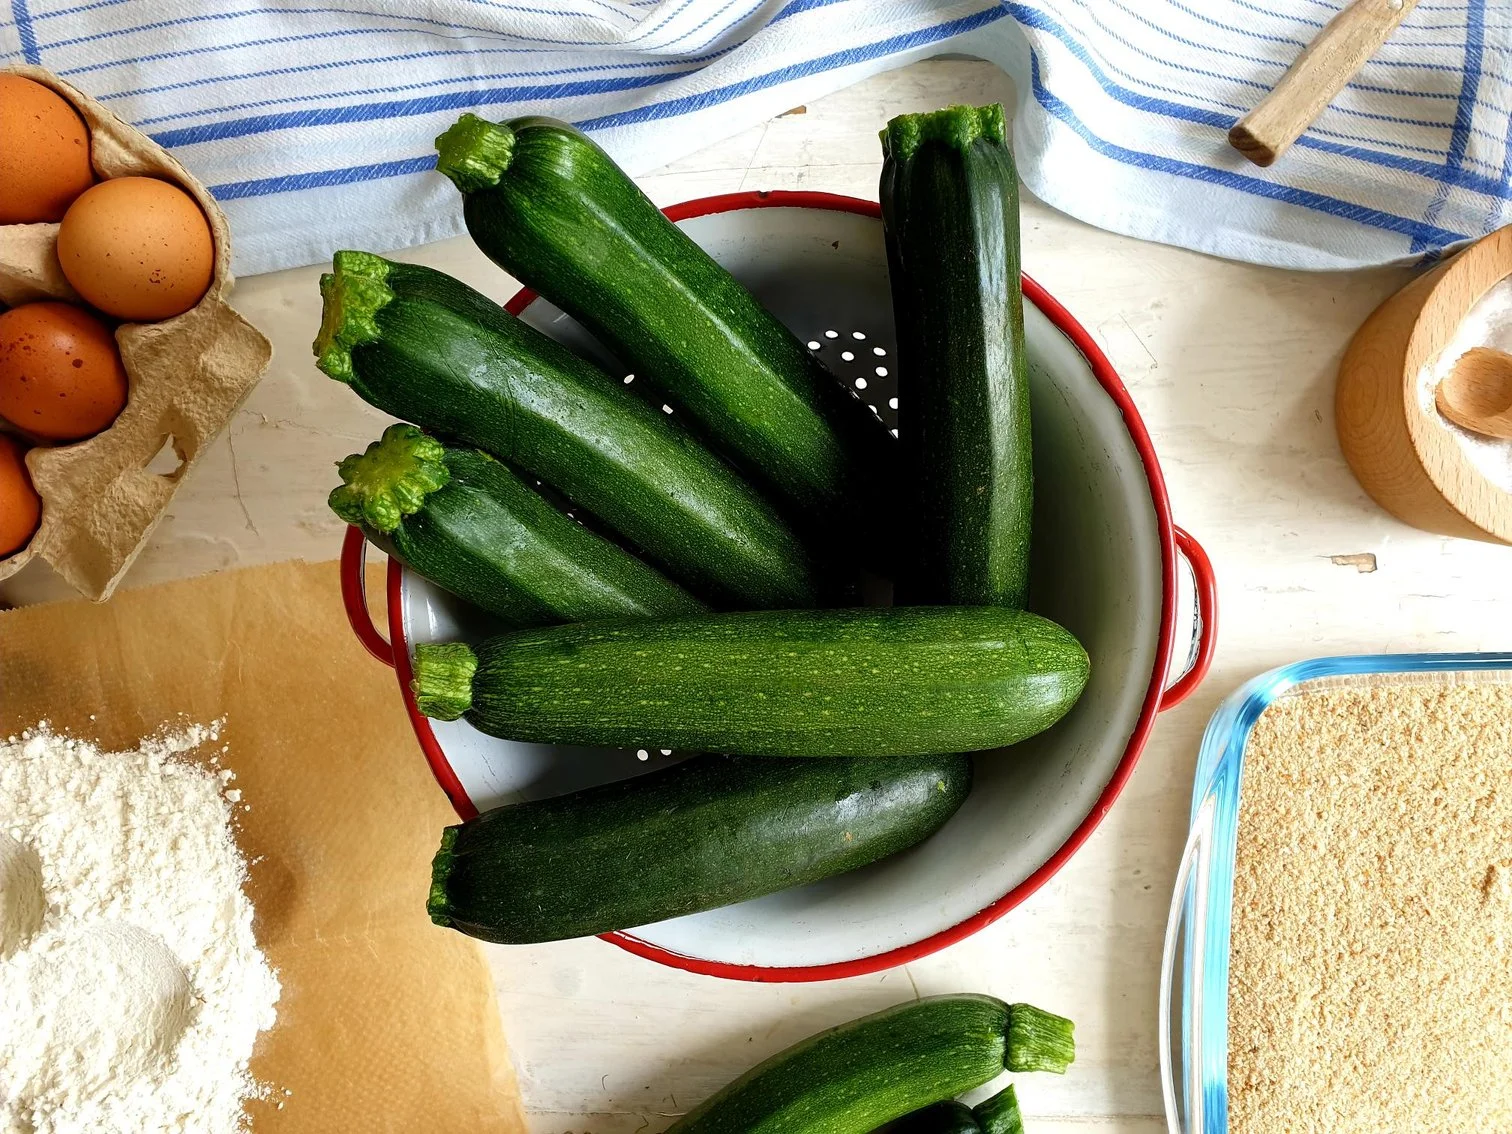
Ingredients

Serves 4

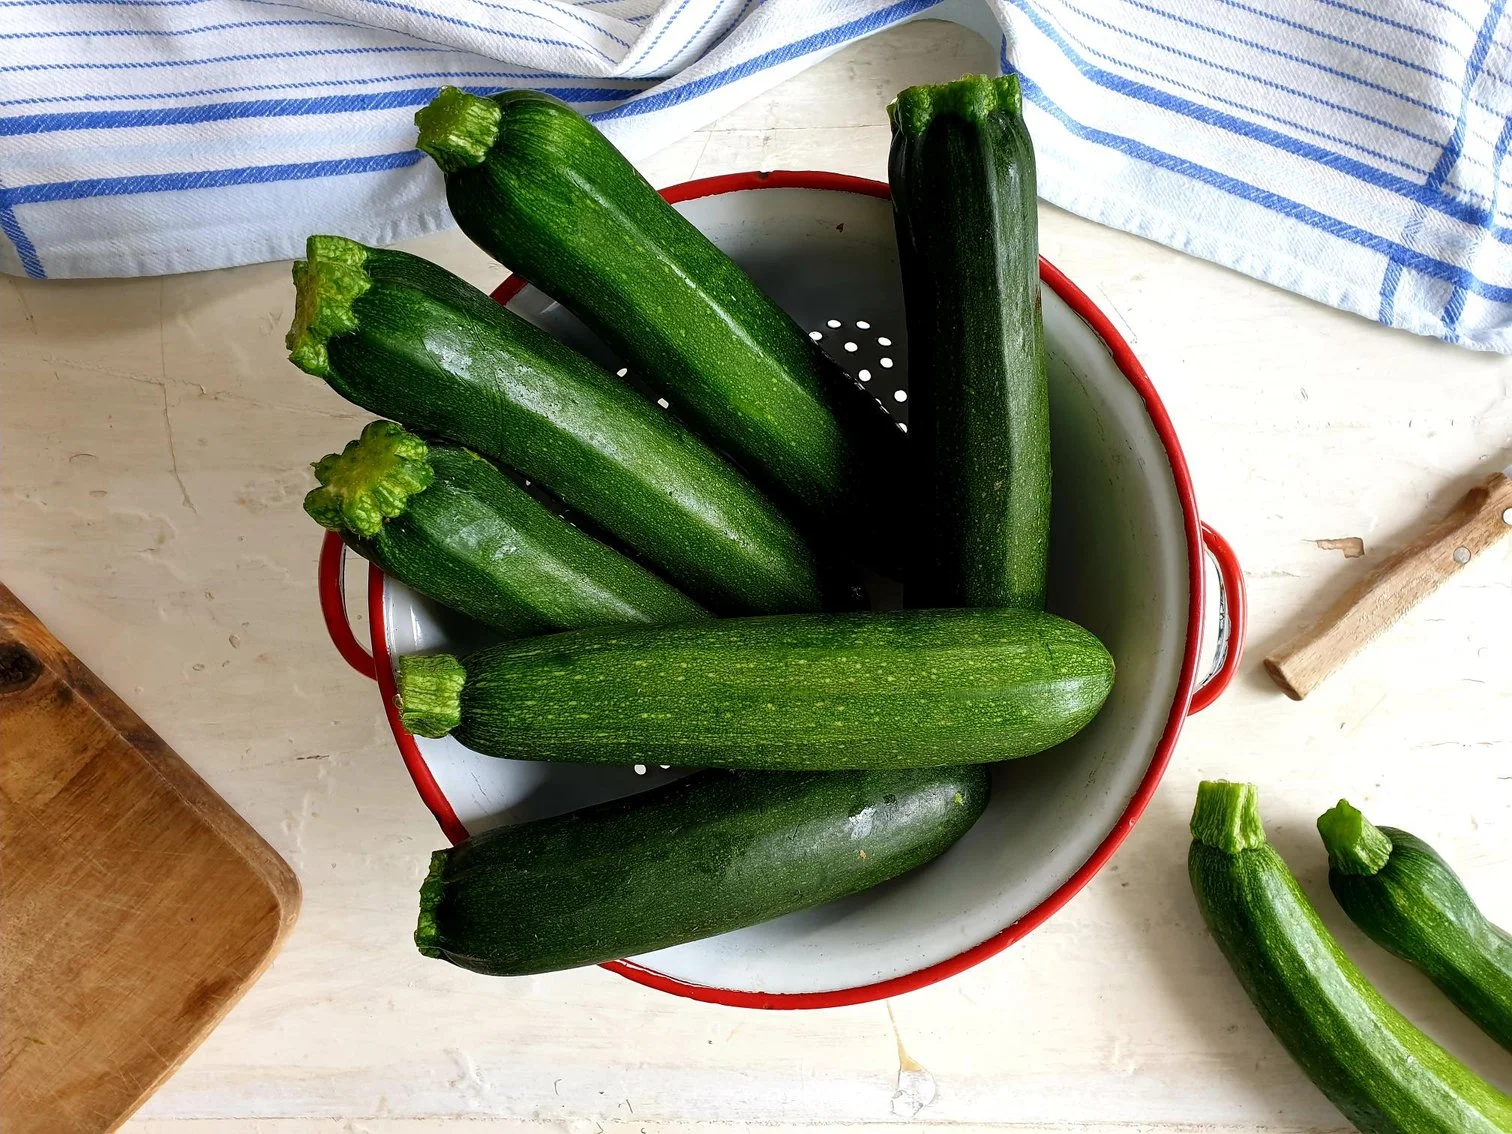
  • fresh courgettes, medium size (approximately 700-800g)

  • 2-3 eggs (the number of the eggs needed depends on their size and on the quantity of the courgettes you are using)

  • dry breadcrumbs

  • plain flour

  • sea salt

  • black pepper, optional

  • oil for frying

Method

Wash the courgettes under cold running water and dry them with the kitchen paper or a clean kitchen towel.

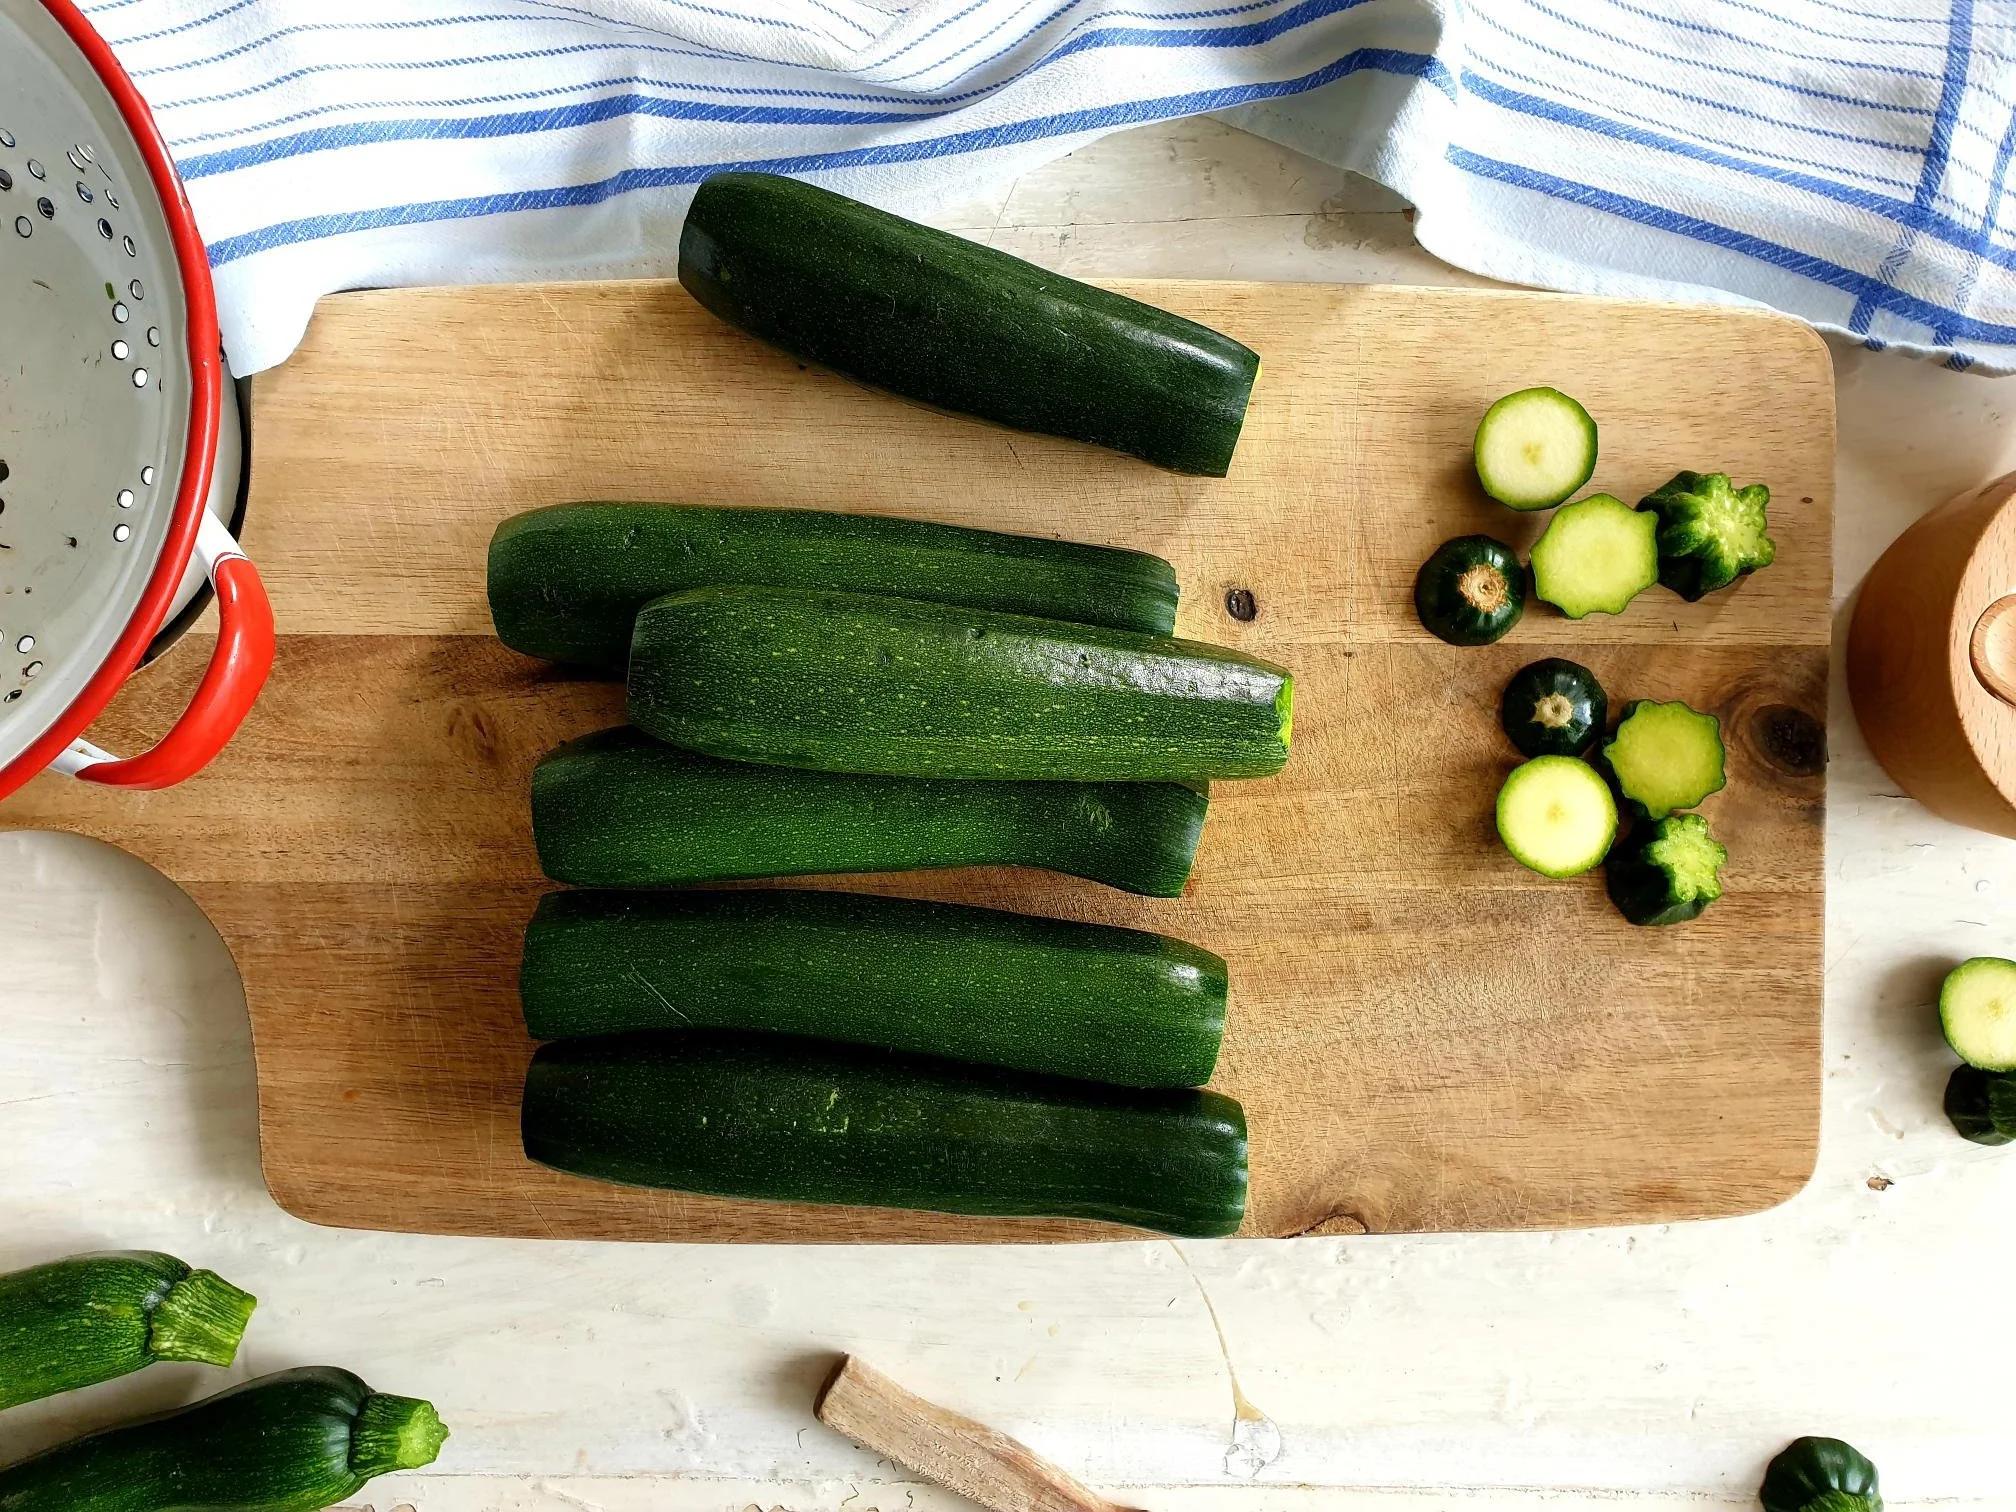
Place the courgettes on a chopping board and cut off the ends.

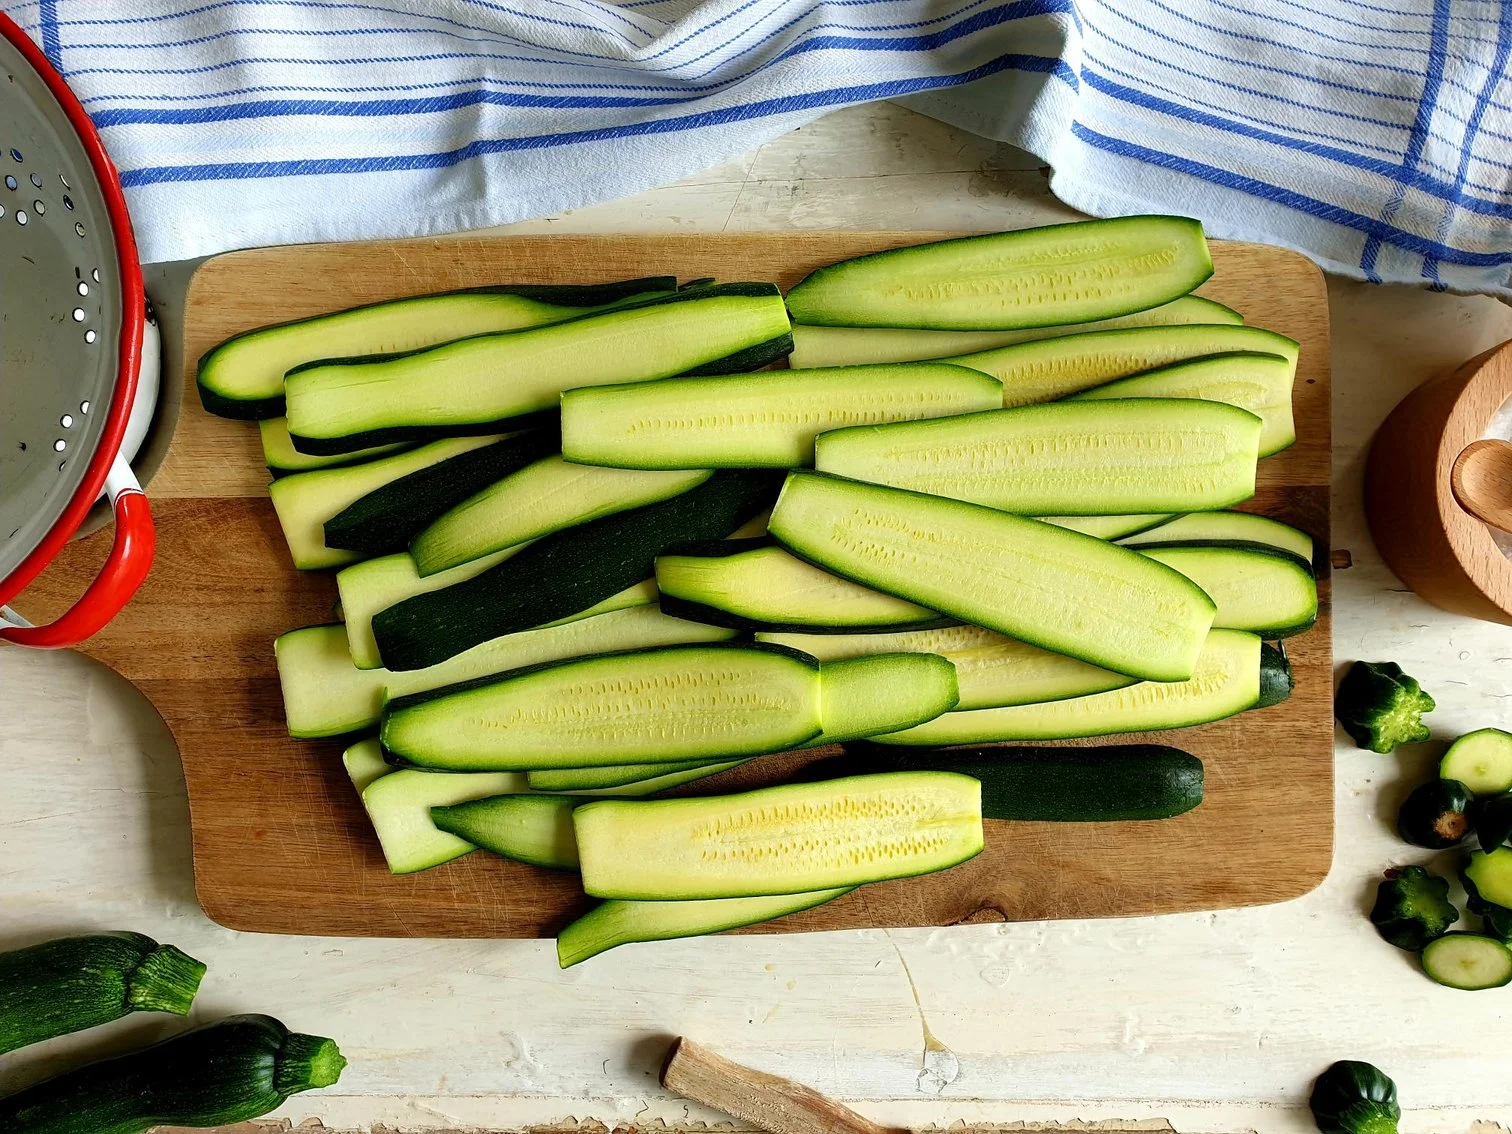
With the knife or a mandolin slicer, slice the courgettes into a 4-5mm thick slices (if the courgettes are big, and you find them difficult to slice vertically, cut each courgette in half first, and then slice).

View fullsize Breaded Courgettes 6.jpg
View fullsize Breaded Courgettes 7.jpg

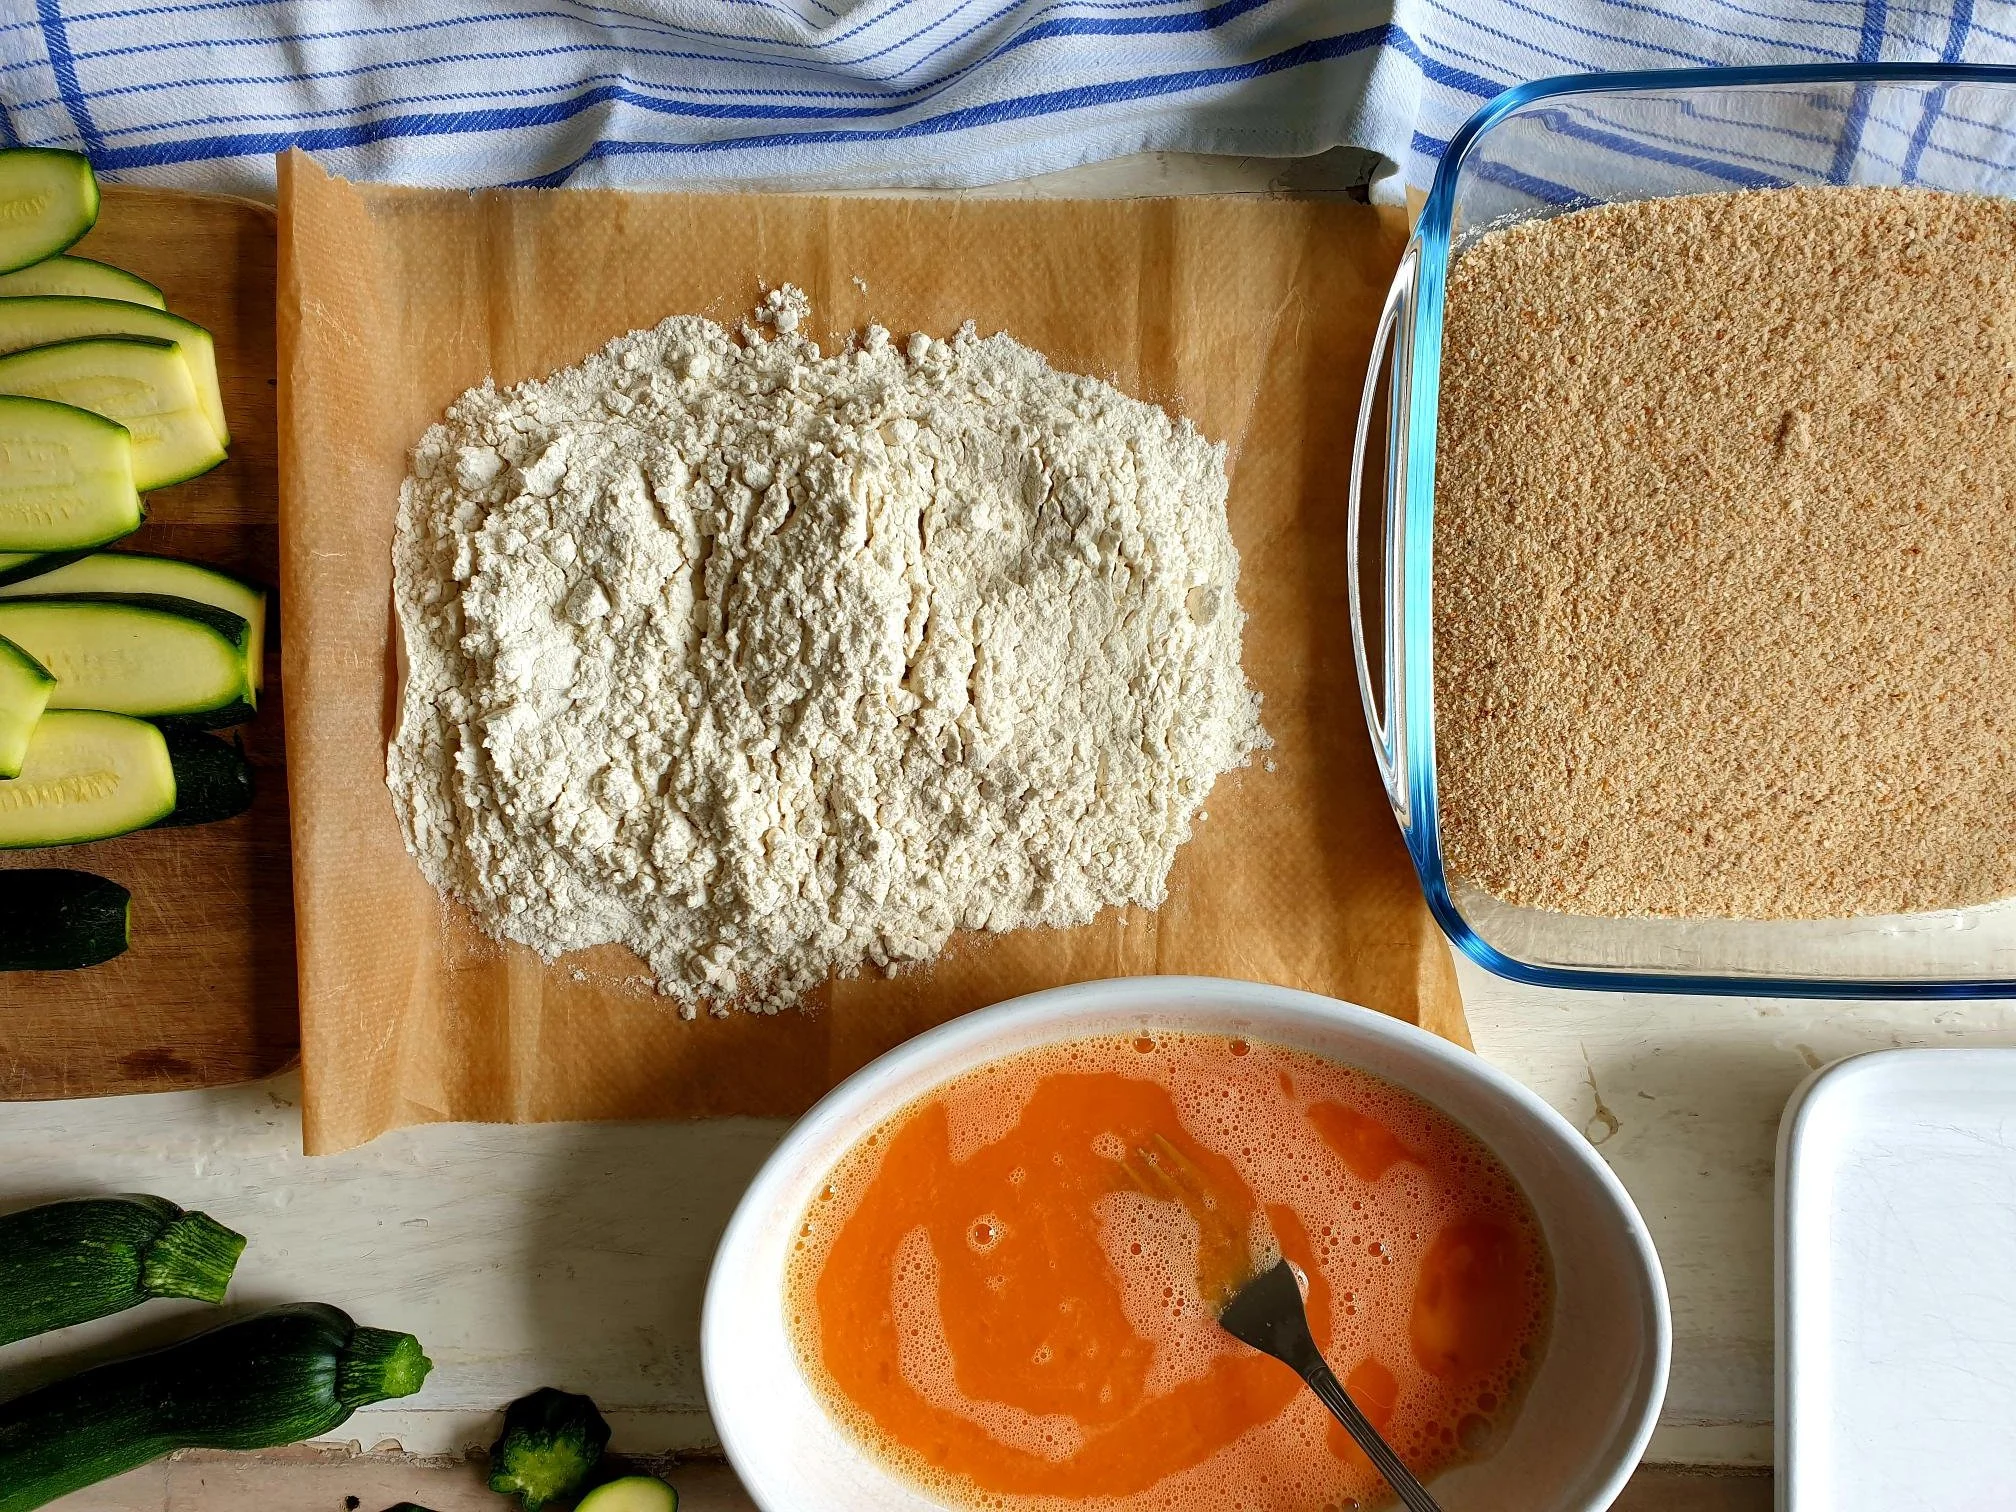
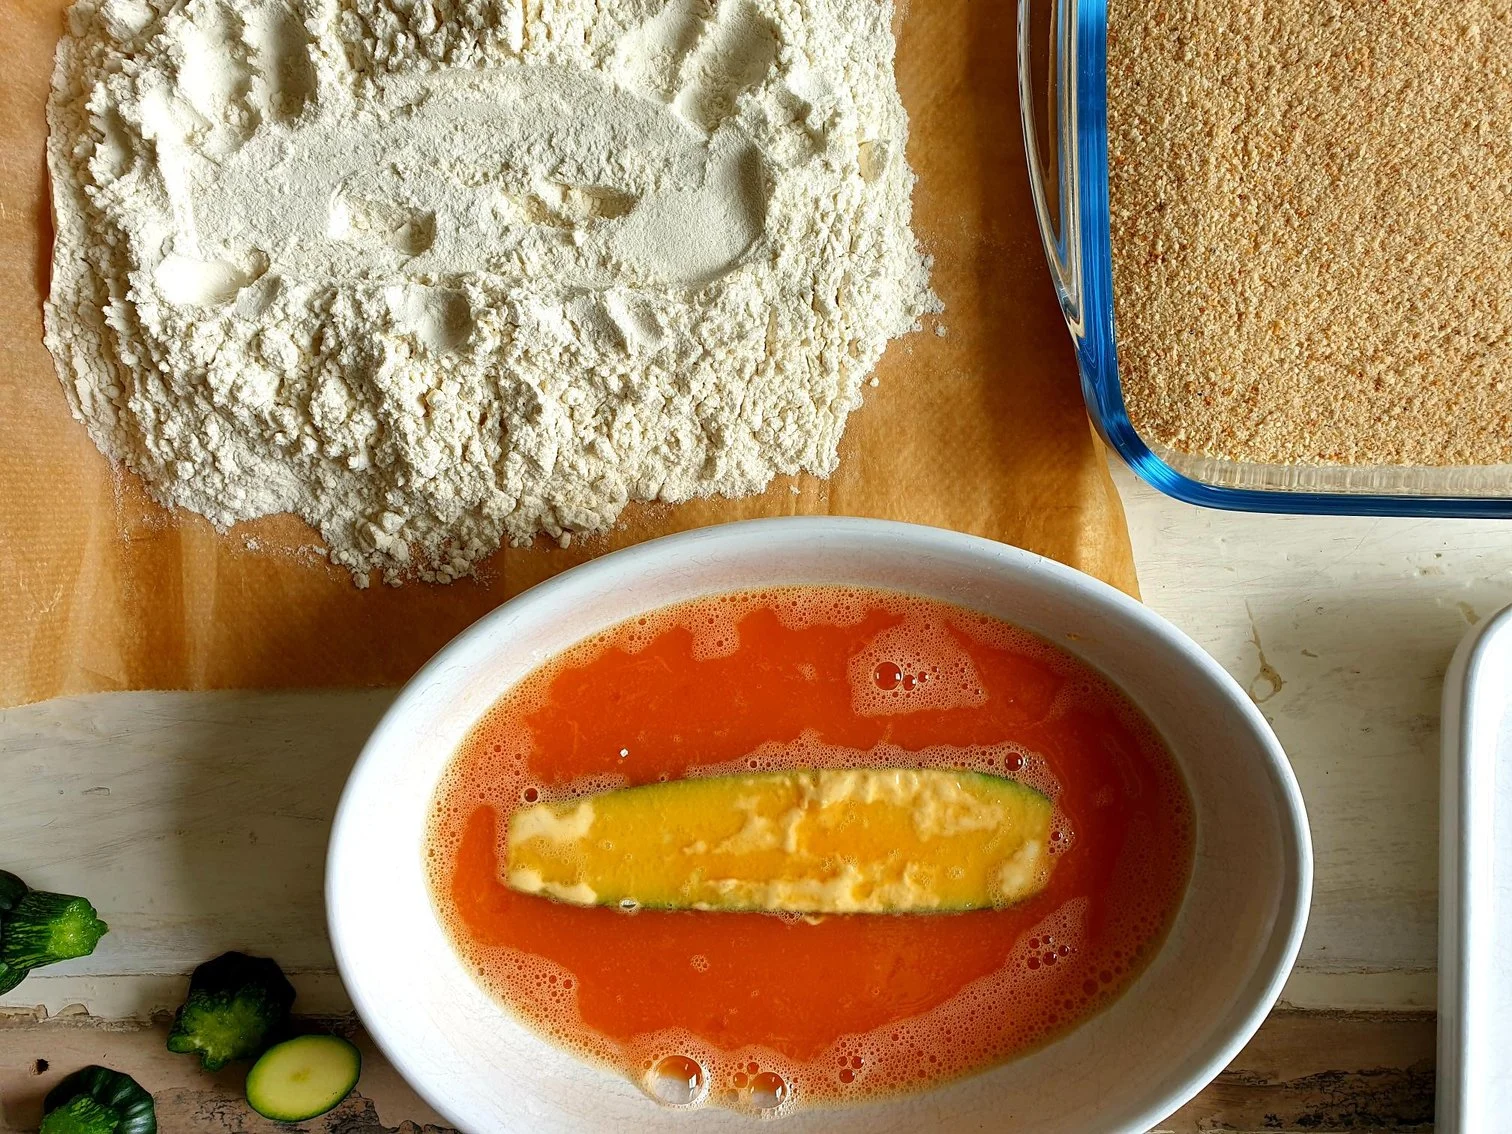
Prepare three dishes for flour, eggs and breadcrumbs.

Put the flour in a wide shallow bowl, dish or on a plate (I just use a piece of baking paper, fold it when I finish, and use it the next time)

Put the eggs in another shallow bowl or dish (big enough to accommodate one or two slices of courgettes at the same time) whisk lightly and season with sea salt and black pepper, if using. I suggest you use two eggs to start with, and crack another one, if two are not enough.

Put the breadcrumbs in a third shallow bowl, dish or plate.

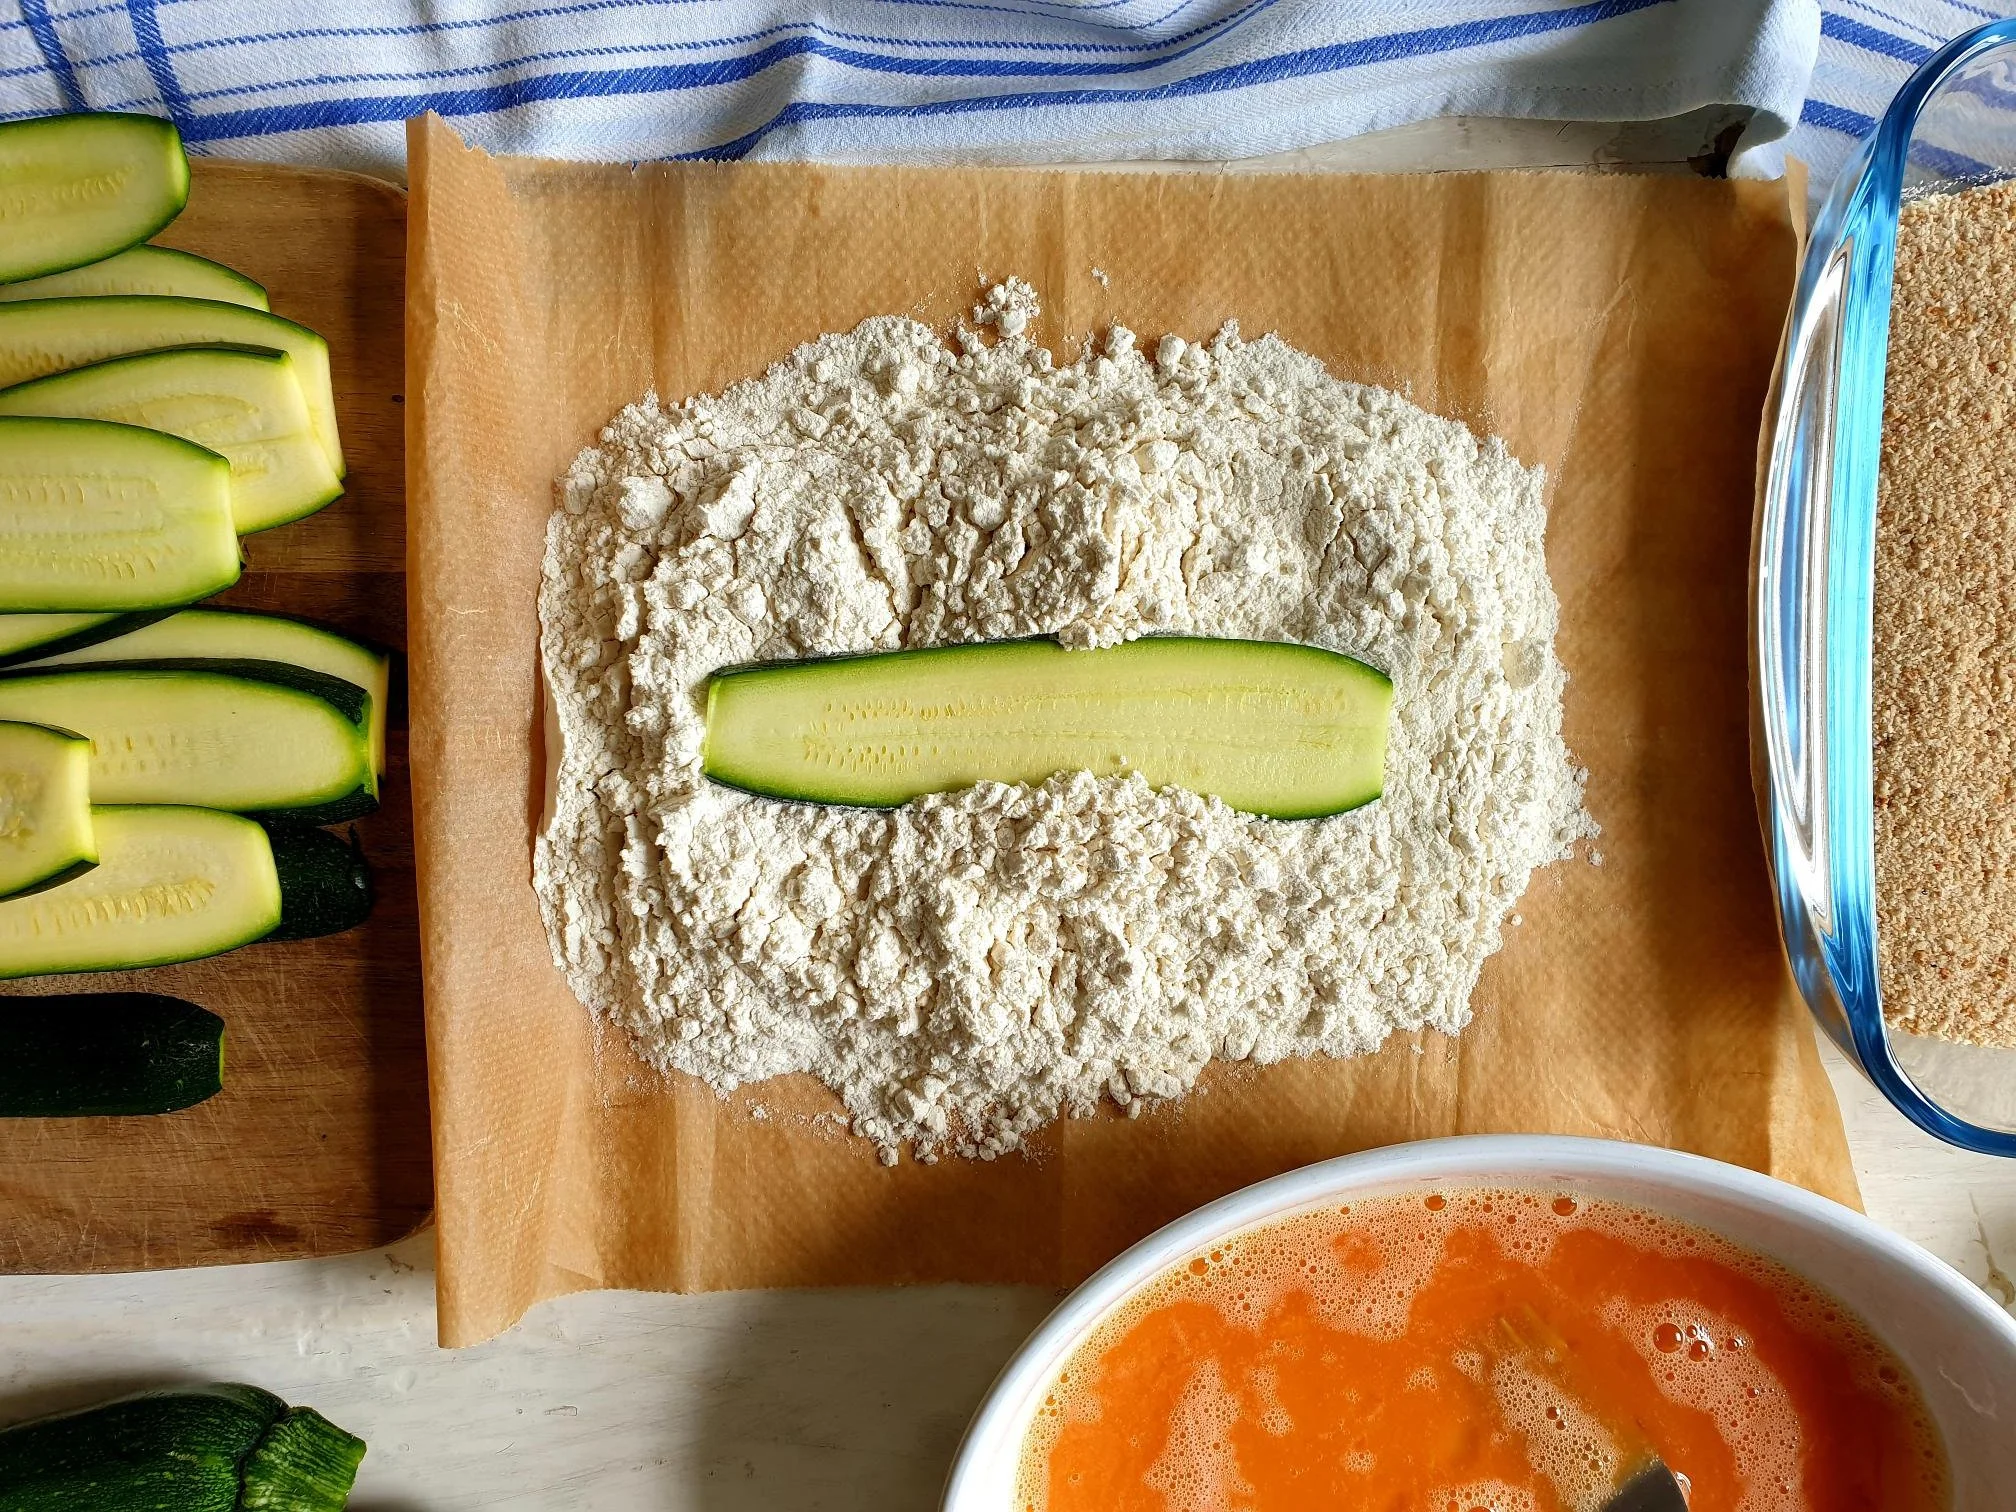
Start the breading process.

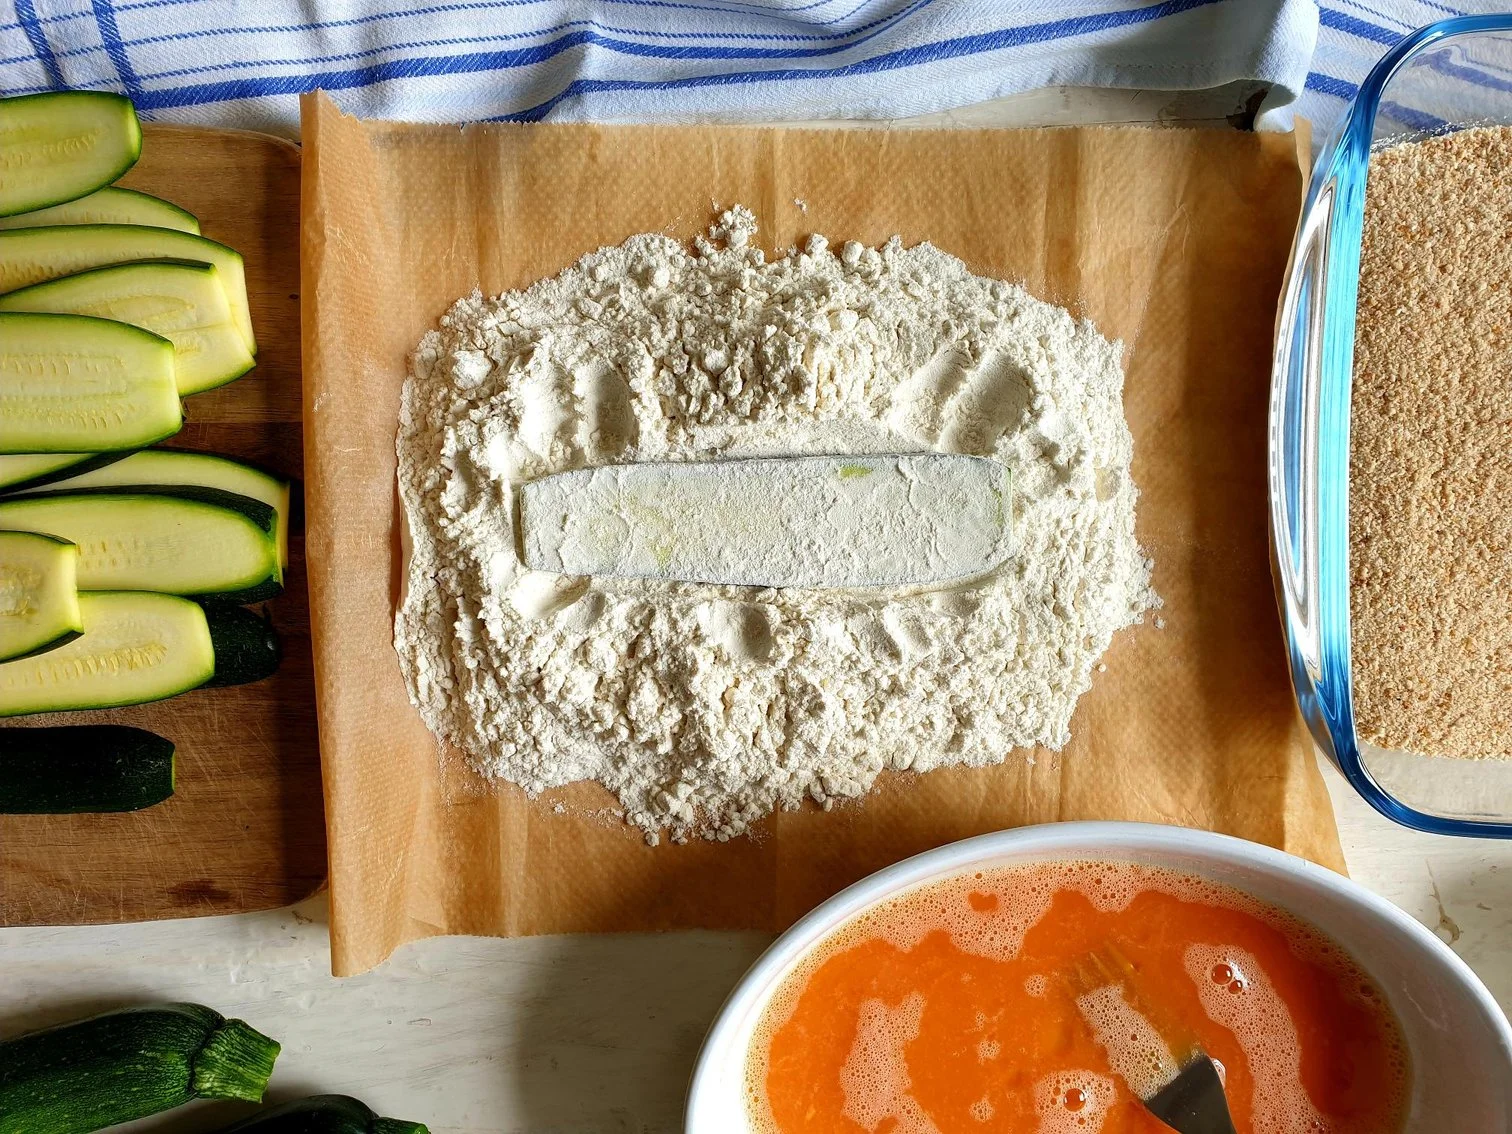
Dredge each slice of courgettes into flour making sure everything is coated and gently shake off the excess.

View fullsize Breaded Courgettes 9.jpg
View fullsize Breaded Courgettes 10.jpg

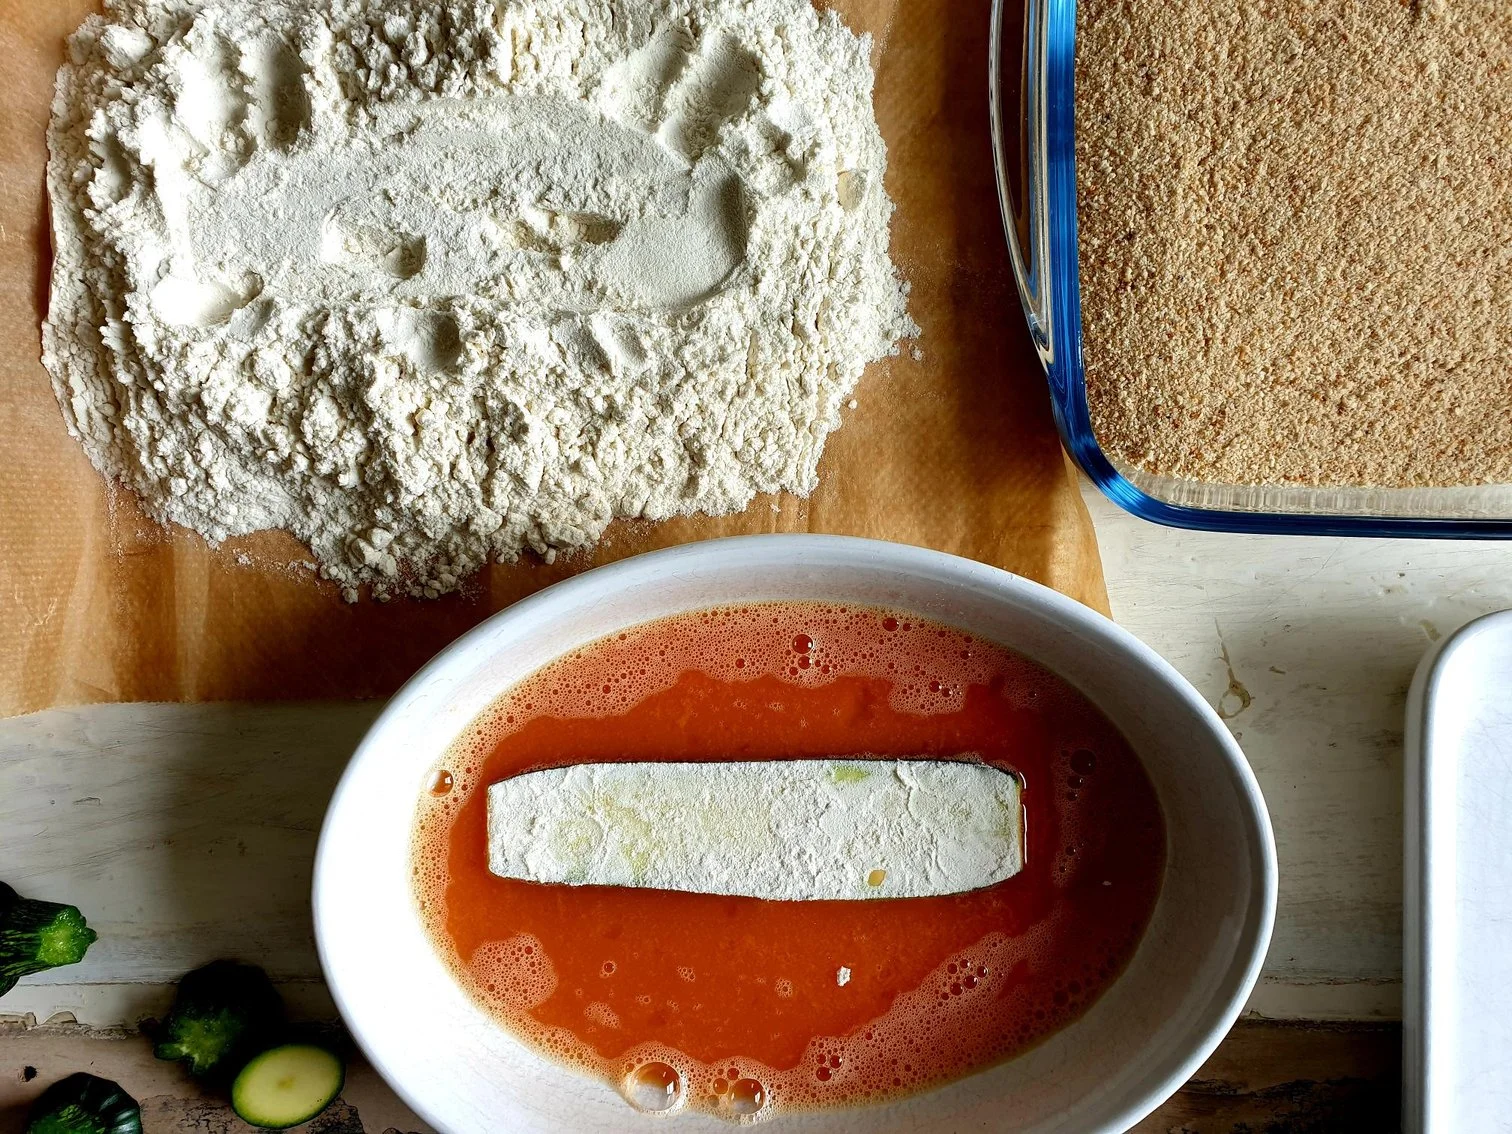
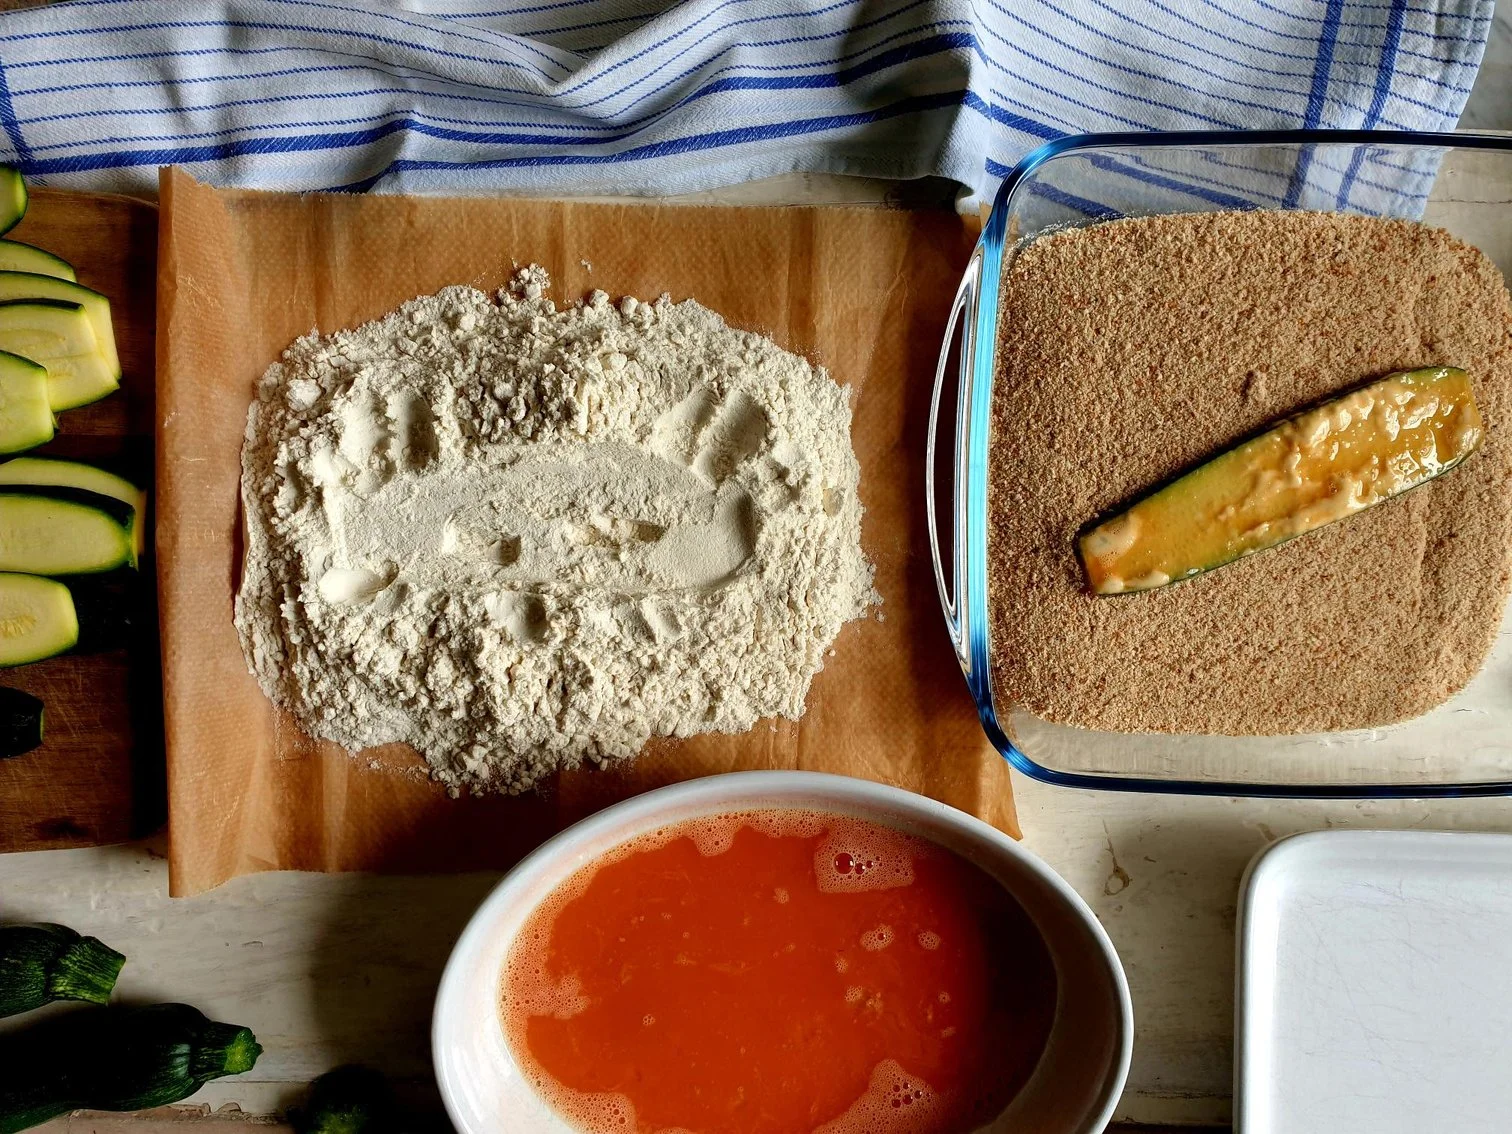
Dip the floured slice of the courgette into a whisked egg, turn to coat, make sure all the sides are covered in egg, and let drip off excessive egg.

View fullsize Breaded Courgettes 11.jpg
View fullsize Breaded Courgettes 12.jpg

Coat in breadcrumbs and press a bit so the breadcrumbs adhere well and shake off gently the excess.

View fullsize Breaded Courgettes 13.jpg
View fullsize Breaded Courgettes 14.jpg

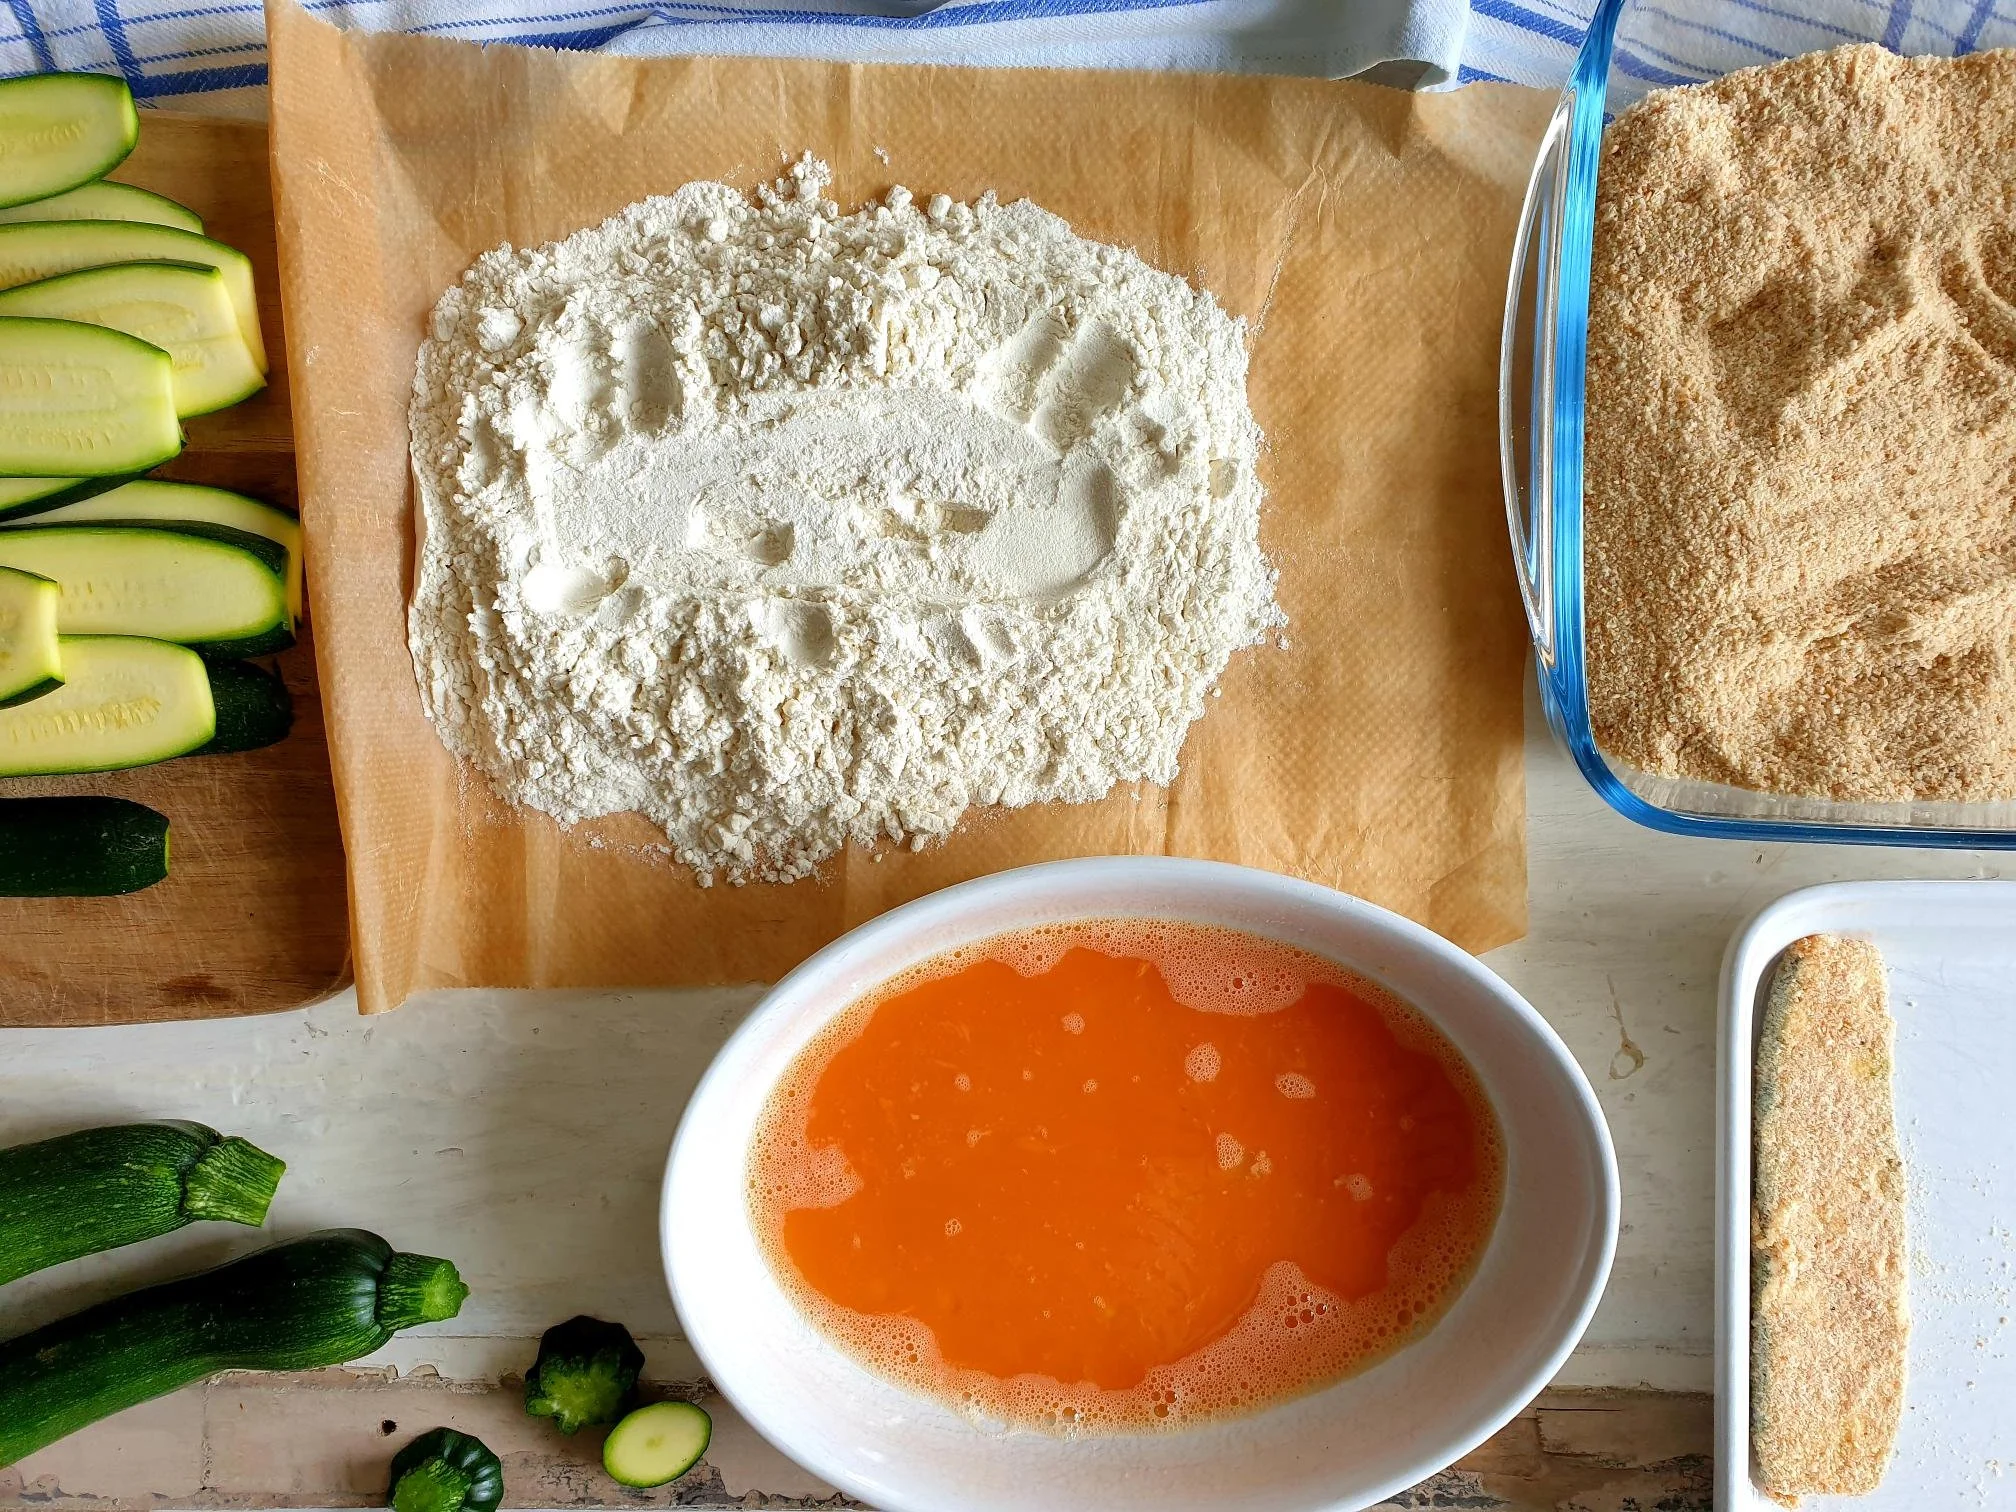
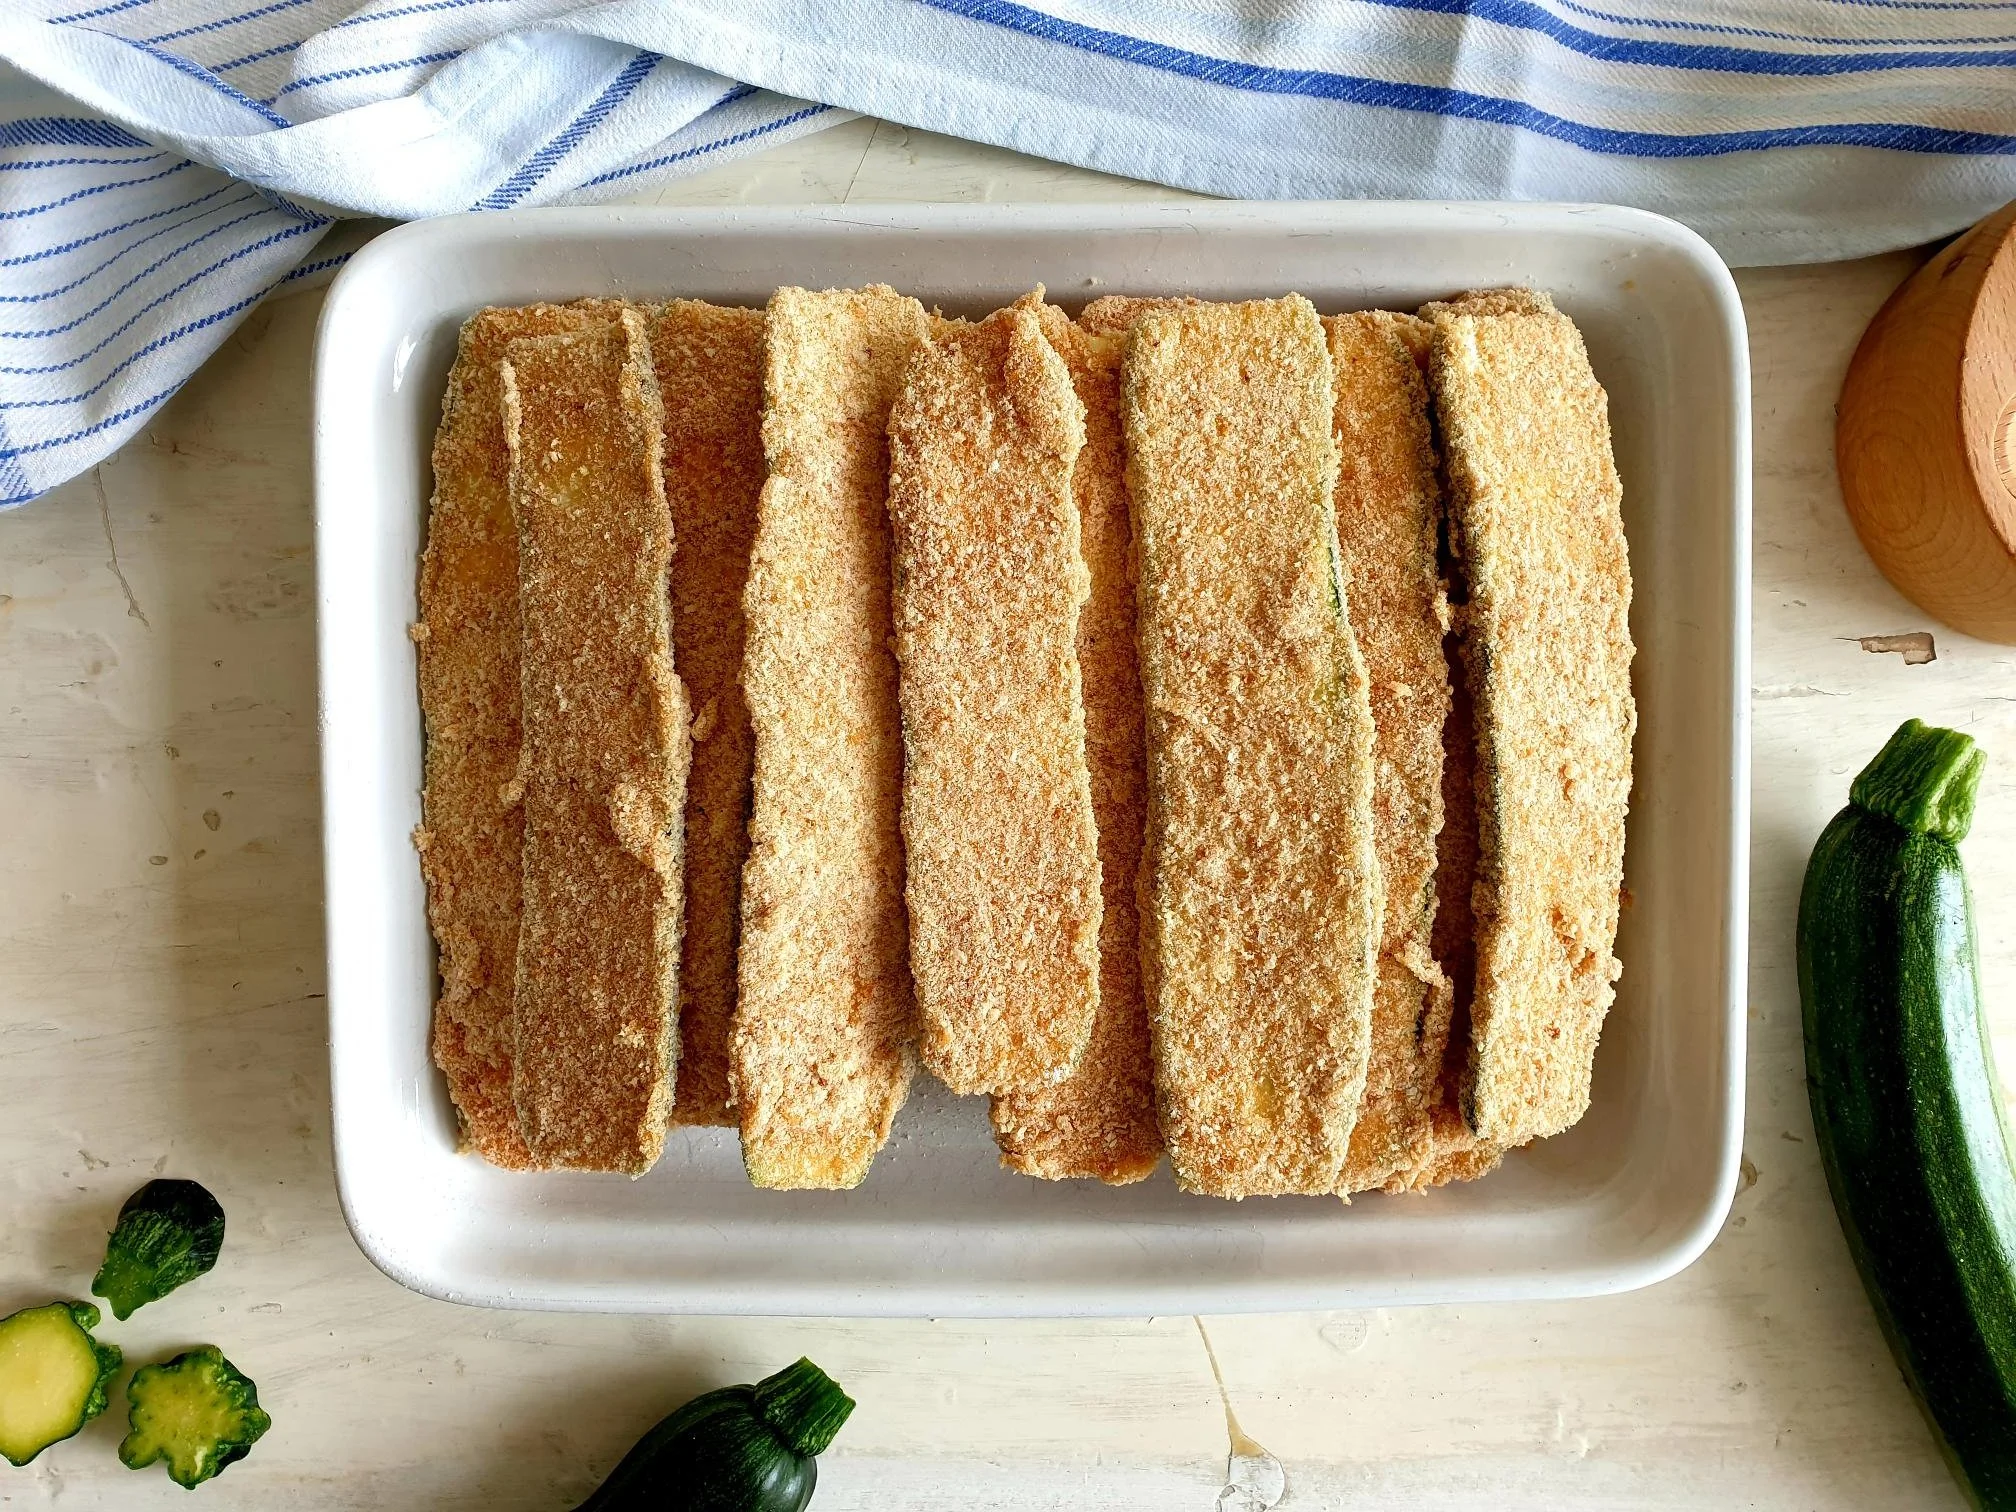
Repeat the process until you have used all the courgette slices.

Breaded courgettes can be shallow fried or baked in the oven.

Frying method

Pour oil into a large frying pan, about 1cm, and heat it over a medium heat (how much oil you need will depend on how big your frying pan is)

Once oil is hot, add breaded courgette slices, a few at time without overcrowding the pan (this will bring the oil temperature down)

Fry for about one minute on each side or until the breadcrumbs turn golden-brown in colour.

Transfer fried courgettes onto a dish lined with kitchen paper to allow excess oil to be absorbed.

If the slices are lined in layers, make sure you put a kitchen paper between every layer.

Baked in the oven method

Line large baking tray with a non stick baking parchment and place sliced bread courgettes on a tray, one next to each other, spray or drizzle with olive oil and bake in a preheat oven at 200 C static or equivalent for about 20 minutes or until golden-brown in colour.

Just a thought

I have shared here the basic recipe for crispy breaded courgettes, but if you wish to add additional flavour to the dish, you can add some fresh finely chopped flat leaf parsley in whisked egg and some grated Parmiggiano Reggiano cheese in breadcrumbs.

You can store crispy breaded courgettes in an airtight container in the fridge for about two days.

This dish is not suitable for freezing.

If you wish to prepare this courgette dish in advance, it is a good idea to store the uncooked and not fried breaded slices of courgettes in an airtight container in the fridge, and just before frying, “refresh” the breadcrumbs coating by covering the slices in breadcrumbs once again, this will give you a crunchy coating.

A vary tasty variation of this dish is using mushrooms or aubergines instead of courgettes.

Wine suggestion

Valdobbiadene Prosecco Superiore Brut - Nino Franco

August 03, 2022 /tina oblak
fresh courgettes, breaded courgettes, crispy breaded courgettes, fried breaded courgettes, zucchini, fresh zucchini, breaded zucchini, crispy breaded zucchini, fried breaded zucchini, zucchine impanate fritte, zucchine impanate al forno, pohane bučke, ocvrte pohane bučke
Adriatic Recipe, Appetizers, bite-sized nibbles, brunch, child friendly dish, child friendly meal, dinner, Easy recipe, entrée course, family friendly dish, family friendly meal, Finger food, first course, first course dish, first course meal, Istrian cuisine, Istrian dish, Istrian food, Istrian gastronomy, main course, main dish, main vegetarian course, main vegetarian meal, main vegetarian dish, Rustic dish, Side Dishes, simple recipe, Slovenian cuisine, Slovenian food, Slovenian gastronomy, Small bites, Spring dish, Spring recipe, Starters, summer dish, summer recipe, supper, savory nibbles, Vegetable side dish, Vegetables, Vegetarian
Comment

Risotto Primavera Venetian inspired Recipe 

Beans and Sardines
July 27, 2022 by tina oblak in Adriatic Recipe, child friendly dish, child friendly meal, dinner, Easy recipe, entrée course, family friendly dish, family friendly meal, first course, first course dish, first course meal, Healthy, healthy mael, hearty dish, Istrian cuisine, Istrian dish, Istrian food, Istrian gastronomy, light meal, main course, main dish, main vegetarian dish, main vegetarian meal, Nutritious, Nutritious dish, recipe from Northern Ital, Risotti, Risotto, Rustic dish, simple recipe, Slovenian cuisine, Slovenian food, Slovenian gastronomy, Spring dish, Spring recipe, Starters, summer dish, summer recipe, supper, Vegan, Vegetables, Vegetarian

This classic spring vegetable risotto, using any seasonal spring vegetables, must be one of the most loved and popular dishes for all generations. This risotto is rustic, simple, and filling, and represents a genuine plate of food that puts a smile on anyone's face with the array of colours on the plate offered by the vegetables.

It can be enjoyed as a first course meal, which is traditionally what it is in Italy, or as a main course with a nice salad on the side.

This vegetarian risotto really celebrates the new season of vegetables, it is light but full of freshness and flavour and it is very satisfying. You can vary the recipe using different vegetables and combinations according to what is in season, just mix and match the vegetables that are your top favourites, add a handful of fresh roughly chopped baby spinach or broad beans a few radishes for example.

My mother has made this risotto time and time again, it was a regular mid week meal, we knew we had risotto primavera but it would be slightly different every single time depending on the variety of vegetables she would find available in the season from the market or from my paternal grandfather's vegetable patch. 

Ingredients 

Serves 4 

  • 300g risotto rice (like Vialone Nano, Arborio or Carnaroli) 

  • 3 Tbsp extra virgin olive oil 

  • 1 celery stick (about 30g), finely chopped 

  • 1 medium courgette (about 113g), sliced or diced 

  • 1 medium carrot (about 90g), peeled and sliced or diced 

  • 1 medium onion (about 100g), peeled and finely chopped 

  • green asparagus (about 100g), wash, trim off the wooden ends and finely slice the stalks leaving the tips whole 

  • green beans (about 50g), sliced 

  • fresh peas in pods (about 300g), remove the peas from the pods (can use frozen petits pois, about a handful) 

  • 1 tomato (about 170g), roughly chopped 

  • sea salt 

  • fresh flat leaf parsley (about 4g), finely chopped 

  • 1 litre hot vegetable or chicken broth or stock (you can use instant vegetable or chicken stock powder) or hot water 

  • Parmiggiano Reggiano or Grana Padano cheese, finely grated for serving, optional 

Method 

Before starting making risotto have your boiling hot vegetable or chicken stock (or just hot water) ready to hand for later. 

Put extra virgin olive oil in a pan,  add finely chopped onions, carrots and celery and sauté for a few minutes on a gentle heat until cooked down and soft. 

Add all the other vegetables (except asparagus tips, if using).

View fullsize Risotto Primavera 5.jpg
View fullsize Risotto Primavera 7.jpg

Add the parsley, and cook on a gentle heat for about 10-15 minutes stirring occasionally. 

Add the rice and toast it for a few minutes, stirring constantly to avoid sticking to the bottom of a pan. 

View fullsize Risotto Primavera 10.jpg
View fullsize Risotto Primavera 11.jpg

Pour or ladle ½ litre (500ml) of hot vegetable or chicken stock, or hot water. 

Cook until the first amount of liquid is absorbed then start gradually adding ladles of hot stock, one at a time, allowing the liquid to be absorbed before adding more. 

Cook on a medium heat, stirring almost constantly, until the rice is cooked al dente, meaning fully cooked but still a bit firm when bitten, it should roughly take between 15-18 minutes for a risotto to be cooked. 

Add the tips of the asparagus, if using, a few minutes before the end of cooking time. 

Taste and adjust the seasoning with sea salt, but this might not be necessary since the stocks from the stores generally speaking contain salt already. 

Serve immediately while the risotto is still hot and a bit runny in consistency. 

Ladle the risotto onto the plates, sprinkle with freshly grated Parmiggiano Reggiano cheese and garnish with some roughly chopped fresh parsley. 

Just a thought 

For even creamier texture, you can finish cooking the asparagus risotto with a typical Italian mantecare phase. Remove the saucepan from the heat, add grated cheese and a bit of cold butter or cream to the risotto when is almost finished and stir with a wooden spoon quite vigorously in order to develop that delicious creamy texture.

Wine suggestion

July 27, 2022 /tina oblak
riso Arborio, riso Vialone Nano, riso Carnaroli, Spring vegetable risotto, vegetarian risotto, vegan risotto, plant based risotto, fresh tomatoes, fresh sweet peas, carrots, green asparagus, courgettes
Adriatic Recipe, child friendly dish, child friendly meal, dinner, Easy recipe, entrée course, family friendly dish, family friendly meal, first course, first course dish, first course meal, Healthy, healthy mael, hearty dish, Istrian cuisine, Istrian dish, Istrian food, Istrian gastronomy, light meal, main course, main dish, main vegetarian dish, main vegetarian meal, Nutritious, Nutritious dish, recipe from Northern Ital, Risotti, Risotto, Rustic dish, simple recipe, Slovenian cuisine, Slovenian food, Slovenian gastronomy, Spring dish, Spring recipe, Starters, summer dish, summer recipe, supper, Vegan, Vegetables, Vegetarian
Comment

Cooked fennel salad with lemon and olive oil dressing Istrian Recipe

Beans and Srdines
July 20, 2022 by tina oblak in Adriatic Recipe, All year round recipe, dinner, Easy recipe, family friendly dish, family friendly meal, Healthy, Istrian cuisine, Istrian dish, Istrian food, Istrian gastronomy, light meal, Nutritious, Nutritious dish, Root vegetables, Rustic dish, Salads, Side Dishes, simple recipe, Slovenian cuisine, Slovenian food, Slovenian gastronomy, supper, Vegan, Vegetable side dish, Vegetables, Vegetarian

Cooked fennel salad is a great choice when you want to complete a meal with a simple salad, all you need is a few humble fresh fennel bulbs and an uncomplicated olive oil and lemon dressing which will get soaked up with some crunchy bread.

This fennel salad is rustic and informal, very healthy and nutritious and a great companion to grilled meats and fish, very fresh and incredibly easy to prepare, can be done in advance, stored in a fridge and served cold on a hot summer day.

Along the Slovenian coast, where I grew up, the area is blessed with Mediterranean climate, which subsequently means that there is an abundance of fennel, a very much loved vegetable by the locals, it is traditionally eaten raw or cooked in salads, or braised, which does go down a treat. Wild fennel is also abundant and grows just about anywhere it can, the fronds are used in the local cuisine instead of flat leaf parsley or in combination with.

I am sharing here this traditional and unpretentious cooked fennel salad that it has been made in my family, and by the locals, well, since forever.

If you go so the food store, see some lovely fennel bulbs, and not quite sure what to do with them, you can start with this recipe...

Ingredients

Serves 4-6 as part of meal

  • few fresh fennel bulbs, approximately 900g (smaller bulbs are better for this dish)

  • extra virgin olive oil, a very generous drizzle

  • 1 lemon (juice of ½ or whole lemon, depending on a taste)

  • fresh flat leaf parsley, roughly or finely chopped (amount to taste)

  • sea salt

  • black pepper, optional

  • fennel fronds, optional

Method

Wash fennel bulbs under cold running water and dry them with kitchen paper or clean kitchen towel.

Place the bulbs on the chopping board and cut off the hard hollow stalks from the bulb which are quite tough and very fibrous. Cut the feathery fronds from the stalks if you are using them for this dish for adding extra flavour and garnish.

Discard the stalks or use them in other recipes for soups and stews, you can use them as a bed for roasted chicken or other meats, and roasted fish.

Trim off a thin layer of the root end of the bulb (the base of the fennel bulb).

View fullsize Cooked fennel salad 4.jpg
View fullsize Cooked fennel salad 5.jpg

Stand your fennel straight up and slice in half.

Check how big the core is, if it is quite big, it is a good idea to remove it for this recipe, as they are very fibrous. The cooking time for this recipe is fairly short, and the core, if not removed, could stay quite hard.

View fullsize Cooked fennel salad 6.jpg
View fullsize Cooked fennel salad 7.jpg

To remove the core, take a knife at a 45 degree angle on both sides of the core and slice in, the core will pop out easily.

Place the fennel in a pot, add boiling water, about ¾ up, alternatively you can steam the fennel.

Put the lid on and gently simmer for about 15 minutes, cooking time will depend on the size of the fennel pieces and the desired consistency.

Adjust cooking time, depending on whether you want the fennel quite soft, or prefer it with still quite a bit of a bite.

View fullsize Cooked fennel salad 9.jpg
View fullsize Cooked fennel salad 10.jpg

Drain in a colander, run under cold water, leave to drain well and cool a bit.

Slice cooked fennel to your liking.

View fullsize Cooked fennel salad 11.jpg
View fullsize Cooked fennel salad 12.jpg

Transfer sliced fennel onto a serving plate.

Season with sea salt and black pepper, if using.

Dress cooked fennel with very generous extra virgin olive oil and lemon juice.

Sprinkle with chopped fresh flat leaf parsley an fennel fronds, if using.

Serve at room temperature or cold, place the serving plate in the middle of the table for everyone to help themselves, and make sure you have some crunchy bread to soak up all those juices.

Just a thought

For extra flavour, sprinkle dressed fennel salad with dried garlic, not a very traditional way of serving, but a nice addition or a variation of the recipe.

July 20, 2022 /tina oblak
fresh fennel bulb, cooked fennel, fennel salad with olive oil and lemon dressing, summer salads
Adriatic Recipe, All year round recipe, dinner, Easy recipe, family friendly dish, family friendly meal, Healthy, Istrian cuisine, Istrian dish, Istrian food, Istrian gastronomy, light meal, Nutritious, Nutritious dish, Root vegetables, Rustic dish, Salads, Side Dishes, simple recipe, Slovenian cuisine, Slovenian food, Slovenian gastronomy, supper, Vegan, Vegetable side dish, Vegetables, Vegetarian
Comment

Šataraš - Bell peppers, onions and tomato Balkan inspired stew with scrambled eggs Recipe

Beans and Sardines
July 13, 2022 by tina oblak in Adriatic Recipe, Appetizers, Balkan dish, breakfast, brunch, child friendly dish, child friendly meal, dinner, Easy recipe, entrée course, family friendly dish, family friendly meal, first course, first course dish, first course meal, Healthy, healthy mael, hearty dish, Istrian cuisine, Istrian dish, Istrian food, Istrian gastronomy, main course, main dish, Nutritious, Nutritious dish, Rustic dish, simple recipe, Slovenian cuisine, Slovenian food, Slovenian gastronomy, Spring dish, Spring recipe, Starters, stew, Vegetable side dish, Vegetables, Vegetarian, summer recipe, summer dish, vegetarian summer stew

Šataraš (pronounced Satarash) is a stew like dish made with fresh bell peppers, ripe sweet tomatoes, onions, and scrambled eggs, it is similar to Shakshuka which has a sunny-side up eggs and makes a perfect main meal choice in the summer when the vegetables used for the dish are in full season. This dish is very well known in the Balkan regions but not so much to the rest of the world.

Eating šataraš just make you happy, and it feels like having a sunshine on a plate, as the addition of the eggs makes this dish colourful, extra flavourful and filling, it is also healthy and fresh.

This is one of my absolute favourite childhood dishes and if you like bell peppers this recipe is one of those you will come back to it time and time again as the recipe is very easy to make and the base can be cooked well in advance.

This dish is normally homemade and not found in the restaurants, it is typically served for lunch or dinner but it is also a great choice for breakfast or brunch.

Šataraš travelled from the neighbouring Balkans and stayed in Slovenian Istra, where it has been a very welcomed guest and has been enjoyed by the generations of locals in the area where gastronomy has been strongly shaped and enriched by the Balkan culinary traditions as well as Venetian and Austro-Hungarian.

I am sharing here my mother's recipe for šataraš with which she has delighted us during long hot summer months. If you do try it, then I think you will soon realize how delicious this dish truly is in its humble simplicity.

Ingredients

Serves 4

  • 4 bell peppers, a combination of yellow and green (each bell pepper weighing about 200g), wash, dry, remove the seeds and white filaments, and cut into strips (you can use more or less peppers according to your preference)

  • 4 vine tomatoes (each weighing about 150g) or other types of sweet and ripe tomatoes, washed and roughly chopped (use more or less tomatoes according your liking)

  • 1 onion (about 170g), peeled and finely sliced

  • 4 Tbsp extra virgin olive oil

  • 4 eggs

  • sea salt

  • black pepper

  • fresh flat leaf parsley, roughly chopped, for serving, optional

Method

Place extra virgin olive oil in a fairly large frying pan, add sliced onions, a pinch of sea salt and cook for about 10 minutes on a gentle heat until the onions become soft and translucent, stirring occasionally.

View fullsize Sataras 5.jpg
View fullsize Sataras 6.jpg

Add strips of bell peppers and stir in with the onions. Cover with the lid (the steam will help to cook down and soften the peppers) and cook on a gentle heat for up to about 30 minutes.

View fullsize Sataras 7.jpg
View fullsize Sataras 8.jpg

Add chopped tomatoes, cover with the lid, and cook on a gentle heat, stirring occasionally, for about 20-30 minutes, or until tomatoes are cooked down and soft.

If the mixture has too much liquid (this will depend on how watery the tomatoes you are using are) take the lid off and cook further for a few minutes or until all of the liquid evaporates.

View fullsize Sataras 9.jpg
View fullsize Sataras 10.jpg

In a small bowl crack the eggs, slightly whisk, add sea salt and pepper.

Pour the egg mixture over the pepper stew, mix and stir and cook until desired consistency.

View fullsize Sataras 11.jpg
View fullsize Sataras 12.jpg

Sprinkle with roughly chopped fresh parsley, optional, and serve immediately with plenty of rustic crunchy bread.

Just a thought

This dish is best served hot, equally delicious at room temperature.

You can prepare pepper, onion and tomato stew well in advance, keep it in a fridge in an airtight container for about 3 days, and pour the whisked eggs on a pepper base just before you want to complete the dish and ready to serve it.

The pepper stew (without the egg) is also great served with grilled and barbecued meats, a great base for a risotto or a pasta dish, and it can also be enjoyed with polenta or an egg frittata.

Pepper, onion and tomato base is suitable for freezing.

Wine suggestion

Salento Negroamaro Rosato IGT “Calafuria” 2021 - Tormaresca

July 13, 2022 /tina oblak
bell peppers, fresh bell peppers, yellow peppers, green peppers, tomatoes, scrambled eggs with peppers, peppers stew
Adriatic Recipe, Appetizers, Balkan dish, breakfast, brunch, child friendly dish, child friendly meal, dinner, Easy recipe, entrée course, family friendly dish, family friendly meal, first course, first course dish, first course meal, Healthy, healthy mael, hearty dish, Istrian cuisine, Istrian dish, Istrian food, Istrian gastronomy, main course, main dish, Nutritious, Nutritious dish, Rustic dish, simple recipe, Slovenian cuisine, Slovenian food, Slovenian gastronomy, Spring dish, Spring recipe, Starters, stew, Vegetable side dish, Vegetables, Vegetarian, summer recipe, summer dish, vegetarian summer stew
Comment

Whole baked Sea Bass on roasted potatoes Istrian Recipe

Beans and Sardines
July 06, 2022 by tina oblak in Adriatic Recipe, All year round recipe, baked dish, baked fish, child friendly dish, child friendly meal, dinner, Easy recipe, family friendly dish, family friendly meal, Fish & Seefood, Healthy, healthy mael, hearty dish, Istrian cuisine, Istrian dish, Istrian food, Istrian gastronomy, light fish course, light meal, main course, main dish, main fish course, main fish meal, Nutritious, Nutritious dish, roasted fish, Rustic dish, simple recipe, Slovenian cuisine, Slovenian food, Slovenian gastronomy, supper

Whole baked sea bass on a layer of potatoes is very simple, easy, and healthy recipe for oven-roasted fish that calls for only a few fresh simple ingredients, and it is a perfect choice for a light meal main course option. This delicate fish, baked whole in the oven, is effortless to make, flavoursome and never fails to impress your guests. The recipe gives you a superior taste, the flesh remains really tender and moist and the potatoes, during the baking, absorb all the wonderful flavours and aromas from the garlic, onions, olive oil and the juices from the fish.

This basic method of roasting the whole fish on the bone on a bed of sliced potatoes represents the most common and traditional way of preparing and eating fish along the Slovenian coast in restaurants as well as in the households. It is considered one of the best fish based recipes by the locals, very often made on Sundays as a Sunday roast choice, and as a alternative to a meat roast.

I am sharing here my family recipe for whole baked sea bass with potatoes that would traditionally be accompanied by a vegetable side dish such as (depending on what is available in the season) sautéed courgettes, peas or bell peppers, green beans with tomatoes, borlotti beans salad, creamed spinach, braised fennel and different types of seasonal salads, just to mention a few...

Ingredients

Serves 4

  • 4 fresh whole sea bass (each weighing around 300g), cleaned, scaled and gutted (your fishmonger will be happy to do this for you)

  • potatoes (about 800g), peeled and sliced (roughly3-5mm)

  • 1 small onion (about 50g), peeled and very finely chopped

  • 2 cloves of garlic, peeled and thinly sliced

  • 4 small sprigs of fresh rosemary (small enough to fit into the body cavity of the fish)

  • 4 Tbsp extra virgin olive oil (plus some extra for drizzling)

  • sea salt

  • black pepper

  • 100ml white wine, fish stock or water (I used a ¼ Tsp of dry granulated fish powder and dissolved it into a 100ml of hot water)

  • fresh flat leaf parsley, finely chopped, for serving, optional

  • fresh lemon, for serving, optional

Method

Preheat the oven to 220C static or equivalent.

Line a baking tray with non stick baking parchment.

Peel the potatoes and cut them with the knife or a mandolin slicer into slices the thickness of about 3-5mm.

Place sliced potatoes into a bowl and add finely chopped onions, sliced garlic, extra virgin olive oil, season with sea salt and black pepper and mix well.

Transfer the potato mixture onto a baking tray and with your hands arrange them, distribute evenly more or less, into a single layer (they will overlap a bit).

Put in the oven and bake for 15-20 minutes.

While the potatoes are baking prepare the fish.

View fullsize Roasted sea bass with potatoes 7.jpg
View fullsize Roasted sea bass with potatoes 8.jpg

Wash the fish thoroughly inside and out under cold running water and pat dry well the fish with the kitchen paper.

With a sharp knife, slash the fish 3 to 5 times through the flesh, about 5mm deep, almost to the bone.

Season with sea salt and black pepper and put a small sprig of fresh rosemary into the body cavity of each fish.

Take the potatoes out of the oven (after 15-20 minutes) and place the sea bass on top of the potatoes, side by side, scored side up and drizzle each fish with a bit of extra virgin olive oil.

Cover the baking tray with the aluminium foil, put it back into the oven and bake for 30 minutes.

View fullsize Roasted sea bass with potatoes 9.jpg
View fullsize Roasted sea bass with potatoes 10.jpg

Remove the aluminium foil and bake further for 10 minutes.

View fullsize Roasted sea bass with potatoes 11.jpg
View fullsize Roasted sea bass with potatoes 12.jpg

Pour white wine, fish stock or water over the fish and potatoes and bake further for about 5-6 minutes.

Serve hot with a sprinkle of finely chopped fresh flat leaf parsley and an extra drizzle of extra virgin olive oil and a squeeze of lemon.

Just a thought

If you end up with a leftover baked sea bass, it is delecious eaten cold or at a room temeprature with a drizzle of olive oil and finely chopped fresh flat parsley and accompanied with some cruncy bread, or alternatively you can make a fish spread (see my recipe for Rustic Sea Bream spread)

Wine suggestion

Fiano di Avellino DOCG “Ciro 906” 2019 - Ciro Picariello

July 06, 2022 /tina oblak
fresh sea bass, whole sea bass, whole baked sea bass, whole roasted sea bass, roasted sliced potatoes, branzino al forno con le patate, brancin v pecici s krompirjem, roasted fish
Adriatic Recipe, All year round recipe, baked dish, baked fish, child friendly dish, child friendly meal, dinner, Easy recipe, family friendly dish, family friendly meal, Fish & Seefood, Healthy, healthy mael, hearty dish, Istrian cuisine, Istrian dish, Istrian food, Istrian gastronomy, light fish course, light meal, main course, main dish, main fish course, main fish meal, Nutritious, Nutritious dish, roasted fish, Rustic dish, simple recipe, Slovenian cuisine, Slovenian food, Slovenian gastronomy, supper
Comment

Cherry strudel Istrian Recipe

Beans and Sardines
June 29, 2022 by tina oblak in Adriatic Recipe, All year round recipe, Austrian inspired dishes, baked dish, baking, breakfast, child friendly dish, dessert, easy baking, Easy recipe, home baking, Hungarian inspired dishes, Istrian cuisine, Istrian dish, Istrian food, Istrian gastronomy, Mitteleuropean cuisine, Mitteleuropean dish, Mitteleuropean food, Mitteleuropean recipes, pudding, Rustic dish, simple recipe, Slovenian cuisine, Slovenian food, Slovenian gastronomy, Snacks, sweet course, Sweet Things, sweet nibbles

Cherry Strudel is a variation of a traditional and well known Viennese Apple Strudel, it is a very scrumptious dessert made with very thin elastic pastry, and the filling contains fresh cherries, a bit of sugar, lemon zest and breadcrumbs. If you are thinking that you cannot be bothered pitting the cherries and making your own dough, I can guarantee you an equal delicious results using store bought pastry and jarred, tinned or frozen cherries, no hassle involved!

Apple strudel dates back to1696, when it was first mentioned, and “conquered” all the countries that were once part of Austro-Hungarian Empire, but it is believed that strudel originated from baklava (a famous Turkish pastry based dessert) and travelled to Austria with Ottoman's Empire and through Hungarian cuisine.

Apple strudel has been a big hit in all the countries that were once ruled by Austro-Hungarian Empire, but it is in the North Adriatic that this new variation was created giving originality to a very unique and less known type of strudel. A cherry strudel, is a very much loved seasonal dessert in Slovenian Istra, (Češnjev štrudelj or Češnjev zavitek) where I come from, and neighbouring Trieste in Italy.

Cherry strudel has always been very popular, and when fresh cherries are in season, this dessert is regularly baked in the households, and if you are lucky enough, sometimes you can find it on the menus of informal family run restaurants.

This irresistible dessert really takes me back to my childhood. My mother frequently baked it with fresh cherries picked by ourselves in the garden, or were very generously given by our neighbours, it is the garden where I, as a child, spent a lot of time when my parent were working in the restaurant. Along with the girl next door, who was only a year older than me, we used to pick cherries from the tree that had the reddest and ripest cherries, climbed up it, found a comfortable branch to sit on and munch on cherries until we were completely full, chatting and giggling...

When we were called for lunch, there was little appetite left for it, no matter how delicious it was, and my mother would only looked at us and had the answer, our T-shirts were stained, our lips and mouths deep red in colour from the cherry juices...she never got cross with us, just smiled and shook her head...since my mother used to do exactly the same when she was small...

Looking back, it just made me realize how lucky I was, the first time I ever had the chance to buy fresh cherries was when as an adult I moved to England...

Cherry strudel is traditionally served warm and generously dusted (there is no sugar in pastry) with regular icing sugar or vanilla flavoured icing sugar.

You can turn this simple and rustic pudding into an elegant dessert and serve it with whipped cream, vanilla ice cream or vanilla sauce.

I am sharing here my mother's recipe, which is slightly off the beaten track, for cherry strudel made with home-made pastry and fresh cherries, however you can still indulge yourself and cut corners a bit by using a store bought ready made puff pastry and frozen, tinned or jarred cherries.

Ingredients

Serves 10-12

You can use store bought ready made puff pastry, shortcrust or filo pastry.

Ingredients for home-made strudel dough

  • 250g all purpose flour

  • 1 egg, lightly beaten

  • 3 Tbsp neutral tasting vegetable oil (I used sunflower oil)

  • 2 Tbsp white wine vinegar or lemon juice

  • sea salt, a pinch

  • 50ml-60ml lukewarm water, or as needed

Ingredients for cherry filling

  • 700g fresh cherries, washed and pitted (can also use tinned or jarred cherries or store bought frozen cherries, defrost and drain well)

  • 100g caster sugar

  • 1 unwaxed lemon, grated zest

  • 20g butter plus, some extra for brushing

  • 80g dry fine breadcrumbs

  • sea salt, a pinch

  • icing sugar, for dusting

Method

To make the dough

Place the flour in a big mixing bowl and make a well.

In a separate, smaller bowl, mix slightly beaten egg, oil, vinegar or lemon juice, (the acidity will help to relax gluten in the flour making the dough more stretchy) a pinch of sea salt and lukewarm water. Pour the mixture into a flour well.

With the fork, stir the mixture with the flour until well combined. Add a little bit of flour at a time, until the dough comes nicely together, then work the dough with your hands.

Transfer the dough on a lightly floured working surface and knead the dough for about 10 minutes or until nice and smooth.

After this time, the dough should be moist and elastic and not sticky. Add a little more flour if the dough is too sticky to knead.

In order to further encourage the development of the gluten, resulting in a very elastic dough, slam the dough onto the working surface a few times.

Shape the dough into a smooth ball and place it in a clean bowl, previously brushed with oil.

Cover the bowl with cling film and let the dough rest for about 1 hour at room temperature (strudel dough has no yeast, so do not expect the dough to rise or double in size, it needs to rest for gluten to relax).

View fullsize Apple Strudel 4.jpg
View fullsize Apple Strudel 5.jpg

To make the filling

In a small pan melt the butter over medium-low heat. When the butter is melted add breadcrumbs, toast them, stirring constantly until golden-brown in colour. Remove from the heat, cool and set aside.

Wash the cherries, dry them a bit, take the stalks off and pit them. Place them in a colander and leave them to drain until needed.

Preheat the oven to 200C static or equivalent.

Divide the dough in half to make two separate strudels as easier to work with.

Place half of the dough on a clean and lightly floured table cloth. Flour the rolling pin and start rolling out the dough. While rolling, to prevent sticking, flour the dough and the surface every now and then.

When the dough reaches about 20 cm in diameter pick it up and keep stretching it. The best way to do so is to use the back of your hands and in particular the knuckles but make sure you remove any sharp jewellery first.

When the dough becomes difficult to handle as it becomes bigger and thinner, place it on a lightly floured tablecloth.

With your hands (tip of the fingers) keep stretching gently the dough on the tablecloth to paper thin consistency, from the inside to the outside working your way round the sheet of dough.

Keep stretching until the sheet of dough starts to look almost translucent and you will be able to see a pattern of your tablecloth through it.

You should end up with a thin sheet of dough stretched more or less into a rectangular shape with a diameter of approximately 40 cm which will fit into a standard 40 cm baking tray.

If you notice that the edges are still a bit thick, stretch them further very gently or cut them off. If you leave the edges thick, when rolling the strudel, they will form quite a thick layer at the very centre of the strudel risking to remain slightly underbaked.

View fullsize Apple Strudel 9.jpg
View fullsize Cherry Strudel 16.jpg

Transfer the cherries into a bowl, add sugar, breadcrumbs mixture, lemon zest and mix well to incorporate all the ingredients.

View fullsize Cherry Strudel 11.jpg
View fullsize Cherry Strudel 12.jpg
View fullsize Cherry Strudel 13.jpg
View fullsize Cherry Strudel 14.jpg

Place and spoon evenly the cherry mixture over one half of the dough sheet leaving about 2-3cm to the edge. Fold in the side ends of the sheet to prevent filling coming out during rolling.

View fullsize Cherry Strudel 17.jpg
View fullsize Cherry Strudel 18.jpg

Using the tablecloth to help you, roll the dough all the way and roll it directly onto a sheet of baking parchment, seam side down.

View fullsize Cherry Strudel 19.jpg
View fullsize Cherry Strudel 20.jpg

Transfer very gently the baking parchment with the rolled strudel on a baking tray.

Repeat the process with the other half of the dough.

View fullsize Cherry Strudel 21.jpg
View fullsize Cherry Strudel 22.jpg

Brush it with a bit of melted butter.

Bake on the middle shelf for 40-45 minutes.

View fullsize Cherry Strudel 23.jpg
View fullsize Cherry Strudel 24.jpg

Cherry Strudel is ready when the crust turns nice and golden.

Take it out of the oven and let it cool completely. Dust it with icing sugar, cut into slices and serve it on its own or with vanilla ice cream or cream.

Just a thought

You can make the strudel dough ahead and keep it refrigerated for up to two days. Before using the dough take it out of the fridge allowing it to come to a room temperature.

Cherry strudel is best eaten the day is made. You can keep cherry strudel in an airtight container in the fridge for 3-4 days or overnight on the counter.

Wine suggestion

Friuli Colli Orientali Verduzzo Sottozona Cialla DOC "Verduzzo di Cialla" 2016 - Ronchi di Cialla

June 29, 2022 /tina oblak
fresh cherries, Češnjev štrudelj, Češnjev zavitek, jarred cherries, tinned cherries, frozen cherries, store bought pastry, filo pastry, ready made puff pastry, shortcrust pastry, strudel pastry, strudel dough, homemade strudel dough, strudel di ciliege
Adriatic Recipe, All year round recipe, Austrian inspired dishes, baked dish, baking, breakfast, child friendly dish, dessert, easy baking, Easy recipe, home baking, Hungarian inspired dishes, Istrian cuisine, Istrian dish, Istrian food, Istrian gastronomy, Mitteleuropean cuisine, Mitteleuropean dish, Mitteleuropean food, Mitteleuropean recipes, pudding, Rustic dish, simple recipe, Slovenian cuisine, Slovenian food, Slovenian gastronomy, Snacks, sweet course, Sweet Things, sweet nibbles
Comment

Egg frittata with wild herbs Istrian Recipe

Beans and Sardines
June 16, 2022 by tina oblak in Adriatic Recipe, All year round recipe, Appetizers, baked dish, bite-sized nibbles, breakfast, brunch, Canapés, dinner, Easy recipe, entrée course, family friendly dish, family friendly meal, Finger food, first course, first course dish, first course meal, foraging, Healthy, healthy mael, Istrian cuisine, Istrian dish, Istrian food, Istrian gastronomy, light meal, main course, main dish, Nutritious, Nutritious dish, Rustic dish, simple recipe, Slovenian cuisine, Slovenian food, Slovenian gastronomy, Small bites, Snacks, Spring dish, Spring recipe, Starters, supper, Vegetarian, Fresh herbs

Egg frittata with wild herbs is a very simple and rustic dish, quick to make and a perfect recipe choice for an easy and uncomplicated midweek or weekend lunch, dinner, brunch or breakfast.

It is delicious when eaten hot, but equally very tasty at room temperature or cold, it can be made ahead, providing a great picnic solution, and frittata cut into small bite size pieces will make a brilliant finger food feeding larger groups served together with some drinks.

This humble frittata is a very traditional dish in the Slovenian Istra where I grew up, it is similar to an omelette, it is Italian in origin (Italian word frittata roughly translates to “fried”) and to me, is more than just a quick meal solution.

This type of frittata together with other two most common variations (frittata with dry sausage and frittata with wild asparagus and pancetta) represent a real speciality in Slovenian Istra which, due to close geographical proximity to Italy, made this dish very popular and is referred by locals as Fritaia de erbe, Fritaja, Fritata or Frtalja, Fritaia, and all of these words derive from the Venetian word fritaia, given Venice's domination of the region.

Both my paternal and maternal grandfathers loved all variations of frittata and would have them for merenda (a dialect word, from Italian meaning snack) indicating in the past a quite substantial late morning breakfast (a slightly less sophisticated version of a “modern” brunch) for pheasants, farmers, fishermen and workers. They all started work at dawn, so by mid morning, when they finished working, and before returning home for lunch, they were all quite hungry, and more than ready to have some food to replenish the energy. Nowadays, merenda indicates a light mid morning or mid afternoon snack, that can be savoury or sweet, and of course, children always push for a sweet option...

Both my grandfathers would pick up wild herbs (spring providing the widest range) when returning home from spending a morning working in their vegetable gardens, orchards or olive groves, in which case egg frittata with wild herbs would be prepared for lunch or dinner.

Wild herbs frittata and other types of frittata were for a long time considered a dish for only the poorest people, but thanks to new gastronomic traditions, they are very proudly back on the menus of many homes and restaurants, and given the true dignity they deserve. They are quick and cheap to prepare, have low caloric intake, and are abundant with nutrients from freshly picked herbs in the local area.

I am sharing here a very easy family recipe for this modest frittata. All you need to do is take a nice walk in the natural world around you - forests, meadows etc., and pick some seasonal wild herbs. What can be easier than that?

Well, if you are mainly in an urban area, you can skip the walk and use store bought baby spinach, wild rocket, some fresh basil and flat leaf parsley and you are ready to go...

Ingredients

Serves 4

  • 100g-150g (about 4 full handfuls) fresh mixed wild herbs, washed and finely chopped

    In this recipe I used wild garlic leaves, wild fennel, stinging nettle, dandelion leaves, mint, chives, lemon balm, sage, marjoram, flat leaf parsley, basil.

    You can also use store bought baby spinach, wild rocket, any combination, proportion does not really matter as long as you have more or less the total amount of fresh herbs stated in the ingredients list.

  • 2 Tbsp extra virgin olive oil

  • 8 medium sized eggs (in this recipe I calculated 2 eggs per person)

  • sea salt

  • black pepper

Method

Wash thoroughly fresh mixed herbs, dry them using a salad spinner, if you have one.

Finely chop the herbs and set aside.

View fullsize Egg frittata with wild herbs 4.jpg
View fullsize Egg frittata with wild herbs 6.jpg

Crack the eggs into a mixing bowl and whisk well, add sea salt and black pepper.

Add finely chopped herbs into a mixing bowl and mix well with the egg mixture.

Put extra virgin olive oil in a fairly large non stick frying pan (28cm or 30cm) and heat it up a bit.

Pour the egg and wild herbs mixture into a pan, cover with a lid (glass lid with steam hole works very well if you have it) and cook on a gentle heat.

The frittata is ready and cooked when the underside is set and the egg mixture on the surface no longer has “runny and raw” consistency.

View fullsize Egg frittata with wild herbs 7a.jpg
View fullsize Egg frittata with wild herbs 10.jpg

Hold a plate upside-down over the pan and turn the two over together so that the frittata inverts on to the plate. Slide the frittata back into the pan and cook for a further minute or so.

Fresh herbs frittata can be eaten and enjoyed warm, room temperature or cold and will make a complete meal accompanied by some salad, fresh crunchy bread, soft cooked or grilled polenta and it also makes a great sandwich filler.

If you want to enjoy it Istrian style, pour yourself a small glass of red wine.

Just a thought

This type of frittata will keep in the fridge in an air tight container for about two days and is not suitable for freezing.

In this recipe, I have chosen to cook the frittata in a traditional way, on the stove with a lid, as my family has always used this method. However, if you are familiar cooking the frittata in the oven, and that is your preferred method, it is perfectly fine to do so.

Wine suggestion

Friuli Colli Orientali Ribolla Gialla DOC 2021 - Torre Rosazza

June 16, 2022 /tina oblak
fresh herbs, fresh wild herbs, wild herbs, fresh parsley, fresh basil, fresh sage, fresh wild dill, fresh wild garlic, stinging nettle, dandelion leaves, fresh mint, Frtalja z zelišči, Fritaia z zelišči, Fritaia de erbe, meadow herbs, edible plants, wild garlic leaves
Adriatic Recipe, All year round recipe, Appetizers, baked dish, bite-sized nibbles, breakfast, brunch, Canapés, dinner, Easy recipe, entrée course, family friendly dish, family friendly meal, Finger food, first course, first course dish, first course meal, foraging, Healthy, healthy mael, Istrian cuisine, Istrian dish, Istrian food, Istrian gastronomy, light meal, main course, main dish, Nutritious, Nutritious dish, Rustic dish, simple recipe, Slovenian cuisine, Slovenian food, Slovenian gastronomy, Small bites, Snacks, Spring dish, Spring recipe, Starters, supper, Vegetarian, Fresh herbs
Comment

Pork risotto Venetian inspired Recipe

Beans and Sardines
June 08, 2022 by tina oblak in Adriatic Recipe, All year round recipe, Autumnal dish, Autumnal recipe, child friendly dish, child friendly meal, dinner, Easy recipe, entrée course, family friendly dish, family friendly meal, first course, first course dish, first course meal, hearty dish, Istrian cuisine, Istrian dish, Istrian food, Istrian gastronomy, main course, main dish, Meat, recipe from Northern Ital, Risotti, Rustic dish, Spring dish, Spring recipe, Starters, supper, Venetian dish, Winter dish, Winter recipe, Risotto, simple recipe

Pork risotto is a perfect recipe when you want to rustle up a quick meal, using only a few fresh simple ingredients. This risotto is easy and uncomplicated to make, and is a delicious, creamy, and very comforting meal. I would not be surprised if it becomes your all time favourite risotto recipe.

The actual name for this pork risotto is Risotto all'Isolana that originated, and is famous in the area of Isola della Scala, situated between Verona and Mantua, in the region of Veneto in Italy. This is where Vialone Nano (type of short grain risotto rice) is widely cultivated. The authentic recipe for this risotto includes the use of two types of meat, a combination of veal and pork, and ground cinnamon, and this is how it is also cooked and eaten in Venice.

In Slovenian Istra, however, where I grew up, and where numerous dishes were inspired from Venetian cooking, it should be no surprise that an Istrian variation of this risotto was created using only pork and omitting ground cinnamon, as this exotic spice was difficult to get hold of, and was out of reach for most locals, and only used to make desserts and puddings.

This type of risotto is a risotto of my childhood and is the one that my mother used to prepare very often, and here I am sharing her recipe.

Ingredients

Serves 4

  • 400g pork shoulder steaks, trimmed off excessive fat and diced

  • 300g risotto rice (like Arborio, Vialone Nano or Carnaroli)

  • 1 medium onion (about 150g), peeled and finely chopped

  • 1 clove of garlic, peeled and crushed

  • 2 Tbsp extra virgin olive oil

  • 1 litre of beef or other meat stock (home made or good quality store bought stock)

  • few leaves of fresh sage, finely chopped

  • one sprig of fresh rosemary, needles removed and finely chopped

  • sea salt

  • black pepper

  • Parmiggiano Reggiano or Grana Padano cheese, finely grated, to serve (optional)

Method

Before starting making risotto have your boiling hot beef or other meat stock ready to hand for later.

Place in a pan extra virgin olive oil, finely chopped onions, crushed garlic and trimmed and diced pork shoulder steaks.

Add a pinch of salt, a bit of black pepper and gently fry on a fairly low heat until the onions become soft and translucent and the meat light brown in colour.

View fullsize Pork risotto Venetian inspired Recipe 2.jpg
View fullsize Pork risotto Venetian inspired Recipe 4.jpg

Add finely chopped herbs and about 100ml of water. With a wooden spoon mix and scrap all the bits and pieces from the bottom of the pan, deglaze and cook further for a few minutes on a gentle heat until all the water evaporates.

View fullsize Pork risotto Venetian inspired Recipe 5.jpg
View fullsize Pork risotto Venetian inspired Recipe 6.jpg

Add risotto rice and toast briefly, stirring constantly to avoid sticking to the pan.

View fullsize Pork risotto Venetian inspired Recipe 7.jpg
View fullsize Pork risotto Venetian inspired Recipe 8.jpg

Start gradually adding ladles of hot stock, one at a time, allowing the liquid to be absorbed before adding more.

Cook on a medium heat, stirring almost constantly, until the rice is cooked al dente, meaning fully cooked but still a bit firm when bitten, it should roughly take between 15-18 minutes for a risotto to be cooked.

Taste and adjust the seasoning with sea salt and black pepper, but this might not be necessary since the store bought stocks are, generally speaking, salty already.

Serve immediately while risotto is still hot and rather liquidy, smooth and runny or as the Italians would describe it, all'onda, meaning on the wave.

Ladle the risotto onto the plates and sprinkle with freshly grated Parmiggiano Reggiano or Grana Padano cheese.

Just a thought

Pork risotto is not suitable for freezing.

Wine suggestion

Marca Trevigiana Raboso IGT 2018 - Gatti

June 08, 2022 /tina oblak
Pork risotto, Venetian style posrk risotto, Istrian style pork risotto, meat based risotto, simple risotto, rustic risotto, Risotto all'Isolana, Arborio, Vialone Nano rice, Carnaroli rice, risotto rice, Rižota s svinjskim mesom
Adriatic Recipe, All year round recipe, Autumnal dish, Autumnal recipe, child friendly dish, child friendly meal, dinner, Easy recipe, entrée course, family friendly dish, family friendly meal, first course, first course dish, first course meal, hearty dish, Istrian cuisine, Istrian dish, Istrian food, Istrian gastronomy, main course, main dish, Meat, recipe from Northern Ital, Risotti, Rustic dish, Spring dish, Spring recipe, Starters, supper, Venetian dish, Winter dish, Winter recipe, Risotto, simple recipe
Comment
  • Newer
  • Older