Beans and Sardines

  • Home
  • About
  • Recipe of the week
  • Recipes
  • Wines
  • Contact

Ćevapčići (Grilled Minced Meat Sausages of the Balkans) recipe

Beams and Sardines
July 13, 2021 by tina oblak in brunch, Central European recipes, dinner, Eastern European recipes, Easy recipe, Finger food, Istrian cuisine, Istrian dish, Istrian food, Istrian gastronomy, main course, main dish, main meat course, Meat, Mitteleuropean recipes, Slovenian cuisine, Slovenian food, Slovenian gastronomy, Small bites, supper, Balkan dish

Ćevapčići (plural and diminutive form of Ćevapčić) or Ćevapi (pronounced [ʨɛ'va:pi]) are small pieces of rolled grilled mince meat, type of Turkish kofte kebab, originally made in the Balkans during the Ottoman period. They are oriental in origin but can be traditionally found in the countries of what was formerly Yugoslavia, the Czech republic, Austria, Slovakia and the Italian province of Trieste and Gorizia.

Ćevapčići must be one of everyone's absolute favourite dishes back home in Slovenia and it is hard to imagine a barbecue without them. In fact, they are so popular, you can buy them ready made in almost every butcher shop or supermarket. They are popular street food (fast food) and became part of everyday diet in Slovenia. For meat lovers this little skinless sausages are a real dream.

As a child I have very vivid memories of going to a skiing holiday to a capital of Bosnia and Herzegovina, Sarajevo, and having the best ever, and I mean the best ever Ćevapčići in Baščaršija which is Sarajevo's old bazaar and the historical and cultural centre of the city. I was utterly fascinated by the place being so different from my native small Venetian looking coastal town of Koper. That was the first time I saw a real mosque and was captured by the beautiful Ottoman architecture.

Ćevapčići are grilled and served as a main course in groups of five to ten pieces on a plate or in a lepinja (traditional flatbread). They are commonly eaten with Ajvar (cream of roasted red peppers), chips, flat breads, pieces of spring onions or thinly sliced yellow or white onions and kajmak (type of cream cheese). What accompanies really well this dish is a fresh salad of tomatoes, cucumber, onions and any feta type of cheese, it completes the meal well.

I currently live in England where I cannot buy ready made Ćevapčići so I have decided to make them fresh from scratch, there is a great sense of satisfaction as you can tweak the ingredients to your taste.

The main ingredient is mince meat, lamb, veal pork or beef, you can mix two or three types of minced meat and there could be a variation of meat content and seasoning.

I am sharing here my father's recipe, he used to love Ćevapčići and he loved preparing them for the family.

Ingredients

Serves 4

  • 500g mince lamb

  • 500g mince beef (can use 250g of mince beef and 250g of mince pork)

  • 60g unsmoked pancetta or bacon, cut in small pieces (can use smoked alternative if prefer)

  • 180g roughly of onions (very finely chopped)

  • 1-2 clove of garlic (pressed)

  • 1 egg (slightly beaten)

  • 1 Tbsp powdered Hungarian sweet paprika

  • ¼ Tsp baking soda

  • sunflower oil for brushing

  • sea salt

  • black pepper (freshly ground)

Method

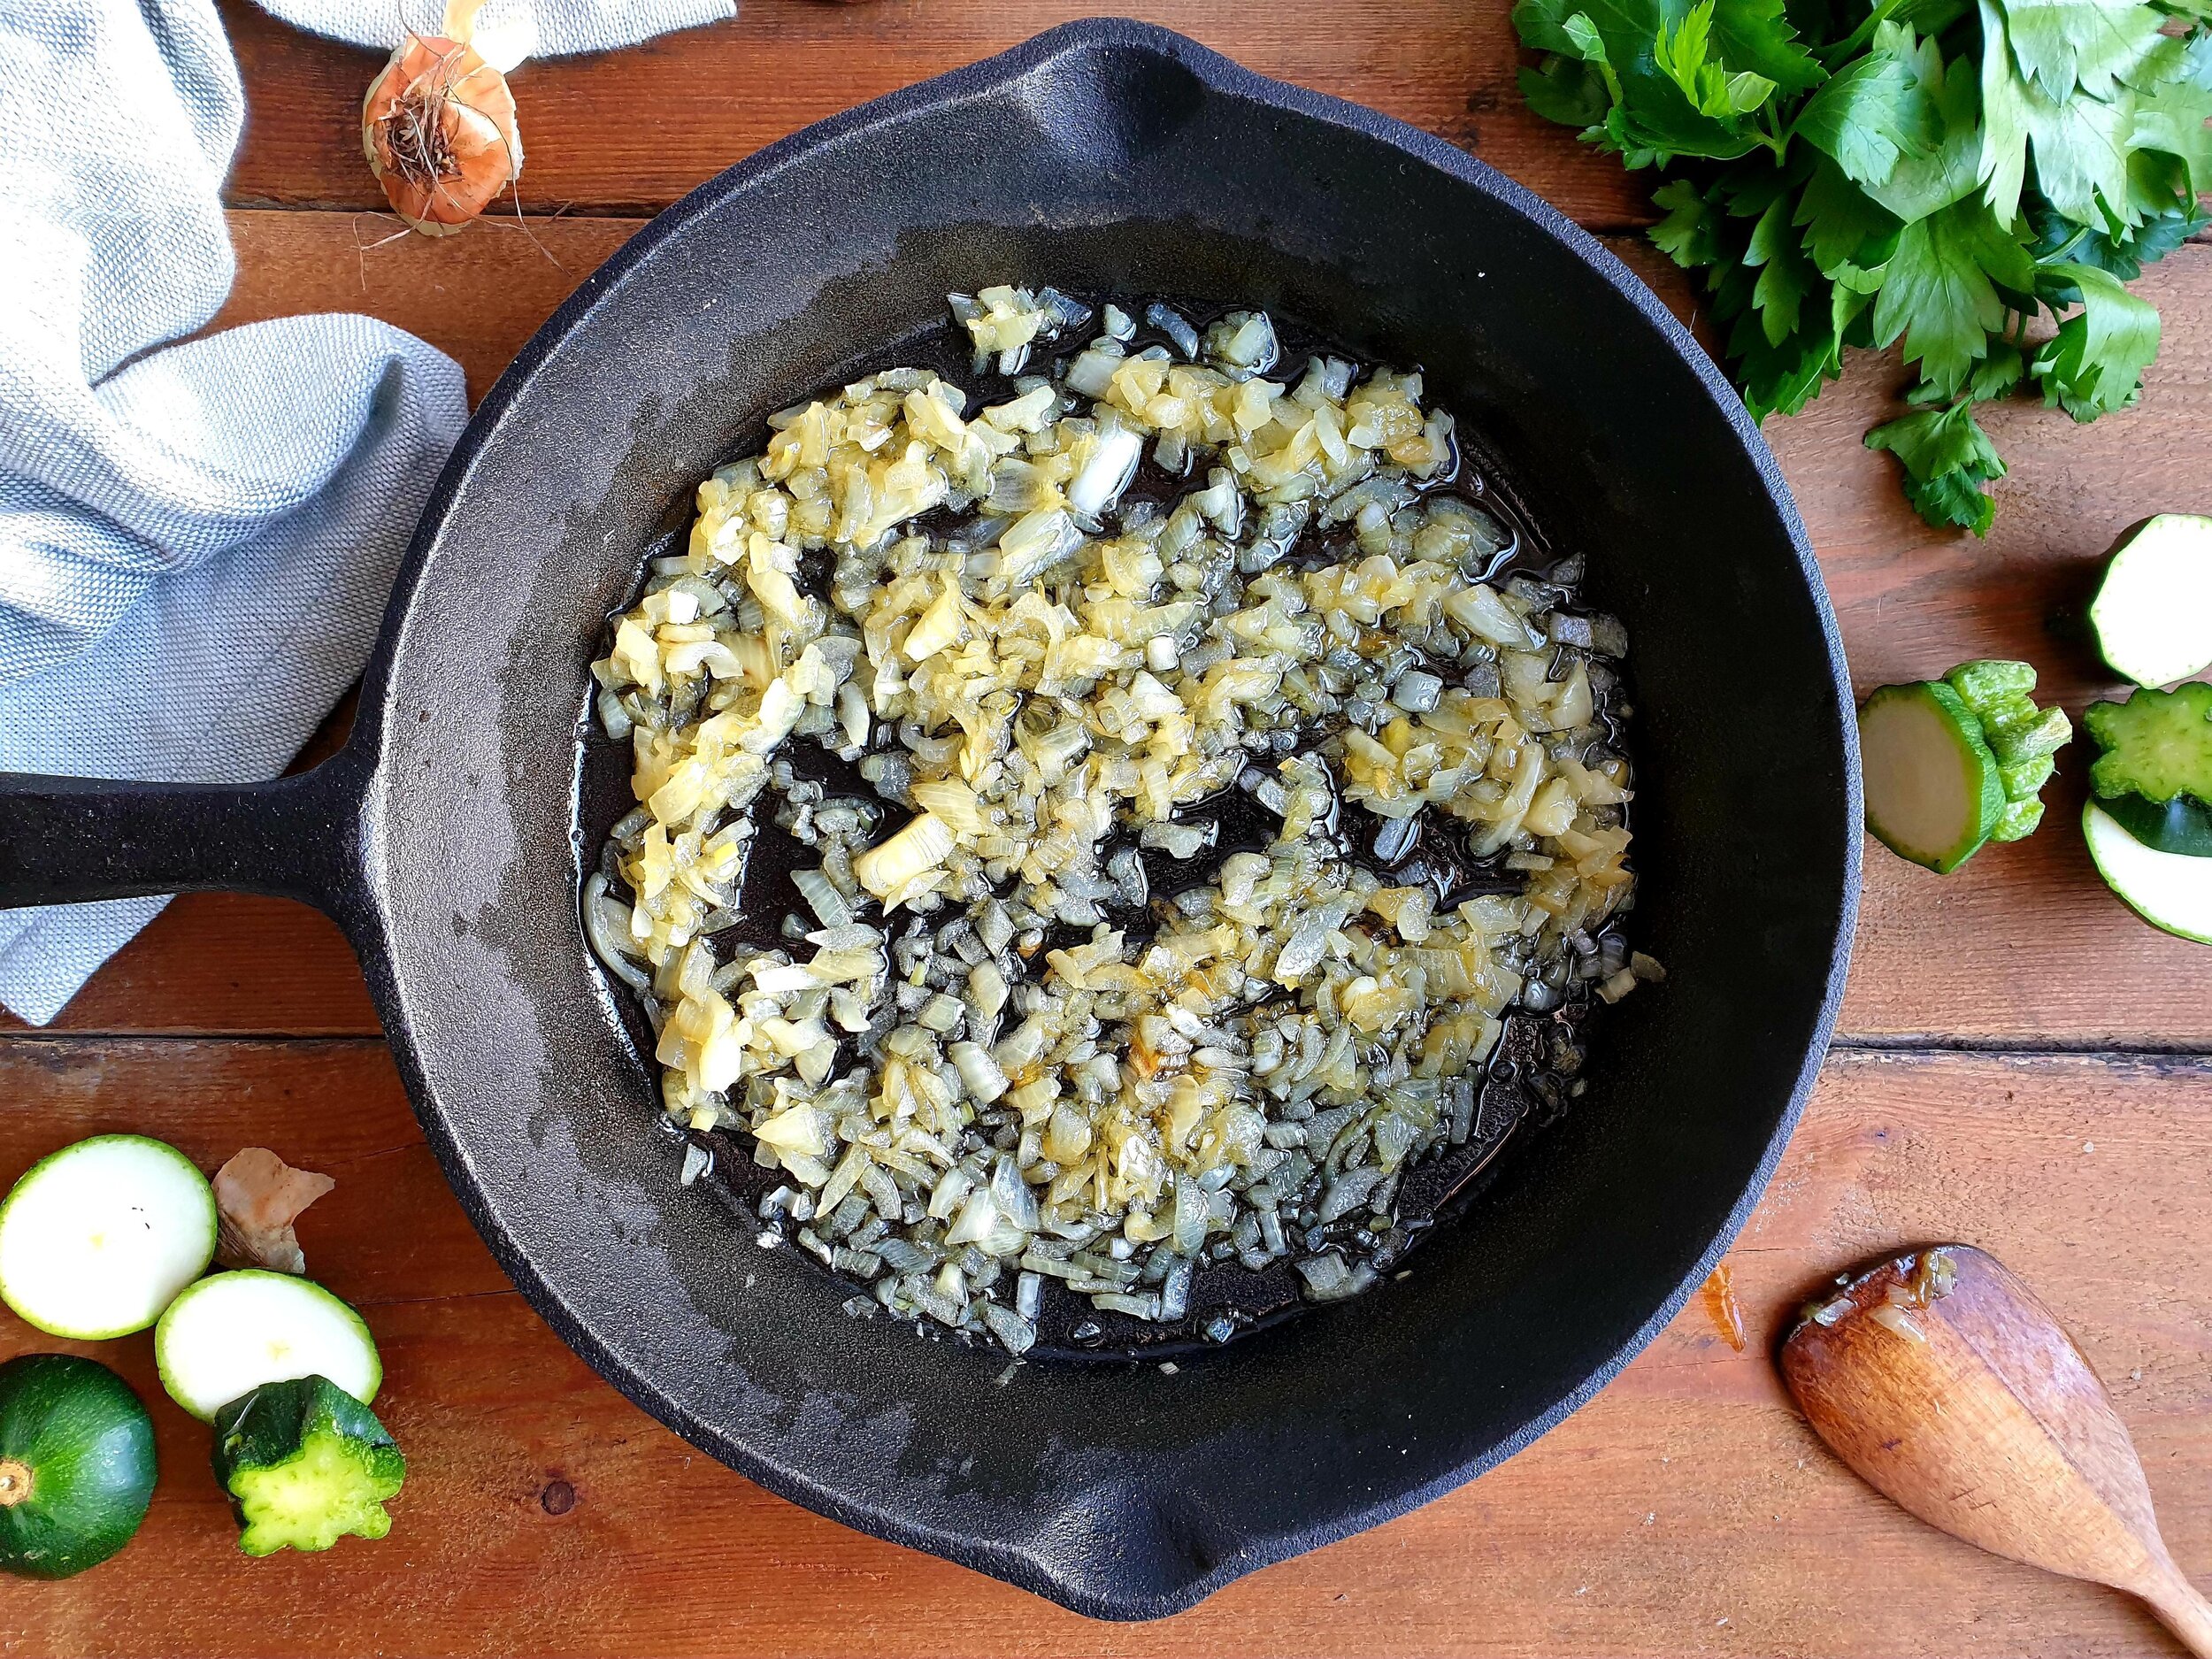
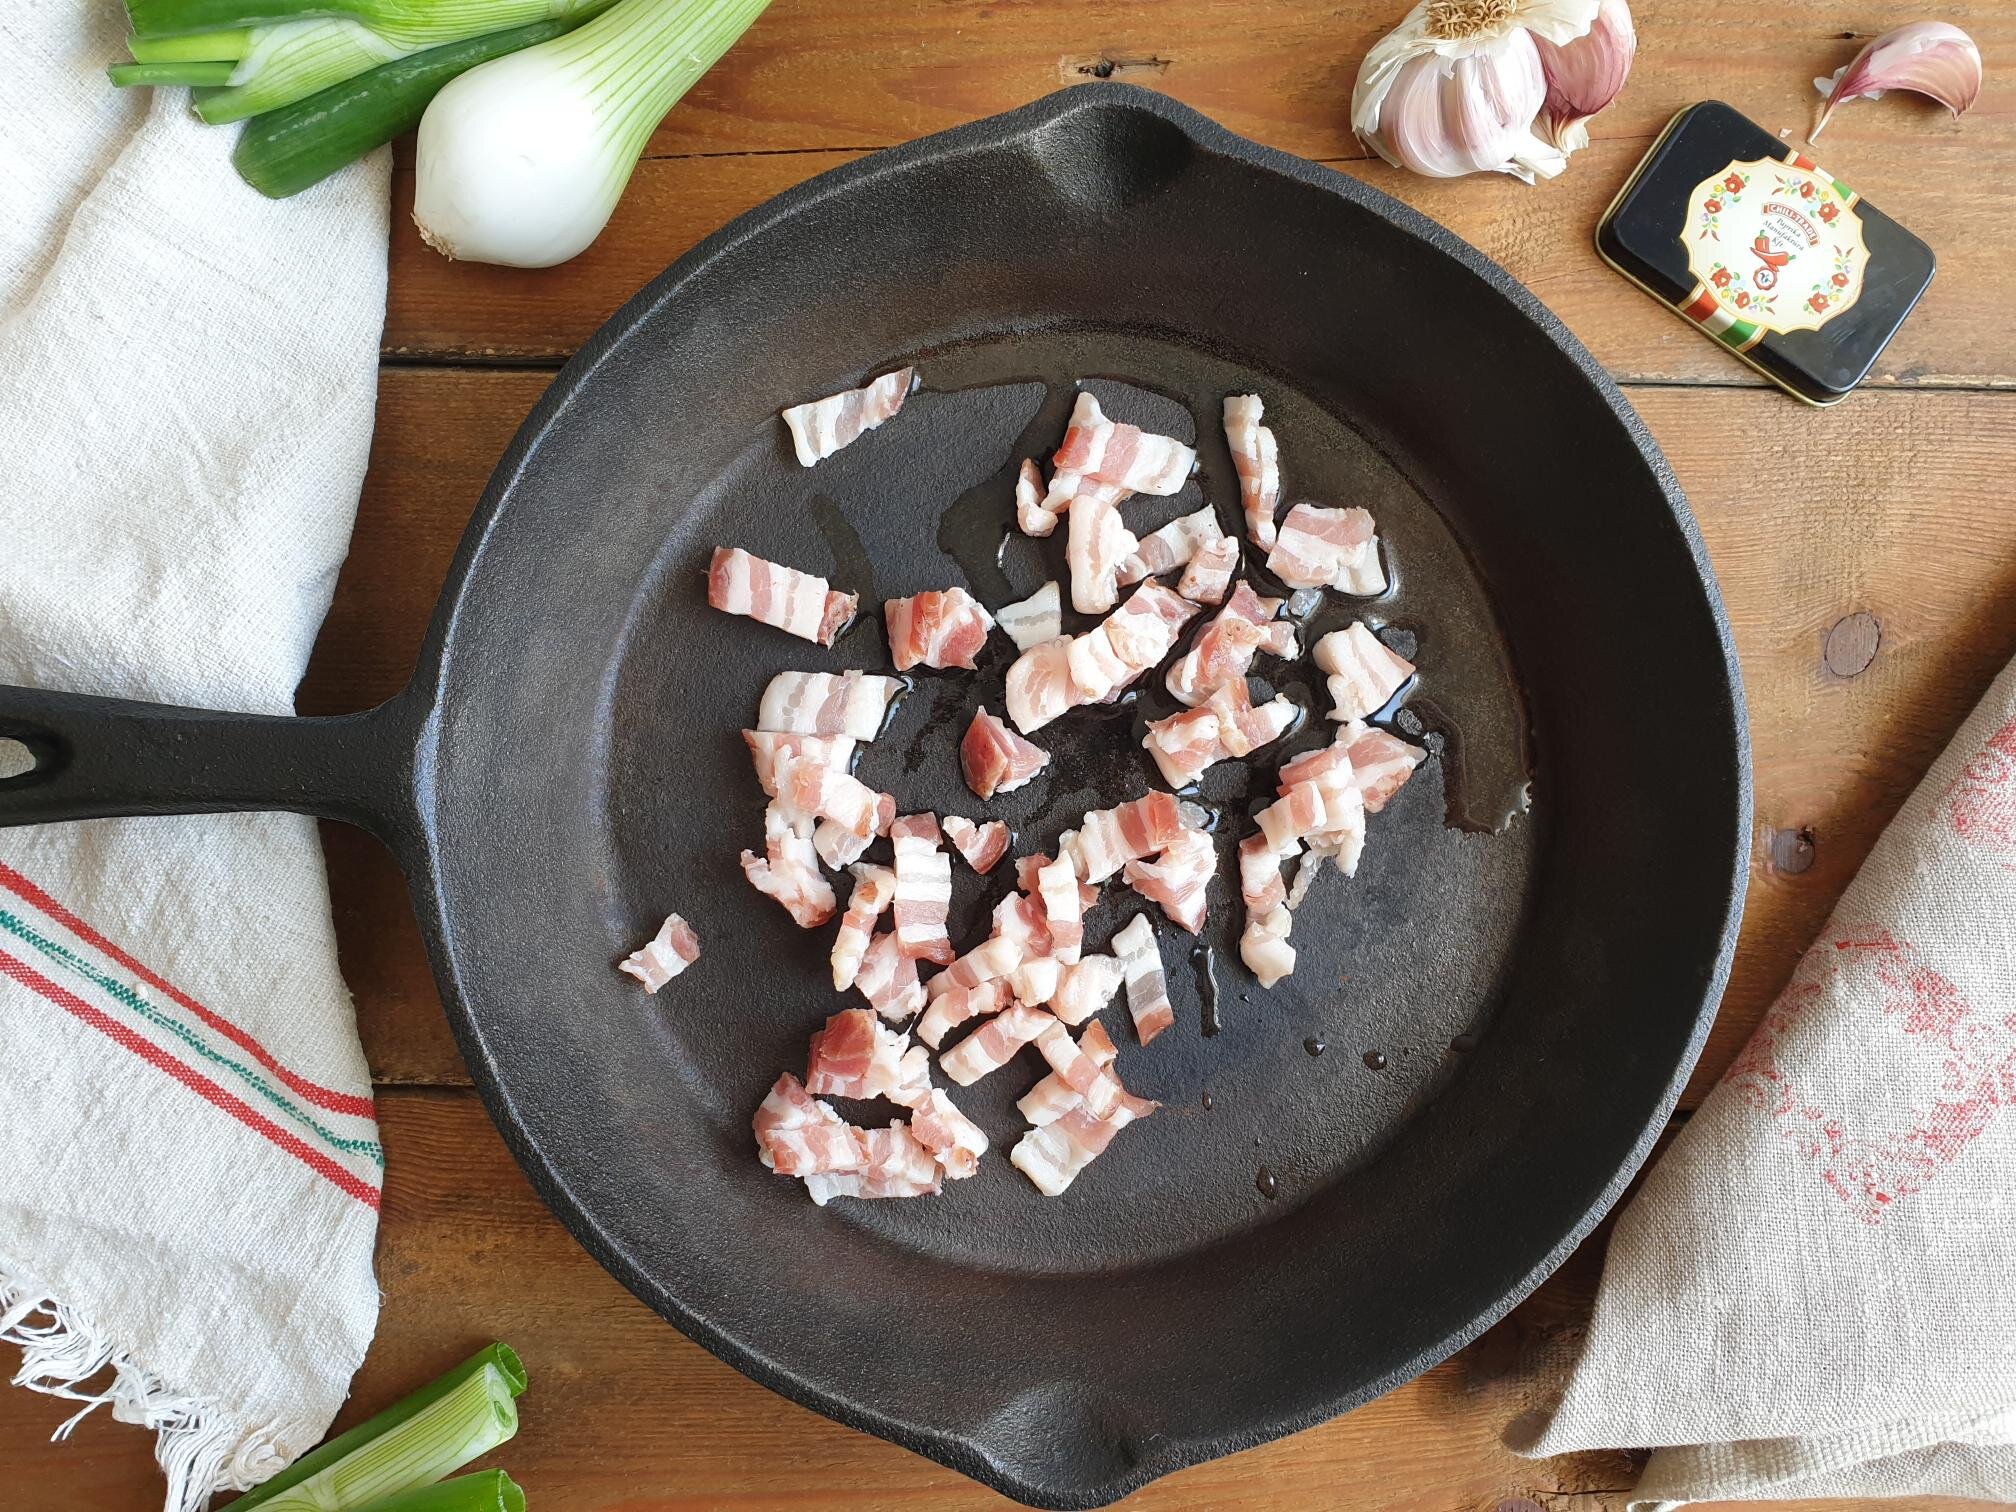
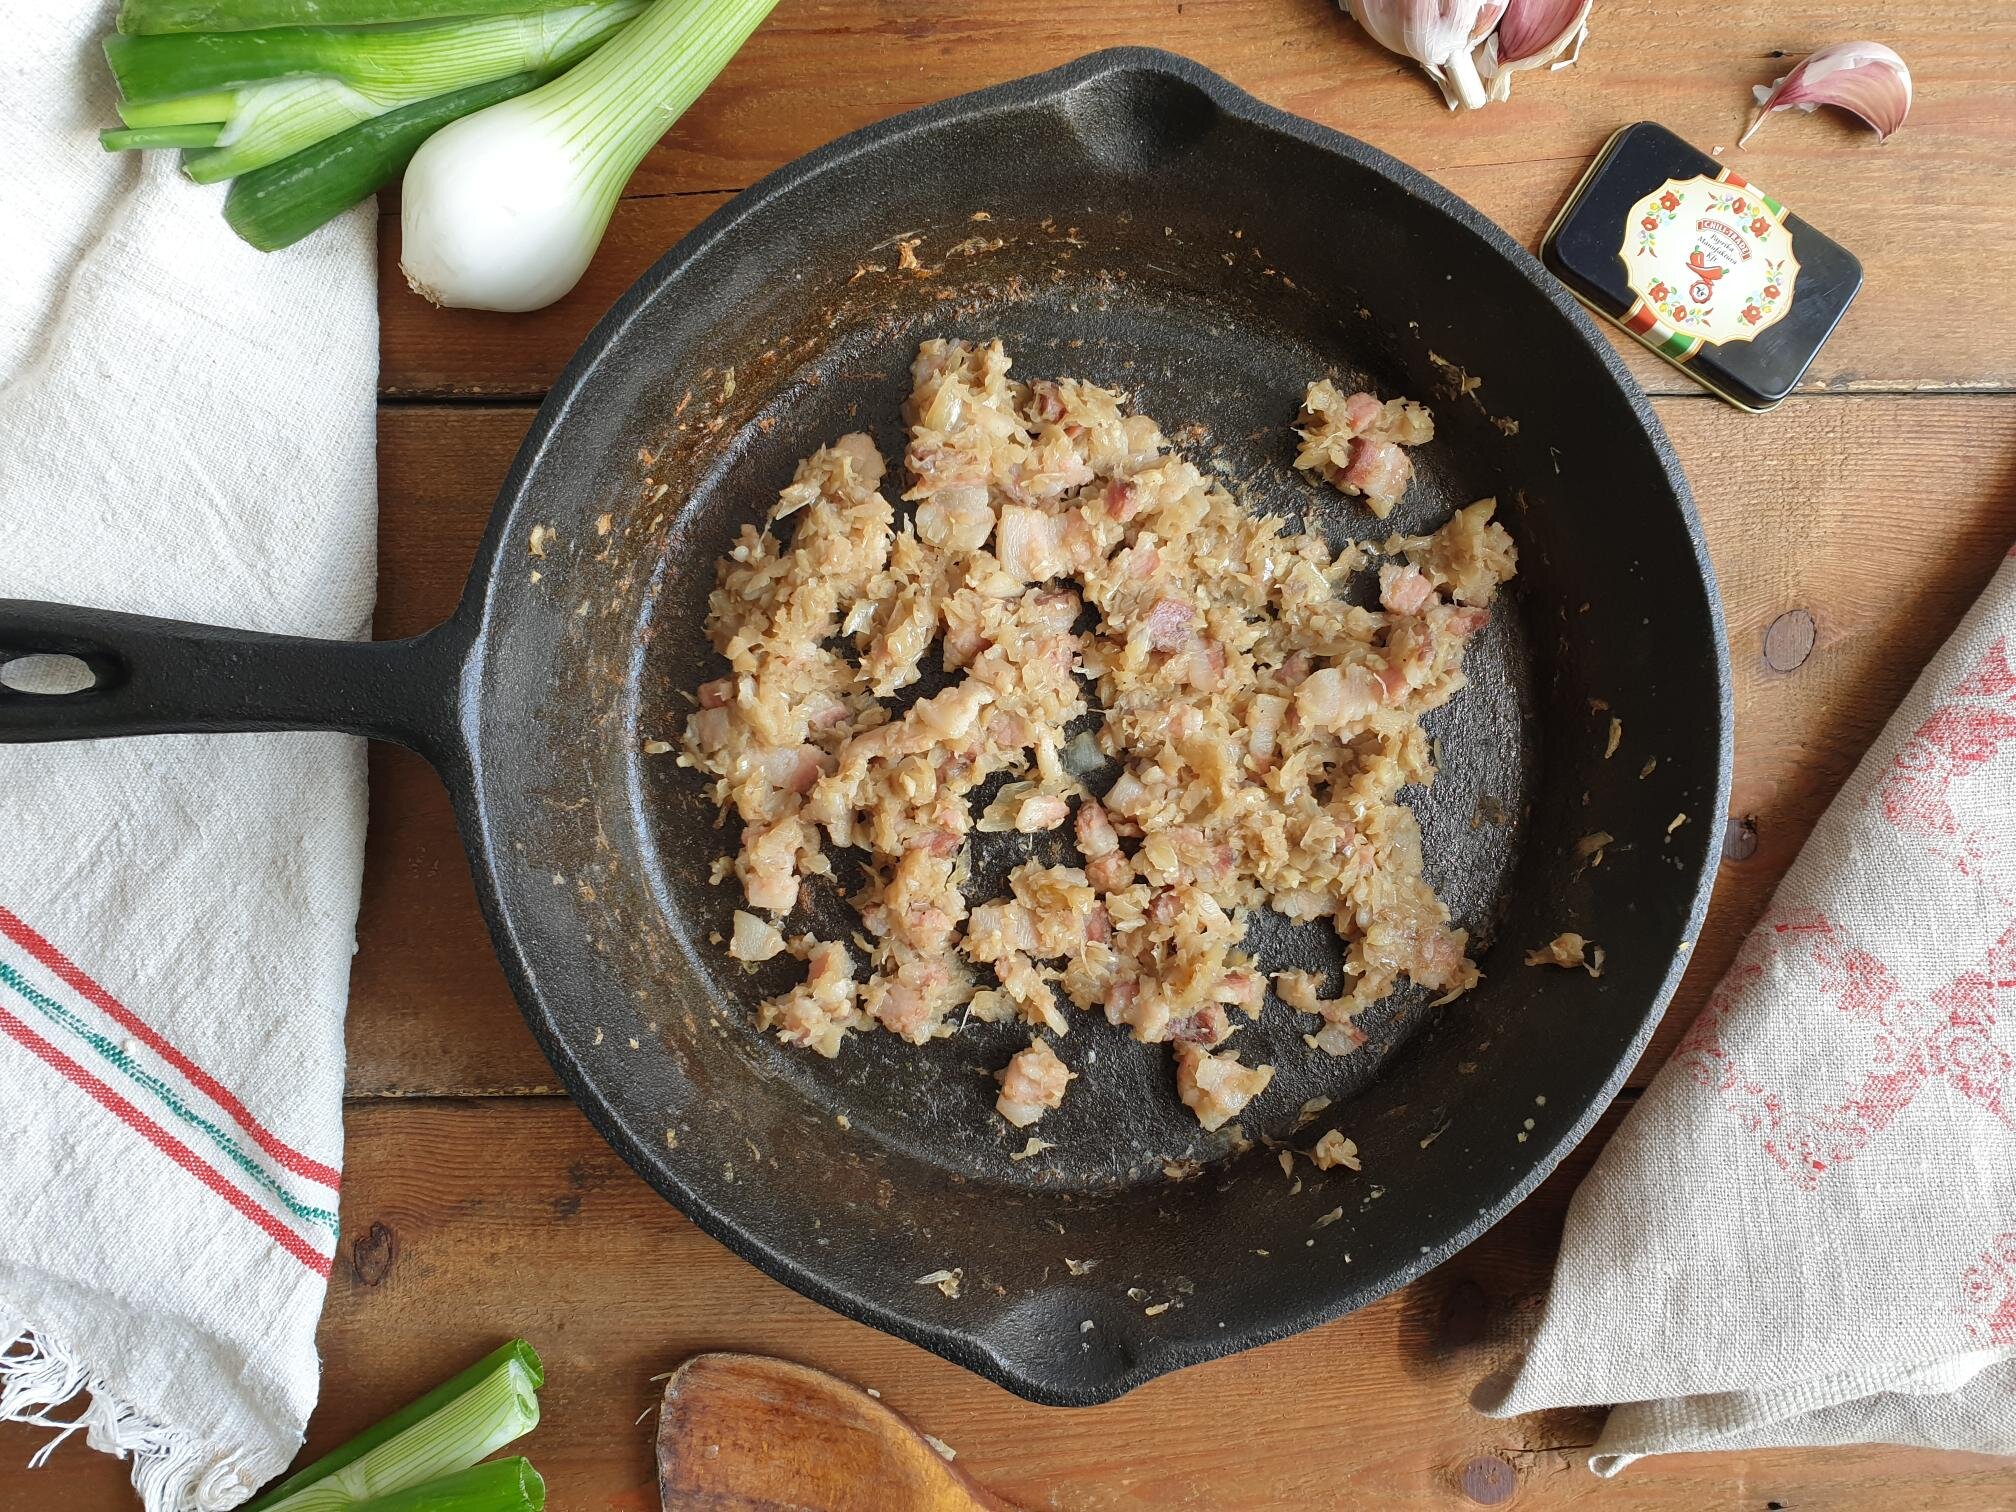
Put a table spoon of water in a frying pan and sautée on a medium heat pieces of pancetta or bacon. Turn the heat down, add the onions, garlic, a pinch of salt and fry gently, stirring frequently, until they become golden in colour and soft. It should take 10-15min, then set aside and cool.

View fullsize Cevapcici 2.jpg
View fullsize Cevapcici 3.jpg
View fullsize Cevapcici 4.jpg

Transfer the pancetta/bacon and onion mixture into a food processor, add mince meat and mix at a low speed. Pulse if you can, as you do not want a completely smooth paste but a mixture with still a bit of a texture. If you have a smaller food processor you might have to do this in batches.

View fullsize Cevapcici 5.jpg
View fullsize Cevapcici 6.jpg

Transfer the mixture from the food processor into a big bowl. Add the egg, pinch of salt, black pepper, baking soda and sweet paprika. With your hands mix well to combine all the ingredients, no food processor will do better job!

View fullsize Cevapcici 6a.jpg
View fullsize Cevapcici 6b.jpg
View fullsize Cevapcici 7.jpg

Take a size of a golf ball, weighing roughly between 30-40g and shape into small sausages of about 7-8cm long.

Place your Ćevapčići onto a big plate or a tray and refrigerate for about 1hour.

Ćevapčići are ideal for barbecuing but as this is not always possible you can cook them in a grill pan.

Barbecue or grill the Ćevapčići on the hot grill pan for about 14 minutes, turning them often in between. They are ready when nice and brown on the outside and cooked through. It might be a good idea to check by cutting one in the middle. In this way you can calculate the grilling time for the following batches.

No matter which way you choose to cook them, make sure you lightly brush them with oil during the cooking process and try not over cook them as they will go hard.

View fullsize Cevapcici 9.jpg
View fullsize Cevapcici 10.jpg

Just a thought

Ćevapčići freeze well, just make sure you freeze them individually first on a plate or a tray to avoid them sticking to each other, and then place them in a freezing bag...... and you are all set for your next BBQ outside with friends or family, or for an enjoyable meal indoors!

Wine suggestion

Carso-Kras DOC "Terra Rossa" 2009 by Branko & Vasja Čotar, Carso-Kras

July 13, 2021 /tina oblak
mince pork, mince beef, mince lamb, grilled meat, grilled sausages, BBQ, Ćevapčići, Grilled Minced Sausages of the Balkans
brunch, Central European recipes, dinner, Eastern European recipes, Easy recipe, Finger food, Istrian cuisine, Istrian dish, Istrian food, Istrian gastronomy, main course, main dish, main meat course, Meat, Mitteleuropean recipes, Slovenian cuisine, Slovenian food, Slovenian gastronomy, Small bites, supper, Balkan dish
1 Comment
Minestrone Primavera 10.jpg

Minestrone Primavera (Spring Vegetable Soup) recipe

Beams and Sardines
June 29, 2021 by tina oblak in Adriatic Recipe, Appetizers, brunch, dinner, Easy recipe, entrée course, healthy mael, Istrian cuisine, Istrian dish, Istrian food, Istrian gastronomy, main course, main dish, Nutritious dish, Rustic dish, Slovenian cuisine, Slovenian food, Slovenian gastronomy, Soups, Starters, supper, Vegetarian, Italian soups, Italian minestrone

This is a really lovely soup to make, it is delicious, comforting, easy to prepare, and it is a great choice for a light lunch or dinner. It will soon become one of your favourites as it is ideal for a rustic style meal or for a more elegant option dining.

What I love about this minestrone is that it is really uncomplicated to make and it looks so pretty with all the new vegetables, yes, spring in a plate and a real celebration of springtime.

This soup is Italian in origin and due to such a close geographical proximity of my homeland it became incredibly popular, it is prepared in almost every household on a weekly basis, and because of its healthy and nutritious properties it is a popular choice in nurseries, school canteens, restaurants and nursing homes.

It is also very common to blitz or puree this soup and use it as a baby food.

In Slovenia you can find it in the menus as Zelenjavna Mineštra and in Istrian dialect being referred to as Maneštra.

This spring vegetable soup is quite light but it is very common to turn it into a more substantial meal just by adding a bit of small shaped pasta or rice, barley, freshly cooked or tinned cannellini or other type of beans, chickpeas and similar.

Minestrone Primavera is one of those dishes that was created out of necessity, using what was available in the season. The idea behind this, is that you would go to the vegetable garden during the spring and early summer season and pick the vegetables that were ready to be used in cooking. And this is exactly what my both paternal and maternal grandfathers used to do.

As a alternative, if you do not have a vegetable patch, you can go to the farmers market, food stores or supermarket and pick up the spring vegetable that you like.

The beauty of Spring minestrone is that it can never taste exactly the same, as the selection of vegetables will slightly vary each time you cook it.

My mum would make this soup very frequently especially in the spring and early summer when there are fresh vegetables available in abundance.

There are also quite a lot of regional variations of this dish like Minestrone alla Genovese, a variant typical of Liguria (Italy), that commonly uses fresh basil pesto and a greater amount of fresh herbs.

What gives this humble minestrone a real boost in flavour is to put the end of a Parmiggiano Reggiano or Padano cheese rind into the soup rather than to throw it away. The rind is that part of the cheese that develops on the outside wheel as it ages and acts as a protective layer. When you are no longer able to grate the cheese, as you get to the crust that also becomes quite hard (i.e. the rind), you do not throw the crust away, use it in a soup to enrich it as it is packed full of flavour.

It just transforms the overall taste of the minestrone, as if just by magic, you have to trust me on this one! You will be amazed what an old rind of cheese can do!

Minestrone Primavera 11.jpg

This is a poor, peasant soup, my paternal nona shared with me that when she was young ingredients were scarce, and the word abundance was almost hardly ever used when it comes to food. It is quite emotional to think how incredibly clever and creative people were to use everything they could to give them fuller flavour with something that would normally end up in the bin or compost.

Here I will share a basic recipe for the minestrone, just how it has been made in my family for generations and it is just a guide, as there is no set recipe.

20210609_114927.jpg

Ingredients

Ingredients for soffritto (Italian in origin, it is a flavour base for many dishes, gently fried chopped onions, carrots and celery in olive oil)

  • 4 Tbsp extra virgin olive oil

  • 1 medium onion, approx. 140g, finely chopped

  • 1 medium carrot (finely chopped), use 70g for soffritto and chop the rest of the carrot and use it in a soup together with the other vegetables

  • 1 celery stick (approx. 70g), finely chopped

Ideally, the onion, carrot and celery stick should be chopped quite finely when preparing soffritto. If you have a mini food processor, this is the time to use it.

The rest of the ingredients for the soup

  • courgette (approx. 100g), a handful, sliced and roughly chopped

  • 1 potato (approx 130g), peeled and cut into cubes

  • 4 runner beans, washed trimmed and sliced

  • 4 green asparagus, wash, trim off the wooden ends and finely slice the stalks leaving the tips whole

  • 4-5 radishes, washed and roughly chopped

  • 5 broad bean pods, podded

  • fresh sweet peas in pods (approx. 150g), remove the peas from the pods (frozen petits pois would do just fine, about a handful)

  • baby spinach, about a handful, chopped

  • 1 handful fresh flat leaf parsley, stalks included (that is where the flavour is), finely chopped

  • 3-4 fresh basil leaves, roughly chopped

  • 1 fresh sage leaf

  • 2l hot vegetable or chicken stock (using instant stock is perfectly fine). You can just simply use hot water if you do not have any type of stock in hand.

  • sea salt (to taste)

  • freshly ground black pepper (optional)

  • Parmiggiano Reggiano cheese rind (optional)

  • 80-100g small shaped pasta or broken up spaghetti

Method

Prepare all your vegetables as described in the Ingredients list above and put it aside.

Minestrone Primavera 12.jpg

Drizzle the oil in a casserole pan, add onions, carrots and celery and prepare the soffritto by gently and slowly frying the trio of vegetables for about 15 minutes, stirring occasionally until soft.

View fullsize Minestrone Primavera 2.jpg
View fullsize Minestrone Primavera 3.jpg
View fullsize Minestrone Primavera 4.jpg
View fullsize Minestrone Primavera 5.jpg

Add all the other vegetables and fry gently together with soffritto for few minutes.

Add all the herbs, stock and cheese rind, if using, and cook for about 40 minutes.

Taste and adjust the seasoning with sea salt and black pepper. If using cheese rind there might be no need for extra seasoning as the cheese rind is quite salty already.

View fullsize Minestrone Primavera 7.jpg
View fullsize Minestrone Primavera 8.jpg

Halfway through cooking add barley, beans (already cooked or canned), rice or any other small shaped pasta you like, very traditional is to use ditalini shape pasta. It is also very common, especially when you realized you have not got any small shaped pasta or completely run out of it, to take a bit of spaghetti and break them up into smaller pieces.

I have lovely memories of my mother giving me this job when I was a child to keep me entertained.

I give this same job to my son today, to keep him entertained...

Serve it hot with freshly grated Parmiggiano Reggiano cheese and bruschetta of your choice.

Minestrone Primavera 9.jpg

Wine suggestion

Chardonnay DOC “Vigna Runc” 2019 by Il Carpino, Collio.

June 29, 2021 /tina oblak
Minestrone Primavera, spring vegetable soup, Nutritious soup, Healthy soup, Zelenjavna minestra, Zuppa primavera, Mixed vegetable soup, Mixed vegetable minestrone
Adriatic Recipe, Appetizers, brunch, dinner, Easy recipe, entrée course, healthy mael, Istrian cuisine, Istrian dish, Istrian food, Istrian gastronomy, main course, main dish, Nutritious dish, Rustic dish, Slovenian cuisine, Slovenian food, Slovenian gastronomy, Soups, Starters, supper, Vegetarian, Italian soups, Italian minestrone
Comment

Rustic Sea Bream spread recipe

Beans and Sardines
June 15, 2021 by tina oblak in Adriatic Recipe, Appetizers, brunch, Canapés, dinner, Easy recipe, Finger food, Fish & Seefood, Healthy, healthy mael, Istrian dish, Istrian food, Istrian gastronomy, Nutritious dish, Rustic dish, Small bites, Snacks, spreads, Starters

This fish spread is creamy and full of flavour and could not be simpler and quicker to make. It is rustic and informal, fantastic as a dinner party starter or as light lunch, it brings people together at the table as it is a real sharing dish and a real success every time I make it.

You can prepare this spread any time of the year but on a hot sunny day it feels somehow a bit of a treat.

Back home it is very popular starter and commonly used as a part of a selection of cold fish based starters.

This spread, like many other dishes, was created out of necessity with the left over baked fish. The fish was cleaned and the three most basic ingredients used in the North Adriatic (garlic, extra virgin olive oil, flat fresh leaf parsley) were added to the fish that was simply mashed with a fork.

Place the spread in the centre of a table, sprinkle with some extra chopped parsley or dill, a drizzle of olive oil, arrange some bread, olives, sliced tomatoes, salads, other fish based starters and really all the other things that you like.

Your family and friends will love this spread, they will ask you for the recipe or you will find them on your doorstep before you intent to invite them back.

Ingredients

Serves 4- 8

  • 2 whole baked sea breams (each weighing between 300-500g before baking) or 4 fillets (can use sea bass, mackerel or similar)

  • 1 clove of garlic, peeled and pressed (small to a medium sized garlic would be appropriate to avoid overpowering the delicate flavour of the fish, you can use big garlic if you are after a more garlicky taste)

  • 4 Tbsp extra virgin olive oil

  • fresh flat leaf parsley, stalks included, finely chopped (about a handful)

  • sea salt, to taste

  • lemon juice (optional, to taste)

Method

If using the whole fish, remove the skin and any bones from the fish.

View fullsize Sea Bream spread 1.jpg
View fullsize Sea Bream Spread-2.jpg
Sea Bream Spread 3.jpg

Place cleaned pieces of fish meat in a food processor. If you do not have food processor you can use hand blender which will give you a very smooth consistency or you can simply finely chop fish fillets and have a spread with more texture.

Add pressed garlic, extra virgin olive oil, chopped parsley and a pinch of sea salt.

Blend until smooth or blitz for more coarse consistency.

View fullsize SEa Bream Spread 4.jpg
View fullsize SEa Bream Spread 5.jpg

Taste and adjust seasoning with sea salt.

Add a squeeze of lemon juice if desired.

Serve at room temperature with fresh or toasted bread, crackers or bread sticks.

SEa Bream Spread 6.jpg

Just a though

If you bake the fish, there will be juices coming out of the fish. Spoon them up and add to the rest of the ingredients. It will really give extra flavour.

This spread can be made up to a day ahead and kept in the fridge but served at room temperature.

Wine suggestion

Ribolla Gialla IGT 2019 by I Clivi, Tre Venezie.

June 15, 2021 /tina oblak
Sea Bream, rustic fish spread, sea bream paté, home made fish spread
Adriatic Recipe, Appetizers, brunch, Canapés, dinner, Easy recipe, Finger food, Fish & Seefood, Healthy, healthy mael, Istrian dish, Istrian food, Istrian gastronomy, Nutritious dish, Rustic dish, Small bites, Snacks, spreads, Starters
Comment
Final dish- sautéed sweet peas with parsley and onion.jpg

Sautéed Early Sweet Peas with fresh parsley and onion recipe

Beans and Sardines
June 08, 2021 by tina oblak in Adriatic Recipe, brunch, dinner, Eastern European recipes, Easy recipe, healthy mael, Istrian cuisine, Istrian dish, Istrian food, Istrian gastronomy, Nutritious dish, Rustic dish, Side Dishes, Slovenian cuisine, Slovenian food, Slovenian gastronomy, supper, Vegetarian

This is a great classic side dish, light and delicious, ideal for a rustic as well as a more formal lunch or dinner, it goes with just about any meat or fish dish, and it is quick and easy to make.

It can also be used as a base for pasta and risotto dishes and is very tasty used in frittatas and on top of bruschetta.

It is ideal to make this dish in spring using fresh peas as they are very sweet and tender. For this recipe, however, you can use fresh peas when in season but frozen petits pois are the ones I use most of the time as they are great alternative to the fresh peas when they are not in season and can be enjoyed all year round.

My mother made sautéed peas very frequently, they are nutritious, healthy and delicious, and they were served on a weekly basis, used fresh when in season but most of the time my mother used frozen petits pois as an alternative.

As a child I loved going to the allotment with my maternal grandparents and have vivid memories picking the pea pods from the plant. I also remember being always amazed walking home with big wicker baskets full of pea pods and ending up with half of what we picked after removing the peas from the pods.

I found picking the pea pods very entertaining, I liked very much opening the pods and finding this lovely vibrant green peas inside them.

As a child, I also soon spotted the opportunity to play and as the peas were all different sizes I would create a long line of peas starting with the smallest.

I thought that was great fun, it also provided fantastic healthy snack, I ate them as I went along creating this pea chain.

My most heart-warming memories around peas, whether they were picked at the allotment or bought at the farmers market, must have been me sitting at the table with my mother or paternal grandmother, and remove the peas from the pods. It provided the opportunity just to be together, have conversation or just stay in silence and smile at each other, I guess I felt reassured, loved...

View fullsize Ingredients- sautéed sweet peas 1.jpg
View fullsize Ingredients- sautéed sweet peas 2.jpg

Ingredients

Serves 4 as part of meal

  • 1kg fresh early sweet peas in pods (after removing the pods you should end up with roughly between 400- 500g of peas)

    You can use sugar snap peas, in this case you will need about 2kg to get roughly 400g of peas after removing the pods.

    In both cases do not worry if you end up with more or less peas. Just use what you end up with after taking them outside the pod and follow the recipe.

    You can also use frozen Petits Pois (about 500g) or canned peas.

  • 4 Tbsp extra virgin olive oil

  • 1 onion, medium size (about 130g), finely chopped

  • fresh flat leaf parsley, about a handful, finely chopped

  • hot vegetable stock or Bouillon powder instant stock

  • sea salt (only needed if using vegetable stock without the salt)

Ingredients- sautéed sweet peas 4.jpg

Method

If using fresh peas, clean and prepare them by removing the peas from inside the pods and discard the pods.

Ingredients- sautéed sweet peas 3.jpg

In a skillet add the olive oil and onions and sautéed them over gentle heat until lightly browned and softened (this should take 5-7 minutes).

View fullsize sautéed sweet peas 5.jpg
View fullsize sautéed sweet peas 6.jpg

Add the peas, fresh or frozen, and sautéed them together with the onions for few minutes. If using frozen peas cover with the lid as it will help to defrost them quicker.

Add fresh parsley and hot vegetable stock just enough to completely cover the peas.

View fullsize sautéed sweet peas 7.jpg
View fullsize sautéed sweet peas 8.jpg

Cook uncovered over medium heat, stirring occasionally, until all the liquid is absorbed but the peas are still nice and moist and not dry (it should take around 15 minutes).

Taste and season with sea salt if needed and serve warm.

sautéed sweet peas 10.jpg

Just a thought

You can keep the cooked peas in the fridge, in a airtight container, for about two or three days.

They freeze very well, so good side dish to prepare ahead.

June 08, 2021 /tina oblak
sautéed peas, sautéed sweet peas, sautéed early sweet peas, sweet peas with fresh parsley and onion, sautéed petits pois, sautéed peits pois woth fresh parsley and onion
Adriatic Recipe, brunch, dinner, Eastern European recipes, Easy recipe, healthy mael, Istrian cuisine, Istrian dish, Istrian food, Istrian gastronomy, Nutritious dish, Rustic dish, Side Dishes, Slovenian cuisine, Slovenian food, Slovenian gastronomy, supper, Vegetarian
Comment
Creamed spinach 1.jpg

My mum's Creamed spinach (without cream) recipe

Beans and Sardines
May 25, 2021 by tina oblak in Adriatic Recipe, brunch, Central European recipes, Eastern European recipes, Easy recipe, healthy mael, Istrian cuisine, Istrian dish, Istrian food, Istrian gastronomy, Nutritious dish, Rustic dish, Slovenian cuisine, Slovenian food, Slovenian gastronomy, Vegetarian

Creamed spinach is one of my absolute favourite side dishes and it is one of those recipes that you will go back to time and time again. Spinach is a beautiful leafy plant but it is sometimes an unsung hero of dinner greens. It is quick and easy to make, perfect to introduce as a vegetable dish during midweek or to serve along those special weekend meat roasts. It is very tasty, nutritious, healthy and accompanies really nicely just about any fish or meat dish.

Spinach cooked this way was the one I loved most as a child, and I could never get enough of it, I could literally eat it out of pan with a spoon, nothing much has changed. And of course, I was never told off for eating too much of it! Definitely worth giving it a go if you have children (and adults) that are not so kin on vegetables.

My mother made creamed spinach very often for me and my brother when we were little during the week as a quick meal together with mashed potatoes and fried egg. This vegetable side dish is very popular back home and still served as part of school meals just as it used to be. It is reassuring to know that some things just haven't changed...

Creamed spinach 2.jpg

Ingredients

Serves 2-4 as part of meal

  • 2 Tbsp extra virgin olive oil

  • 1 clove of garlic, peeled

  • 500g of baby spinach (washed and ready to use) You can use other varieties of spinach or Swiss chard in which case you remove the stalks

  • 2 Tbsp all-purpose flour

  • 250 ml milk (semi skimmed or full fat)

  • sea salt

  • nutmeg, freshly grated (optional)

Method

First of all you need to wash the spinach thoroughly if you bought it unwashed. If you are using the spinach that has been washed already and is ready to use just skip the following step.

The best way to wash the spinach is to put it in a sink or large container of cold water. Swish leaves around and than let them stand for a few minutes allowing the dirt to sink to the bottom.

Place washed spinach in a big pot and pour over boiling hot water. If you prefer you can bring a large pot of water to a rolling boil and then add the spinach. In both cases you need to push the leaves down to completely submerge them in the water.

Blanch the spinach for about 40 seconds to a minute (blanching is most often used as an intermediary step for a dish and it means giving greens, in this case spinach, a quick cook in hot water to cook them through and soften them).

Place a large colander in a sink, drain the spinach and run it under cold water just for few seconds. This will stop the cooking immediately (and retain the nutrients) but it will also help to cool down the spinach.

Let the spinach cool completely for few minutes and drain as much as you can. You want to remove as much excess liquid as you can (spinach contains quite a lot of water). I do this in batches by taking small handfuls of spinach and squeeze it very well. I end up with few balls of very well drained spinach.

View fullsize Creamed spinach 3.jpg
View fullsize Creamed spinach 4.jpg

Transfer drained spinach on a chopping board and chop quite finely.

Creamed spinach 5.jpg

Put the extra virgin olive oil and peeled clove of garlic in a saucepan. Infuse the oil with the garlic on a medium-low heat and when the garlic turns nice golden colour remove it from the saucepan and discard it. Be careful not to burn it, trust me this is easily done.

Add the flour and cook briefly, stirring constantly, until the flour turns golden colour.

View fullsize Creamed spinach 6.jpg
View fullsize Creamed spinach 7.jpg

Add chopped spinach and stir well so the spinach is mixed well with the flour mixture. At this point the spinach mixture might stick to the bottom a bit, do not worry if this is the case.

Start pouring gradually the milk, stirring and mixing constantly, incorporating well. Season with salt and add some freshly grated nutmeg, if using, and cook further for about 5-7 minutes on a gentle heat, stirring constantly. By this time you should end up with a lovely thickened creamed spinach. If it does look a bit watery give it another minute or so.

View fullsize Creamed spinach 8.jpg
View fullsize Creamed spinach 9.jpg

Just a thought

If you prepare this dish in advance it might get a bit thick. When heating up just pour in gradually a little bit more milk and stir constantly until you get the desired consistency.

Creamed spinach 10.jpg
May 25, 2021 /tina oblak
fresh baby spinach, baby spinach in a skillet, quick spinach recipe, easy spinach recipe
Adriatic Recipe, brunch, Central European recipes, Eastern European recipes, Easy recipe, healthy mael, Istrian cuisine, Istrian dish, Istrian food, Istrian gastronomy, Nutritious dish, Rustic dish, Slovenian cuisine, Slovenian food, Slovenian gastronomy, Vegetarian
3 Comments

Sautéed courgettes with onions and parsley recipe

Beans and Sardines
May 11, 2021 by tina oblak in Adriatic Recipe, Easy recipe, healthy mael, Italian-style courgettes, Nutritious, Vegan, Vegetarian, Rustic dish

I simply love cooking with courgettes, this humble vegetable is divine and incredibly versatile.

Courgettes are fantastic when grilled, fried, roasted, used raw in salads, but sautéed courgettes with onions and fresh parsley must be the method I most often return to when cooking with courgettes, as it is a classic side dish to accompany just about any main course.

This is a rustic dish and offers a great deal more than meets the eyes. My mother made this dish on a weekly basis, especially during late spring and summer when they are in season.

In this recipe, the courgettes are slow-cooked until they become creamy, golden in colour and silky in texture, with sweet and caramelized taste.

Courgettes cooked in this way originate from the Italian recipe Zucchine trifolate, where trifolare in Italian simply means a method of preparing vegetables with onions or garlic or both, olive oil, and fresh parsley until they are thoroughly cooked and soft.

And once again, the proximity to Italy of my homeland and the mild climate offering the courgettes in abundance when in season, would explain the popularity of this dish.

View fullsize Sautéed courgettes 2.jpg
View fullsize Sautéed courgettes 3.jpg

Courgettes prepared this way, would most commonly be served as a hot side dish for grilled, barbecued or roasted meat or fish dishes or used as a base for risotto, frittata or omelette or simply stirred through pasta.

Fantastic used in savoury pies and served in a less traditional way, for example stirred through couscous or with jacket potatoes.

At room temperature or cold are a great addition to an antipasti selection and fantastic spooned onto bruschetta with fresh chopped basil or mint if it's summertime.

Ingredients

Serves 4-6 as part of meal

  • 1 kg courgettes (4-6 courgettes roughly, depending on the size)

  • 1 onion (about 150g), finely chopped (you can use garlic instead if prefer or use both)

  • 4-5 Tbsp (about 15g) fresh flat leaf parsley, finely chopped

  • 4 Tbsp extra virgin olive oil

  • 100 ml vegetable stock (you can use good quality instant vegetable stock or water), optional if you prefer a less creamier consistency as an end result.

  • sea salt

Sautéed courgettes 4.jpg

Method

Wash the courgettes under cold running water, dry them a bit, place them on a chopping board, cut off the tops and the bottoms. Cut the courgettes in half and then slice them in half lengthwise.

Slice the courgettes, you should get half moon shaped pieces.

View fullsize Sautéed courgettes 5.jpg
View fullsize Sautéed courgettes 6.jpg
View fullsize Sautéed courgettes 7.jpg
View fullsize Sautéed courgettes 8.jpg

In a large, wide pan put the extra virgin olive oil, heat it a bit, add the onions and sauté them on a fairly low heat for about 10-15 minutes, stirring constantly until the onions become soft and translucent.

Add the courgettes and parsley, sauté them on a medium-low heat for about 20-25 minutes, stirring occasionally to stop them from sticking to the bottom of the pan. By now, almost all the water should evaporate, the courgettes should get softer and start breaking down a bit.

View fullsize Sautéed courgettes 9.jpg
View fullsize Sautéed courgettes 10.jpg
View fullsize Sautéed courgettes 11.jpg
View fullsize Sautéed courgettes 12.jpg

Add vegetable stock or water and cook further for about 25-30 minute on a gentle heat, stirring occasionally now and again.

After this time, the water should be completely evaporated, courgettes broken down and soft, but most probably with not much colour.

View fullsize Sautéed courgettes 13.jpg
View fullsize Sautéed courgettes 14.jpg

Season with sea salt to taste, increase the heat, and cook the courgettes for few more minutes, so they get a bit of a colour. At this stage, they might start to catch a bit and this is exactly what should happen. If they are still not getting the colour, increase the heat a bit and stir them a little more if needed.

The dish is ready when the courgette pieces are golden around the edges and oozy and creamy in the middle.

Sautéed courgettes 15.jpg

Just a thought

It is quite common to add a pinch of red chilli flakes for extra kick.

Sautéed courgettes freeze very well, so it might be a good idea to cook in bigger quantities when the courgettes are in season and freeze them.

May 11, 2021 /tina oblak
side dish
Adriatic Recipe, Easy recipe, healthy mael, Italian-style courgettes, Nutritious, Vegan, Vegetarian, Rustic dish
Comment
Potato gnocchi 1.jpg

Potato Gnocchi recipe

Beans and Sardines
May 04, 2021 by tina oblak in Gnocchi, recipe from Northern Ital, Easy recipe, healthy mael, Rustic dish, Side Dishes, main course, entrée course, main dish

Gnocchi are incredibly popular dish from where I come from, and again this is of no surprise, as the region is so close to Veneto and Friuli-Venezia Giulia, regions in Northern Italy where gnocchi actually originated. This is due to a cooler climate that is very well suited for growing potatoes.

I will share here with you my nona Nada's recipe for a basic homemade potato gnocchi that can be served with endless variety of sauces but the most common are probably melted butter, sage and grated Parmiggiano Reggiano cheese, bolognese sauce, classic tomato sauce, four cheeses sauce and basil pesto. Gnocchi can also be prepared in advance to use for a gnocchi bake.

In Slovenia they are frequently found on the menus in family run restaurants served with different meat roasts and the gravy; the idea behind it is to squash the gnocchi with the fork so they absorb the sauce. When you eat it like that, it is like receiving a hug.

I grew up on them, my nona Nada made tuns of them in her lifetime. I learnt how to make them directly from her, under her strictest supervision of course, apparently I passed!

A lot of people are quite daunted by the idea of making gnocchi from scratch, but I promise you they are much less complicated that is seems and once you make them yourself and realize how easy it is to make them and how much tastier they are compared to ready made once from the store, you will think twice before buying them.

Before you start, it is crucial that you chose the right type of potato, they need to be starchy with floury texture and minimum content of water, giving you a light and airy dough with gnocchi being soft, delicate with a pillowy texture.

Gnocchi are perfect for both informal or more formal lunches or dinners.

Recipe

Ingredients

Serves 4-6

  • 1kg floury, yellow-fleshed potatoes, e.g. King Edward, Maris Piper, (avoid new potatoes). I use red skin potatoes.

  • 300g all purpose flour (plus extra for flouring the board and working surface)

  • 1 egg, slightly beaten

  • sea salt, a pinch

Potato gnocchi 2.jpg

Method

Wash the potatoes, with the skin on, under cold running water.

Place the potatoes in a saucepan or a pot, cover with cold water and bring to boil. After the water has come to a boil, cook for about 20 minutes or until tender. Cooking time will obviously vary depending on the size of the potatoes you are using.

Don't pierce them during cooking and don't overcook them allowing the skin to burst as they will absorb too much water.

You might ask yourself why is it so important to use floury, low water content potato and why is it so important that the potatoes do not absorb too much water during the cooking.

It is crucial that the potatoes stay dry, in this way you will only add the necessary flour, having as a finished product a cooked gnocchi that will actually taste of potato, how they should. On the contrary, the wet potatoes will require more flour as the dough will be wetter and stickier resulting in potato gnocchi tasting floury.

There is a very simple way to avoid potatoes absorbing too much water, steam them, and this is my secret, success guaranteed.

Remove from the pot, drain them in a colander and let them cool enough to handle, then remove the skin. If the potatoes are still quite warm to handle, the best way to remove the skin is to stick the fork though the potato and peel it using a knife.

View fullsize Potato gnocchi 3.jpg
View fullsize Potato gnocchi 4.jpg

Put the flour on a working surface, add salt and mix with the fork.

Make a well in the middle and pass the potatoes through a potato ricer while still warm as they become stickier when cooler. Allow riced potatoes to cool for few minutes and then add the egg.

View fullsize Potato gnocchi 5.jpg
View fullsize Potato gnocchi 6.jpg
View fullsize Potato gnocchi 7.jpg

Cut a small piece of the dough; my nona Nada told me that the dough should cut like a loaf of bread, roll it out into a log about 2 cm thick and cut them into pieces.

It is very important that you sprinkle the gnocchi with a bit of flour and gently toss them so they don't stick together.

View fullsize Potato gnocchi 8.jpg
View fullsize Potato gnocchi 9.jpg
View fullsize Potato gnocchi 10.jpg
View fullsize Potato gnocchi 11.jpg

Repeat the process until you finish all the dough.

View fullsize Potato gnocchi 12.jpg
View fullsize Potato gnocchi 13.jpg

Cook them straight away or leave them uncooked for later use. They can stay uncooked for about a maximum of two hours providing you are covering the gnocchi with kitchen towel.

You can also freeze them, see my section Just a thought.

Potato gnocchi 14.jpg

Gnocchi really do cook in a flash. Place them in a large pot of salted boiling water and when they float to the top you know they are cooked.

Drain them in a colander or scoop them out with slotted spoon, I prefer the latter method as less aggressive with soft and delicate gnocchi.

Add your favourite sauce and serve immediately.

Potato gnocchi 15.jpg

Just a thought

The great thing about gnocchi is that they freeze very well. It is very important that you spread the uncooked gnocchi in a single layer, so they don't stick together, on a well floured wooden board, baking sheet, serving tray or similar laid with kitchen cloth and floured.

Put your tray with gnocchi into a freezer for at least 20- 30 minutes and once frozen put them into a freezing bag.

When you want to cook them just drop them frozen directly into a boiling salted water without defrosting them first.

May 04, 2021 /tina oblak
home made potato gnocchi, authentic potato gnocchi recipe, njoki
Gnocchi, recipe from Northern Ital, Easy recipe, healthy mael, Rustic dish, Side Dishes, main course, entrée course, main dish
Comment
Foto 1.jpg

Gratinated scallops Venetian style recipe

Beans and Srdines
April 27, 2021 by tina oblak in Fish & Seefood, Adriatic Recipe, Easy recipe, entrée course, healthy mael, Istrian cuisine, Istrian dish, Istrian food, Istrian gastronomy, main course, main dish, Rustic dish, shellfish

The scallop, which is also known as coquille St-Jacques in French, is probably one of the best known, appreciated and loved types of shellfish, even by those that are generally not so keen on fish or seafood.

I have always adored gratinated scallops, so simple and quick to make. Plum, juicy scallops are covered with enriched breadcrumb mixture and then quickly baked. Despite its simplicity, they feel so luxurious and festive and very impressive, especially when served in their shells.

The use of the scallop shell goes back to medieval times when it was used to pour holy water on the head of the baptized members of the congregation, and it had a very practical purpose and served as a replacement for a bowl so the pilgrims could use them to hold their food and drink on their long journey on the Camino de Santiago, or in English the Way of St. James, i.e. the pilgrim trail leading to the Cathedral of Santiago de Compostela, in Galicia in north-western Spain, and the shrine of St. James, one of the original apostles, and it is widely travelled today.

The scallop shell scoop would also serve as the measure for the food the pilgrims would receive, donated by local churches and other establishments.

This is a great and very tasty starter for special occasions and there are a lot of variations of this dish. The most familiar variation of it to me, which I grew up with, is eating it in the Venetian style (called Capesante a la Selvadega in Venetian dialect). This is another example of a dish that left significant footprints in the region due to strong presence in the territory of the Serenissima (i.e. ‘the Most Serene Republic of Venice’).

No matter how you prefer making them, scallops are a healthy eating option as they mainly consist of protein and healthy omega-3 fat, are rich in vitamin B12 and zinc, all of which are essential for a healthy brain.

Great to freeze and can be prepared in advance.

For this recipe, you can buy fresh scallops and clean them yourself or buy the ones that have been cleaned already by the fishmonger but still sold in their original shell. You can, however, buy already cleaned fresh or frozen scallops without the shell and use the ramekins to cook and serve them in.

Foto 2.jpg

If you buy the fresh scallops in their original shell, I would suggest you keep them for the future use. Brush them well, wash them in a hot soapy water or you can even put them in the dishwasher.

Whether you buy them fresh or frozen you really want to make sure they are caught using sustainable fishing methods.

Ingredients

Serves 4

  • 12 large fresh scallops (separated from their shell and cleaned)

  • 12 clean concave scallop shell to be used as cooking and serving dishes (or ramekins)

  • 120g breadcrumbs

  • 1 clove of garlic (peeled and pressed)

  • vegetable stock, 1-2 Tsp per scallop (using a good quality instant vegetable stock is perfectly fine)

  • fresh flat leaf parsley, about a handful (7g), very finely chopped

  • fresh Parmigiano-Reggiano (Parmesan cheese) (about 30g), finely grated

  • extra virgin olive oil (about 4 Tbsp)

  • sea salt, to taste

  • butter, few knobs

  • lemon wedges, for serving

Method

Preheat the oven to 200C static.

First of all, make the breadcrumb mixture. In a mixing bowl put the breadcrumbs, garlic, parsley, parmesan cheese and extra virgin olive oil. With the fork stir and mix so that all the ingredients combine well. You should end up with a moist breadcrumb mixture. Taste and adjust seasoning with sea salt.

Foto 3.jpg
View fullsize Foto 4.jpg
View fullsize Foto 5.jpg
View fullsize Foto 6.jpg

Place the deep, concave shells (or ramekins if using) with scallops on a baking tray. With a small spoon pour the vegetable stock over each scallop.

Foto 7.jpg

Spoon 1-2 Tbsp of the breadcrumb mixture over each scallop and press down the breadcrumb mixture slightly with the back of the spoon.

Add a knob of butter on the top of each scallop. At this stage you can freeze the prepared scallops if not used immediately.

View fullsize Foto 8.jpg
View fullsize Foto 9.jpg

Bake in preheated oven for about 10 min until the breadcrumbs turn nice golden colour. Do not overbake the scallops as they will dry too much.

Foto 10.jpg

Serve hot with lemon wedges on the side.

Foto 11.jpg
View fullsize Foto 12.jpg
View fullsize Foto 13.jpg

Just a thought

You can use the same breadcrumb topping but use mussels instead of scallops. Fantastic warm canapé served with drinks.

Wine suggestion

Friulano DOC "Toc Bas" 2018 by Ronco del Gelso, Friuli Isonzo Rive Alte.

April 27, 2021 /tina oblak
Gratinated scallops Venetian style recipe, gratinated scallops easy recipes, gratinated scallops with breadcrumbs mix
Fish & Seefood, Adriatic Recipe, Easy recipe, entrée course, healthy mael, Istrian cuisine, Istrian dish, Istrian food, Istrian gastronomy, main course, main dish, Rustic dish, shellfish
1 Comment
Octopus Salad 1.jpg

Octopus Salad recipe

Beans and Sardines
April 06, 2021 by tina oblak in Fish & Seefood, Adriatic Recipe, Easy recipe, entrée course, healthy mael, main course, Nutritious, Rustic dish

This dish, with its simplicity, evokes those truly Mediterranean flavours, and has that real Mediterranean feel about it. It has always been incredibly popular and a real success every time it was served, be it at home or in the restaurant where it has been on the menus since I was a child, and has never gone out of fashion. Needles to say, it is one of my favourite dishes, and it is also a family favourite too!

My parents would prepare this dish over and over again and it does evoke some heart worming memories. My grandfather or my dad would go to the fish market and returned home with a full bag of octopus to clean and cook. They would display it on the kitchen table and I was really fascinated by the animal itself just admiring its long tentacles. Now to think back, it was a great biology lesson.

Octopus salad is a very simple but delicious and healthy way to eat octopus. You can eat it on its own just simply dressed or over the bed of fresh rocket salad. Traditionally you would have a nice fresh crunchy piece of bread to pick up the dressing and a glass of chilled wine to further elevate the dish, and this is exactly how my husband loves to eat it. Everyday troubles just somehow seem to disappear, at least for a while.

This tasty octopus salad can be eaten all year round, although having it as a cold salad on a hot summer's day is quite a refreshing treat.

There are a lot of stories of how you should cook the octopus to have it really nice and tender. I always cook it in the evening, then turn the heat off and leave it to cool overnight in its own liquid. The following day is wonderfully tender and surely cool enough to clean and dress.

Ingredients

Serves 4

  • fresh octopus, cleaned (about 1kg in weight) Most fishmongers will be happy to clean it for you.

    1 stick of celery

    1 carrot washed and peeled

    1 small onion, peeled

    1 fresh or dry bay leaf

    5 whole black peppercorns

    1 clove of garlic, peeled

    4 Tbsp (60ml) extra virgin olive oil

    7g fresh parsley (plus some extra to be finely chopped and sprinkled over the salad)

    juice of 1 lemon (optional)

    sea salt, to taste

    freshly ground black pepper, to taste

    a splash of white vinegar (optional)

Method

To make a dressing, take a small bowl and add extra virgin olive oil, roughly chopped garlic and roughly chopped parsley, lemon juice (if using), a pinch of sea salt and a bit of freshly ground black pepper. Leave the dressing for at least 1 hour for all the flavours to develop.

View fullsize Octopus Salad 4.jpg
View fullsize Octopus Salad 5.jpg

Wash the cleaned octopus under the cold running water and put it in a large pot together with celery stick, carrot, onion, bay leaf, peppercorns. Fill the pot with cold water enough to completely cover and bring to boil. Turn down the heat and simmer with the lid covered for about 1 hour or until the octopus is cooked and fork tender.

P8259675.JPG

Remove the octopus from the pot and let it cool for a bit until you find the temperature of the octopus manageable. Out of habit and simplicity, I always cook the octopus in the evening and leave it to cool overnight in its own liquid.

View fullsize Octopus Salad 6.jpg
View fullsize Octopus Salad 7.jpg

Clean the cooked octopus with your hands by sliding the darkish pink layer off the tentacles and the body of the octopus. This should feel very similar to when you roast the peppers and you take the skin off. You should be left with a nice pinkish white meat.

Cut the cleaned octopus head in cubes and tails in slices roughly about 1 square cm in size. Put the octopus in a bowl ready to be dressed.

View fullsize Octopus Salad 8.jpg
View fullsize Octopus Salad 9.jpg

Sieve the dressing over the bowl with the octopus and adjust seasoning with sea salt and pepper. Add more extra virgin olive oil if you think the dish is a bit too dry and sprinkle with fresh finely chopped flat parsley. For freshness you can add a splash of white wine vinegar, a squeeze of lemon juice or a combination of both. Mix and serve.

Just a thought

You can serve dressed octopus over the bed of fresh rocket salad.

With a dressed octopus you can also create a more substantial salad and serve it as a main dish by adding for example chopped celery sticks, some sweet cherry vine tomatoes, cold boiled potato cut in smaller pieces, black olives and finely sliced red onion.

A lovely idea to serve octopus salad is to put it on a serving dish, together with smaller plates consisting of sun dried tomatoes, a mixture of olives, different types of Mediterranean vegetables in olive oil and for sure plenty of rustic crunchy bread.

View fullsize Octopus Salad 10.jpg
View fullsize Octopus Salad 11.jpg
Octopus Salad 13.jpg

Wine suggestion

Malvasia ZGP 2016 by Hedele, Vipavska Dolina.

April 06, 2021 /tina oblak
octopus salad, Adriatic style octopus salad, simple octopus salad, Polpo all'insalata, hobotnica v solati
Fish & Seefood, Adriatic Recipe, Easy recipe, entrée course, healthy mael, main course, Nutritious, Rustic dish
Comment
LRM_20191017_111905 (1).jpg

Rustic Fig Jam Crostata (rustic Italian style jam tart) recipe

Beans and Sardines
March 16, 2021 by tina oblak in Sweet Things, Adriatic Recipe, baking, dessert, Easy recipe, pudding, recipe from Northern Ital, Rustic dish

When I was a child, desserts after the main meal were more of a weekend treat, and it is when my mum would bake.

And there is one simple dish she always baked in our household, and that is a jam tart or simply crostata as we call it in Italian. It is made using Italian style sweet shortcrust pastry that is enriched with eggs, which help make the dough even flakier, lemon zest, sugar, and baking powder. It is still very popular to bake at home and easily available in bakery shop and supermarkets.

My mum would use different fruit jams that she made using a variety of fruits in the season from our orchard or fruit given by friends or neighbours. Most commonly used type of jam to fill the crostata with would be the apricot jam. Crostata can be also filled with ricotta, Nutella, pastry cream and fresh fruit.

This year we had a brilliant year for figs and they were in abundance in my grandma's back garden. Most were eaten just picked directly from the tree, how luxurious. But there were just so many figs and since nothing gets ever wasted, we made a lot of jam!

View fullsize P8239632.JPG
View fullsize P8239635.JPG

There is something so comforting and homely about jam crostata, with a delicate flake crust, filled with your favourite choice of jam. Simply delicious, just melts into your mouth, and most importantly, it is easy to make, and the aroma during the baking is unmistakable.

Crostata is also great for colder days, as a dessert or snack, and is commonly served for breakfast too.

Nice accompanied with cream, vanilla ice-cream or natural Greek yogurt, just to tone down a bit the sweetness of the the fig jam.

LRM_20191017_114606.jpg

Ingredients

  • 250g all purpose flour

  • 105g diced butter, room temperature

  • 1 egg and 1 egg yolk (slightly beaten), keep the egg white for brushing the crostata just before putting it in the oven for baking

  • 50g caster sugar (optional if you use fig jam as it is quite sweet already)

  • lemon zest of one small unwaxed lemon, finely grated

  • 1 Tsp of liquor like grappa or rum ( I used rum)

  • ¼ Tsp baking powder

  • jar of fig jam or any other jam of your choice, home made or a good quality one from the food store

Method

To make the pastry, measure the flour into a large bowl and add the butter.

Using just your fingertips, rub the butter into the flour until the mixture resembles fine breadcrumbs.

Make a well in the centre of the flour, then add the sugar, the eggs, lemon zest, liquor, and baking powder. First stir gently with the fork to combine all the ingredients and for the mixture to come together.

LRM_20191016_103910.jpg
View fullsize LRM_20191016_105737.jpg
View fullsize LRM_20191016_110609.jpg

Gently gather the dough together with your hands and transfer it onto a floured work surface.

Gently press the dough, without kneading it, until it comes together to form a firm ball.

Press the dough into a flat disc, wrap it in cling film and refrigerate for about 30min.

View fullsize LRM_20191016_111346 (1).jpg
View fullsize LRM_20191016_111840.jpg
View fullsize LRM_20191016_112034.jpg

Preheat the oven to 180C static or equivalent.

Lightly flour the surface and the rolling pin. Take about 2/3 of the pastry and with the rolling pin roll it out on a surface, then roll the pastry back over the rolling pin, so it is hanging, and ease it into the 23cm loose bottom non stick flan tin.

Press the pastry shell into the side of the tin.

Allow the excess to hang over the side and roll the rolling pin over the top of the flan tin, to cut off the excess pastry.

View fullsize LRM_20191016_120752 (2).jpg
View fullsize LRM_20191016_121132 (2).jpg
View fullsize LRM_20191016_121512.jpg
View fullsize LRM_20191016_121652.jpg
View fullsize LRM_20191016_121805.jpg
View fullsize LRM_20191016_123009.jpg

Spoon the jam of your choice into the pastry case.

On a lightly floured surface roll out the remaining pastry, cut it in strips with pastry wheel cutter or with the knife and decorate your tart.

If you happen to have a bit of left pastry, just take your favourite cookie cutter and make few biscuits.

Brush the pastry with a slightly beaten egg white, put it in the oven and bake for 30-40min until nice and golden in colour.

View fullsize LRM_20191016_125219.jpg
View fullsize LRM_20191016_130654.jpg
View fullsize LRM_20191016_131203.jpg
View fullsize LRM_20191016_131635.jpg

When baked, let it cool in a tin, dust with little icing sugar and serve warm or cold.

LRM_20191016_152518 (1).jpg
View fullsize LRM_20191017_104058 (3).jpg
View fullsize LRM_20191017_114606 (1).jpg

Wine suggestion

Verduzzo Friulano Passito DOC 2019 by La Tunella, Colli Orientali del Friuli.

March 16, 2021 /tina oblak
Rustic Fig Jam Crostata (rustic Italian style jam tart) recipe, classic jam crostata recipe, Italian style jam filled tart recipe, Rustic Italin style jam tart recipe, crostata recipe, Italian sweet pastry
Sweet Things, Adriatic Recipe, baking, dessert, Easy recipe, pudding, recipe from Northern Ital, Rustic dish
1 Comment
LRM_20191009_123138.jpg

Liptauer (Austro-Hungarian paprika spiced cheese spread) recipe

Beans and Sardines
March 09, 2021 by tina oblak in Starters, brunch, Easy recipe, entrée course, healthy mael, Slovenian cuisine, Slovenian food, Slovenian gastronomy, Vegetarian, spreads, Eastern European recipes, Central European recipes, Mitteleuropean recipes, Snacks, Canapés, Finger food, Small bites, Appetizers

Liptauer, pronounced “Lip-tower”, is a simple, flavourful, central European, or Mitteleuropean, well seasoned, paprika spiced cheese spread with a sharp, rich, and deep smoky taste.

Its origin has long been disputed but the name derived from the German name Liptau for the region of Liptov (Hungarian: 'Lipto') in northern Slovakia, a former county in the Austro-Hungarian Empire.

Nowadays, Liptauer spread appears in numerous variations throughout many other European countries, and is a part of Slovak, Hungarian, Slovenian, Italian (some north-east regions) and Austrian cuisine, where it is commonly served as a popular dish in wine taverns, and as a snack for kids during break time in schools.

Despite extensive variations on the recipe, as many families have their own unique version of Liptauer, they all have in common the main ingredient which is cheese that can vary from Quark, Bryndza (a sheep milk cheese) cream cheese, cottage or goat cheese and powdered sweet paprika giving a spread a beautiful colour.

It is great for vegetarians and you can change and play around with the quantities of some ingredients to suit your taste.

Here, I will share with you the recipe my maternal Grandma Iva used to make. This dish was a constant part of my childhood and it really does bring back some wonderful memories as it was made on numerous occasions, especially when the family got together to mark special festivals like Carnival (before Lent began), Easter, Christmas, and All Saint's Day, or family celebrations like birthdays and anniversaries.

LRM_20191009_123656 (1).jpg

My grandmother would put the spread in the middle of the table with freshly made home made bread, and everyone would help themselves before the big meal ahead. Along with the spread, there would be a selection of cold meats, different types of cheeses, and a variety of pickles. We children often got so stuffed with this delicacy we did not get to the first course! We just simply could not resist the fresh spread on a crunchy piece of bread. It is a great appetizer from Mitteleuropa to start the children on!

LRM_20191009_115935.jpg

Liptauer has a very versatile use. Traditionally served as part of cheese and charcuterie board and hard boiled eggs.

It is typically eaten as an open sandwich, or on toast, crackers and bagels. It is a great alternative base for a variety of sandwiches, and can be used as canapè spread.

You can serve it with drinks, pretzels, and a selection of pickles, cheese sticks, and really whatever you fancy.

I also serve them as a canapè with drinks, and they do go down as a real treat. Just take a single round of thinly sliced piece of German or Hungarian style salami, spread a bit of Liptauer and roll it into a cigar shape. And there you have it, salami roll ups.

LRM_20191015_110326.jpg

Ingredients

  • 250g curd cheese (was difficult to find, now available in most supermarkets and Polish food stores)

  • 50g butter (soft at room temperature)

  • 1 Tsp Dijon mustard

  • 1 Tsp powdered sweet Hungarian paprika

  • 1 Tsp caraway seeds (crashed well with pestle and mortar)

  • 2 Tbsp pickled gherkins, cornichons or pickled cucumber (very finely chopped)

  • 2 Tbsp onions (very finely chopped)

  • sea salt, a pinch or to taste

  • freshly ground black pepper, a pinch or to taste

View fullsize LRM_20191008_110825.jpg
View fullsize LRM_20191008_135836.jpg

Method

Put all the ingredients in a bowl. Mix and combine well all the ingredients. Serve as a cold starter.

LRM_20191009_103405.jpg

You can keep the spread in the fridge for up to a week in an airtight container.

Just a thought

This is a great cold starter. If you can, try to prepare it in advance, and ahead of a time to allow all the ingredients and flavours to absorb well.

Wine suggestion

Traminer Aromatico DOC 2019 by Sirch, Friuli Colli Orientali.

March 09, 2021 /tina oblak
Sweet Hungarian paprika, Liptauer (Austro-Hungarian paprika spiced cheese spread) recipe, Austro-Hungarian paprika spiced cheese spread recipe, Liptauer spread, Eastern European cheese spreads, Eastern European cheese spread, sandwich spread, canapé spread, vegetarian curd cheese spread, Liptauer
Starters, brunch, Easy recipe, entrée course, healthy mael, Slovenian cuisine, Slovenian food, Slovenian gastronomy, Vegetarian, spreads, Eastern European recipes, Central European recipes, Mitteleuropean recipes, Snacks, Canapés, Finger food, Small bites, Appetizers
1 Comment
Pasta e Fasoi 1.jpg

Nona Nada's pasta e fasoi Istrian style (pasta and beans soup Istrian style) recipe

Beans and Sardines
March 02, 2021 by tina oblak in Soups, Adriatic Recipe, Easy recipe, entrée course, healthy mael, Istrian cuisine, Istrian dish, Istrian food, Istrian gastronomy, main course, main dish, Nutritious dish, Rustic dish, Slovenian cuisine, Slovenian food, Slovenian gastronomy, Vegan, Vegetarian

This must be one of the most humble, hearty and comforting dishes ever. It originated as a peasant dish, it is flavoursome, makes a robust meal, and it is made with simple, inexpensive ingredients.

Pasta and beans is a traditional Italian soup but there are numerous variations of recipe and names according to the region where it originates from, Central and Northern Italy.

Some vegetables like onions, celery and carrots can be used as a base. Some recipes include the use of diced tomatoes or tomato purée, pancetta or lard and flavoured with rosemary and garlic.

However, no matter how you want to call it, or where it originates from, two ingredients would be in common to all the variations: beans (cannellini beans or borlotti most commonly) and a small variety of pasta like ditalini pasta.

Using mixed shape pasta or breaking spaghetti in small sticks is very common, or the use of fresh egg pasta, like home made tagliatelle works wonderful.

I will share with you my Nona Nada's recipe that she learnt as a young girl from her grandmother, so it really goes back generations. It is the soup that reminds me of home, and of my childhood, and is a variety of simple variations. In the Istrian local dialect, we just simply call it “Pasta e fasoi,” and is based on a Venetian variation (as the area was once under the Venetian empire) characteristic of which is the use of pancetta, lard or cotenna (thick and hard outer layer covering pancetta or prosciutto).

My grandma told me that they would prepare the soup in advance in the morning, put it on the stove on a low heat to cook for hours while they would be working on the fields. Upon return this hearty soup would be ready to be eaten.

This dish is so common that it also appeared in popular culture in the song “That’s Amore” by Warren and Brooks (popularized by Dean Martin) including the rhyme "When the stars make you drool, just like pasta fazool, that's amore".

No matter how simple and humble this dish is, it is a big hit every single time! My son and my husband love it and here is how to make it.

The quantities of the ingredients in the recipe is for a big pot of soup, feeding quite a lot of people, about eight (providing they do not go for seconds!).

This soup also freezes very well. Keep in mind that when you defrost it, or simply refrigerate it and then reheat, it will most probably thicken up quite a bit. You can keep it thick or just dilute it with a bit of water.

You can make half the quantity with 300g borlotti and 2 ½ l of water, smaller piece of pancetta and 100g of pasta

Ingredients

Serves 8

  • 500g dried borlotti beans

  • 4 ½ l water

  • 1 bay leaf, fresh or dry

  • few celery leaves

  • 1 medium size potato, peeled (about 200g)

  • extra virgin olive oil, generous drizzle

  • 1 piece, about 130g of pancetta (cured pork belly) or similar like ham hock, pig's trotter, cotenna or bone of prosciutto

  • sea salt

  • freshly ground black pepper

  • 200g ditalini shape pasta (or any small shaped pasta), or fresh egg pasta

Method

First of all, you need to soak the dry borlotti beans in plenty of cold water overnight. The following day drain them using a colander and run them through cold water.

Put the beans in a big pot, add cold water so the beans are completely covered. Add bay leaf, celery leaves, potato, piece of pancetta, drizzle of oil and season with sea salt and black pepper.

View fullsize Foto 2.jpg
View fullsize Foto 3.jpg

Bring to boil then lower the heat to medium-low and with the lid partially uncovered cook for about 2 ½ h.

Remove bay leaf and pancetta. Cut the meaty bits off the pancetta, set aside and put it back in a soup after you pass it through a food mill.

Pasta e Fasoi 4.jpg

Take a food mill and place it steadily over a bowl. With a soup spoon, spoon out about ¾ of the beans with the liquid and mill them so you get a bean purée. Transfer the bean purée back in the pot and mix well with the rest and cook for further 30 min.

Add the pasta of your choice and cook until al dente making sure you mix it now and again just to avoid sinking the pasta to the bottom and burn.

It is very common to cook pasta separately, drain it and then added to the soup.

If the potato did not end up through the mill, then take the wooden spoon and with the back of it just press the potato against the wall of the pot. By doing so the potato will just disintegrate giving pasta and fasoi a nice thick, velvety, consistency.

Serve hot with a drizzle of extra virgin olive oil and a nice rustic type of bread, slightly toasted even better. It is very common to grate fresh Parmigiano-Reggiano (Parmesan cheese) on top of it.

Foto 5.jpg

Just a thought

This is a great dish for vegetarians and vegans by opting out pancetta or similar and using non egg based pasta for the soup.

Wine suggestion

Friulano DOC “Valeris” 2019 by Muzic, Collio.


March 02, 2021 /tina oblak
pasta and bean soup Istrian style, pasta and borlotti beans soup, Venetian style pasta and beans soup, Pasta e fagioli recipe, Pasta e fasioi Venetian recipe, rustic borlotti beans and pasta soup, simple bean soup
Soups, Adriatic Recipe, Easy recipe, entrée course, healthy mael, Istrian cuisine, Istrian dish, Istrian food, Istrian gastronomy, main course, main dish, Nutritious dish, Rustic dish, Slovenian cuisine, Slovenian food, Slovenian gastronomy, Vegan, Vegetarian
Comment
Beef Goulash 1.jpg

Beef goulash with fresh herbs Istrian style recipe

Beans and Sardines
February 23, 2021 by tina oblak in Meat, Adriatic Recipe, Easy recipe, Istrian cuisine, Istrian food, Istrian gastronomy, Rustic dish, Slovenian cuisine, Slovenian food, Slovenian gastronomy, main meat course, Istrian dish

There is a wide variety of different goulash recipes and the one that I share here with you is more like the Austrian version than the Hungarian one since it has a nice thick gravy and a texture of a stew. It does derive, however, from the Hungarian version, which is more of a soupy consistency with bell peppers and potatoes.

Beef goulash, locally called “golaž” is one of those dishes that, yes, belong to the Austro-Hungarian Empire but it took a bit of a “southern turn” and changed to fit in better with Istrian's local flavours and ingredients.

And as I come from the coastal town Koper, held by Austrian Empire between 1813 -1918, with Mediterranean climate, a handful of fresh herbs would be added for flavour, developing into Istrian Style beef goulash instead of using caraway seeds and powdered sweet Hungarian paprika that can be added for more “imperial” taste.

In Central Europe and in other parts of Europe, goulash is a common meal. Very popular in Austria, Slovenia and Italy, especially in Friuli Venezia Giulia, the most eastern region of Italy, which borders with Slovenia and Austria. A dish that truly represents a gastronomic osmosis.

This must be comfort food at its best, and it is so popular that it appears almost weekly on tables as a family meal, and on menus in local “gostilnas” (informal family run restaurants in Slovenia) especially during colder months. I grew up with this dish and my husband and my son go mad for it, especially when accompanied with fluffy potato gnocchi, that are squashed with a fork to soak up that delicious gravy.

It is very easy to make but it does take time to cook so not the best option if you are in a rush and want a quick meal.

It is best made one day or two days in advance and then reheat it, as the beef tenderizes further, the gravy thickens and flavours enhance.

Traditionally is served with soft, just cooked polenta, fresh crunchy rustic bread, mashed or roasted potatoes, potato gnocchi, bread dumplings or pasta of any shape and form.

Beef Goulash 2.jpg

Great also with spinach or plain spaetzle (German style egg pasta) and moon crescent fried gnocchi. All good options as they will soak up the gravy.

Commonly beef goulash would be made with shin of beef, which is very tough piece of meat but after long and slow cooking process it melts into your mouth and becomes so tender you do not need the knife to cut it, so a trip to a local butcher is worth if you are having difficulty to find it in a local food store or supermarket.

Ingredients

Serves 4-6

  • 1 kg shin of beef, diced (can use stewing beef)

  • 4 Tbsp extra virgin olive oil

  • 200 g onions or shallots, finely chopped

  • 4 garlic cloves, finely grated or crashed

  • 1 small carrot 20g-40g, finely grated

  • 1 full handful of mixed fresh herbs, finely chopped (marjoram, thyme, sage, rosemary, basil, fresh or dry oregano)

  • 1 bay leaf fresh or dry

  • 1 ½ l water, vegetable or beef stock

  • 2 Tbsp double concentrated tomato purée

  • 1 Tbsp all purpose flour

    Method

In a large pot put the oil, finely chopped onions, crashed garlic, grated carrots a pinch of salt and cook on a low-medium heat stirring quite often until the onions are soft.

View fullsize Beef Goulash 3.jpg
View fullsize Beef Goulash 4.jpg

Add diced beef, turn up the heat a bit and brown it stirring and turning occasionally. The meat should be sealed on all sides with almost no juices from the meat left in the pot.

Beef Goulash 5.jpg

Sprinkle flour over the beef, stir and add water, vegetable or beef stock, herbs, bay leaf, tomato purée and let it simmer for about 2 ½ -3 hours on a fairly low heat with a lid partially uncovered.

Beef Goulash 6.jpg
View fullsize Beef Goulash 7.jpg
View fullsize Beef Goulash 8.jpg
View fullsize Beef Goulash 9.jpg
Beef Goulash 9.jpg

Wine suggestion

Teroldego IGT "Foradori" 2019 by Elisabetta Foradori, Vigneti delle Dolomiti.

February 23, 2021 /tina oblak
Beef goulash with fresh herbs Istrian style recipe, beef goulash recipe, easy beef goulash recipe, slow cooked sheen of beef goulash, goulash with fresh herbs, Austrian style beef goulash, Slovenian golaž
Meat, Adriatic Recipe, Easy recipe, Istrian cuisine, Istrian food, Istrian gastronomy, Rustic dish, Slovenian cuisine, Slovenian food, Slovenian gastronomy, main meat course, Istrian dish
Comment
Sautéed Sauerkraut 1.jpg

Sautéed Sauerkraut recipe

Beans and Sardines
February 16, 2021 by tina oblak in Side Dishes, Adriatic Recipe, Easy recipe, healthy mael, Nutritious dish, Vegan, Vegetarian, Istrian food, Istrian cuisine, Istrian gastronomy, Slovenian food, Slovenian gastronomy, Slovenian cuisine, Rustic dish

The word “sauerkraut” comes from German Sauerkraut, which literally means “sour cabbage”. From sauer “sour” and kraut “vegetable, cabbage.” The origin of the dish has been disputed but it took root mostly in Central and Eastern European cuisines.

Sauerkraut is finely shredded cabbage, that has been fermented by various lactic acid bacteria and it has a distinctive sour flavour due to the fact, that the lactic acid is formed when the bacteria ferment the sugars in the cabbage. It is the lactic acid that naturally preserves sauerkraut and gives it long shelf life.

Sautéed Sauerkraut 2.jpg

It is incredibly popular dish back home, and would appear on tables as a part of a family meal on a weekly basis, especially during colder months. Its popularity is not surprising, if we consider the fact, that the area was under Austro-Hungarian Empire until the end of First World War. Almost every household would have a slightly different version of how to prepare and cook sauerkraut.

In Slovenia, you can buy sauerkraut in all supermarkets in sealed plastic bags or glass jars, but I just love getting it from farmer's market, where it is sold on food stalls by local farmers directly from big wooden barrels.

I am sharing with you my grandma and my mum's version of how it is cooked on the coastal region, simply with extra virgin olive oil, a bit of garlic and bay leaf, however, adding a pinch of sweet Hungarian paprika and few crushed caraway seeds is quite common too, in order to achieve once again that “imperial” flavour. This is a great side dish, traditionally used to accompany almost any meat based dish like sausages, cooked ham, pork roast or other meat roasts, pork chops, black sausage...

As children, my brother and I would have it just simply with fried eggs and a bit of potato mash.

Sauerkraut is quite versatile, and it can be also used in a variety of other dishes, and just to mention a few, jota (Istrian sauerkraut and bean soup), Hungarian style sauerkraut, rice and mince pork casserole, and it is great in sandwiches, made for example, with rye bread and cooked ham.

Sautéed Sauerkraut 3.jpg

My nona Nada has vivid memories from when she was a child, of every household in the village making a big barrel of sauerkraut; cabbage would be harvested in autumn and fermented during winter month.

Sauerkraut is also very healthy, and has numerous nutritional benefits. Contains live and active probiotics, helping your body to fight off harmful bacteria or toxins, it has high level of digestive enzymes, high in vitamin C and K2. Rich in fibre and minerals like potassium, iron and magnesium.

No wonder Captain James Cook always took a store of sauerkraut on his sea voyages!

It is really not surprising, that sauerkraut has been gaining increasing popularity in the past few years, especially in the countries where it has been less known.

Back home, it has always been there...just like family.

When shopping for sauerkraut, make sure you get a good quality one, just sea salt and nothing else should be added on the ingredient list.

Ingredients

Serves 4

  • 1kg Sauerkraut (sauerkraut is normally sold in glass jars or sealed plastic bags and will have different net weights of sauerkraut, it does not matter if you end up with slightly less or more than 1kg of sauerkraut)

  • 1 bay leaf (fresh or dry)

  • 4 Tbsp extra virgin olive oil

  • 2-3 cloves of garlic (peeled and crashed)

  • sea salt

  • few black whole peppercorns

Method

Drain the saurekraut in a colander and give it a quick rinse with cold water if you think the sauerkraut is too acid for your taste, but do not over rinse it, as you will loose the characteristic sauerkraut taste.

Sautéed Sauerkraut 4.jpg

Place the rinsed sauerkraut into a large, preferably non stick pan, add sea salt, peppercorns, bay leaf, garlic, extra virgin olive oil.

Add water, just enough to cover the sauerkraut, bring to boil, reduce the heat and simmer for about 1-1 1/2 hours.

Sautéed Sauerkraut 5.jpg

Sauerkraut is cooked, when you have no excess liquid left in the pan, and the sauerkraut is nice and soft. Adjust seasoning with sea salt and freshly ground pepper.

Sautéed Sauerkraut 6.jpg
Sautéed Sauerkraut 7.jpg

Wine suggestion

Cabernet Sauvignon IGT 2017 by Balter, Vallagarina.

February 16, 2021 /tina oblak
side dish, Sautéed Sauerkraut recipe, Istrian style Sautéed Sauerkraut recipe, Sauerkraut recipe
Side Dishes, Adriatic Recipe, Easy recipe, healthy mael, Nutritious dish, Vegan, Vegetarian, Istrian food, Istrian cuisine, Istrian gastronomy, Slovenian food, Slovenian gastronomy, Slovenian cuisine, Rustic dish
Comment
Leek Risotto 10.jpg

Leek Risotto recipe

Beans and sardines
February 09, 2021 by tina oblak in Risotti, Adriatic Recipe, Easy recipe, entrée course, healthy mael, main course, recipe from Northern Ital, Side Dishes, Healthy

Leek is a humble vegetable of great potential but it is sadly often overlooked. It is a relative of the onion with long green leaves and a white bulbous root. As we know it today, leeks were first grown by the ancient Egyptians.

These alliums (the type of plants that belong to the group that includes onions, shallots, scallions, chives and garlic) are almost inedible when raw but when cooked slow and low they become mellow, sweet, creamy and taste delicious. Fantastically versatile, full of flavour, and it should be no surprise the humble leek is used in risotto where it takes central stage.

Leeks are omnipresent at the vegetable markets but at its best during the coldest months of the year from October through May.

They are packed with nutrients and anti-oxidants, and so make the best use out of them especially during autumn and winter months when less native vegetables are available. They will help fight colds and flu.

Leek Risotto 2.jpg

Back home we will use just about anything to make risotto, a very much liked and loved dish. This should be no surprise since my hometown is less than a two hours drive to Venice, and the region of Veneto (Northern Italy), especially the Po Valley, where growing rice is very popular, and is a major agricultural industry.

The valley offers a constant supply of water for the rice fields since there are many large non-seasonal rivers.

It is in this region of Italy, the Veneto region, with its colder climate compared to the warmer South of Italy, that the dishes had to be warming, hearty, and filling, and although risotto is found in the whole of Italy, it is in the Veneto that the greatest variety, and number of risotto recipes can be found.

My mum would go to the vegetable market and made risotto with the vegetables there were in season, and when the leeks were at their best, leek risotto would be on the table for lunch or dinner.

This very simple, comforting leek risotto is perfect solution for mid week quick nutritious lunch or dinner, but equally great for more formal entertaining since it is also presentable as a delicate and elegant dish.

Ingredients

Serves 4

  • 500g leeks, cleaned and chopped (Do buy more than you think you will need to allow for losses caused by trimmings)

  • 4 Tbsp extra virgin olive oil

  • 1 clove of garlic (peeled)

  • 300g risotto rice (like Vialone Nano, Arborio, Carnaroli) In this recipe I used Vialone Nano.

  • 1l vegetable or chicken stock (you can use good quality instant stock powder or boiling water)

  • 40g Parmiggiano Reggiano (finely grated)

  • knob of butter (1-2 Tbsp)

Method

Rinse your leeks under cold running water and pat dry with a paper towel.

Put your rinsed leeks on a chopping board and with a sharp knife cut off the dark green leaf ends of the leek and the muddy tips of the roots. Keep the green ends for the stock if you wish or discard.

Slice each leek in half from top to bottom and slice further the halves into thin stripes (julienne cut), then chop.

View fullsize Leek Risotto 3.jpg
View fullsize Leek Risotto 4.jpg
View fullsize Leek Risotto 5.jpg
Leek Risotto 6.jpg

Wash chopped leeks thoroughly under running cold water. Leeks need a good cleaning before using, as dirt often gets stuck between the layers of leaves as they grow.

Before starting making risotto, it is a good idea to have your boiling hot stock or water ready to hand for later.

Now, let's start making risotto by putting the oil in a pan and heat it with the garlic clove. When the garlic has turned golden in colour and infused the oil, remove it. Pay attention not to burn the garlic.

Add chopped leeks and cook them slowly on a gentle heat for about 20-30min until they reach a very soft consistency, almost disintegrating.

Season with sea salt, add risotto rice, mix well with the leeks and toast it together for few minutes stirring constantly to avoid sticking to the bottom of a pan.

View fullsize Leek Risotto 7.jpg
View fullsize Leek Risotto 8.jpg
View fullsize Leek Risotto 9.jpg

After toasting the rice, cover it completely with boiling stock or water and cook over medium heat.

Start adding gradually the ladles of stock or water, one at a time, to keep the risotto moist, allow liquid to be absorbed before adding more. Stir constantly and cook until the rice is cooked al dente (fully cooked but still firm when bitten) and the stock almost completely absorbed but make sure you do not dry the risotto too much.

If the risotto gets too dry just add a bit more stock. There should always be enough liquid just to cover the risotto, the Italians say that risotto should be smooth and runny enough to be described as all'onda (on the wave).

Generally it will take at least about 15 to 18 min for risotto to be cooked.

The risotto is now ready to be finished with a typical Italian mantecare phase which is quite essential when making risotto. Mantecare simply means that you remove the saucepan from the heat, add grated cheese and cold butter or cream to the risotto when is almost finished and stir with a wooden spoon quite vigorously in order to develop that delicious creamy texture.

Leek Risotto 1.jpg

Serve immediately garnished with extra grated or shaved Parmiggiano Reggiano if desired.

Wine suggestion

Pinot Grigio DOC 2019 by Le vigne di Zamò, Friuli Colli Orientali.

February 09, 2021 /tina oblak
leeks, creamy leek risotto, simple leek risotto, Vialone nano rice
Risotti, Adriatic Recipe, Easy recipe, entrée course, healthy mael, main course, recipe from Northern Ital, Side Dishes, Healthy
Comment
Pumpkin soup 1.jpg

Pumpkin Soup recipe

Beans and Sardines
February 02, 2021 by tina oblak in Soups, Starters, Easy recipe, healthy mael, Rustic dish, Vegetarian

I simply love autumn, the leaves falling gently from the trees and the crunch you hear when stepping on them, the conkers, the woody fragrance in the air, but there is nothing like the sight of a field full of pumpkins of different shapes and colours... Pumpkin to me is a queen of the autumn. Yes, it gets cold and dark, but equally the opportunity arises to cook some comforting dishes.

When you want to cosy up, pumpkin soup must be one of the easiest and fastest dishes to cook with that gives an almost instant reward. Pumpkins are widely available to buy, they are inexpensive and make a very nutritious meal. During the cold autumn and winter months this smooth and velvety pumpkin soup must be one of the most reassuring. It has a silky texture and is perfect to serve as a light supper or lunch or as a starter for a more formal dinner party. No wonder my mother would present it on the table quite often, usually on Sundays as a hot starter followed by a chicken roast and Apple strudel as a dessert.

View fullsize Pumpkin soup 3.jpg
View fullsize Pumpkin soup 2.jpg

It is simply delicious serving the soup with toasted pumpkin seeds and a drizzle of toasted pumpkin seed oil, it really does compliment the soup well giving it extra dimension and completes the dish beautifully. You can also use croutons or just have it with a rustic type bread. If you never had pumpkin seed oil before this is a great opportunity to buy it and try it. It bursts with flavour, has a deeply nutty aroma and is full of valuable nutrients. Its use is very versatile, it is used cold and can be added to salad dressings, dips and sauces.

This little known speciality is gaining popularity very fast among the foodies but has been part of daily culinary use since... forever. It is widely used in central Europe but particularly known for high consumption and production of it are the countries like Austria (especially the region of Styria), Hungary and Slovenia (in particular the region of Prekmurje).

I am sharing here my mum's recipe and the success will be guaranteed.

Pumpkin soup 4.jpg

Ingredients

Serves 4

  • 2 Tbsp (30ml) extra virgin olive oil

  • 2 Tbsp (30g) butter

  • 1kg butternut squash, peeled, deseeded and roughly chopped (you should end up with about 600g of butternut)

  • 200g potatoes, washed, peeled, roughly chopped

  • 1 onion (about 80g) peeled and roughly chopped

  • 2-3 Tbsp fresh flat leave parsley, roughly chopped

  • 1l vegetable stock (it is perfectly fine to use a good quality instant vegetable stock like Bouillon powder)

  • sea salt

  • black pepper

  • handful of pumpkin seeds, optional (about 30-40g), lightly toasted (I used pumpkin seeds already cleaned and dried directly from a pack, widely available from the supermarkets and other food stores)

  • pumpkin seed oil or extra virgin olive oil for drizzling, optional

Method

Clean, peel, deseed and roughly chop the butternut squash.

View fullsize Pumpkin soup 5.jpg
View fullsize Pumpkin soup 6.jpg
View fullsize Pumpkin soup 7.jpg
View fullsize Pumpkin soup 8.jpg

Put extra virgin olive oil and butter in a large heavy-based pan or casserole dish set over low heat and allow butter to melt. Add the onions, pinch of salt and sauté gently for about 10 minutes until the onions are translucent, stirring frequently to make sure they don't catch.

Add the squash and the potatoes and sauté further for about 10-15min, stirring frequently. Squash and potatoes will become slightly softer and absorb the flavours from the oil, butter and the onions.

Add stock, parsley and bring to the boil. Reduce the heat and simmer for 25-30min or until the squash and potatoes are completely soft.

View fullsize Pumpkin soup 9.jpg
View fullsize Pumpkin soup 10.jpg
View fullsize Pumpkin soup 11.jpg

While the soup is simmering, if using, lightly toast pumpkin seeds in a non stick frying pan on a medium to low heat for few minutes giving a pan a shake now and again. They are ready when they turn darker in colour.

Remove the soup from the heat and blend it until completely smooth and velvety in consistency.

Taste and adjust the seasoning with sea salt if needed but bare in mind that your vegetable stock will already have salt in it.

View fullsize Pumpkin soup 12.jpg
View fullsize Pumpkin soup 13.jpg
View fullsize Pumpkin soup 14.jpg

Ladle the soup into bowls , top with toasted pumpkin seeds and a drizzle of pumpkin oil or extra virgin olive oil. Serve immediately.

Pumpkin soup 15.jpg

Just a thought

Butternut squash freezes really well, so if you end up with more than you need just cut the butternut squash into cubes, put them in the bags and freeze them. It really helps to weight cubed butternut squash before freezing. By doing so, you know that you have 600g of butternut squash in your bag ready to use.

Alternatively you can double the amount of the ingredients in the recipe and cook a big batch of pumpkin soup and freeze it.

Wine suggestion

Bianco IGT “Arteus” 2016 by La Viarte, Venezia Giulia.

February 02, 2021 /tina oblak
rustic pumpkin soup, creamy pumpkin soup, pumpkin soup with toasted pumpkin seeds, pumpkin soup with toasted pumpkin seed oil recipe, hearty pumpkin soup recipe, easy pumpkin soup recipe, healthy pumpkin soup
Soups, Starters, Easy recipe, healthy mael, Rustic dish, Vegetarian
1 Comment
  • Newer
  • Older