Beans and Sardines

  • Home
  • About
  • Recipe of the week
  • Recipes
  • Wines
  • Contact

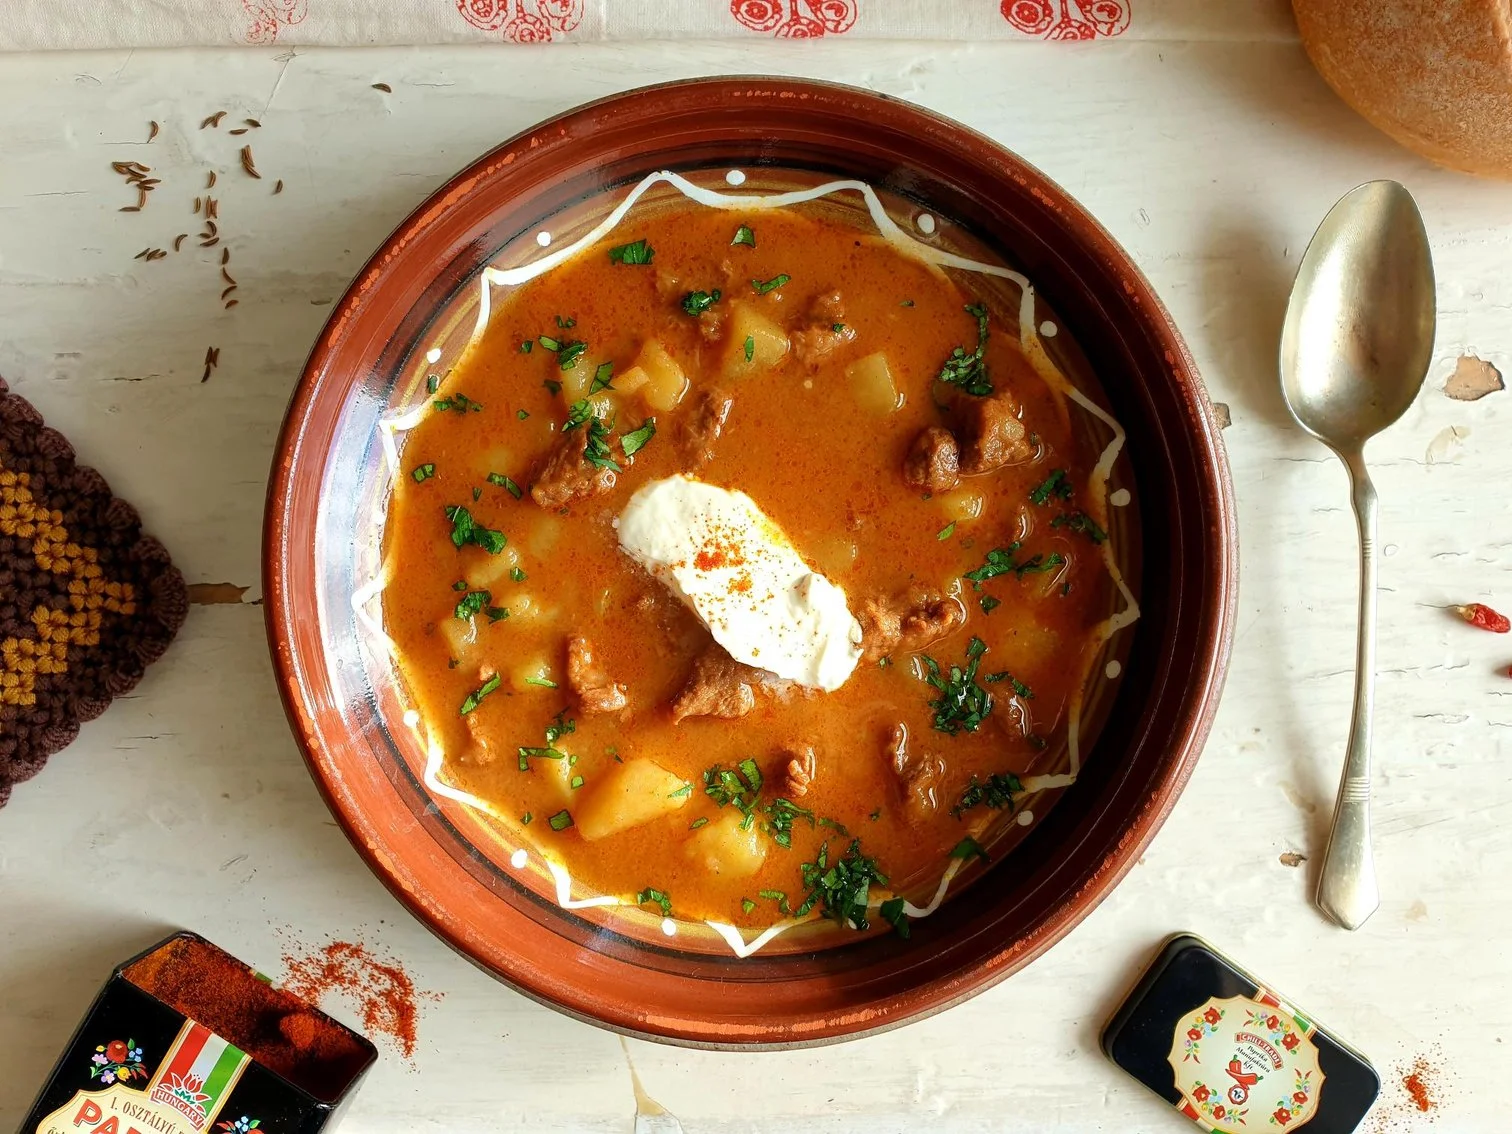
Hungarian style Creamy Potato and Beef Goulash Soup Recipe

Beans and Sardines
February 23, 2022 by tina oblak in Appetizers, Autumnal dish, Autumnal recipe, casserole, Central European recipes, dinner, Eastern European recipes, Easy recipe, entrée course, main course, main dish, Mitteleuropean recipes, one pot meal, Slovenian cuisine, Slovenian food, Slovenian gastronomy, Starters, stew, supper, Vegan, Winter dish, Winter recipe, winter soup, Hungarian inspired dishes

This soup, warm, wholesome, and rich in flavour, can be used as a main meal, especially on those cold days when it will be much appreciated. It is made with only a few simple ingredients, and when cooked well and simmered slowly, it makes a perfect meal choice for body and soul, it is also quite filling, so there is no need to plan a main course.

This Hungarian soup, Gulyásleves, is generally made of beef, vegetables, ground paprika and other spices, but originates from a dish, a thicker stew (what is commonly known as beef goulash) that was cooked outside in the cauldron over an open fire, by the cattlemen, the Hungarian cowboys, who camped with their cattle in the Great Hungarian Plain.

This dish, although native to Hungary, became very popular in the countries around Hungary, which, like in most cases, gave a little twist to the original recipe, and is the origin of variety of new regional variations.

For example in Austria, where this dish is called Goulaschsuppe, it is common to cook this soup without its meat component, which makes a fantastic vegetarian and vegan friendly meal.

In Slovenia, where I come from however, this soup (called kromprjev golaž) which is a real crowd pleaser and became part of Slovenian food culture, testimony of the strong presence of the Austro-Hungarian Empire in the the territory, is almost always cooked with the meat component, where beef can be substituted by dry meats, i.e. some sort or sausages (smoked varieties are often used for a deeper, smokier, and more “imperial” flavour).

In Slovenia, like in Italy (mountainous parts of some regions like of Trentino-Alto Adige, Veneto and Friuli-Venezia Giulia bordering with Austria), this soup is generally served in the informal mountainside restaurants to the delight of hikers and skiers, as well as cooked in the households.

This seriously delicious one pot meal is quite nostalgic for me and reminds me of my childhood. It was served in the school canteens for lunch, and what were called 'dinner ladies, cooked the soup from scratch with fresh ingredients, and the aroma would travel around the school, into the classrooms, destructing the minds of us children struggling with some impossible maths sexercises, especially when approaching lunch time, when you could hear growling in the little tummies.

The soup would be followed by the Austrian inspired pudding, Buchteln, sweet yeast buns filled with apricot jam. This is the type of lunch, among many others, we children really looked forward to...

When I moved to England, goulash soup is one of those dishes, which for some strange reason has been a bit forgotten, and it was not until our skiing trip to Austria, when I saw this soup on the menu that all my childhood memories suddenly came back to me, this is what food does...

As soon as we got back to England I cooked this wonderful tasting goulash soup, it was a hit. I have been making it on a regular basis since then, and I will most definitely make sure this time it stays on the menu.

It is just so hearty, comforting and cosy, the whole family loves this one pot soup and it is cooked very often for my husband and my son who simply adore it. When I serve it, we get transported to the skiing memories we created together as a family, and the table conversations would start ....

I am sharing here a family recipe how my maternal grandmother used to make it, and how my mother still makes it. If you never had this soup before, try it and it will become one of your favourites, and all you need to serve the soup with is a nice rustic bread to dunk it, yes .... this is 'home' for me...

Ingredients

Serves 4

  • 4 Tbsp extra virgin olive oil

  • 3 medium size potatoes (about 500g) peeled and chopped into small cubes

  • 1 onion (about 120g) peeled and finely chopped

  • 1 clove of garlic, peeled and crushed

  • 2 Tbsp Hungarian sweet paprika

  • 2 Tsp red or white wine vinegar

  • 2 Tbsp tomato purée

  • 1 Tsp fresh marjoram (a few springs) finely chopped, (can use dry marjoram)

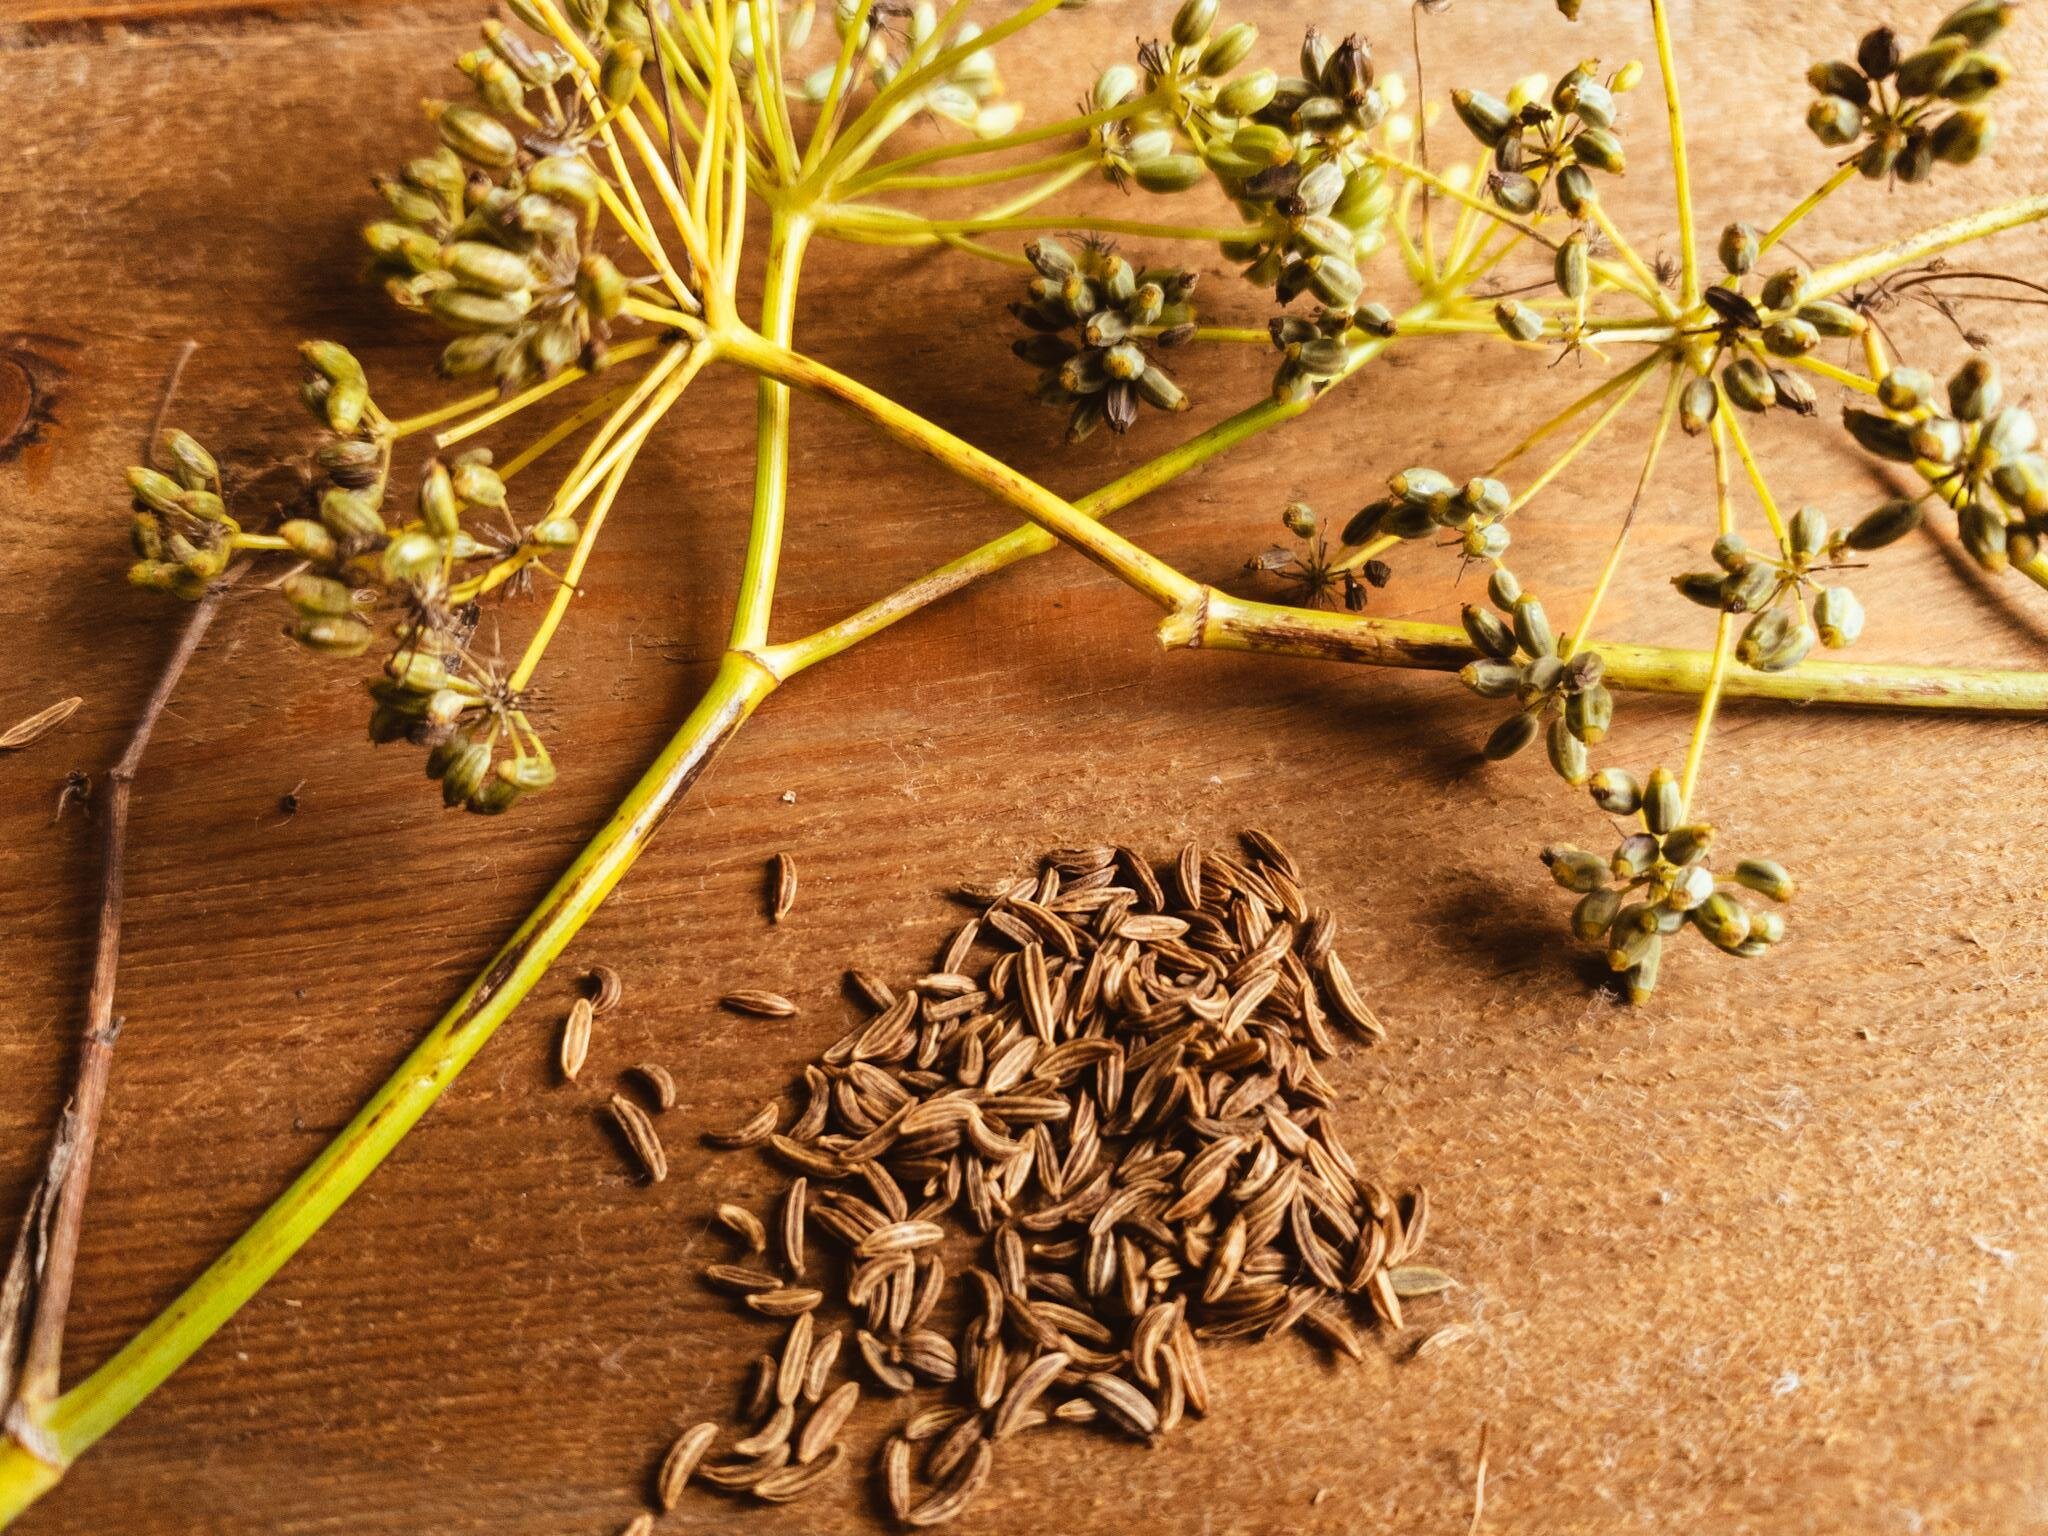
  • 3 Tsp caraway seeds, crashed with mortar and pestle (can use spice or coffee grinder)

    whole caraway seeds can be used if you have none of the above ways to ground the seeds

  • 400-500g braising steak or shin of beef, trim any hard fat off the beef and dice finely

  • sea salt

  • black pepper, freshly ground

  • 2 fresh or dry bay leaves

  • 2l water or vegetable stock

  • sour cream (optional)

  • fresh flat leaf parsley, roughly chopped, for garnish (optional)

Method

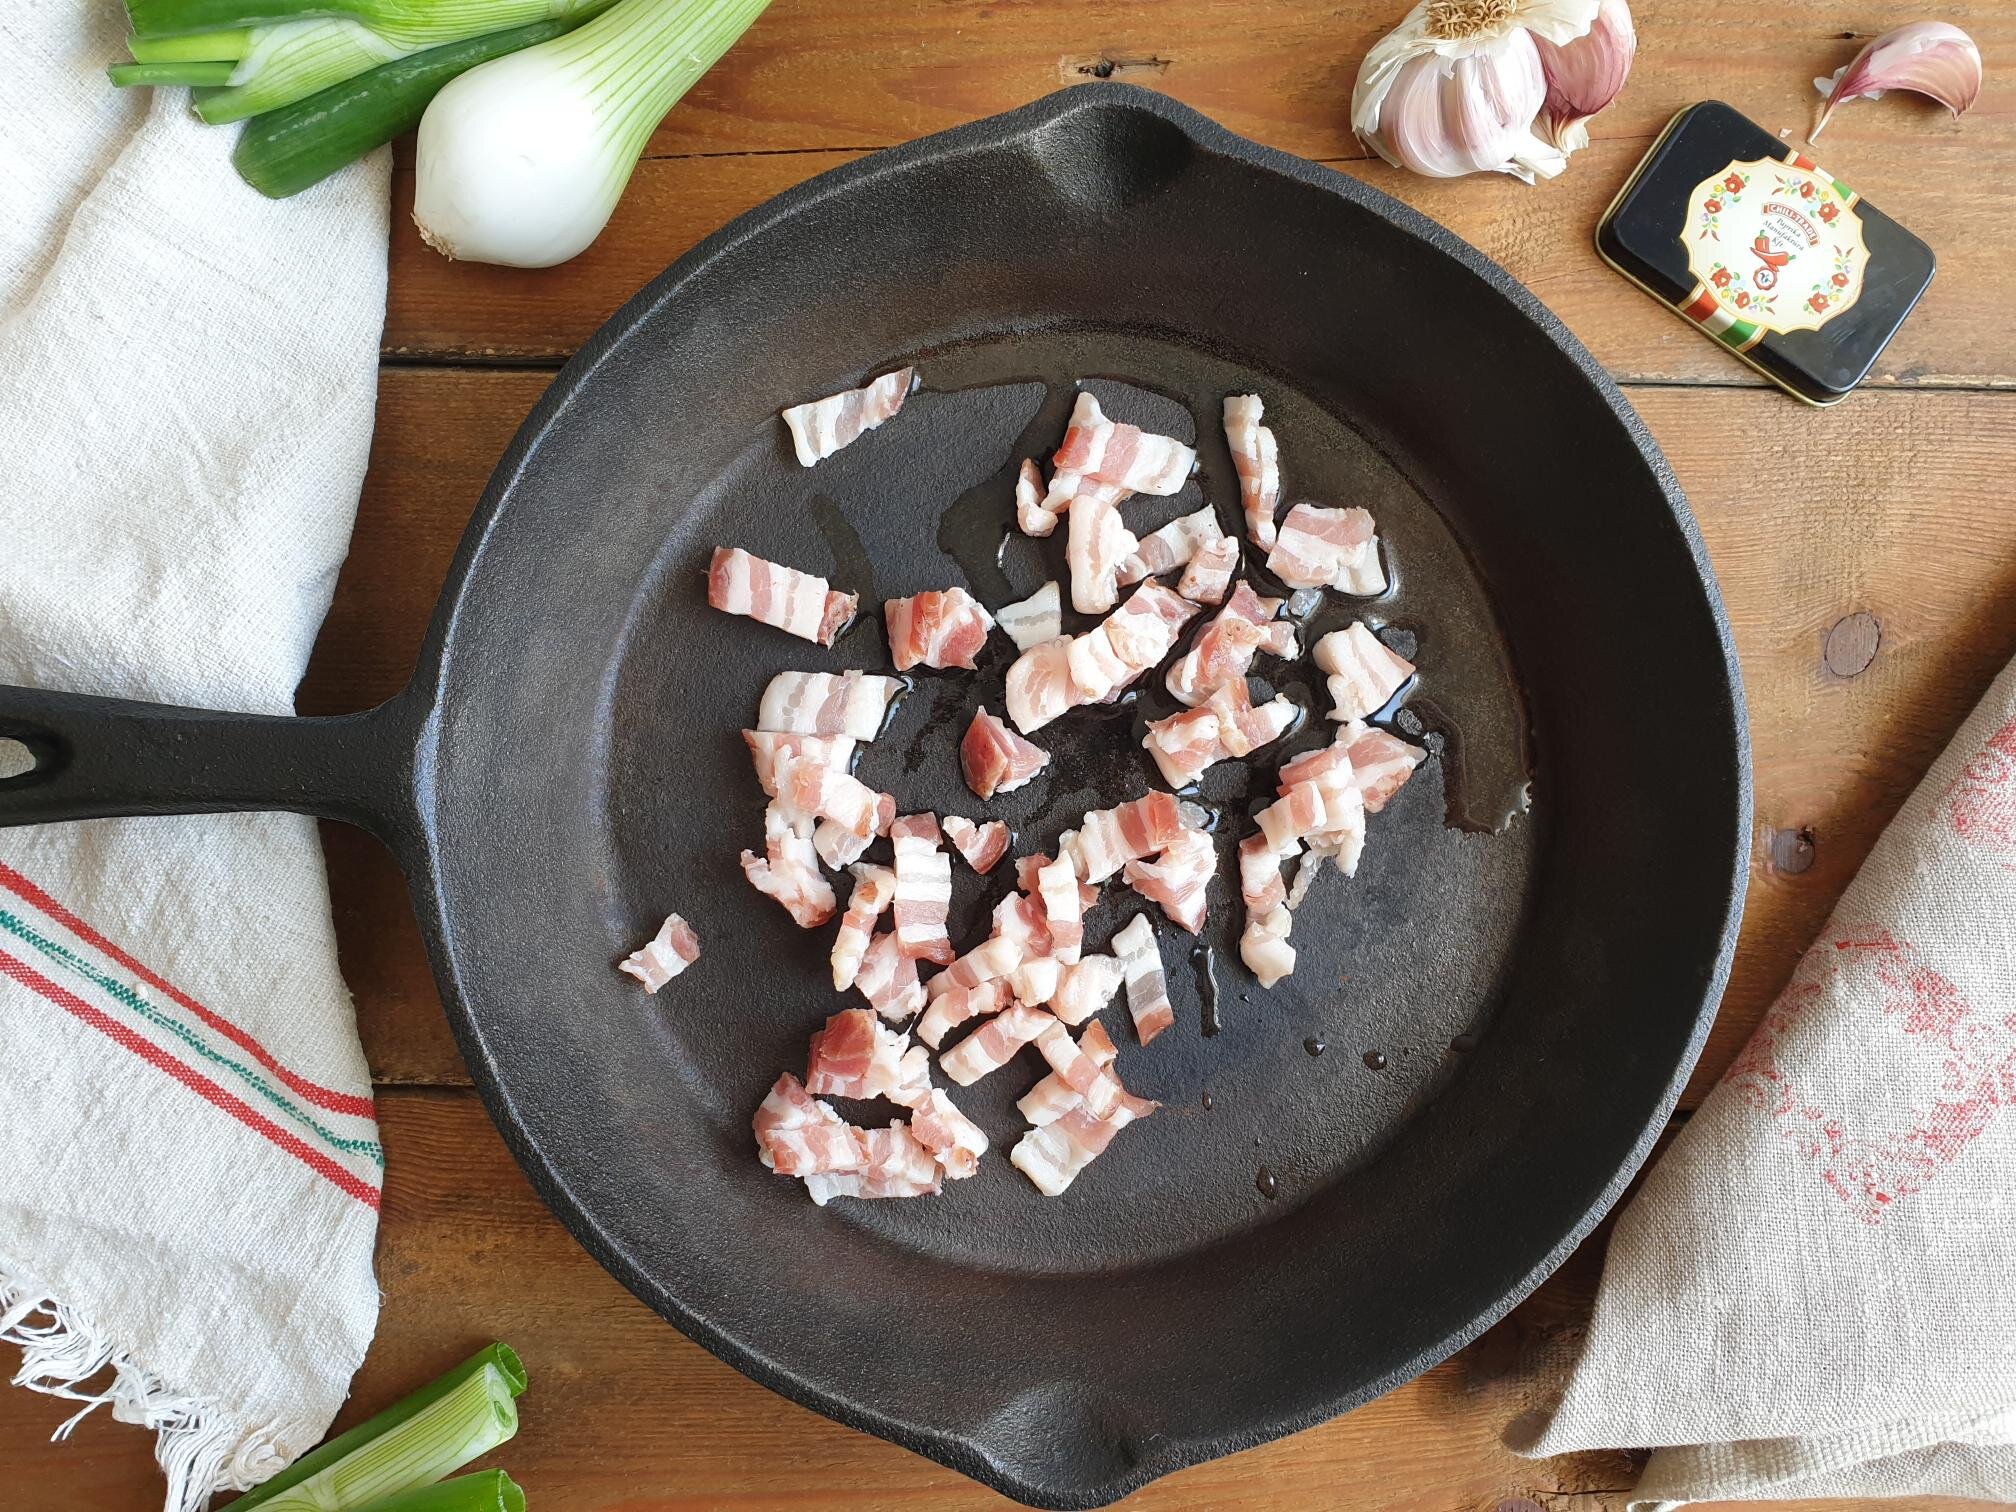
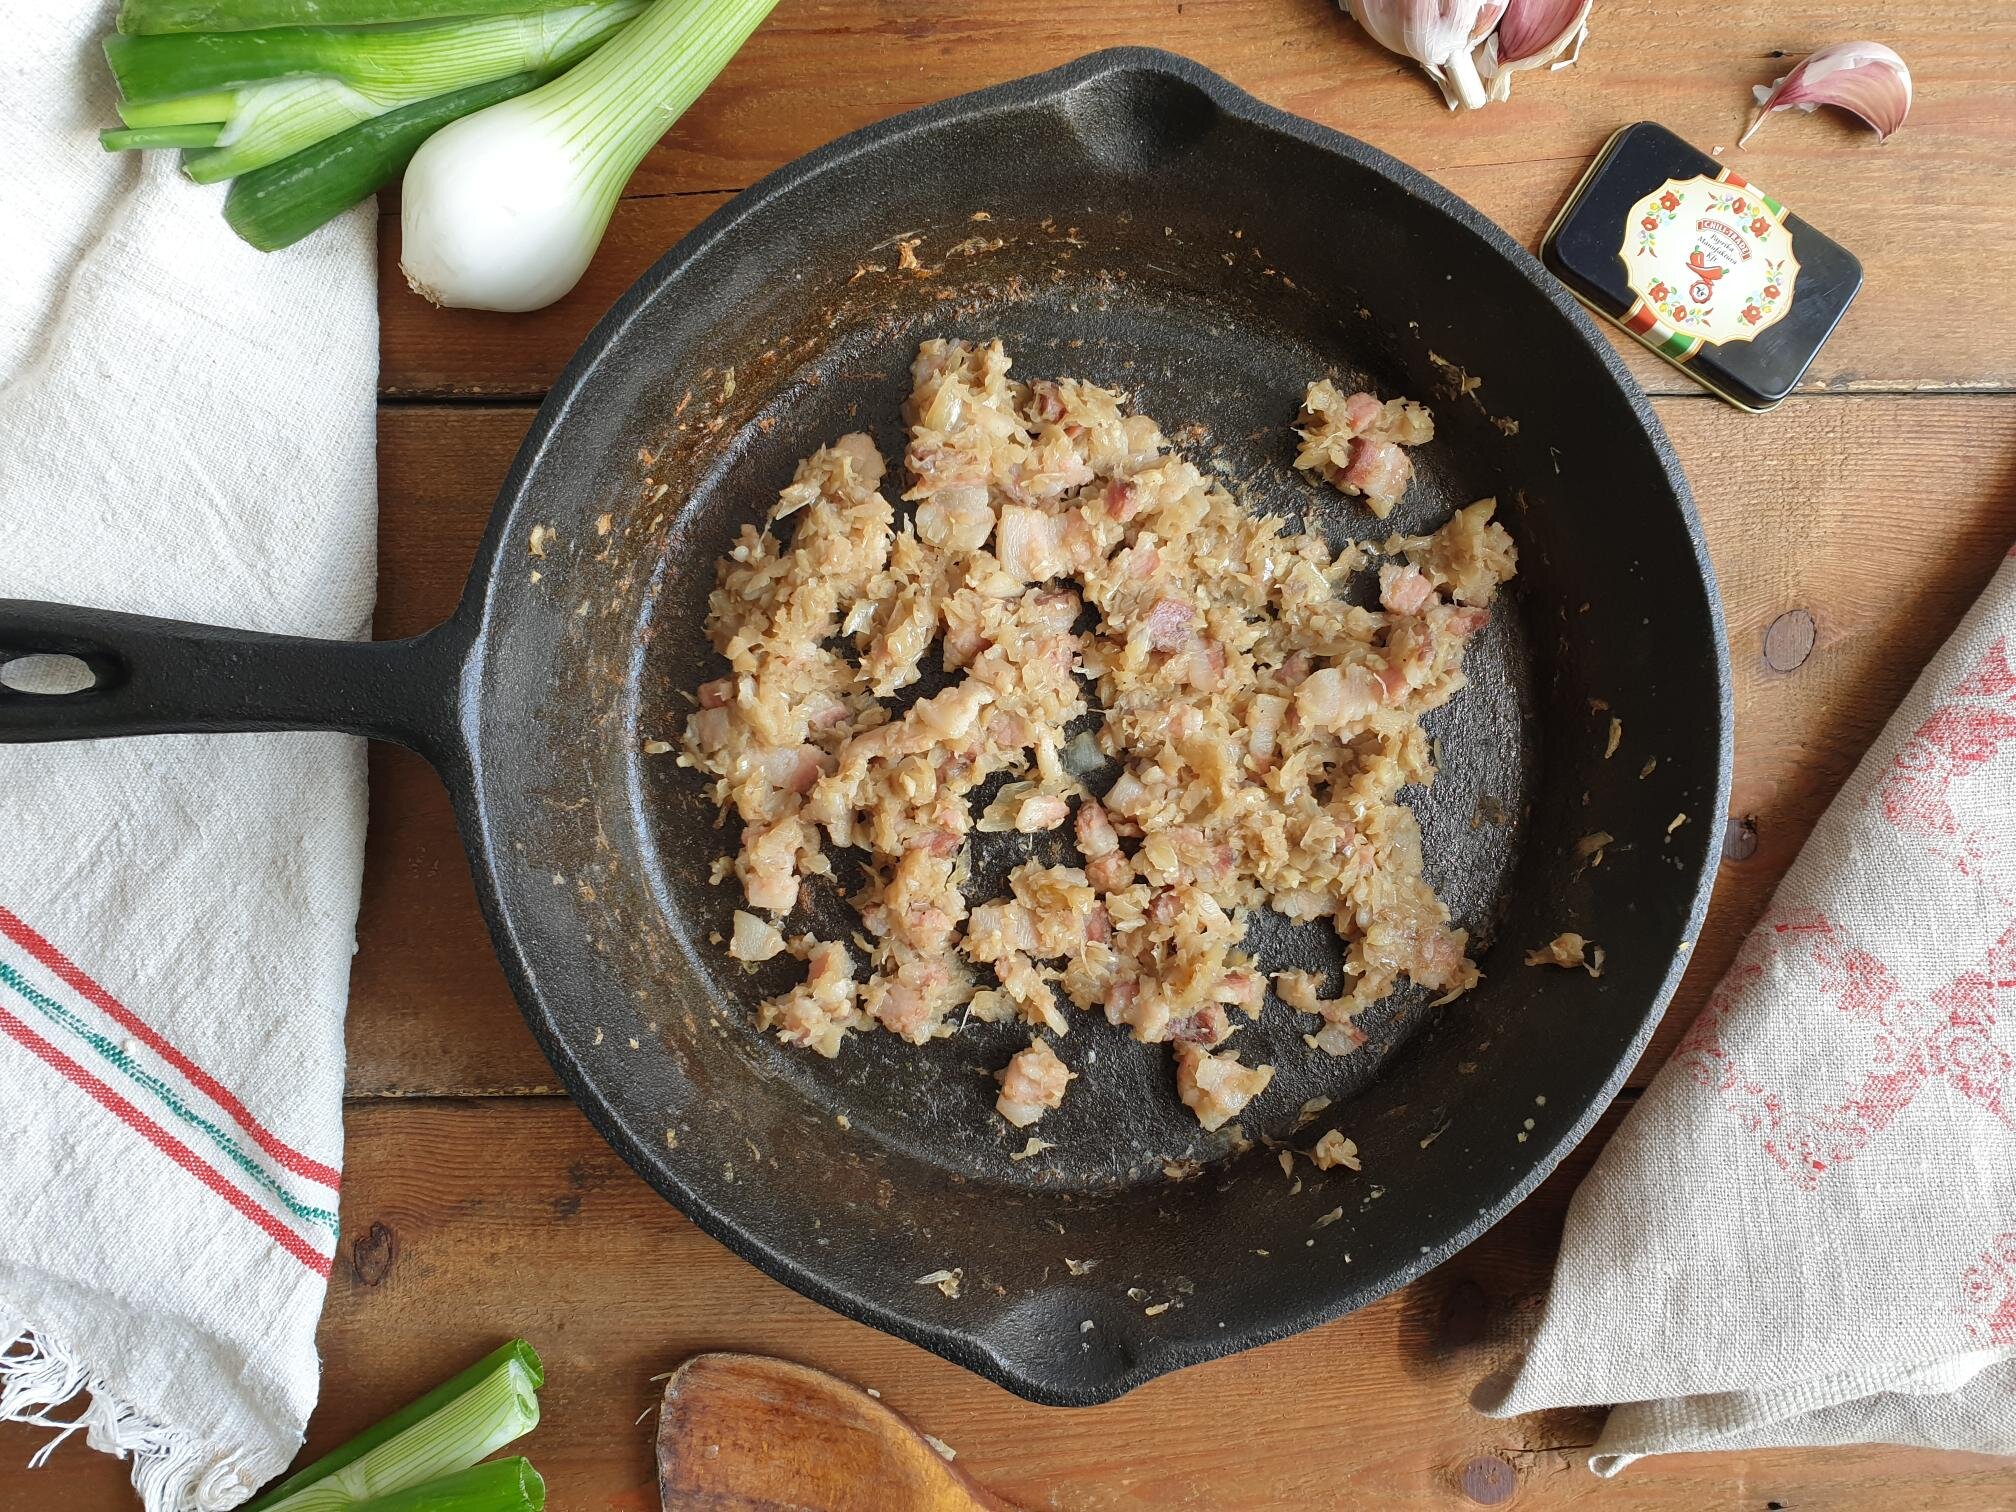
Put the oil in a fairly large pan, add chopped onions, crushed garlic, a pinch of salt and gently sauté until the onions are soft and translucent.

Pour wine vinegar and cook for a minute or so stirring the onion and garlic mixture. The vinegar will help to deglaze and release any bits stuck to the bottom of the pan.

Add diced beef and continue to cook, turning and stirring regularly, until the meat is nicely browned on all sides.

View fullsize Goulash soup 4.jpg
View fullsize Goulash soup 5.jpg

Add cubed potatoes and cook briefly for a few minutes together with meat and onions mixture.

View fullsize Goulash soup 7.jpg
View fullsize Goulash soup 8.jpg
View fullsize Goulash soup 9.jpg
View fullsize Goulash soup 10.jpg

Add paprika, tomato purée, fresh or dry marjoram, crushed caraway seeds and bay leaves, sea salt and black pepper.

Add water or vegetable stock, bring to a boil.

View fullsize Goulash soup 11.jpg
View fullsize Goulash soup 12.jpg
View fullsize Goulash soup 13.jpg
View fullsize Goulash soup 14.jpg

Cover with the lid and simmer on a gentle heat for about 2 hours. After this time, the soup will become slightly thicker and the meat will become so tender it will just melt in your mouth.

To make the goulash soup slightly “creamier” in consistency, you can press with a fork few cubes of potatoes on the side of the casserole pan and give it a good stir.

Taste and adjust the seasoning with sea salt and black pepper and add more paprika to your liking, if you wish.

Serve hot with a spoonful of sour cream, if desired, sprinkle some roughly chopped fresh parsley for garnish and a bit more paprika. Place some crunchy rustic bread on the table to dunk in the goulash soup and life just cannot get any better.
Just a thought

Double the amount of the ingredients in the recipe, if serving for 6-8 people or, if you wish to make a bigger batch and freeze.

Like most stews and soups, this goulash soup is best made in advance, as it tastes better every time you reheat it.

Wine suggestion

Vigneti delle Dolomiti Rosso IGT "Fojaneghe" 2015 - Bossi Fedrigotti, Masi
February 23, 2022 /tina oblak
potatoes, beef, stewing beef, shin of beef, caraway seeds, paprika, sweet Hungarian paprika, Gulyásleves, Goulaschsuppe, kromprjev golaž, Goulash soup, Goulash soup without meat, Hungarian beef and potato stew
Appetizers, Autumnal dish, Autumnal recipe, casserole, Central European recipes, dinner, Eastern European recipes, Easy recipe, entrée course, main course, main dish, Mitteleuropean recipes, one pot meal, Slovenian cuisine, Slovenian food, Slovenian gastronomy, Starters, stew, supper, Vegan, Winter dish, Winter recipe, winter soup, Hungarian inspired dishes
Comment

Jota – Sauerkraut, beans and potato stew Istrian Recipe

Beans and Sardines
November 10, 2021 by tina oblak in Adriatic Recipe, Central European recipes, dinner, Eastern European recipes, Easy recipe, entrée course, healthy mael, Istrian cuisine, Istrian dish, Istrian food, Istrian gastronomy, main course, main dish, Mitteleuropean recipes, Nutritious dish, one pot meal, recipe from Northern Ital, Rustic dish, Slovenian cuisine, Slovenian food, Slovenian gastronomy, Soups, Starters, stew, supper, Vegan, Vegetarian, Autumnal recipe, Autumnal dish, Winter recipe, Winter dish

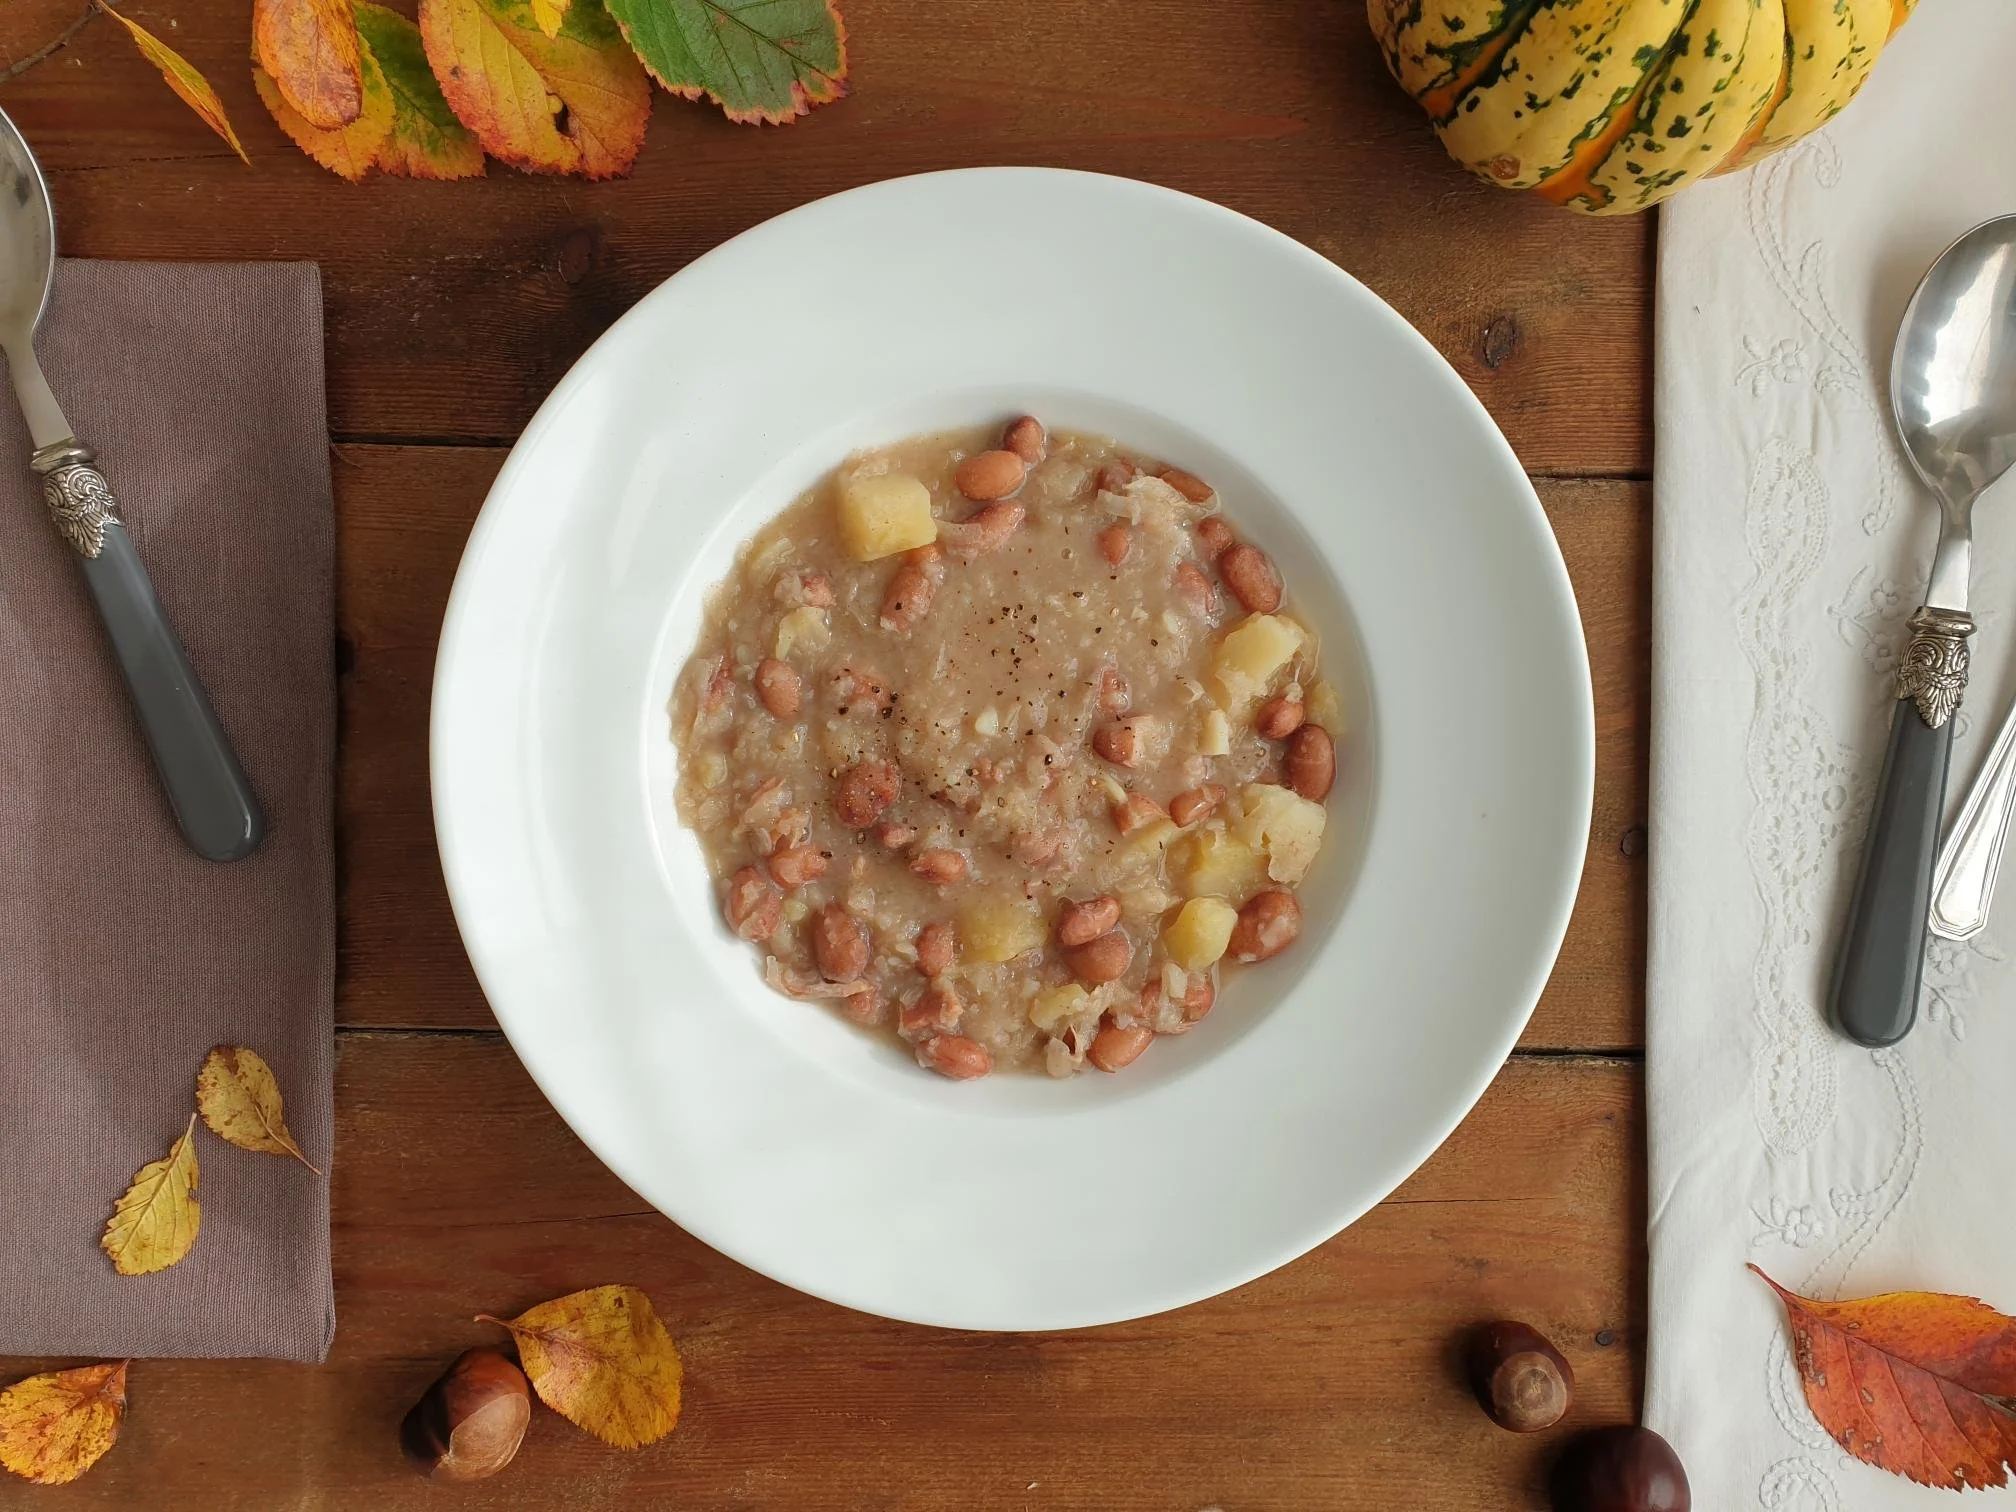
Jota, pronounced 'yota,' is a very old recipe for a stew made of sauerkraut, dried borlotti beans, potatoes and some kind of pork cuts. It is believed that the word jota derives from Celtic word “jutta” indicating a liquidy soup.

Jota is filling and makes a perfect choice for a comfort food when the first cold starts as it will warm your body and soul. It is really easy to make, healthy, inexpensive, and it has become a staple and much loved dish in Slovenian households. Jota, being also very nutritious, is served in nurseries, schools, care homes for elderly, and family run informal restaurants, as well as being one of the most requested dishes from hikers and skiers in mountainside restaurants.

This hearty stew is incredibly humble and proper peasant food as it was born out of necessity and from what was available. My paternal nona told me that most of the households in the countryside, where she was growing up (a little village called Marezige just a few kilometres from the coastal town Koper), would have a wooden barrel of home made sauerkraut, sacks of potatoes and dried borlotti beans, and if you were lucky enough, a pig or a few pigs that would eventually get slaughtered and provided a very precious meat. The better cuts of pork meat were used for drying and curing and for what was considered a very rare and luxurious roasts while less prestigious cuts were put in soups and stews to enrich the flavour.

This very poor dish comes from the region of Primorska near the Adtriatic Sea and it is considered a quintessentially, one of the most famous Istrian peasant dishes, also enormously popular in Trieste and province of Trieste in Italy.

According to Anna Gosetti della Salda, in her book, Le ricette regionali Italiane, Jota (or Jote) was widely made over the whole region of Friuli (Italy), the area bordering with Slovenia, but towards the end of last century the use of jota was limited almost exclusively to the Valli di Gorto and Pesarina in Carnia.

The use of sauerkraut in all these regions, referred to as kapus in the Istrian dialect, is a testimony to how strongly the Austro-Hungarian Empire influenced the dishes in these areas.

Like with most dishes in the culinary world, it is no surprise that there are some variations in the recipe for Jota as well. The most common variation of Jota is without potatoes, and instead, a bit of flour is used to thicken the soup, and another common variation is making jota using sour turnip (called kisla repa in Slovenian).

In some variations, also used by both my mother and my nona, besides the use of different pork cuts, pešto or taca (smooth paste made with pancetta, crushed garlic and fresh, very finely chopped parsley) would be used. This was done, once again, to boost the flavour of the dish.

In some parts of Slovenia that are geographically closer to Hungary, a small quantity of powdered smoked sweet Hungarian paprika will be added to jota.

Before serving this sauerkraut stew, different cuts of pork, that have been cooked in jota, are removed from the bone, sometimes shredded and then returned and mixed into a soup. It is also very common to remove the meats from the soup and serve it later as a separate course.

Different cuts of pork can be used to enrich the flavour of this stew, but it is equally delicious without the meaty element and so it makes a lovely vegetarian and vegan meal.

My nona also “jokingly” shared with me, that to make a really good jota you need three days. The first day for soaking the beans, the second day for cooking Jota and the third for eating it, and enjoying it after it has rested, and all the flavours had a chance to fully develop. It is up to you whether you want to follow my nona three day rule.

I do, no wonder it turns out delicious...

Here I am sharing my family recipe for jota.

Ingredients

Serves 6-8

  • 300g dry borlotti beans, soaked overnight or least for 4 hours

  • 650g -1kg sauerkraut, drained and rinsed

    (I am giving you an approximate amount of sauerkraut to be used in this recipe as it can be flexible. The amount you use will depend on what you can find in your local food store. Sauerkraut is normally sold in either glass jars or sometimes in sealed plastic bags and they will indicate on the label both total net weight (with the liquid) and drained weight, and the latter is the weight you need to look for.

  • For this recipe I bought a glass jar of sauerkraut with total weight of 680g and 650g drained weight which is the amount of sauerkraut I used for the soup).

  • 2 bay leaves, fresh or dry

  • 500g or more, pork ribs (can use ham hocks or similar)

  • 100-200g g smoked bacon lardons (can use smoked cubed pancetta, a slab of bacon or pancetta, chopped strips of smoked bacon or similar)

    (The use of combination of smoked and unsmoked meat element is quite important, as it really gives that traditional and typical Jota flavour, but it is also very flexible. You can, if you prefer, only use unsmoked meats or all smoked for a deeper smoky flavour. Traditionally a bone or outer rind of dry cured ham would be used in order not to waist anything, and it is also packed full of flavour.

  • few black peppercorns, 4-6

  • 2 cloves of garlic, peeled and crushed

  • 3 fairly big potatoes about 600-800g, peeled and cubed

  • 2 Tbsp extra virgin olive oil

  • 2 tbsp tomato paste (optional)

  • sea salt

Method

There are three simple stages to make jota.

Stage 1

Drain previously soaked beans in a colander, rinse with cold running water and drain again.

Transfer the beans to a very big pot (5 litre at least, where jota will be cooked), add the meats, bay leaf and 5 litre of cold water. Bring to boil over high heat, turn the heat down to a medium low and cook the beans, partially covered with the lid for about 1 hour until the beans are just soft. Skim any foam that rises to the surface, you might have to repeat this process few times.

Do not add sea salt at this point as this will make the skin of the beans hard causing them to crack during the cooking.

Stage 2

Place the sauerkraut in a colander and drain, rinse briefly but thoroughly with cold running water and drain again.

Transfer the sauerkraut in a pan, add a pinch of salt, peppercorns, crashed garlic, bay leaf, olive oil and cold water just enough to cover the sauerkraut.

Bring to a boil, lower the heat and cook for about 30 minutes. After this time, transfer the sauerkraut to a big bean pot.

Stage 3

Peel, wash, cube the potatoes and place them in pan. Cover completely with water, bring to boil, turn the heat down and cook for about 30 minutes until the potatoes are soft when pierced with the tip of a knife.

Drain the potatoes in a colander or with the slotted spoon transfer the potatoes to a large plate or bowl. With the back of the fork coarsely mash half of the potatoes and leave the other half cubed.

Transfer coarsely mashed and cubed potatoes in a big pot with beans.

Partially cover with a lid the big pot with beans, sauerkraut and potatoes and continue cooking on a gentle heat for another hour. All three elements will mix and blend together and the soup will start thickening. Taste and adjust seasoning with sea salt and freshly ground black pepper.

The soup should be quite thick but still have enough liquid to be able to ladle it nicely on the plate.

If jota gets too thick just add a bit of water to dilute it.

When jota is cooked, depending on what type of meats you use, take the meat of the bones, discard skin and bones and transfer pieces of shredded meat to the soup if you wish.

Discard the bay leaves before serving jota hot with a nice piece of crunchy bread.

Just a thought

Jota will keep well in a fridge for few days and is suitable for freezing.

If jota gets too thick, simply dilute it adding a bit of water, bring to boil and serve hot.

Wine suggestion

Venezia Giulia Pinot GrigioIGT 2019 – Azienda Agricola Pierpaolo Pecorari

November 10, 2021 /tina oblak
Sauerkraut recipe, Istrian sauerkraut stew, Istrian sauerkraut soup, hearty stew, comforting stew, borlotti beans, potatoes, autumnal stew, winter stew, winter dish
Adriatic Recipe, Central European recipes, dinner, Eastern European recipes, Easy recipe, entrée course, healthy mael, Istrian cuisine, Istrian dish, Istrian food, Istrian gastronomy, main course, main dish, Mitteleuropean recipes, Nutritious dish, one pot meal, recipe from Northern Ital, Rustic dish, Slovenian cuisine, Slovenian food, Slovenian gastronomy, Soups, Starters, stew, supper, Vegan, Vegetarian, Autumnal recipe, Autumnal dish, Winter recipe, Winter dish
2 Comments

Apple Strudel with home made pastry Recipe

Beans and Sardines
November 05, 2021 by tina oblak in Adriatic Recipe, baked dish, baking, breakfast, Central European recipes, dessert, Eastern European recipes, Istrian cuisine, Istrian dish, Istrian food, Istrian gastronomy, Mitteleuropean recipes, pudding, recipe from Northern Ital, Rustic dish, Slovenian cuisine, Slovenian food, Slovenian gastronomy, sweet course, Sweet Things

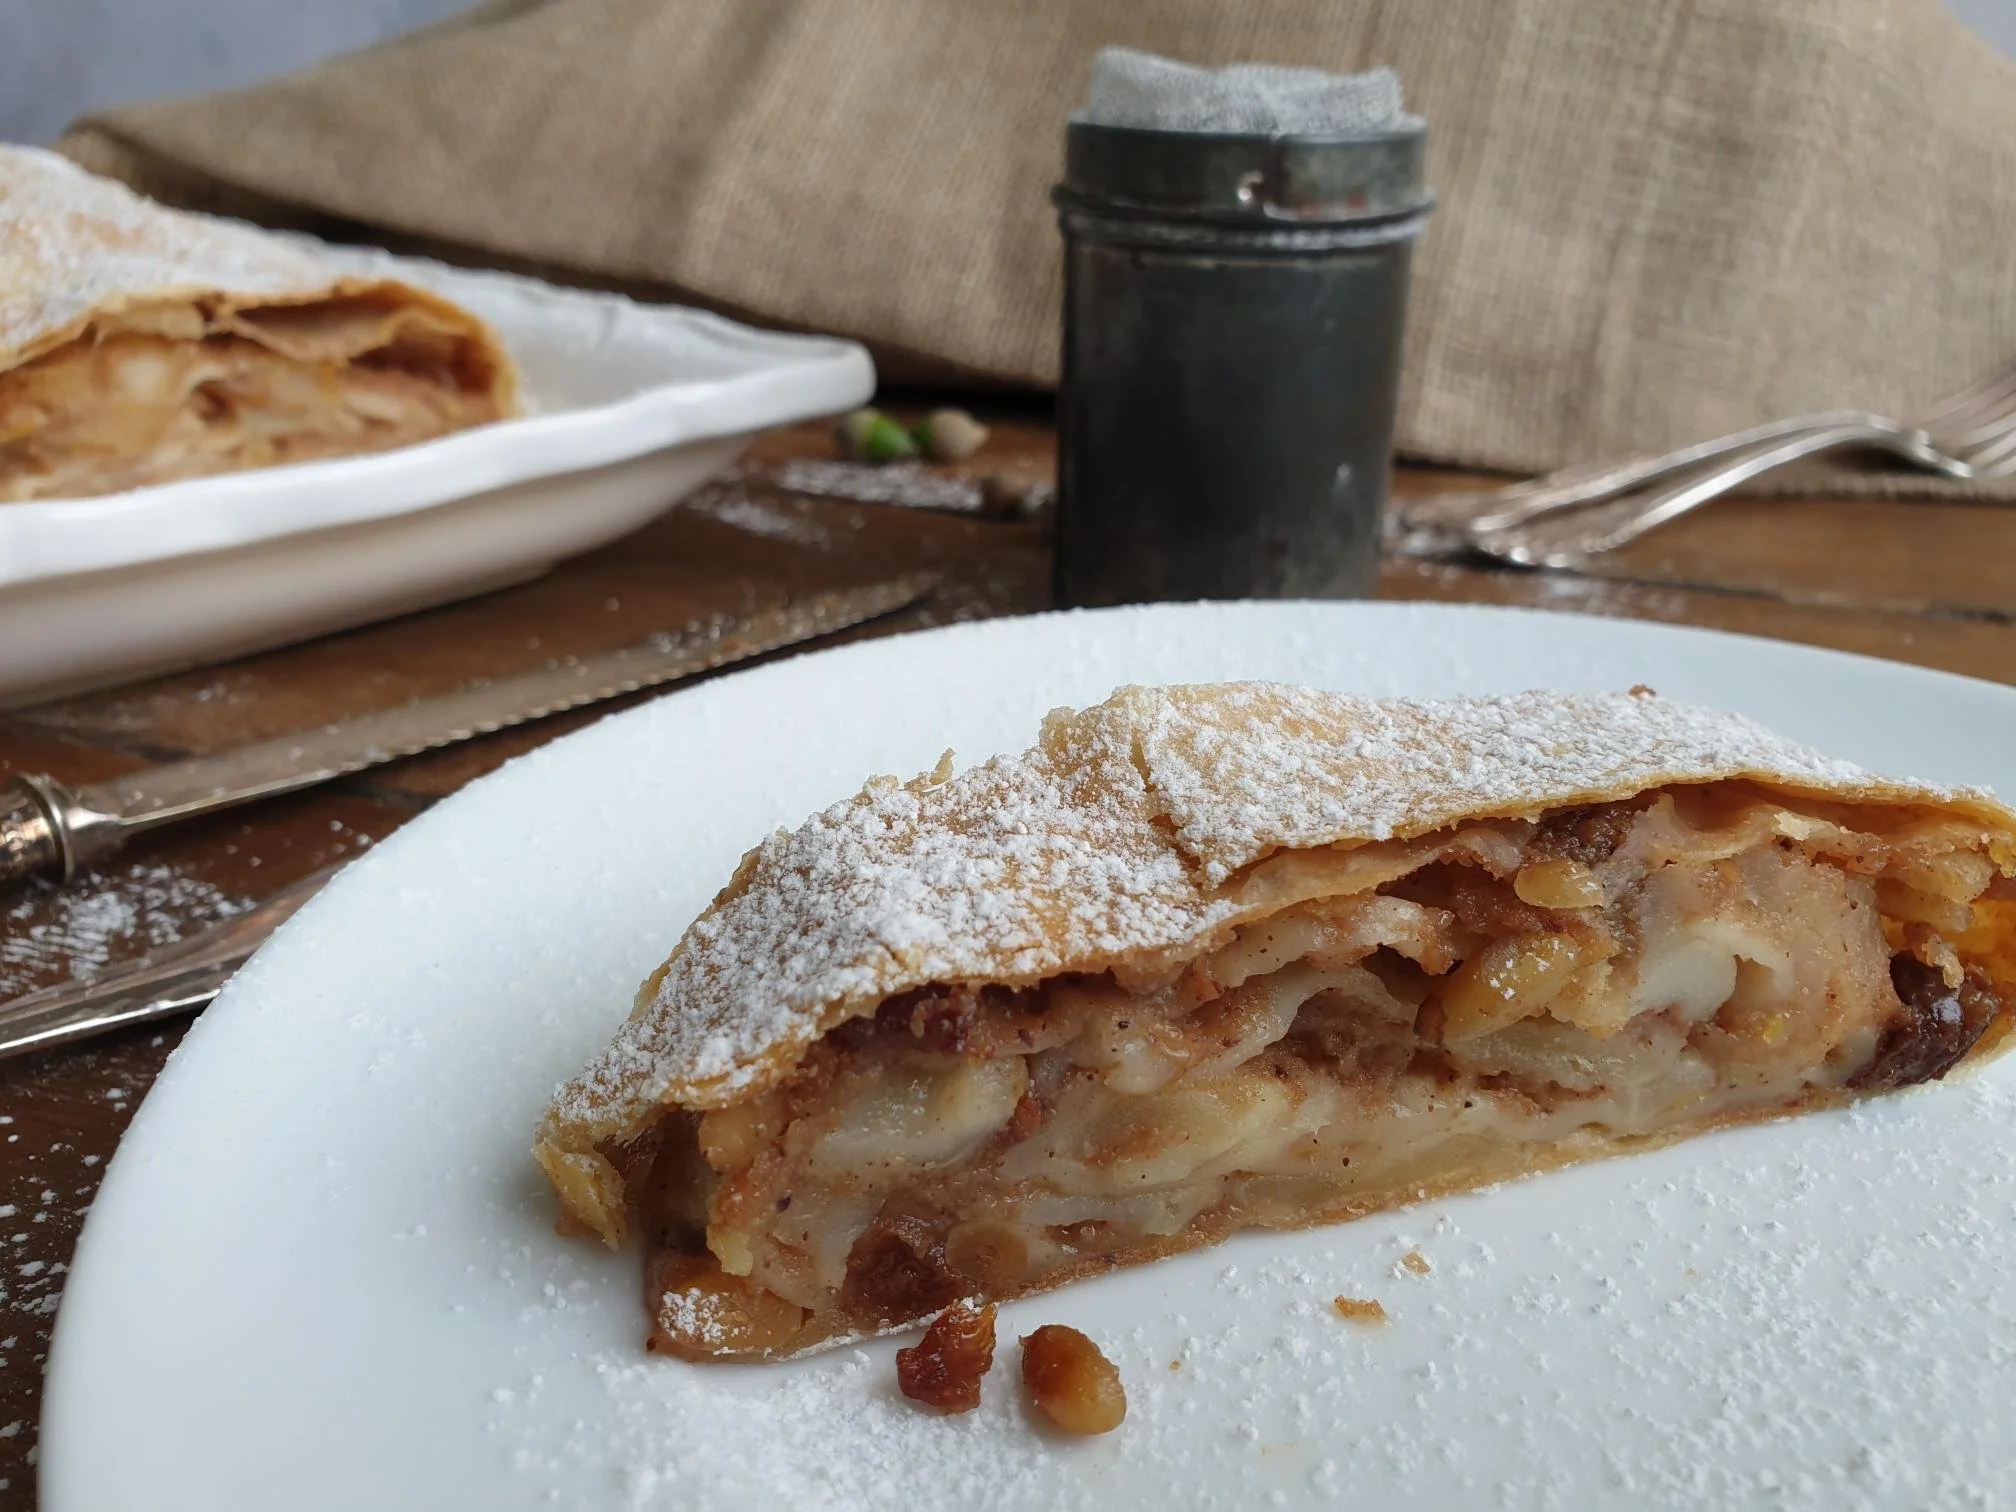
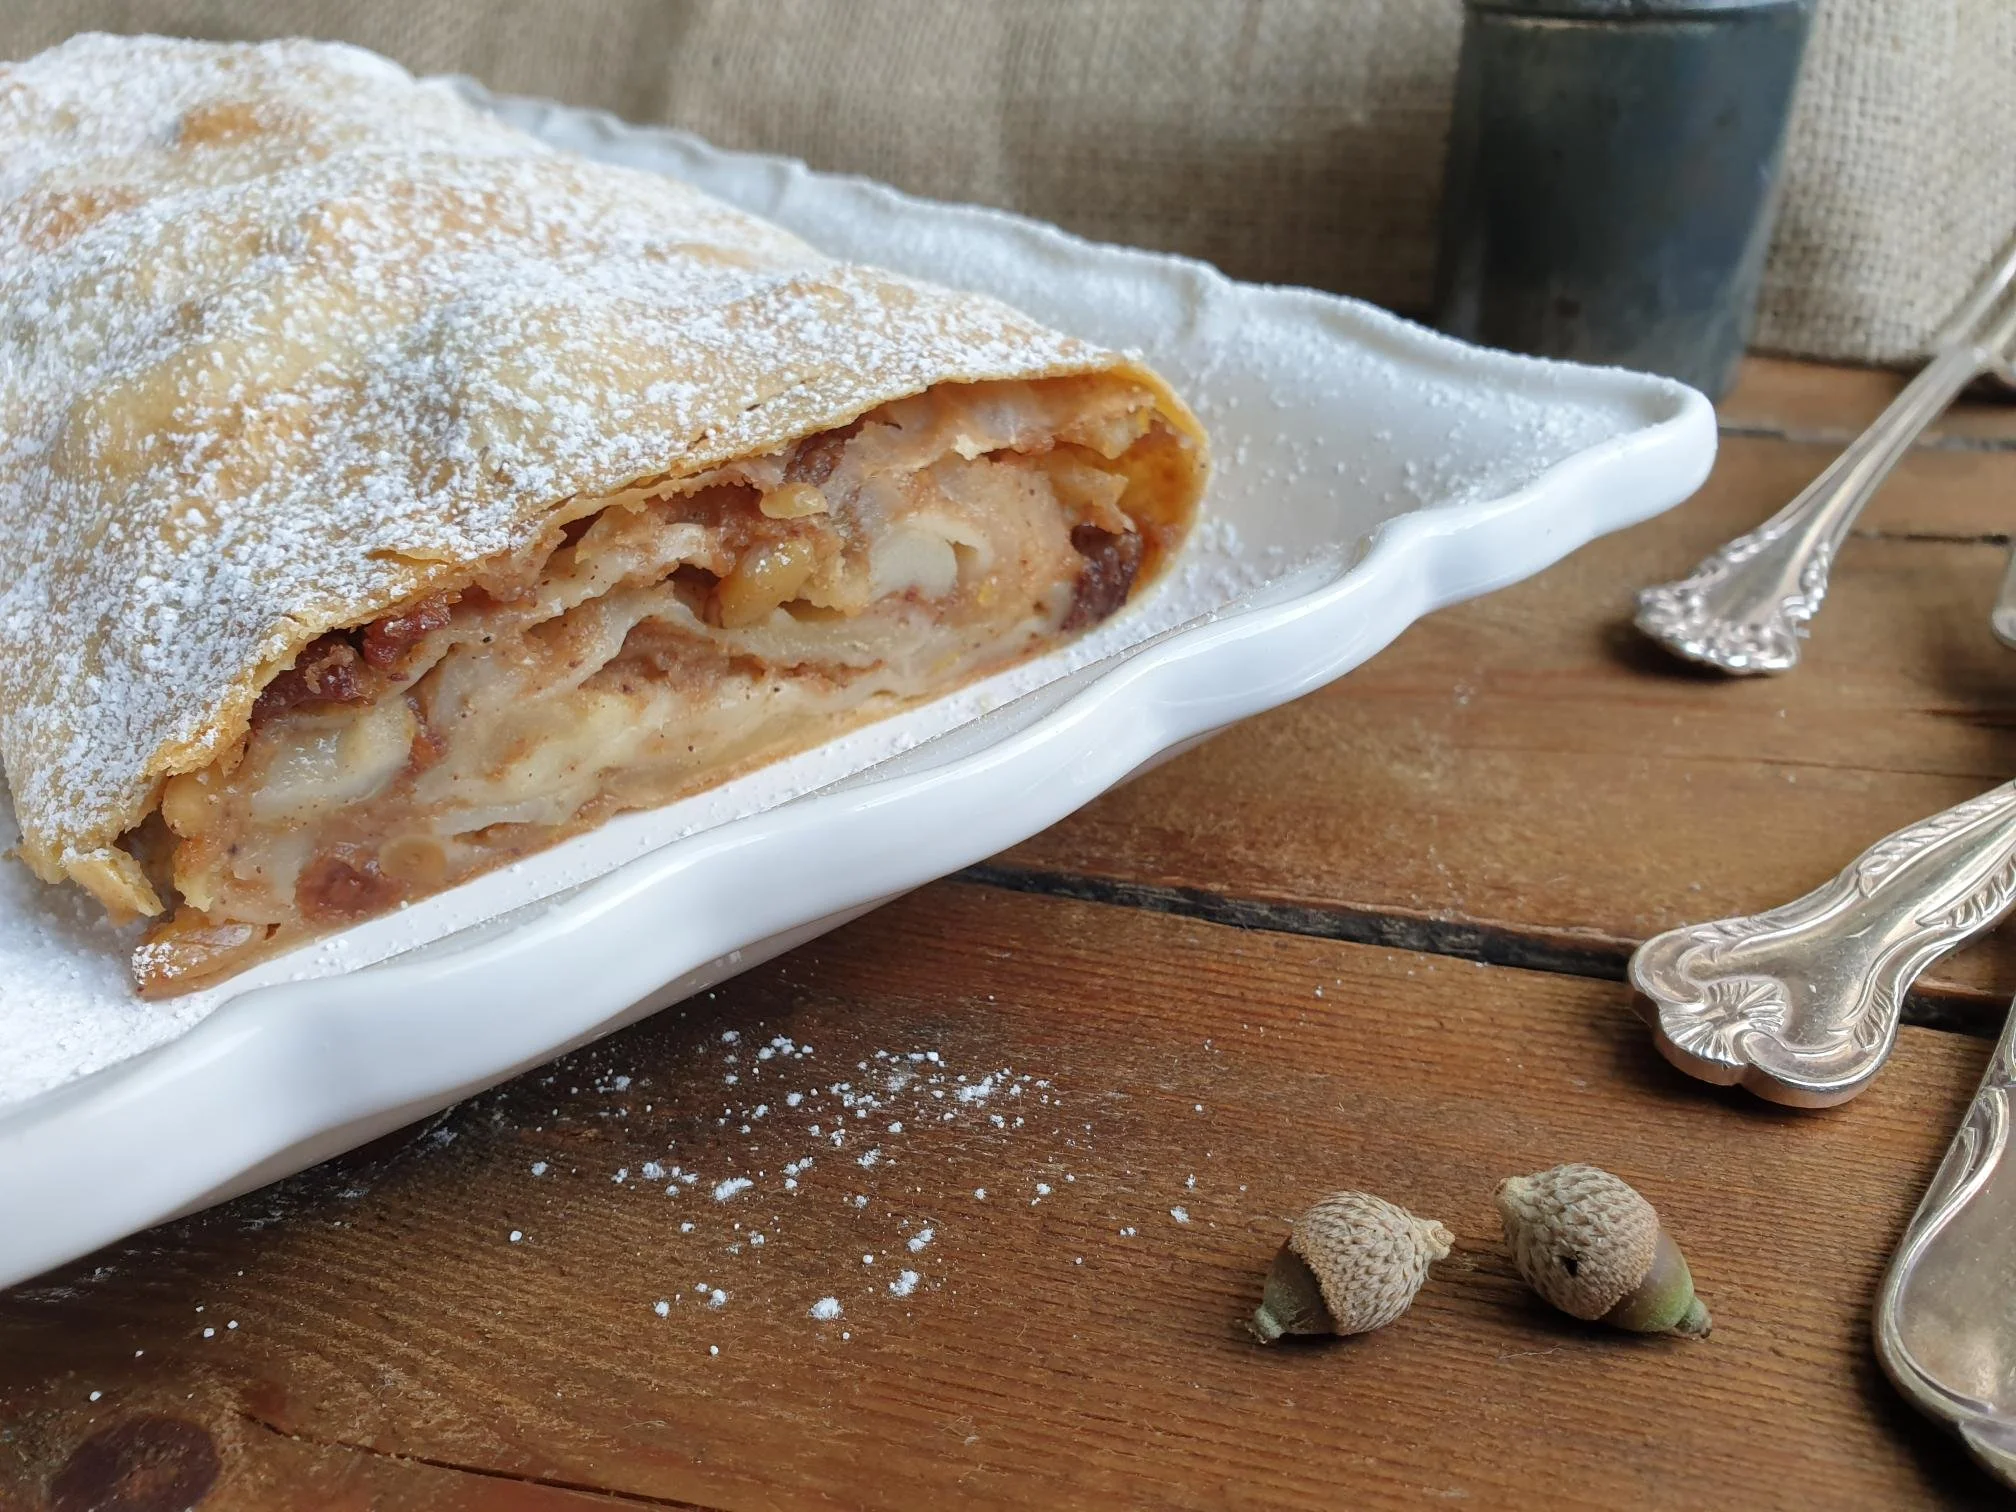
Apple strudel is a traditional Viennese dessert, made of very thin elastic pastry, and the filling contains sliced apples, sugar, cinnamon, raisins (soaked in dark rum), lemon zest, lemon juice and bread crumbs. This popular pastry can also be found in the rest of Austria, Bavaria, Czech Republic, Northern Italy, and in many other countries in Europe that were once part of the Austro-Hungarian Empire.

It is believed that strudel originated from baklava, a very famous Turkish pastry based dessert, that came to Austria with the Ottoman's Empire and through Hungarian cuisine.

Records show that Strudel was first named in 1696 and gained popularity after it was served to Empress Maria Theresia who was the ruler of the Habsburg dominions and the only women to hold the position.

In Slovenia and in coastal Istria, areas that also once belonged to Austro-Hungarian Empire, apple strudel became, and today still is, a very well known sweet treat. It has gained such a high level of popularity that it is almost considered a national dessert. During autumn and winter months, this typical and very much loved dessert would be baked on a regular basis up and down the country, with little variations, and no Sunday roast lunch could be completed without a slice of strudel, dusted, of course, with a generous amount of icing sugar. When this task was left for us children, there would be so much icing sugar on the top that you could hardly see what type of dessert was hiding underneath it. Some things just never change...this is what happens when I leave my 11 year old son with the icing sugar task!

Apple strudel in Slovenia is called Jabolčni štrudelj or Jabolčni zavitek while along the coast of Northwest Istria, where the informal Istrian dialect is also spoken, it can be referred to as Strucolo de pomi.

Strudel made with apples is by far the most popular but in the North Adriatic two variations of strudel have been created and are also very well liked, strudel filled with ricotta cheese filling (or curd cheese) and strudel with cherries.

In my family we all knew when it was weekend, as apple strudel, this warming autumnal pudding, would be in the oven, and the aromas of apples and cinnamon would travel around the house. This dessert is not just part of my childhood but part of my adulthood as well. It has been the most frequently baked dessert by my mum and even today my friends and family cannot get enough of it. Now that I live abroad it is even more special, and it really does take me right back home to my childhood, and my mum's kitchen.

Apple strudel is traditionally served warm, dusted with regular icing sugar or vanilla floured icing sugar, and when accompanied with whipped cream, vanilla ice cream or vanilla sauce, this rustic pudding soon turns into a complete and very elegant dessert.

This recipe for apple strudel is made with home made pastry, however you can still indulge yourself and cut corners a bit by using a store bought ready made puff pastry, in which case only half the amount of apple filling is enough

Apples can be sliced or coarsely grated and lightly toasted walnuts can replace pine kernels.

View fullsize Apple Strudel 1.jpg
View fullsize Apple Strudel 2.jpg

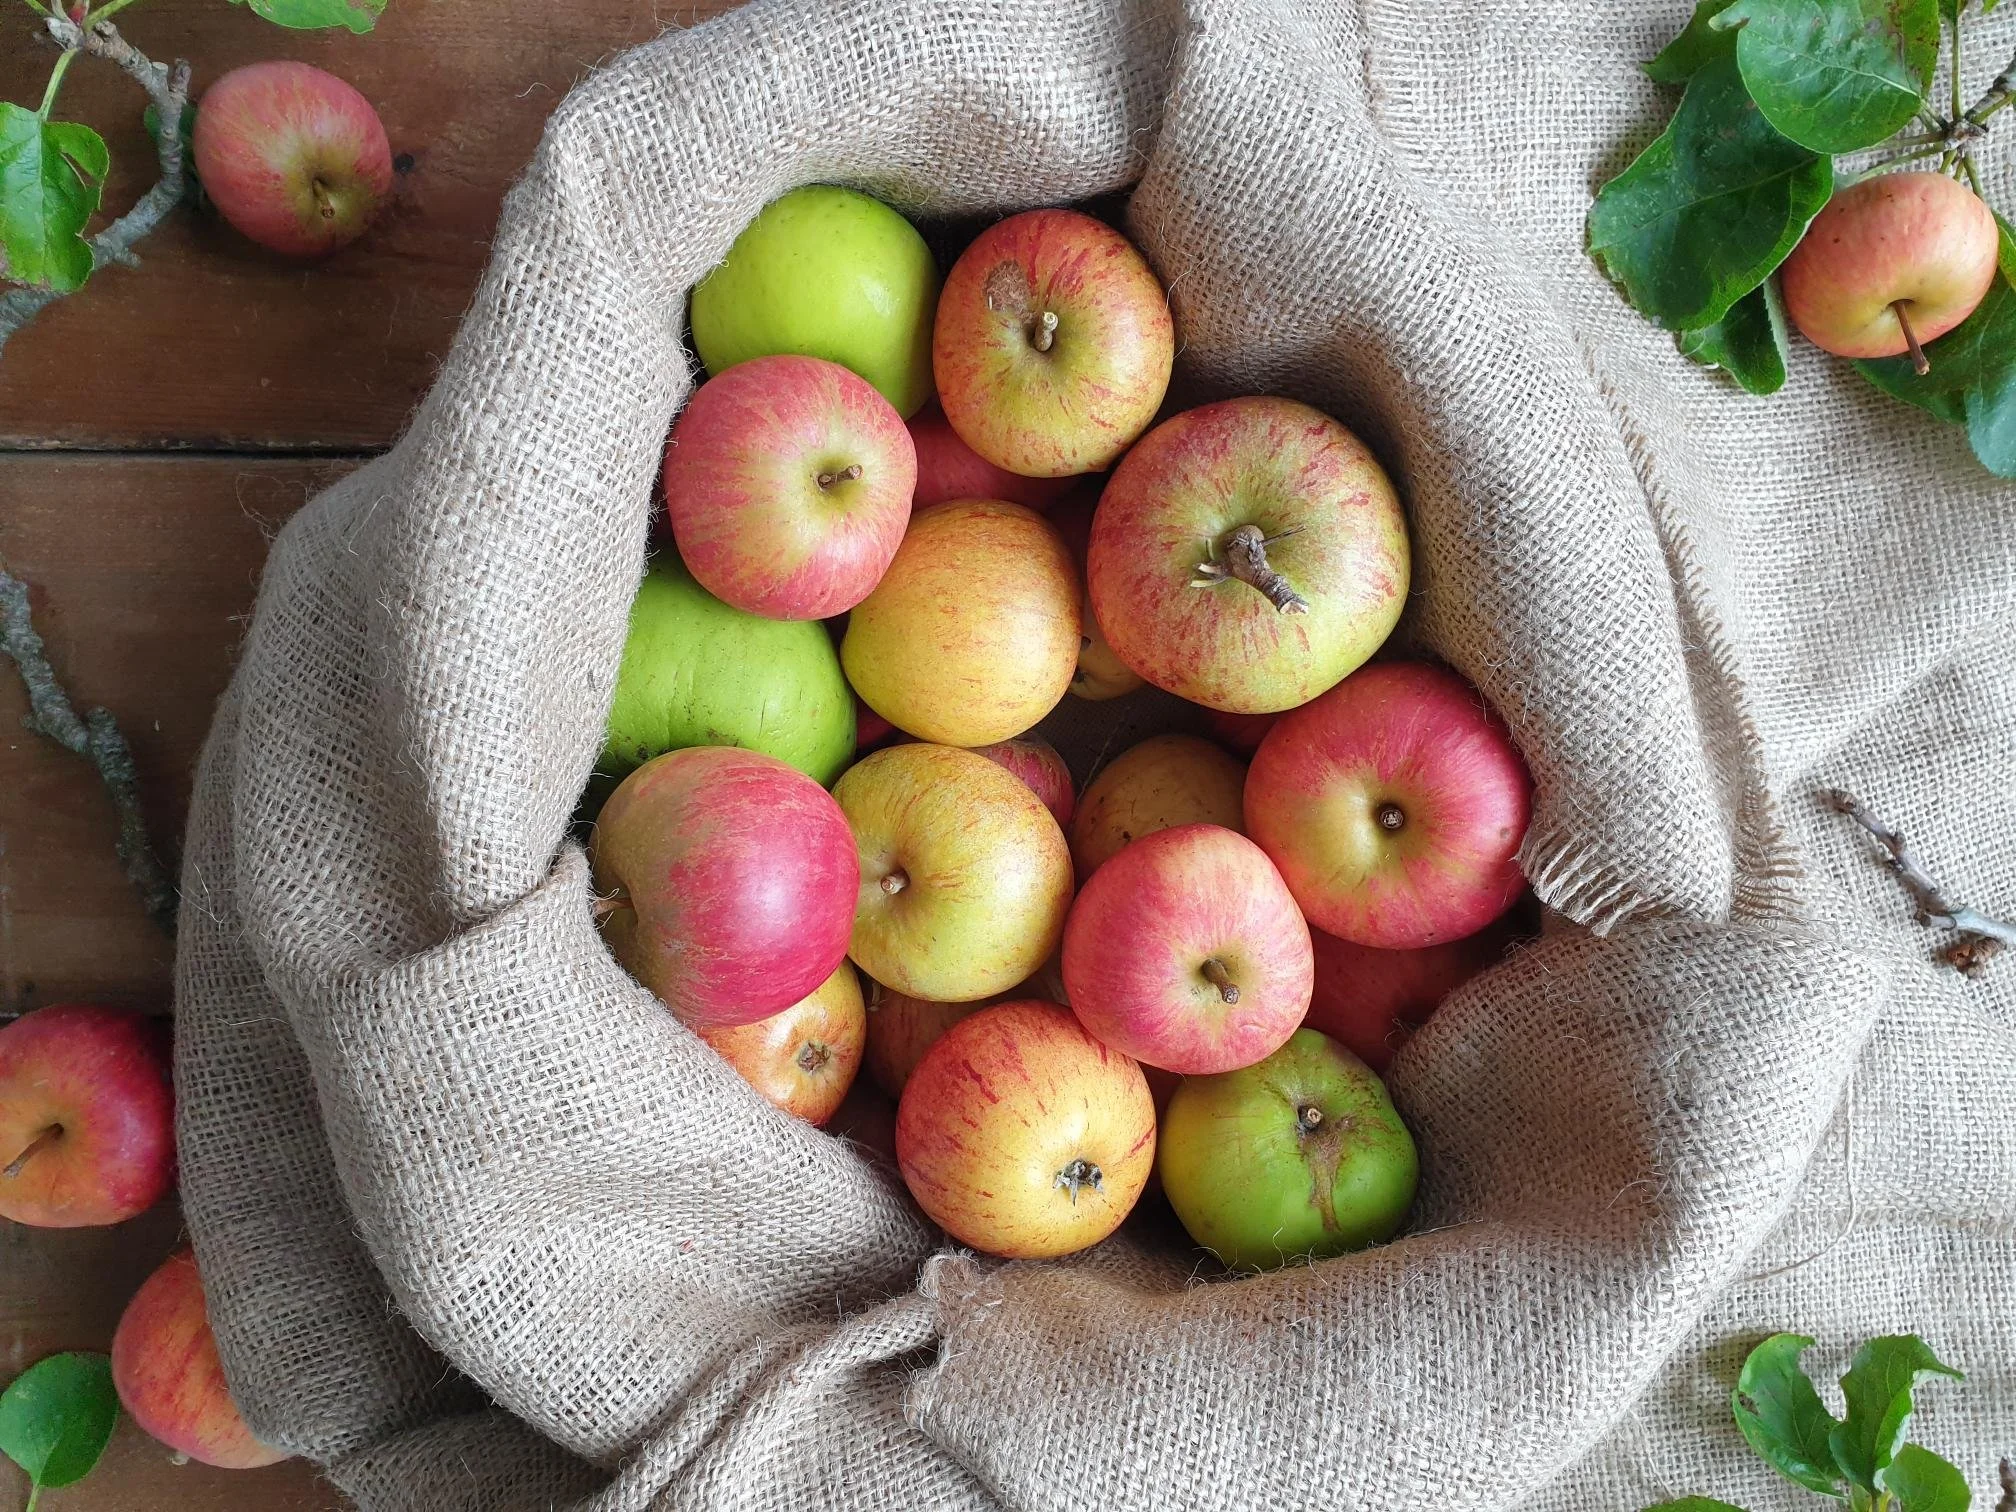
In this recipe I will indicate which apples are appropriate to use for apple strudel, however, I have never used specific type of apples and that is simply because I always bake apple strudel when apples are in season and abundant in nature. Apples would be generously given from neighbours and friends with fruit orchards or apple trees in their gardens, I just make sure I taste them and pick a mixture of sweet and tart apples.

Ingredients

Serves 10-12

Dough

  • 250g all purpose flour or bread flour

  • 1 egg, lightly beaten

  • 3 Tbsp neutral tasting vegetable oil (I used sunflower oil)

  • 2 Tbsp white wine vinegar or lemon juice

  • sea salt, a pinch

  • 50ml-60ml lukewarm water, or as needed

Apple Filling

  • 1kg apples, peeled, cored, quartered and sliced (sweet-tart apples like MacIntosh and Gala in combination) Bramley

  • 1 unwaxed lemon, grated zest and juice (grate lemon zest first and then squeeze the lemon juice, trying to do it the other way round might prove a tricky task)

  • 1 Tsp ground cinnamon

  • 30g pine nut kernels, slightly toasted (can use walnuts)

  • 50g raisins or sultanas

  • 3 Tbsp dark rum or lukewarm water (for soaking the raisins)

  • 60g dry fine breadcrumbs

  • 20g unsalted butter plus extra for brushing

  • 80g caster sugar

  • icing sugar for dusting

Method

To make the dough

Place the flour in a big mixing bowl and make a well.

In a separate, smaller bowl, mix slightly beaten egg, oil, vinegar or lemon juice, (the acidity will help to relax gluten in the flour making the dough more stretchy) a pinch of sea salt and lukewarm water. Pour the mixture into a flour well.

With the fork, stir the mixture with the flour until well combined. Add a little bit of flour at a time, until the dough comes nicely together, then work the dough with your hands.

Transfer the dough on a lightly floured working surface and knead the dough for about 10 minutes or until nice and smooth.

After this time, the dough should be moist and elastic and not sticky. Add a little more flour if the dough is too sticky to knead.

In order to further encourage the development of the gluten, resulting in a very elastic dough, slam the dough onto the working surface a few times.

Shape the dough into a smooth ball and place it in a clean bowl, previously brushed with oil.

Cover the bowl with cling film and let the dough rest for about 1 hour at room temperature.

View fullsize Apple Strudel 4.jpg
View fullsize Apple Strudel 5.jpg

To make the filling

In a small pan, place pine nuts and toast them on a medium-low heat for a few minutes until golden-light brown in colour. Remove from the heat, cool and set aside.

In another pan melt the butter over medium-low heat. When the butter is melted add breadcrumbs, toast them, stirring constantly until golden-brown in colour. Remove from the heat, cool and set aside.

In a small bowl, place raisins or sultanas, add dark rum (traditionally used) or lukewarm water. Leave them to soak and plump up for at least 15 minutes, or until you need them.

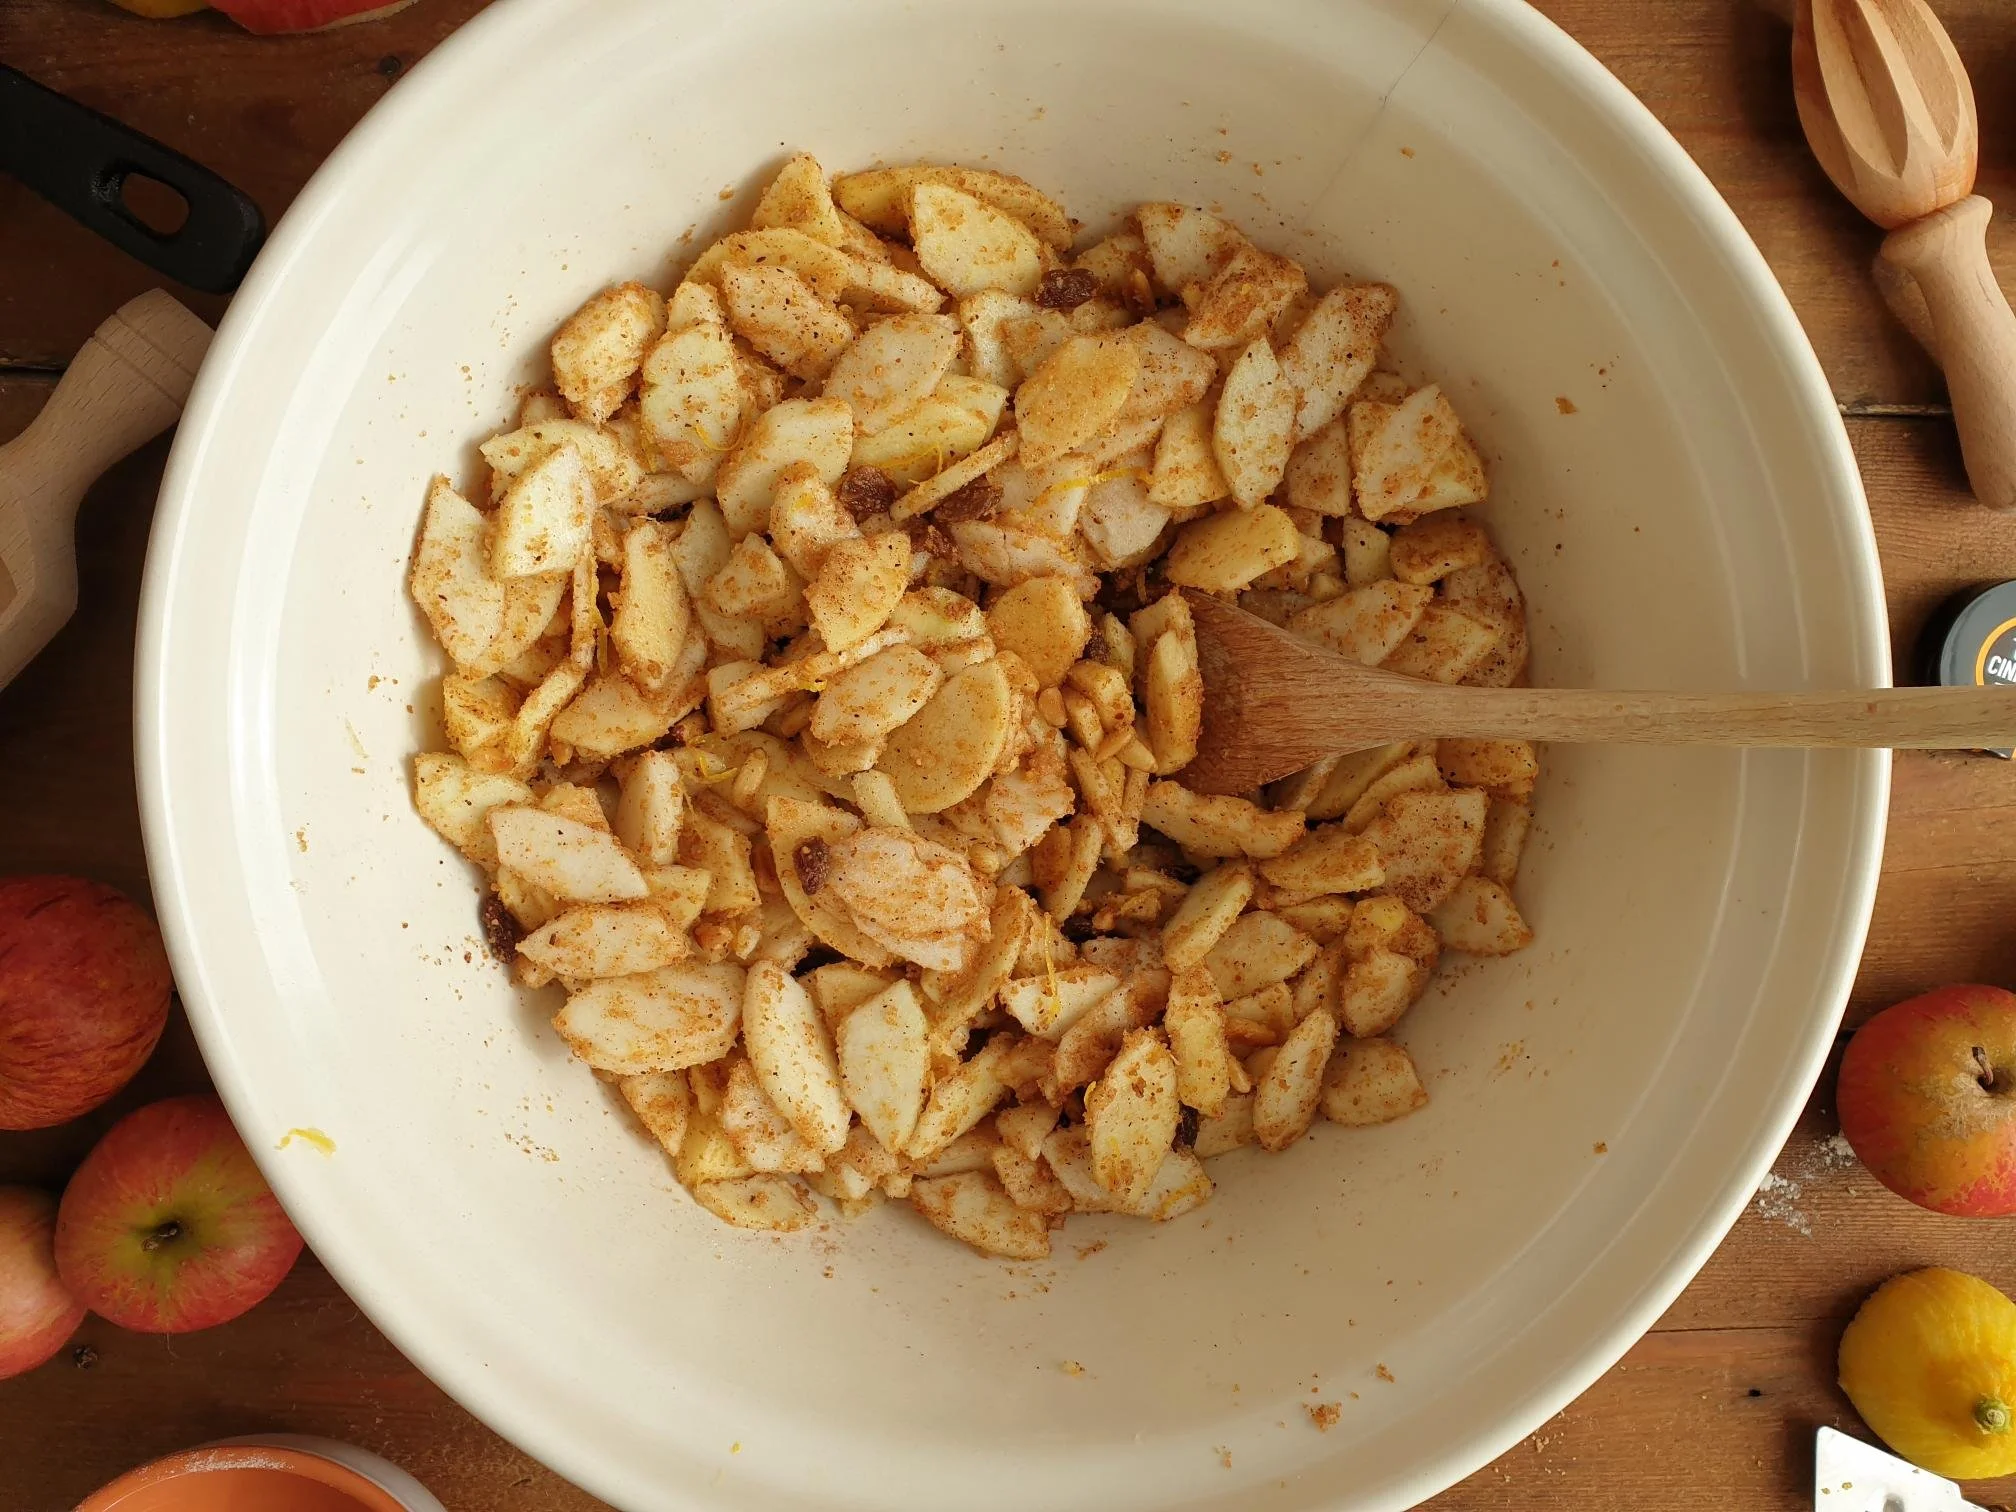
Peel, core, quarter and slice the apples. Place sliced apples in a bowl, pour lemon juice over them, toss and mix well. The lemon juice will prevent apples from oxygenating and turning brown.

View fullsize Apple Strudel 6.jpg
View fullsize Apple Strudel 7.jpg

Add lemon zest, roasted pine nuts, breadcrumbs mixture, soaked raisins or sultanas (squeeze out excess rum or water), sugar and cinnamon. Mix well to incorporate all the ingredients.

Preheat the oven to 200C static or equivalent.

Place the dough on a clean and lightly floured table cloth. Flour the rolling pin and start rolling out the dough. While rolling, to prevent sticking, flour the dough and the surface every now and then.

When the dough reaches about 20 cm in diameter pick it up and keep stretching it. The best way to do so is to use the back of your hands and in particular the knuckles but make sure you remove any sharp jewellery first.

View fullsize Apple Strudel 9.jpg
View fullsize Apple Strudel 10.jpg

When the dough becomes difficult to handle as it becomes bigger and thinner, place it on a lightly floured tablecloth.

With your hands (tip of the fingers) keep stretching gently the dough on the tablecloth to paper thin consistency, from the inside to the outside working your way round the sheet of dough.

Keep stretching until the sheet of dough starts to look almost translucent and you will be able to see a pattern of your tablecloth through it.

You should end up with a thin sheet of dough stretched more or less into a rectangular shape with a diameter of approximately 40 cm which will fit into a standard 40 cm baking tray.

If you notice that the edges are still a bit thick, stretch them further very gently or cut them off. If you leave the edged thick, when rolling the strudel, they will form quite a thick layer at the very centre of the strudel risking to remain slightly underbaked.

Place and spoon evenly the apple mixture over one half of the dough sheet leaving about 2-3cm to the edge.

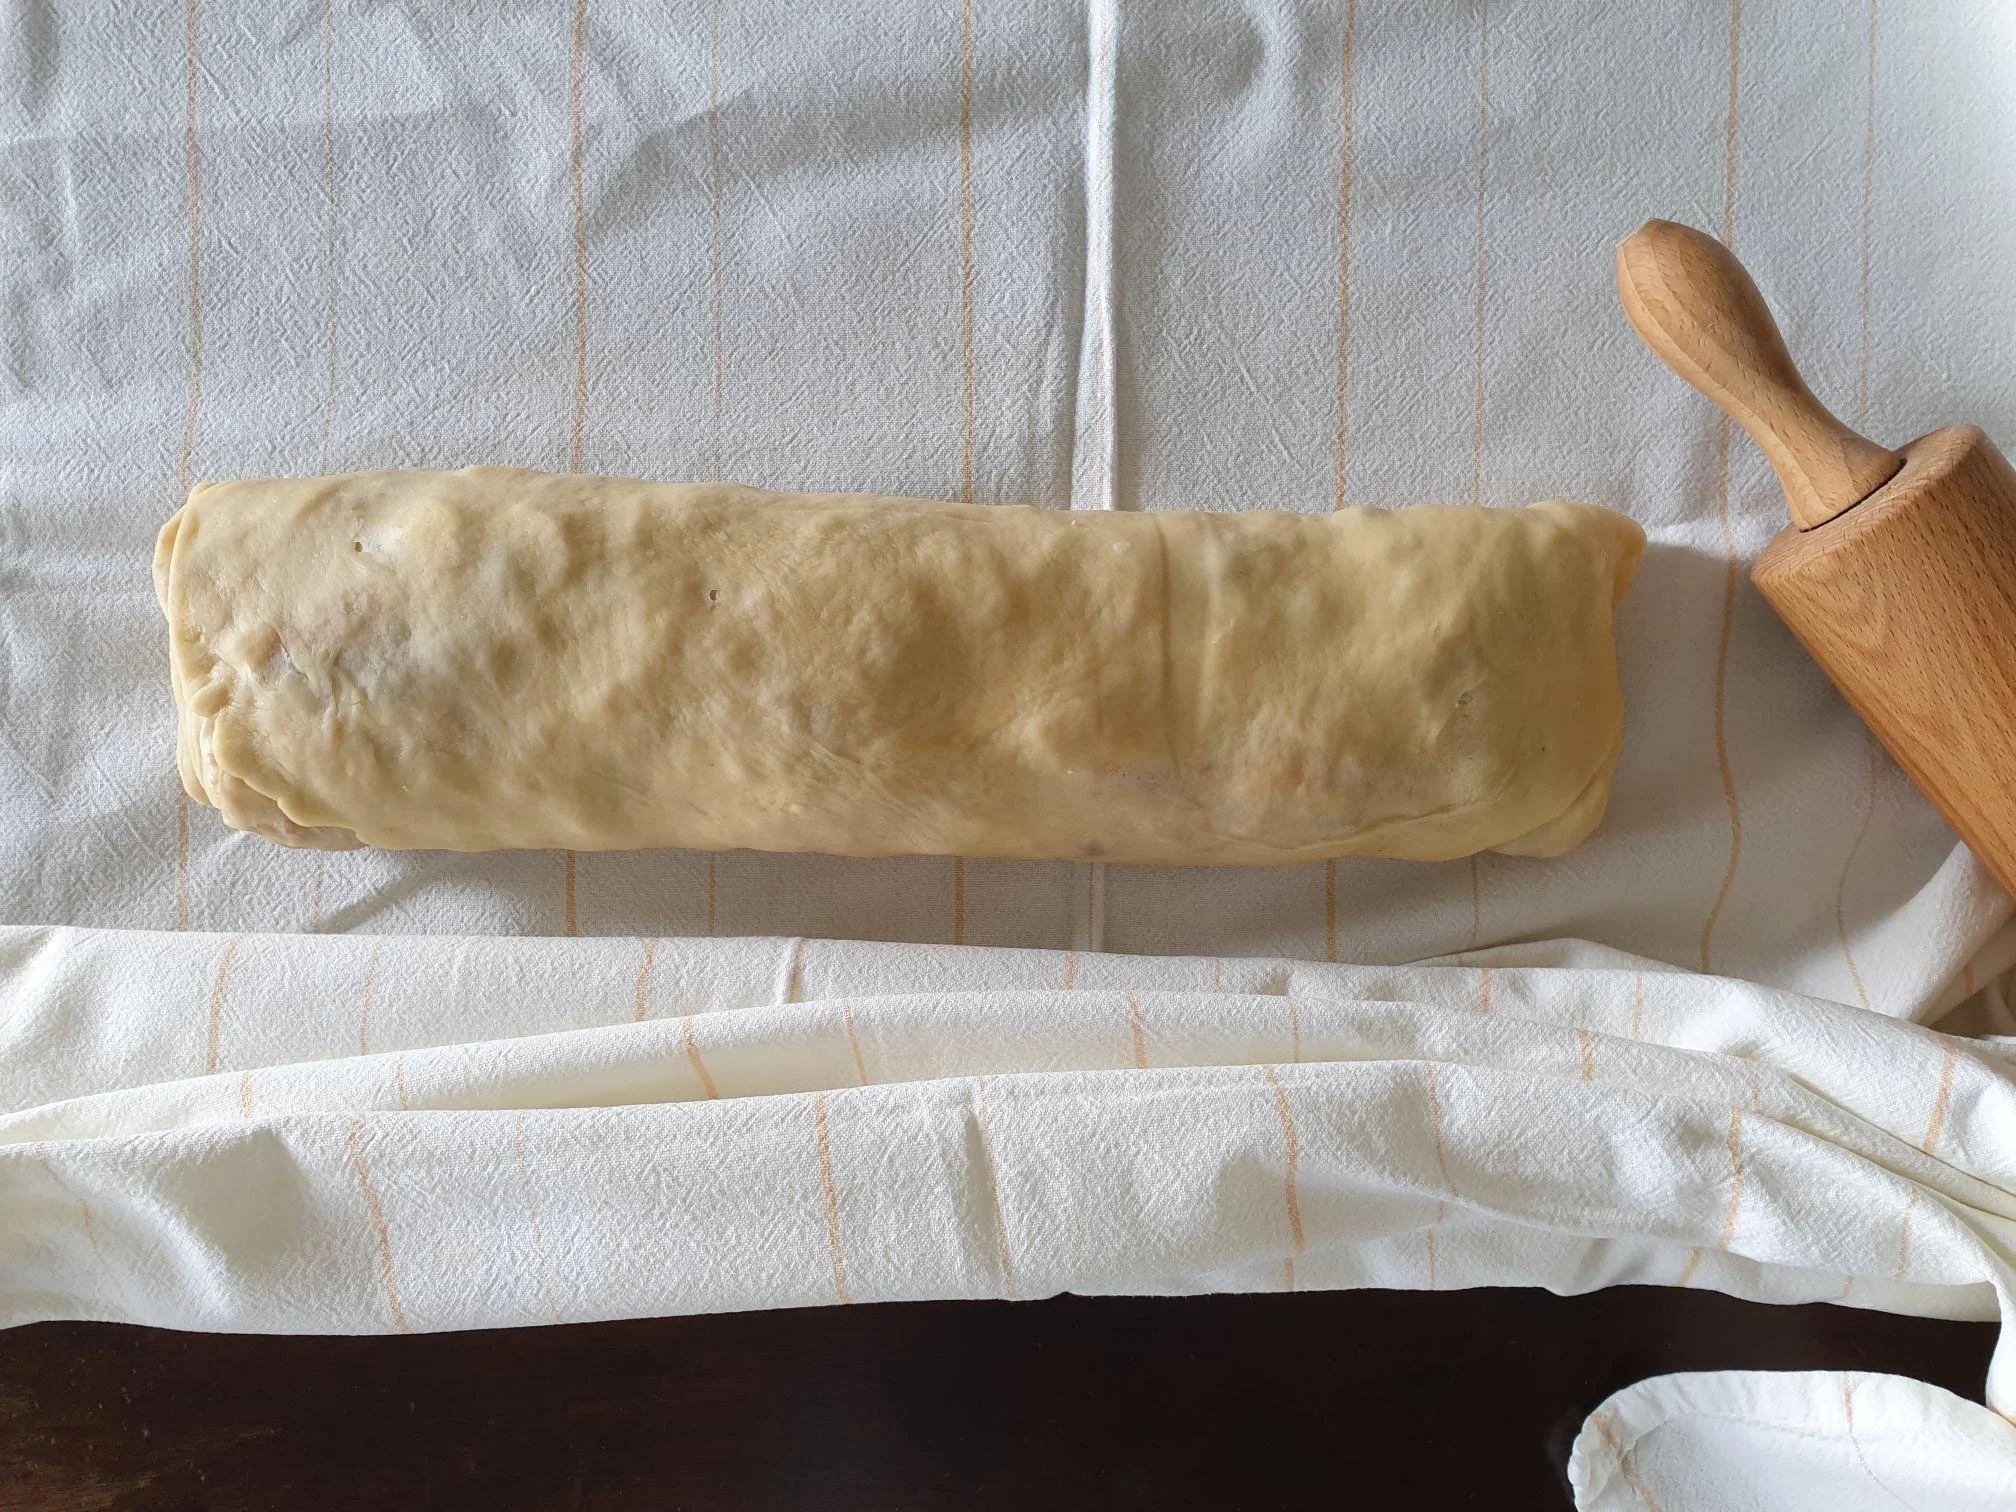
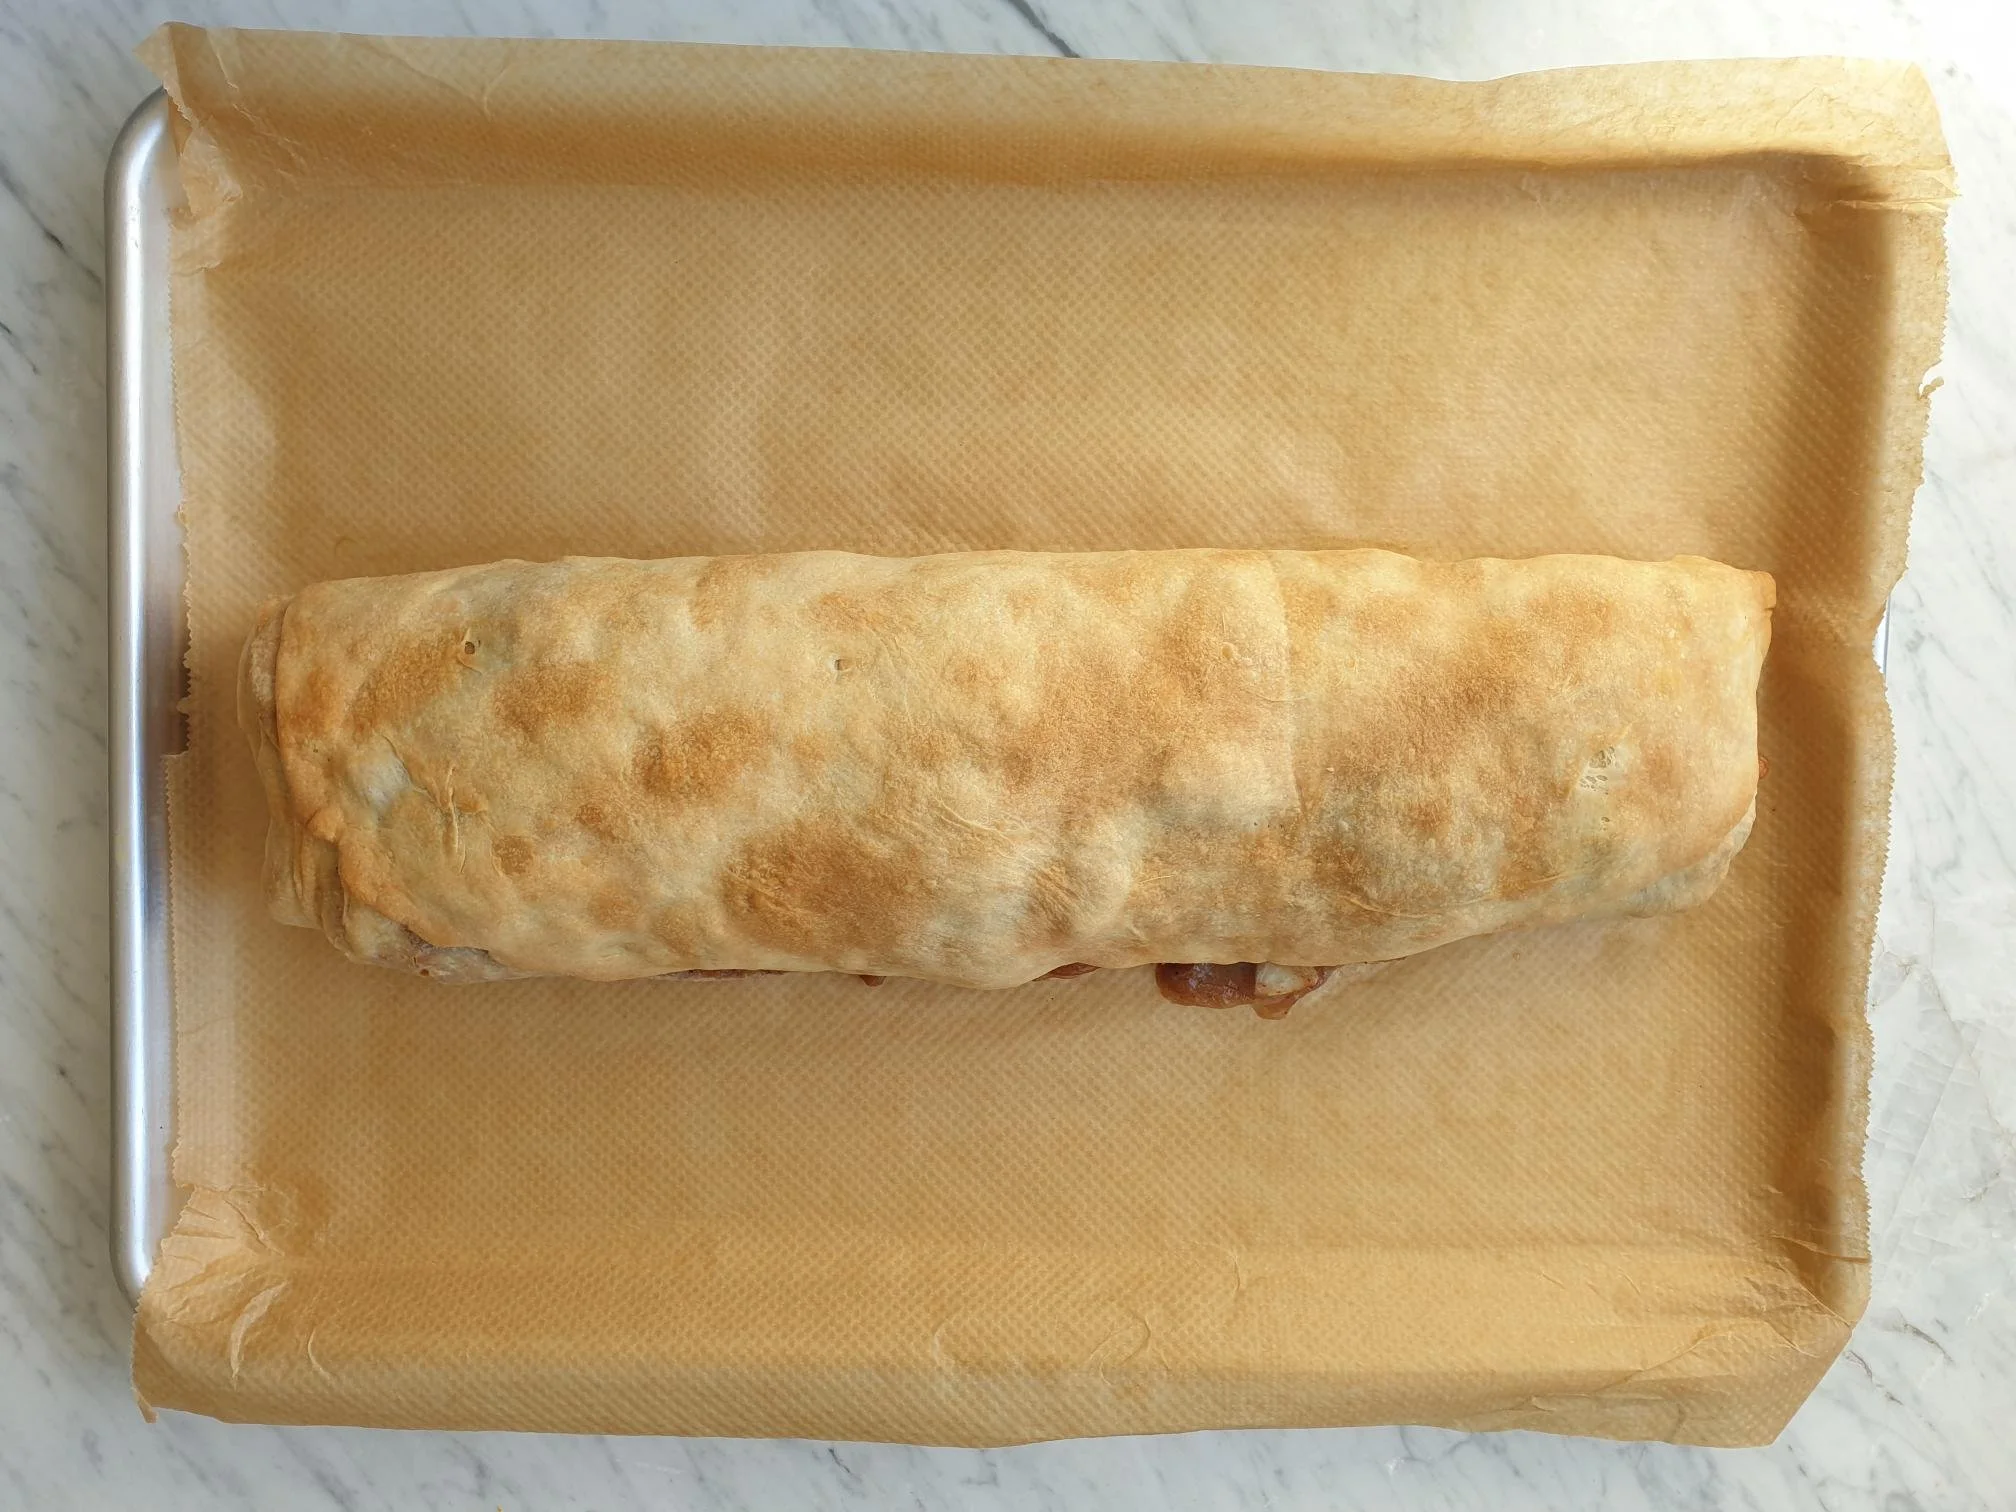
Fold in the side ends of the sheet to prevent filling coming out during rolling. Using the tablecloth to help you, roll the dough all the way and place the rolled strudel very gently on a baking tray previously lined with baking parchment, seam side down.

View fullsize Apple Strudel 11.jpg
View fullsize Apple Strudel 12.jpg
View fullsize Apple Strudel 13.jpg
View fullsize Apple Strudel 14.jpg

Brush it with a bit of melted butter.

View fullsize Apple Strudel 16.jpg
View fullsize Apple Strudel 17.jpg

Bake on the middle shelf for 40 45 min.

Apple Strudel is ready when the crust turns nice and golden.

Take it out of the oven, let it cool. Dust it with icing sugar, cut into slices and serve it on its own or with vanilla ice cream or cream.

Just a thought

You can make the strudel dough ahead and keep it refrigerated for up to two days. Before using the dough take it out of the fridge allowing it to come to a room temperature.

Wine suggestion

Alto Adige Gewürztraminer DOC Vendemmia Tardiva "Roen" 2019 - Cantina Tramin (0.375l)

November 05, 2021 /tina oblak
apples, strudel dough, Autumnal dessert, cinnamon, pine nuts kernels, raisins, Apple strudel home made, Strudel di mele, Jabolčni štrudelj, Jabolčni zavitek, Strucolo de pomi
Adriatic Recipe, baked dish, baking, breakfast, Central European recipes, dessert, Eastern European recipes, Istrian cuisine, Istrian dish, Istrian food, Istrian gastronomy, Mitteleuropean recipes, pudding, recipe from Northern Ital, Rustic dish, Slovenian cuisine, Slovenian food, Slovenian gastronomy, sweet course, Sweet Things
Comment
Plum Dumplings 18.jpg

Plum Dumplings Recipe

Beans and Sardines
September 16, 2021 by tina oblak in Adriatic Recipe, Appetizers, breakfast, brunch, Central European recipes, dessert, dinner, Easter treats, Eastern European recipes, Easy recipe, entrée course, Istrian cuisine, Istrian dish, Istrian food, Istrian gastronomy, main course, main dish, Mitteleuropean recipes, pudding, Rustic dish, Slovenian cuisine, Slovenian food, Slovenian gastronomy, Starters, supper, sweet course, Sweet Things, Vegetarian, Dumplings

This is a great dish for Autumn that originated in the Austro-Hungarian Empire. It is made with potato gnocchi dough in which you stuff the plums, simmer them in water, and then coat them with breadcrumbs, sugar and cinnamon mixture.

These rustic plum dumplings will become a real treat in the family since they are super delicious and easy to make! This dish is traditionally offered as a dessert, however, it is very common as a main course for lunch or dinner.

Plum dumplings are very well known and common throughout the countries that were once part of the Austro-Hungarian Empire. This dish is therefore very popular in Eastern and Central Europe as well as in Trieste and the province of Trieste in Italy.

This historical influence made plum dumplings a very appreciated meal in Slovenia, and is referred to in Slovenian as češpljevi cmoki or slivovi cmoki (češplje and slive meaning plums and cmoki meaning dumplings). They are widely available to buy frozen in bags in the supermarkets, but nothing is comparable to making them at home with this simple recipe.

This dish is very familiar to me, I grew up with it, and it was prepared frequently in the late summer and early autumn when plums are in peak season, in abundance, and with the right level of sugar and sweetness in them.

In Slovenia, where I come from, plum trees are very common to have in the back garden or in a near by orchard and the sight of these beautiful, humble, bluish purple colour fruits, almost like jewels hanging from the branches, is simply heart warming. Plums are popular to use not only for plum dumplings but also for other desserts like bake trays, tarts, jams, and compotes.

Damsons plums, being oval and small, therefore easy to handle, are the preferred and most frequently used type of plums for this recipe. Other types of plums work very well too and fresh apricots are also used frequently to make the dumplings.

If you decide to offer plum dumplings as a dessert, I would suggest to serve 2, if you decide to prepare them as a main meal then 3 or 4 depending on the size.

Plum Dumplings 1.jpg

Ingredients

Serves 6- 8 (you will get about 16 dumplings)

Ingredients for the plum dumplings

  • 16 fresh plums, Damsons plums and prune plums most commonly used, you can use other variety (plums should be sweet, ripe and fairly firm to the touch, avoid overripe with soft pulp as it gets quite difficult and messy to pit them). You can use fresh apricots instead.

  • 1kg floury, yellow-fleshed potatoes, e.g. King Edward, Maris Piper, (avoid new potatoes). I use red skin potatoes.

  • 300g all purpose flour (plus extra for flouring the board and working surface)

  • 1 egg, slightly beaten

  • sea salt, a pinch

Ingredients for the breadcrumb coating

The ingredients stated here are to coat all the dumplings, if you wish to half the quantity of dumplings half the ingredients for the breadcrumb coating

  • 100g unsalted butter

  • 5 Tbsp natural dry breadcrumbs

  • 5 Tbsp caster sugar

  • 1 Tsp cinnamon

Method

Start this recipe by making a basic potato gnocchi dough. (For more details refer to my full step by step recipe for Potato gnocchi dough)

Wash the potatoes, with the skin on, under cold running water.

Place the potatoes in a saucepan or a pot, cover with cold water and bring to boil. After the water has come to a boil, cook for about 20 minutes or until tender. Cooking time will obviously vary depending on the size of the potatoes you are using.

Don't pierce them during cooking and don't overcook them allowing the skin to burst as they will absorb too much water, alternatively you can steam them.

Remove from the pot, drain them in a colander and let them cool enough to handle, then remove the skin. If the potatoes are still quite warm to handle, the best way to remove the skin is to stick the fork though the potato and peel it using a knife.

Put the flour on a working surface, add salt and mix with the fork.

Make a well in the middle and pass the potatoes through a potato ricer while still warm as they become stickier when cooler. Allow riced potatoes to cool for few minutes and then add the egg.

With your fingers work the flour into the potato and egg, bringing the dough together, until it becomes a soft, pliable dough and do not overwork it. If the dough is too sticky, wet and soft add a bit more flour. Make sure your working surface is always well floured.

When the dough is the right consistency it should not stick to your fingers.

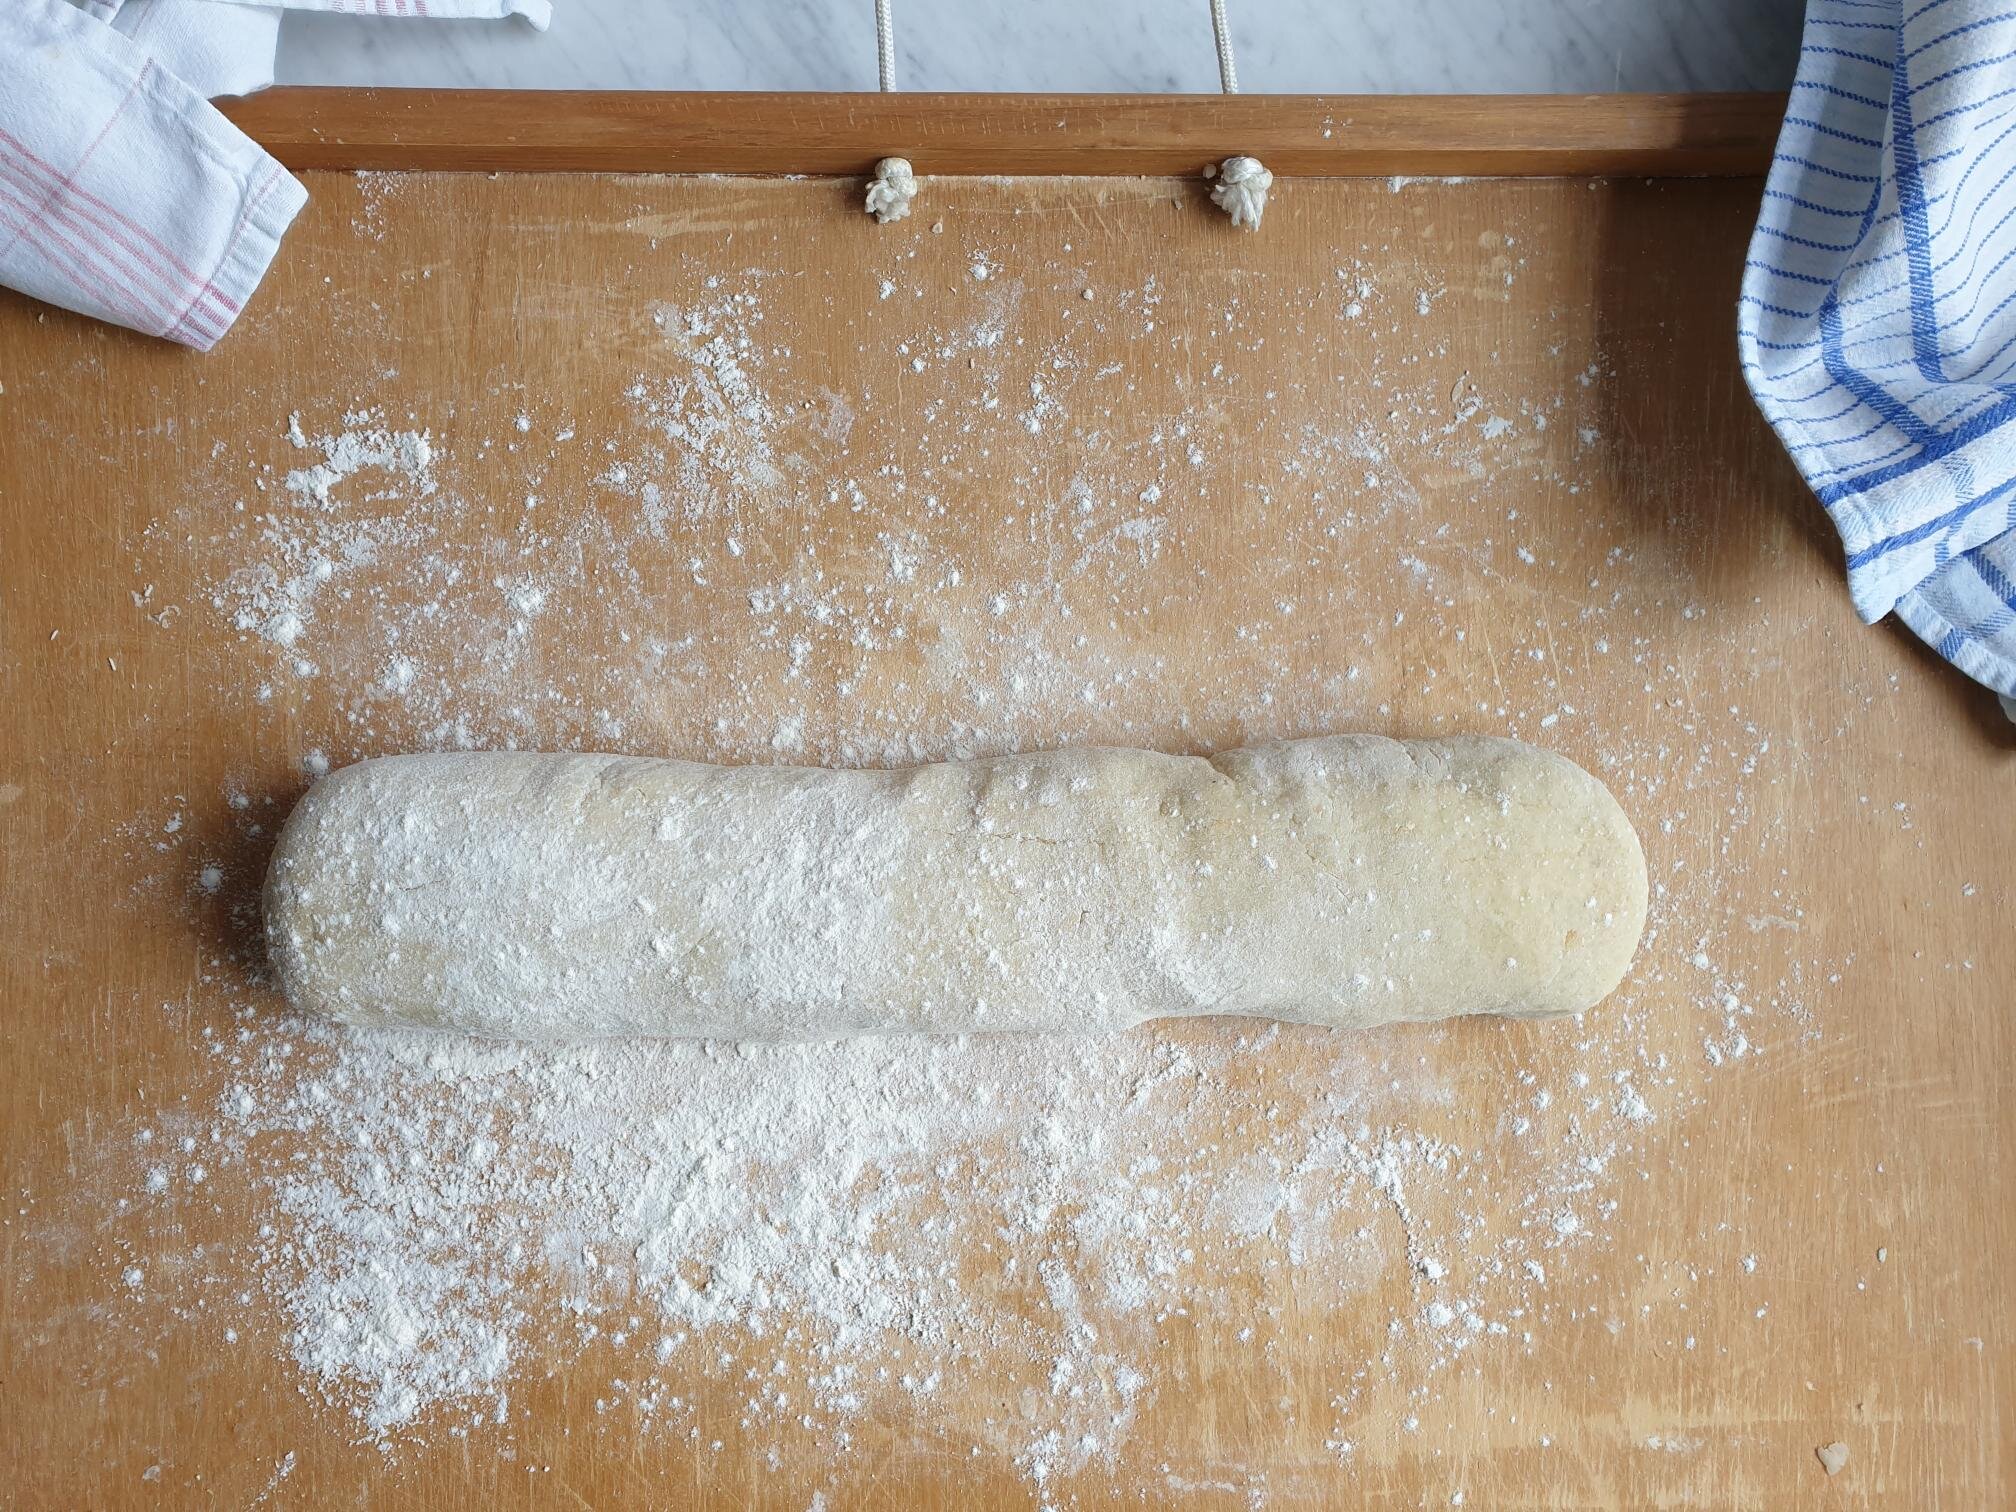
Shape the potato dough into a log.

Plum Dumplings 4.jpg

Prepare your plums by washing them and pat dry them. Then cut each plum lengthwise all the way round in order to get two halves and remove the pits.

View fullsize Plum Dumplings 2.jpg
View fullsize Plum Dumplings 3.jpg

Flour well your working surface and divide and cut the potato dough log roughly into 16 portions.

With your hands slightly floured, flatten and shape each portion into a round circle.

View fullsize Plum Dumplings 4a.jpg
View fullsize Plum Dumplings 5.jpg

Place one half of the plum in the centre and fill it with half Tsp of sugar, then place the other half of the plum on top of it.

If your plums are quite big in size, you might want to use only one half, as you will end up with very big dumplings which are more difficult to handle and not looking particularly elegant on a serving plate.

View fullsize Plum Dumplings 6.jpg
View fullsize Plum Dumpling 7.jpg

Wrap the dough tightly around the plums.

Seal the edges properly and tightly and shape it into a ball, roughly the size of a peach.

If the edges do not stick properly, dampen the edges with your fingers previously dipped in a bit of water, this will act a bit like a glue.

This step is quite important to prevent the dumplings from bursting and losing the juices during cooking.

Make sure you place each dumpling on a well floured surface to avoid sticking.

View fullsize Plum dumplings 8.jpg
View fullsize Plum Dumplings 9.jpg

It is quite crucial, when making dumplings, that you start and finish the process without interrupting for too long, as the sauce from inside the dumplings (the sugar inside the plum starts dissolving) will start leaking from the dumplings making it quite a mission to rescue them, and this is from the first hand experience!

Repeat the process until you use all the dough.

View fullsize Plum Dumplings 10.jpg
View fullsize Plum Dumplings 11.jpg
Plum Dumplings 12.jpg

Fill a large pot with water, add a generous pinch of salt and bring to boil.

Place gently each plum dumpling in a pot making sure they do not stick to the bottom.

Cook the plum dumplings in simmering water for about 12 minutes (not strong boiling as that can damage the dumplings).

They are fully cooked when they float on the surface.

While the plum dumplings are simmering, make the breadcrumbs sauce.

In a large pan, ideally non stick, melt gently the butter, add the breadcrumbs and toast for few minutes on a medium-low heat until slightly darker in colour.

Add sugar and cinnamon and mix until all the ingredients are well combined. Remove the pan from the heat to avoid burning the breadcrumbs mixture.

View fullsize Plum Dumplings 13.jpg
View fullsize Plum Dumplings 14.jpg

With a slotted spoon, remove plum dumplings from the simmering water.

Transfer them and place them in a pan with breadcrumbs mixture.

View fullsize Plum Dumplings 15.jpg
View fullsize Plum Dumplings 16.jpg

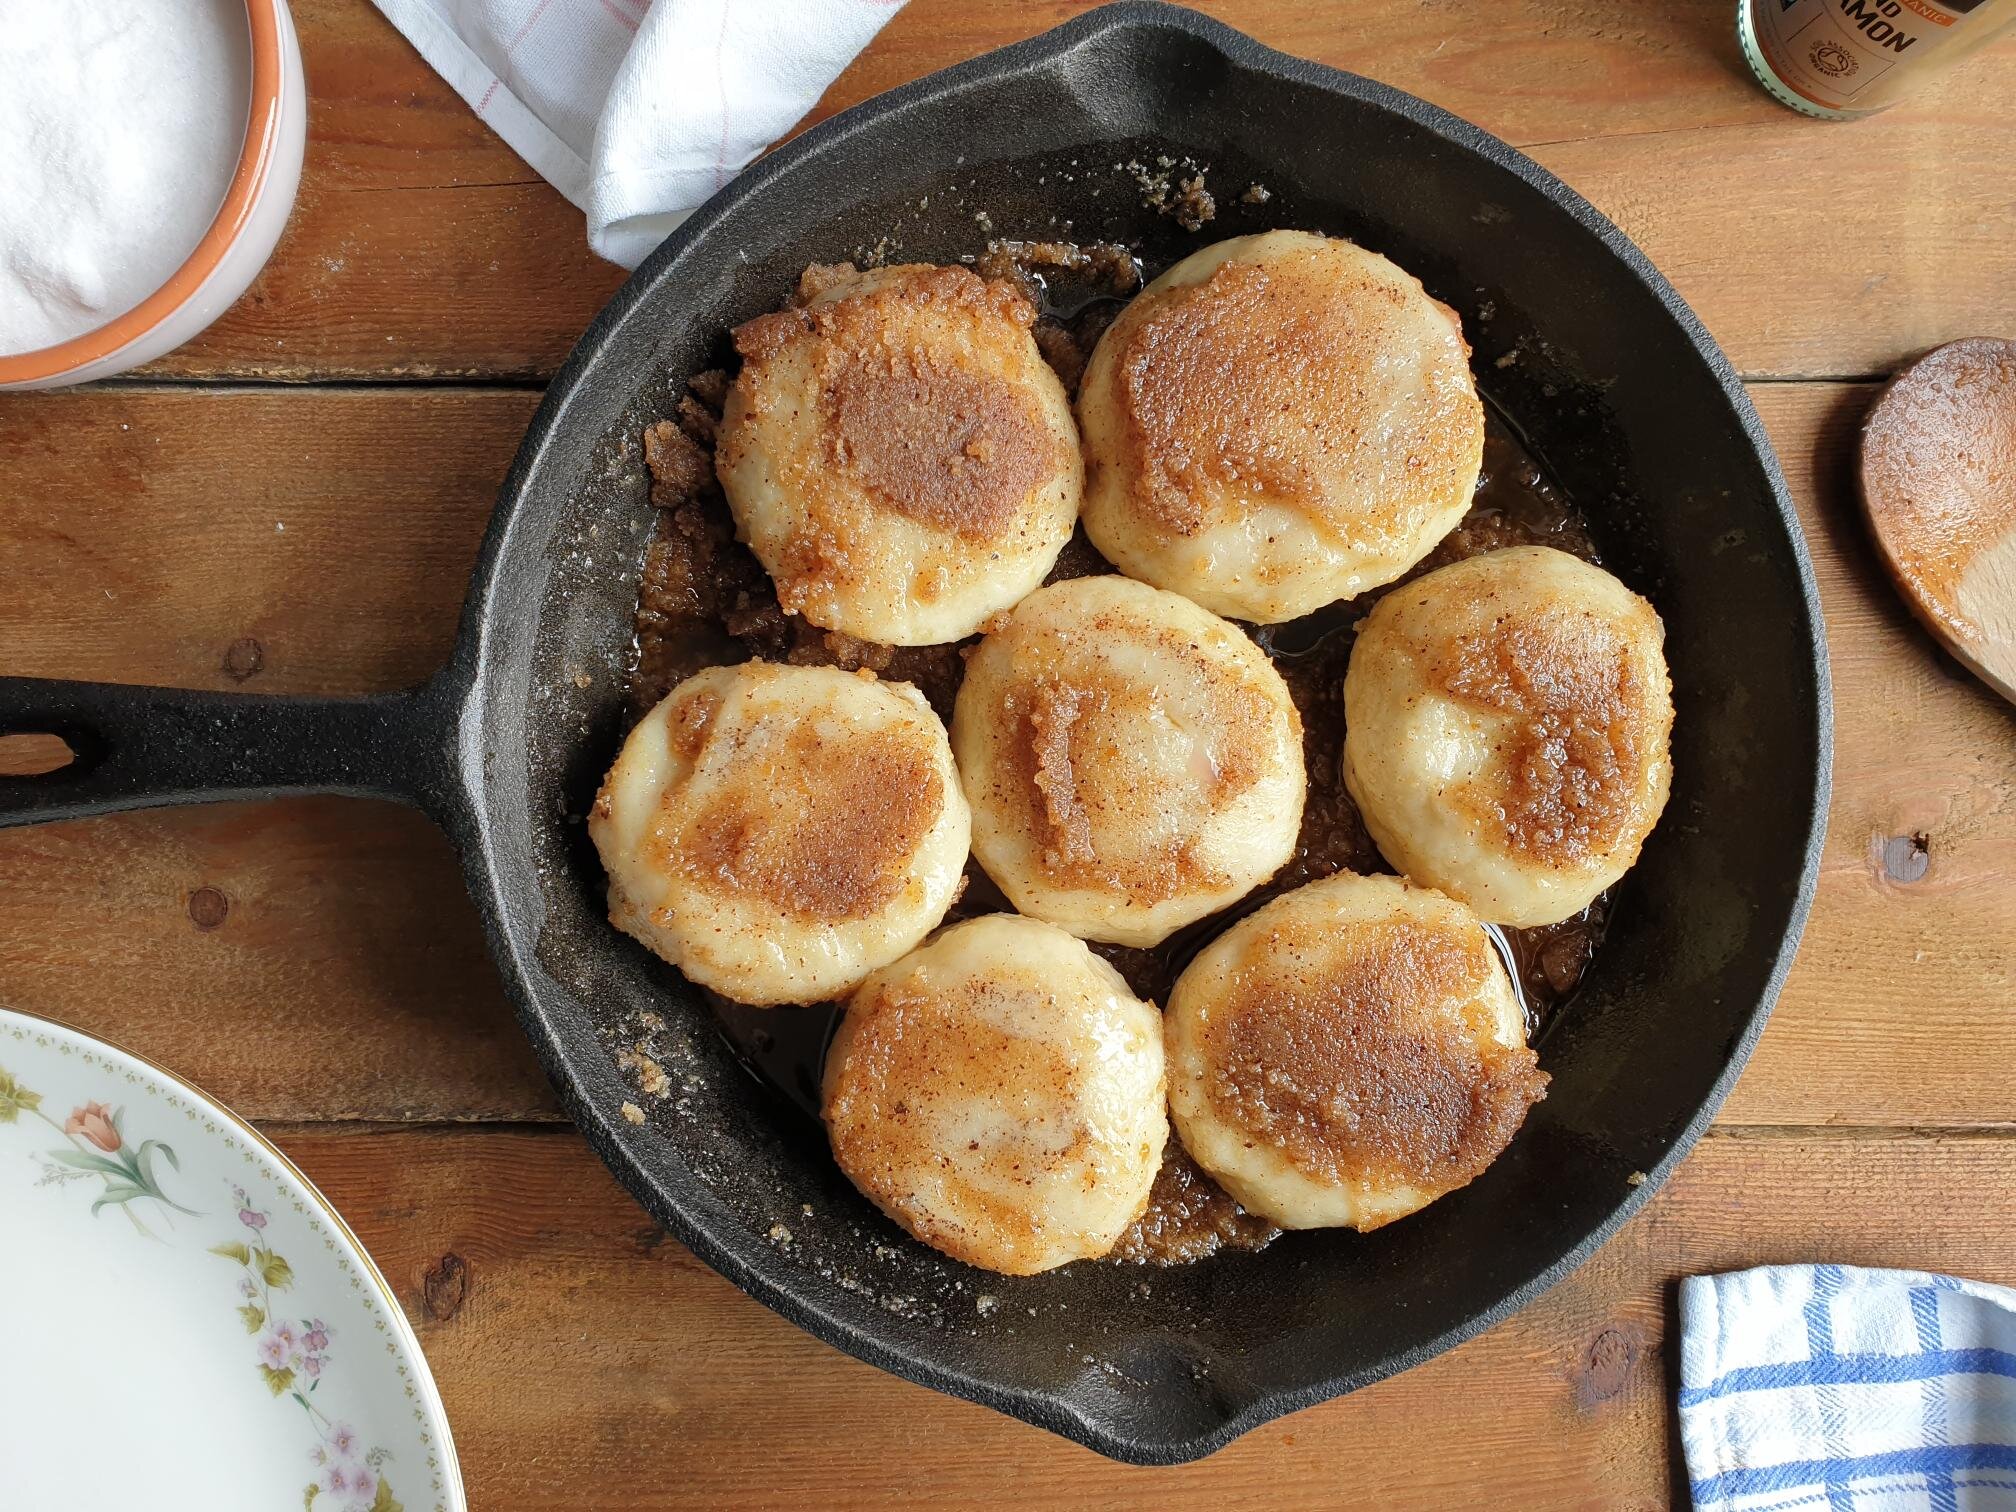
Shake the pan gently so the dumplings can roll around and get fully coated in the breadcrumbs mixture.

Plum Dumplings 17.jpg

Place on the serving plate, dust them with a bit of extra icing sugar and serve immediately. They are best eaten hot but equally delicious at room temperature.

Plum Dumplings 19.jpg

Just a thought

If you decide to only make half a batch of plum dumplings, you can use half of the potato dough for the plum dumplings and the other half for potato gnocchi. (see my full recipe step by step for potato gnocchi).

You can store cooked plum dumplings for up to three days in a airtight container.

If you need and desire to warm them up, putting them in a microwave is a good option as they retain the moisture.

The great thing about plum dumplings is also that they freeze very well. It is very important that you spread the uncooked dumplings in a single layer, leaving a bit of space between each dumpling, so they don't stick together, on a well floured wooden board, baking sheet, serving tray laid with baking parchment or with well floured kitchen cloth or similar.

Put the tray with the freshly made dumplings into a freezer, for at least 20- 30 minutes, and once frozen, put them into a freezing bag.

When you want to cook them just drop them frozen directly into a boiling salted water without defrosting them first, bearing in mind that the cooking time will be slightly longer, around 15 minutes. They are ready when they are floating on the surface.

Wine suggestion

Moscato Rosa delle Venezie IGT 2014 - Foffani

September 16, 2021 /tina oblak
Autumn Recipe, autumnal recipe, plums, plum puddings, plum desserts, potato gnocchi dough, češpljevi cmoki, slivovi cmoki, sweet dumplings
Adriatic Recipe, Appetizers, breakfast, brunch, Central European recipes, dessert, dinner, Easter treats, Eastern European recipes, Easy recipe, entrée course, Istrian cuisine, Istrian dish, Istrian food, Istrian gastronomy, main course, main dish, Mitteleuropean recipes, pudding, Rustic dish, Slovenian cuisine, Slovenian food, Slovenian gastronomy, Starters, supper, sweet course, Sweet Things, Vegetarian, Dumplings
Comment

Ćevapčići (Grilled Minced Meat Sausages of the Balkans) recipe

Beams and Sardines
July 13, 2021 by tina oblak in brunch, Central European recipes, dinner, Eastern European recipes, Easy recipe, Finger food, Istrian cuisine, Istrian dish, Istrian food, Istrian gastronomy, main course, main dish, main meat course, Meat, Mitteleuropean recipes, Slovenian cuisine, Slovenian food, Slovenian gastronomy, Small bites, supper, Balkan dish

Ćevapčići (plural and diminutive form of Ćevapčić) or Ćevapi (pronounced [ʨɛ'va:pi]) are small pieces of rolled grilled mince meat, type of Turkish kofte kebab, originally made in the Balkans during the Ottoman period. They are oriental in origin but can be traditionally found in the countries of what was formerly Yugoslavia, the Czech republic, Austria, Slovakia and the Italian province of Trieste and Gorizia.

Ćevapčići must be one of everyone's absolute favourite dishes back home in Slovenia and it is hard to imagine a barbecue without them. In fact, they are so popular, you can buy them ready made in almost every butcher shop or supermarket. They are popular street food (fast food) and became part of everyday diet in Slovenia. For meat lovers this little skinless sausages are a real dream.

As a child I have very vivid memories of going to a skiing holiday to a capital of Bosnia and Herzegovina, Sarajevo, and having the best ever, and I mean the best ever Ćevapčići in Baščaršija which is Sarajevo's old bazaar and the historical and cultural centre of the city. I was utterly fascinated by the place being so different from my native small Venetian looking coastal town of Koper. That was the first time I saw a real mosque and was captured by the beautiful Ottoman architecture.

Ćevapčići are grilled and served as a main course in groups of five to ten pieces on a plate or in a lepinja (traditional flatbread). They are commonly eaten with Ajvar (cream of roasted red peppers), chips, flat breads, pieces of spring onions or thinly sliced yellow or white onions and kajmak (type of cream cheese). What accompanies really well this dish is a fresh salad of tomatoes, cucumber, onions and any feta type of cheese, it completes the meal well.

I currently live in England where I cannot buy ready made Ćevapčići so I have decided to make them fresh from scratch, there is a great sense of satisfaction as you can tweak the ingredients to your taste.

The main ingredient is mince meat, lamb, veal pork or beef, you can mix two or three types of minced meat and there could be a variation of meat content and seasoning.

I am sharing here my father's recipe, he used to love Ćevapčići and he loved preparing them for the family.

Ingredients

Serves 4

  • 500g mince lamb

  • 500g mince beef (can use 250g of mince beef and 250g of mince pork)

  • 60g unsmoked pancetta or bacon, cut in small pieces (can use smoked alternative if prefer)

  • 180g roughly of onions (very finely chopped)

  • 1-2 clove of garlic (pressed)

  • 1 egg (slightly beaten)

  • 1 Tbsp powdered Hungarian sweet paprika

  • ¼ Tsp baking soda

  • sunflower oil for brushing

  • sea salt

  • black pepper (freshly ground)

Method

Put a table spoon of water in a frying pan and sautée on a medium heat pieces of pancetta or bacon. Turn the heat down, add the onions, garlic, a pinch of salt and fry gently, stirring frequently, until they become golden in colour and soft. It should take 10-15min, then set aside and cool.

View fullsize Cevapcici 2.jpg
View fullsize Cevapcici 3.jpg
View fullsize Cevapcici 4.jpg

Transfer the pancetta/bacon and onion mixture into a food processor, add mince meat and mix at a low speed. Pulse if you can, as you do not want a completely smooth paste but a mixture with still a bit of a texture. If you have a smaller food processor you might have to do this in batches.

View fullsize Cevapcici 5.jpg
View fullsize Cevapcici 6.jpg

Transfer the mixture from the food processor into a big bowl. Add the egg, pinch of salt, black pepper, baking soda and sweet paprika. With your hands mix well to combine all the ingredients, no food processor will do better job!

View fullsize Cevapcici 6a.jpg
View fullsize Cevapcici 6b.jpg
View fullsize Cevapcici 7.jpg

Take a size of a golf ball, weighing roughly between 30-40g and shape into small sausages of about 7-8cm long.

Place your Ćevapčići onto a big plate or a tray and refrigerate for about 1hour.

Ćevapčići are ideal for barbecuing but as this is not always possible you can cook them in a grill pan.

Barbecue or grill the Ćevapčići on the hot grill pan for about 14 minutes, turning them often in between. They are ready when nice and brown on the outside and cooked through. It might be a good idea to check by cutting one in the middle. In this way you can calculate the grilling time for the following batches.

No matter which way you choose to cook them, make sure you lightly brush them with oil during the cooking process and try not over cook them as they will go hard.

View fullsize Cevapcici 9.jpg
View fullsize Cevapcici 10.jpg

Just a thought

Ćevapčići freeze well, just make sure you freeze them individually first on a plate or a tray to avoid them sticking to each other, and then place them in a freezing bag...... and you are all set for your next BBQ outside with friends or family, or for an enjoyable meal indoors!

Wine suggestion

Carso-Kras DOC "Terra Rossa" 2009 by Branko & Vasja Čotar, Carso-Kras

July 13, 2021 /tina oblak
mince pork, mince beef, mince lamb, grilled meat, grilled sausages, BBQ, Ćevapčići, Grilled Minced Sausages of the Balkans
brunch, Central European recipes, dinner, Eastern European recipes, Easy recipe, Finger food, Istrian cuisine, Istrian dish, Istrian food, Istrian gastronomy, main course, main dish, main meat course, Meat, Mitteleuropean recipes, Slovenian cuisine, Slovenian food, Slovenian gastronomy, Small bites, supper, Balkan dish
1 Comment
LRM_20191009_123138.jpg

Liptauer (Austro-Hungarian paprika spiced cheese spread) recipe

Beans and Sardines
March 09, 2021 by tina oblak in Starters, brunch, Easy recipe, entrée course, healthy mael, Slovenian cuisine, Slovenian food, Slovenian gastronomy, Vegetarian, spreads, Eastern European recipes, Central European recipes, Mitteleuropean recipes, Snacks, Canapés, Finger food, Small bites, Appetizers

Liptauer, pronounced “Lip-tower”, is a simple, flavourful, central European, or Mitteleuropean, well seasoned, paprika spiced cheese spread with a sharp, rich, and deep smoky taste.

Its origin has long been disputed but the name derived from the German name Liptau for the region of Liptov (Hungarian: 'Lipto') in northern Slovakia, a former county in the Austro-Hungarian Empire.

Nowadays, Liptauer spread appears in numerous variations throughout many other European countries, and is a part of Slovak, Hungarian, Slovenian, Italian (some north-east regions) and Austrian cuisine, where it is commonly served as a popular dish in wine taverns, and as a snack for kids during break time in schools.

Despite extensive variations on the recipe, as many families have their own unique version of Liptauer, they all have in common the main ingredient which is cheese that can vary from Quark, Bryndza (a sheep milk cheese) cream cheese, cottage or goat cheese and powdered sweet paprika giving a spread a beautiful colour.

It is great for vegetarians and you can change and play around with the quantities of some ingredients to suit your taste.

Here, I will share with you the recipe my maternal Grandma Iva used to make. This dish was a constant part of my childhood and it really does bring back some wonderful memories as it was made on numerous occasions, especially when the family got together to mark special festivals like Carnival (before Lent began), Easter, Christmas, and All Saint's Day, or family celebrations like birthdays and anniversaries.

LRM_20191009_123656 (1).jpg

My grandmother would put the spread in the middle of the table with freshly made home made bread, and everyone would help themselves before the big meal ahead. Along with the spread, there would be a selection of cold meats, different types of cheeses, and a variety of pickles. We children often got so stuffed with this delicacy we did not get to the first course! We just simply could not resist the fresh spread on a crunchy piece of bread. It is a great appetizer from Mitteleuropa to start the children on!

LRM_20191009_115935.jpg

Liptauer has a very versatile use. Traditionally served as part of cheese and charcuterie board and hard boiled eggs.

It is typically eaten as an open sandwich, or on toast, crackers and bagels. It is a great alternative base for a variety of sandwiches, and can be used as canapè spread.

You can serve it with drinks, pretzels, and a selection of pickles, cheese sticks, and really whatever you fancy.

I also serve them as a canapè with drinks, and they do go down as a real treat. Just take a single round of thinly sliced piece of German or Hungarian style salami, spread a bit of Liptauer and roll it into a cigar shape. And there you have it, salami roll ups.

LRM_20191015_110326.jpg

Ingredients

  • 250g curd cheese (was difficult to find, now available in most supermarkets and Polish food stores)

  • 50g butter (soft at room temperature)

  • 1 Tsp Dijon mustard

  • 1 Tsp powdered sweet Hungarian paprika

  • 1 Tsp caraway seeds (crashed well with pestle and mortar)

  • 2 Tbsp pickled gherkins, cornichons or pickled cucumber (very finely chopped)

  • 2 Tbsp onions (very finely chopped)

  • sea salt, a pinch or to taste

  • freshly ground black pepper, a pinch or to taste

View fullsize LRM_20191008_110825.jpg
View fullsize LRM_20191008_135836.jpg

Method

Put all the ingredients in a bowl. Mix and combine well all the ingredients. Serve as a cold starter.

LRM_20191009_103405.jpg

You can keep the spread in the fridge for up to a week in an airtight container.

Just a thought

This is a great cold starter. If you can, try to prepare it in advance, and ahead of a time to allow all the ingredients and flavours to absorb well.

Wine suggestion

Traminer Aromatico DOC 2019 by Sirch, Friuli Colli Orientali.

March 09, 2021 /tina oblak
Sweet Hungarian paprika, Liptauer (Austro-Hungarian paprika spiced cheese spread) recipe, Austro-Hungarian paprika spiced cheese spread recipe, Liptauer spread, Eastern European cheese spreads, Eastern European cheese spread, sandwich spread, canapé spread, vegetarian curd cheese spread, Liptauer
Starters, brunch, Easy recipe, entrée course, healthy mael, Slovenian cuisine, Slovenian food, Slovenian gastronomy, Vegetarian, spreads, Eastern European recipes, Central European recipes, Mitteleuropean recipes, Snacks, Canapés, Finger food, Small bites, Appetizers
1 Comment
  • Newer
  • Older