Beans and Sardines

  • Home
  • About
  • Recipe of the week
  • Recipes
  • Wines
  • Contact

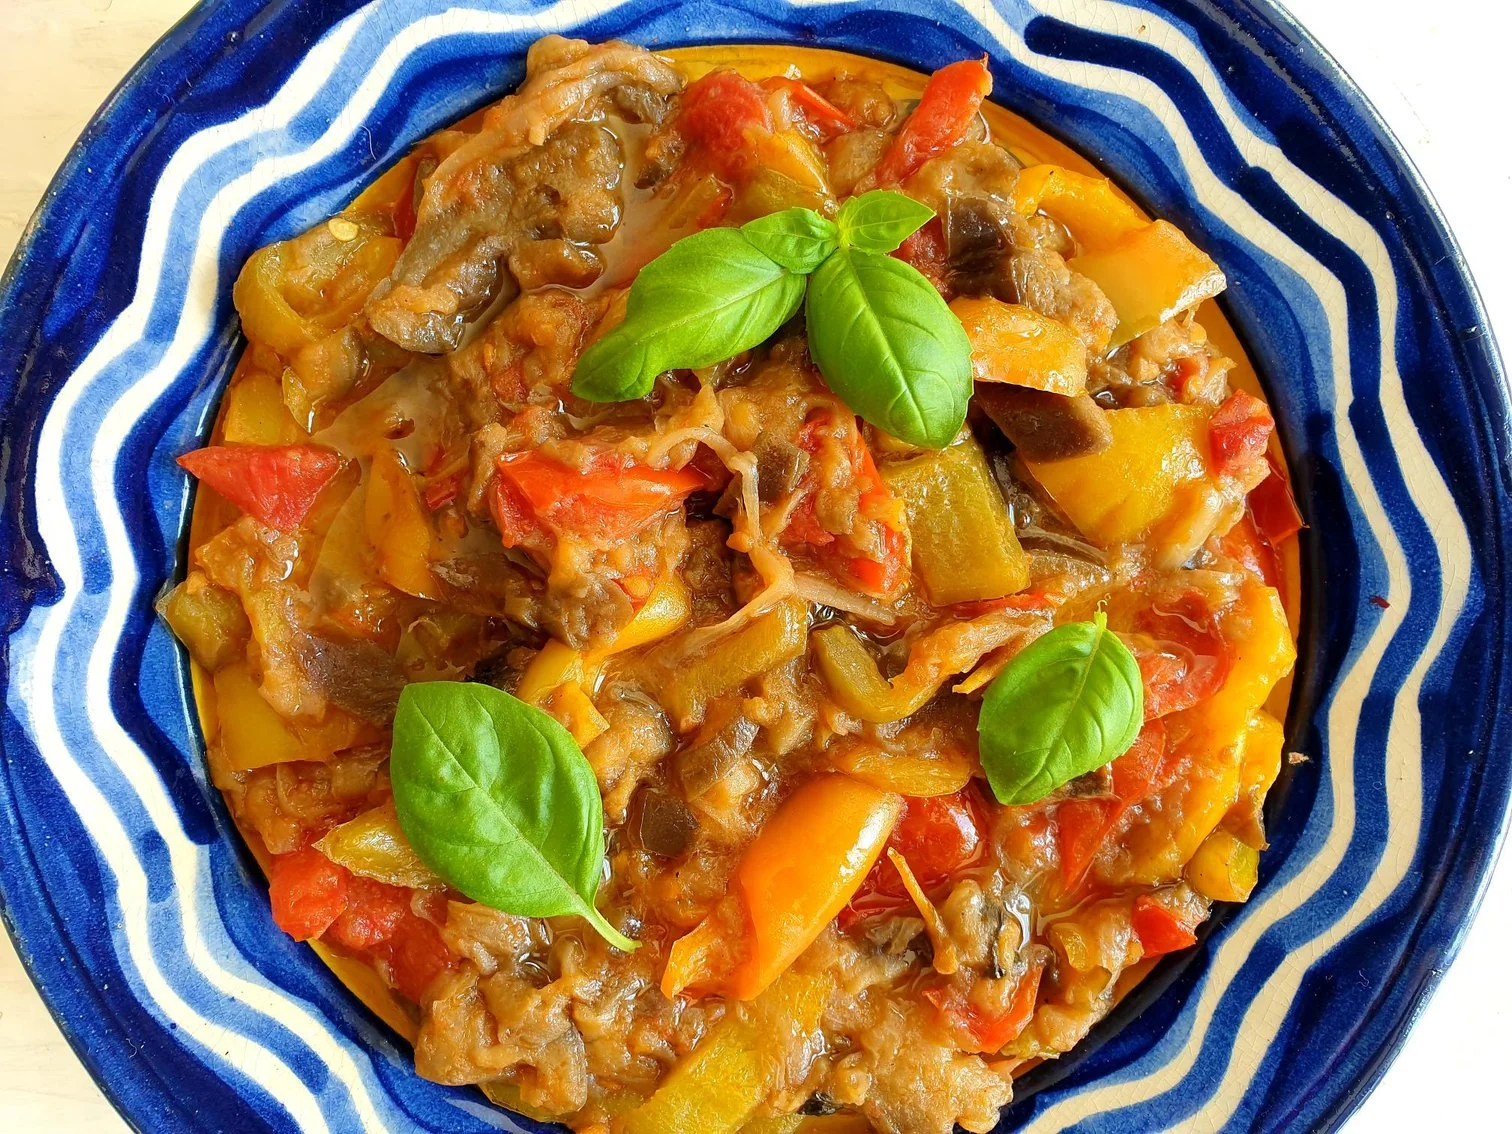
Peperonata Istrian style Recipe

Beans and Sardines
August 10, 2022 by tina oblak in Adriatic Recipe, brunch, child friendly dish, child friendly meal, dinner, Easy recipe, entrée course, family friendly dish, family friendly meal, Healthy, healthy mael, Istrian cuisine, Istrian dish, Istrian food, Istrian gastronomy, light meal, main course, main dish, main vegetarian dish, main vegetarian meal, Nutritious, Nutritious dish, one pot meal, Rustic dish, Side Dishes, simple recipe, Slovenian cuisine, Slovenian food, Slovenian gastronomy, Starters, stew, summer dish, summer recipe, supper, Vegan, Vegetable side dish, Vegetables, Vegetarian, vegetarian summer stew, Venetian dish

This quintessentially summer dish gets devoured and seems to be a real hit every single time, it is a very “practical” dish, as it usually prepared in advance, and takes central stage on the tables of the locals back home on the Slovenian coast, where during the summer months the heat can be terrible but it is also during this time of the year that the ingredients for this dish are most abundant and taste their best.

Peperonata is cooked by the locals during the fresh, cooler, hours of the day, usually early in the morning or in the evening when it cools down a bit (there is a different rhythm of life, a different way of doing things, when you live in a climate that can regularly be very hot).

Moreover, better cooking follows this different, summer, rhythm of daily activities, since the following day the dish tastes even better as all the ingredients have a chance to mingle together!

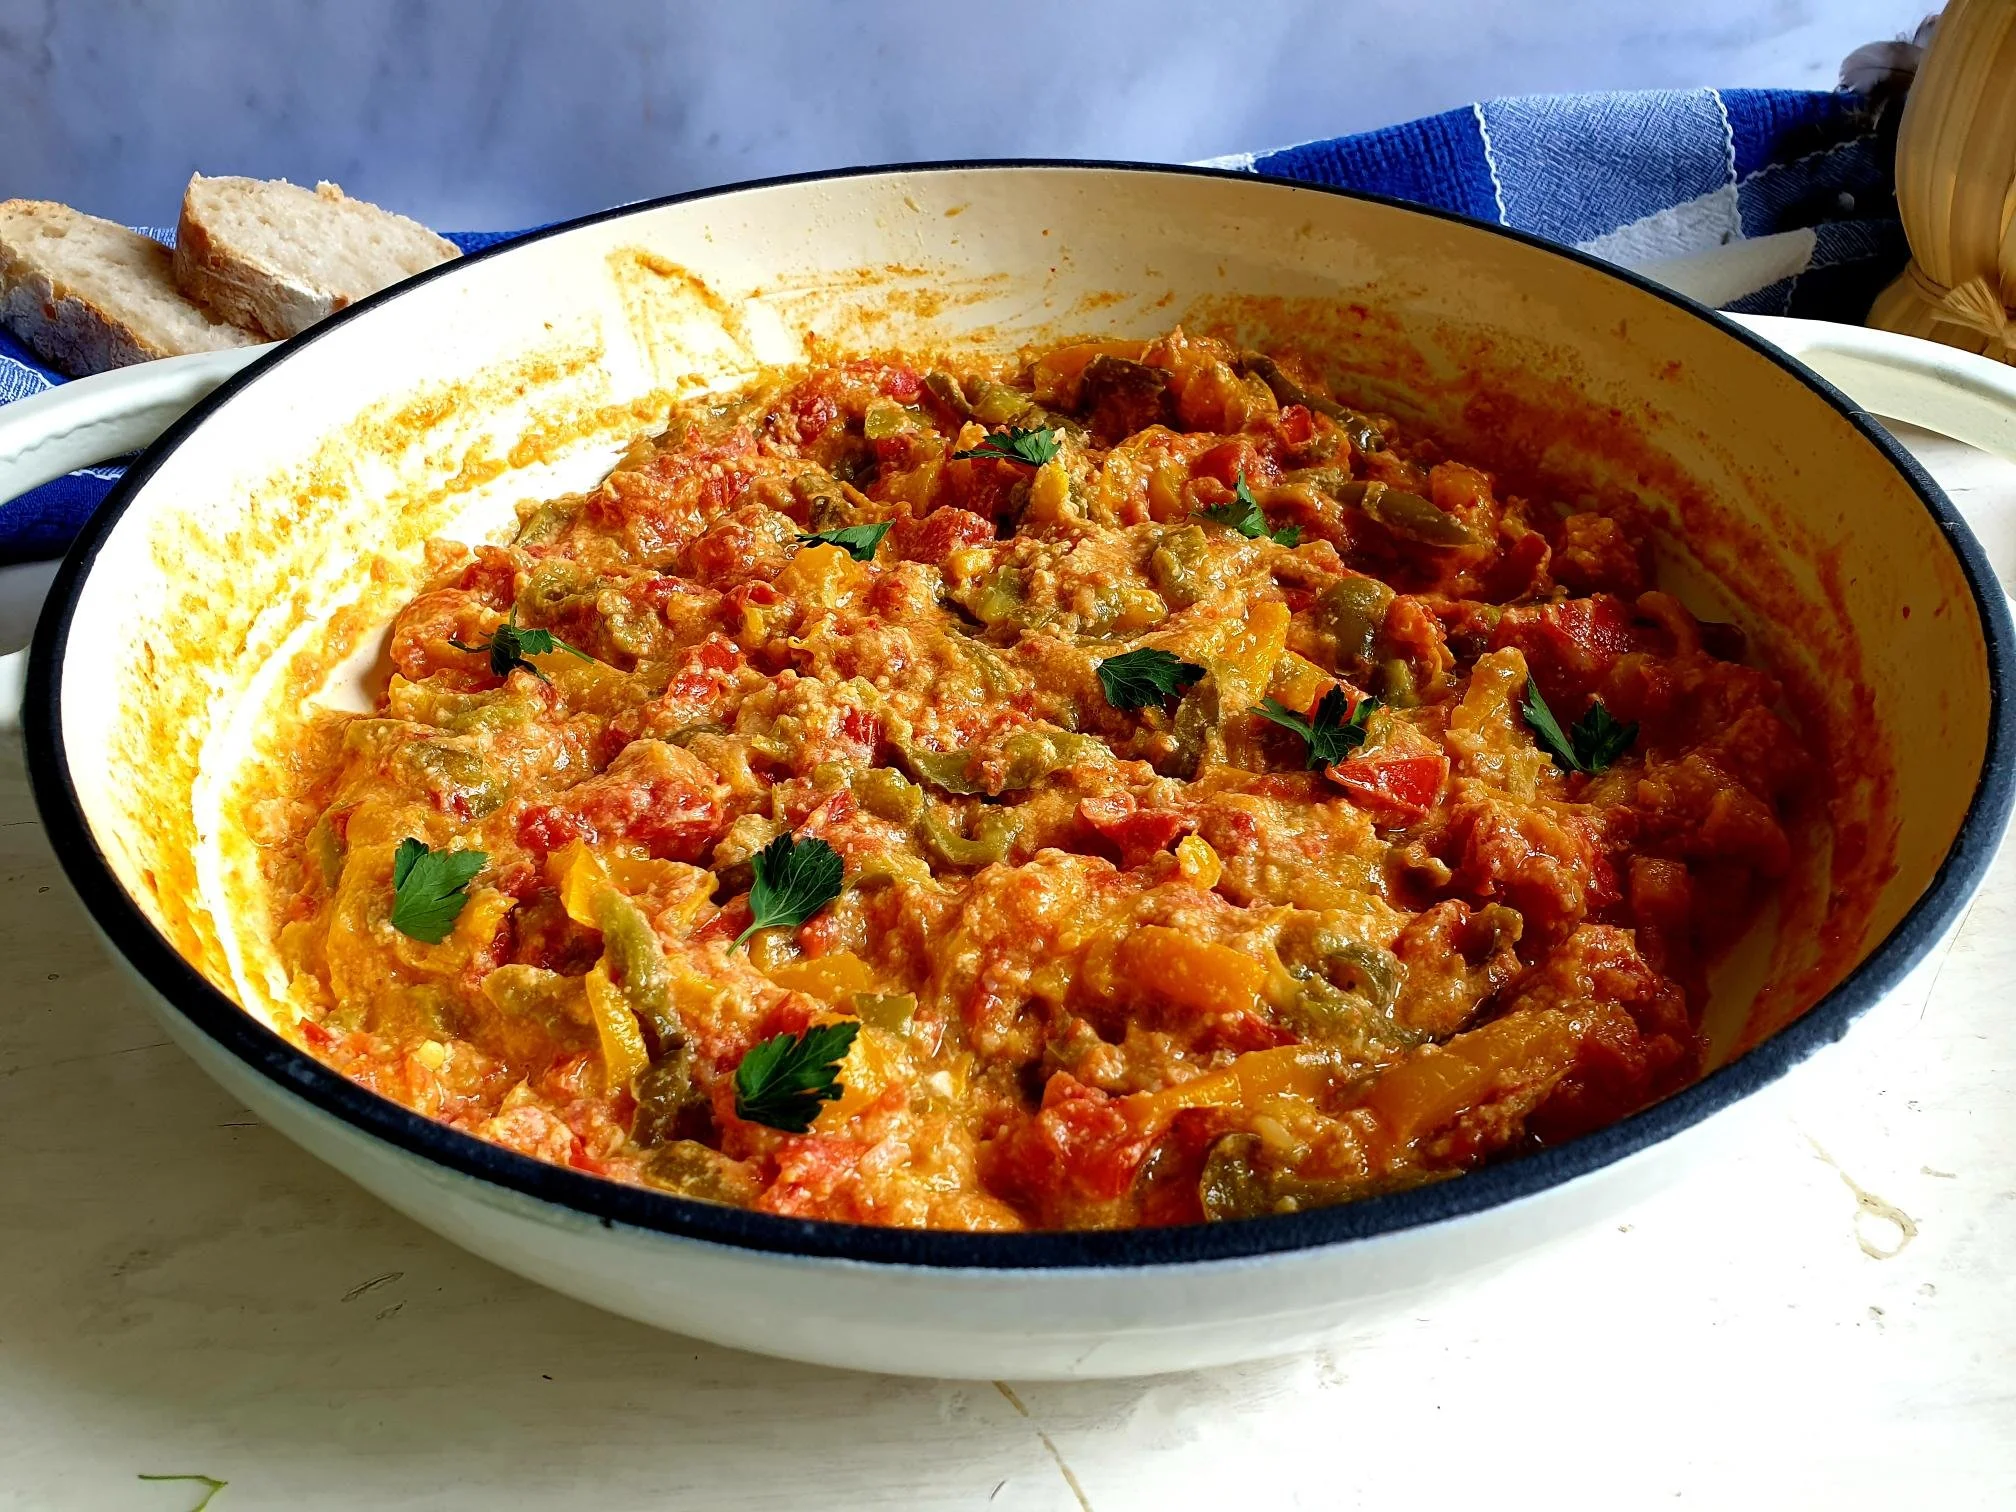
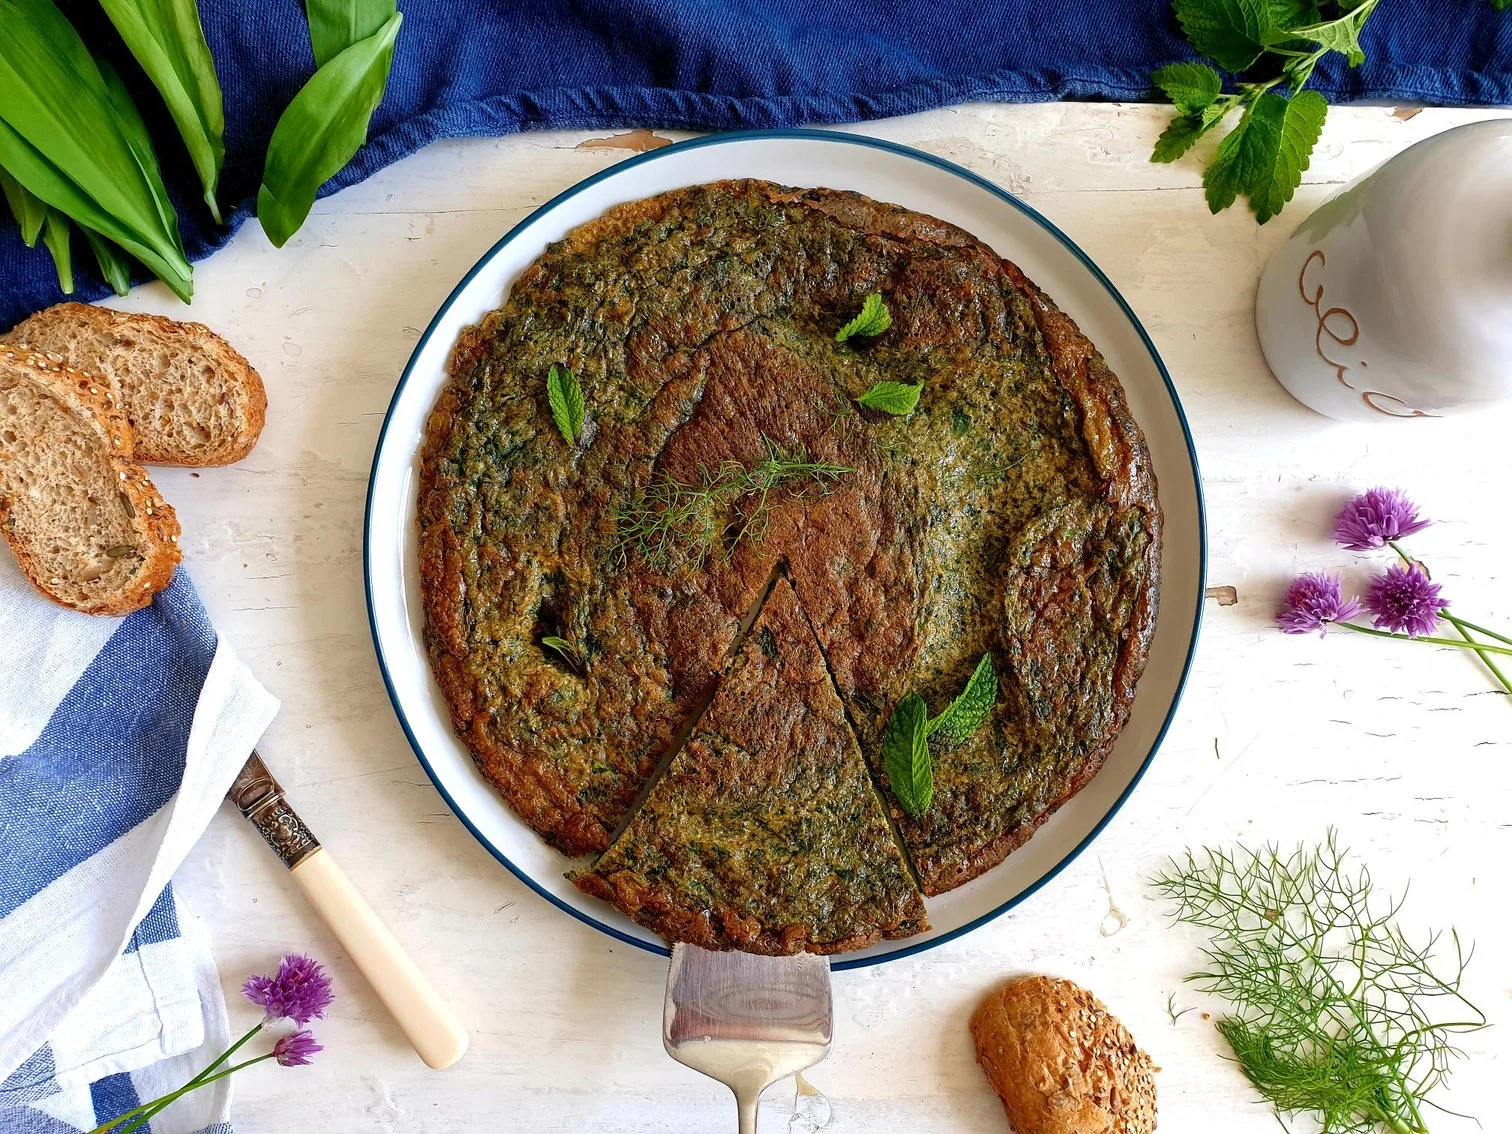
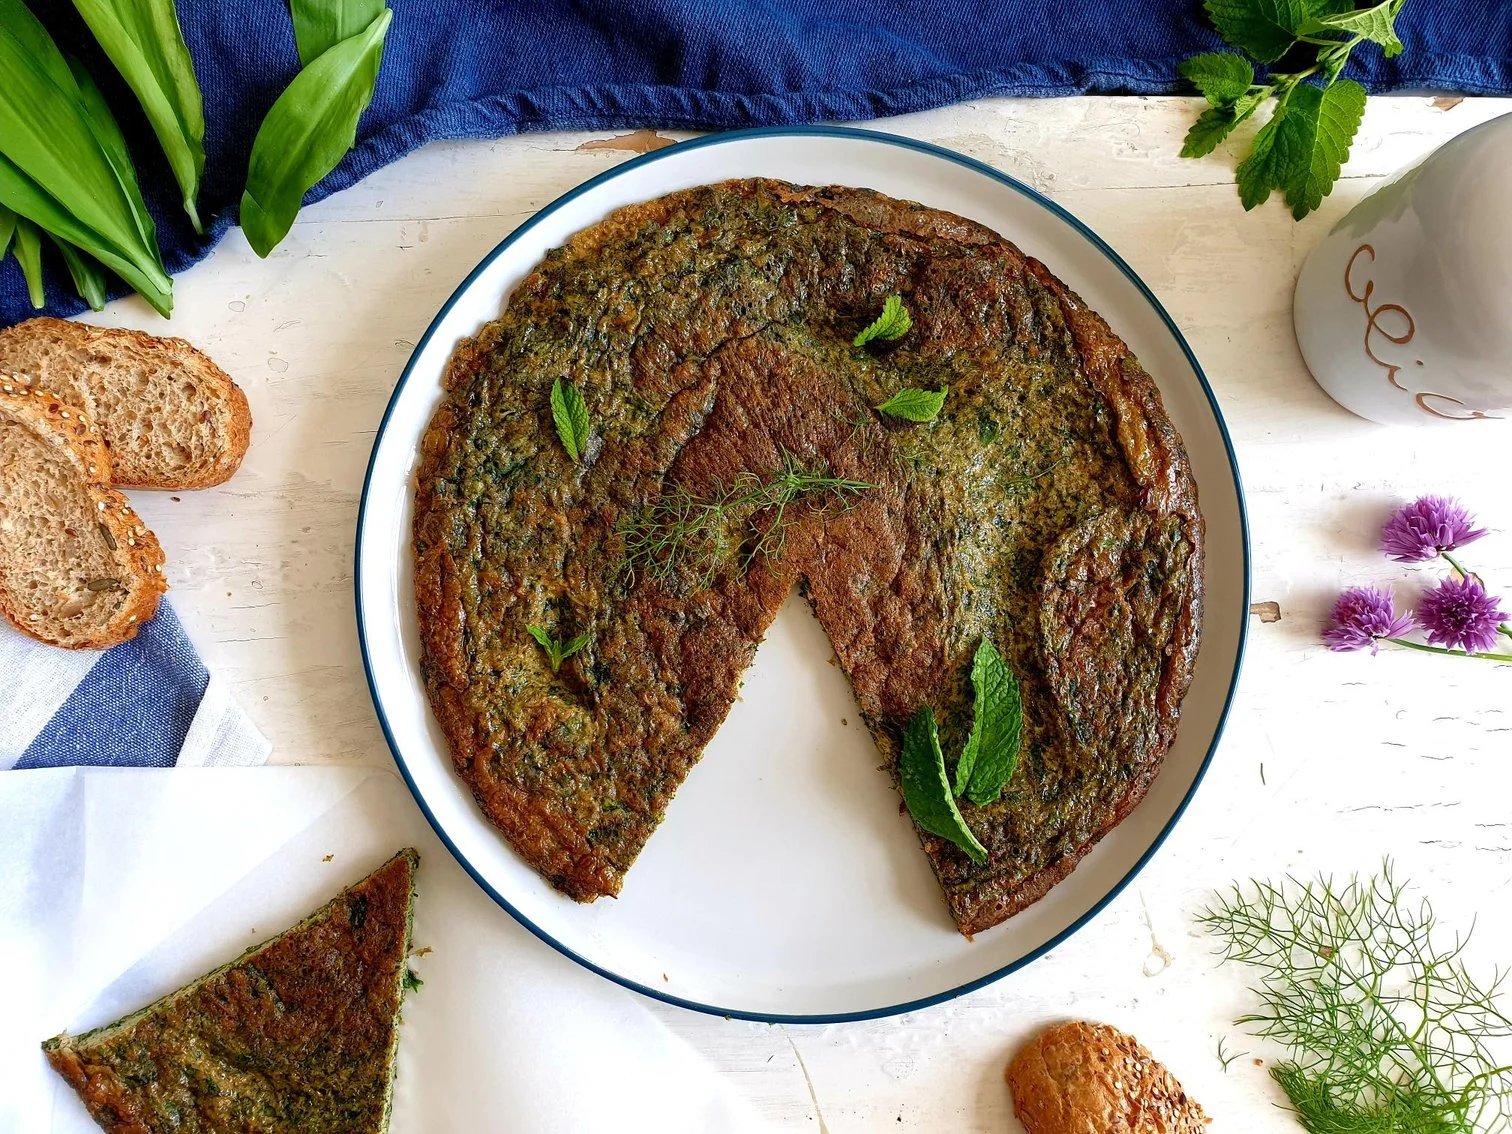
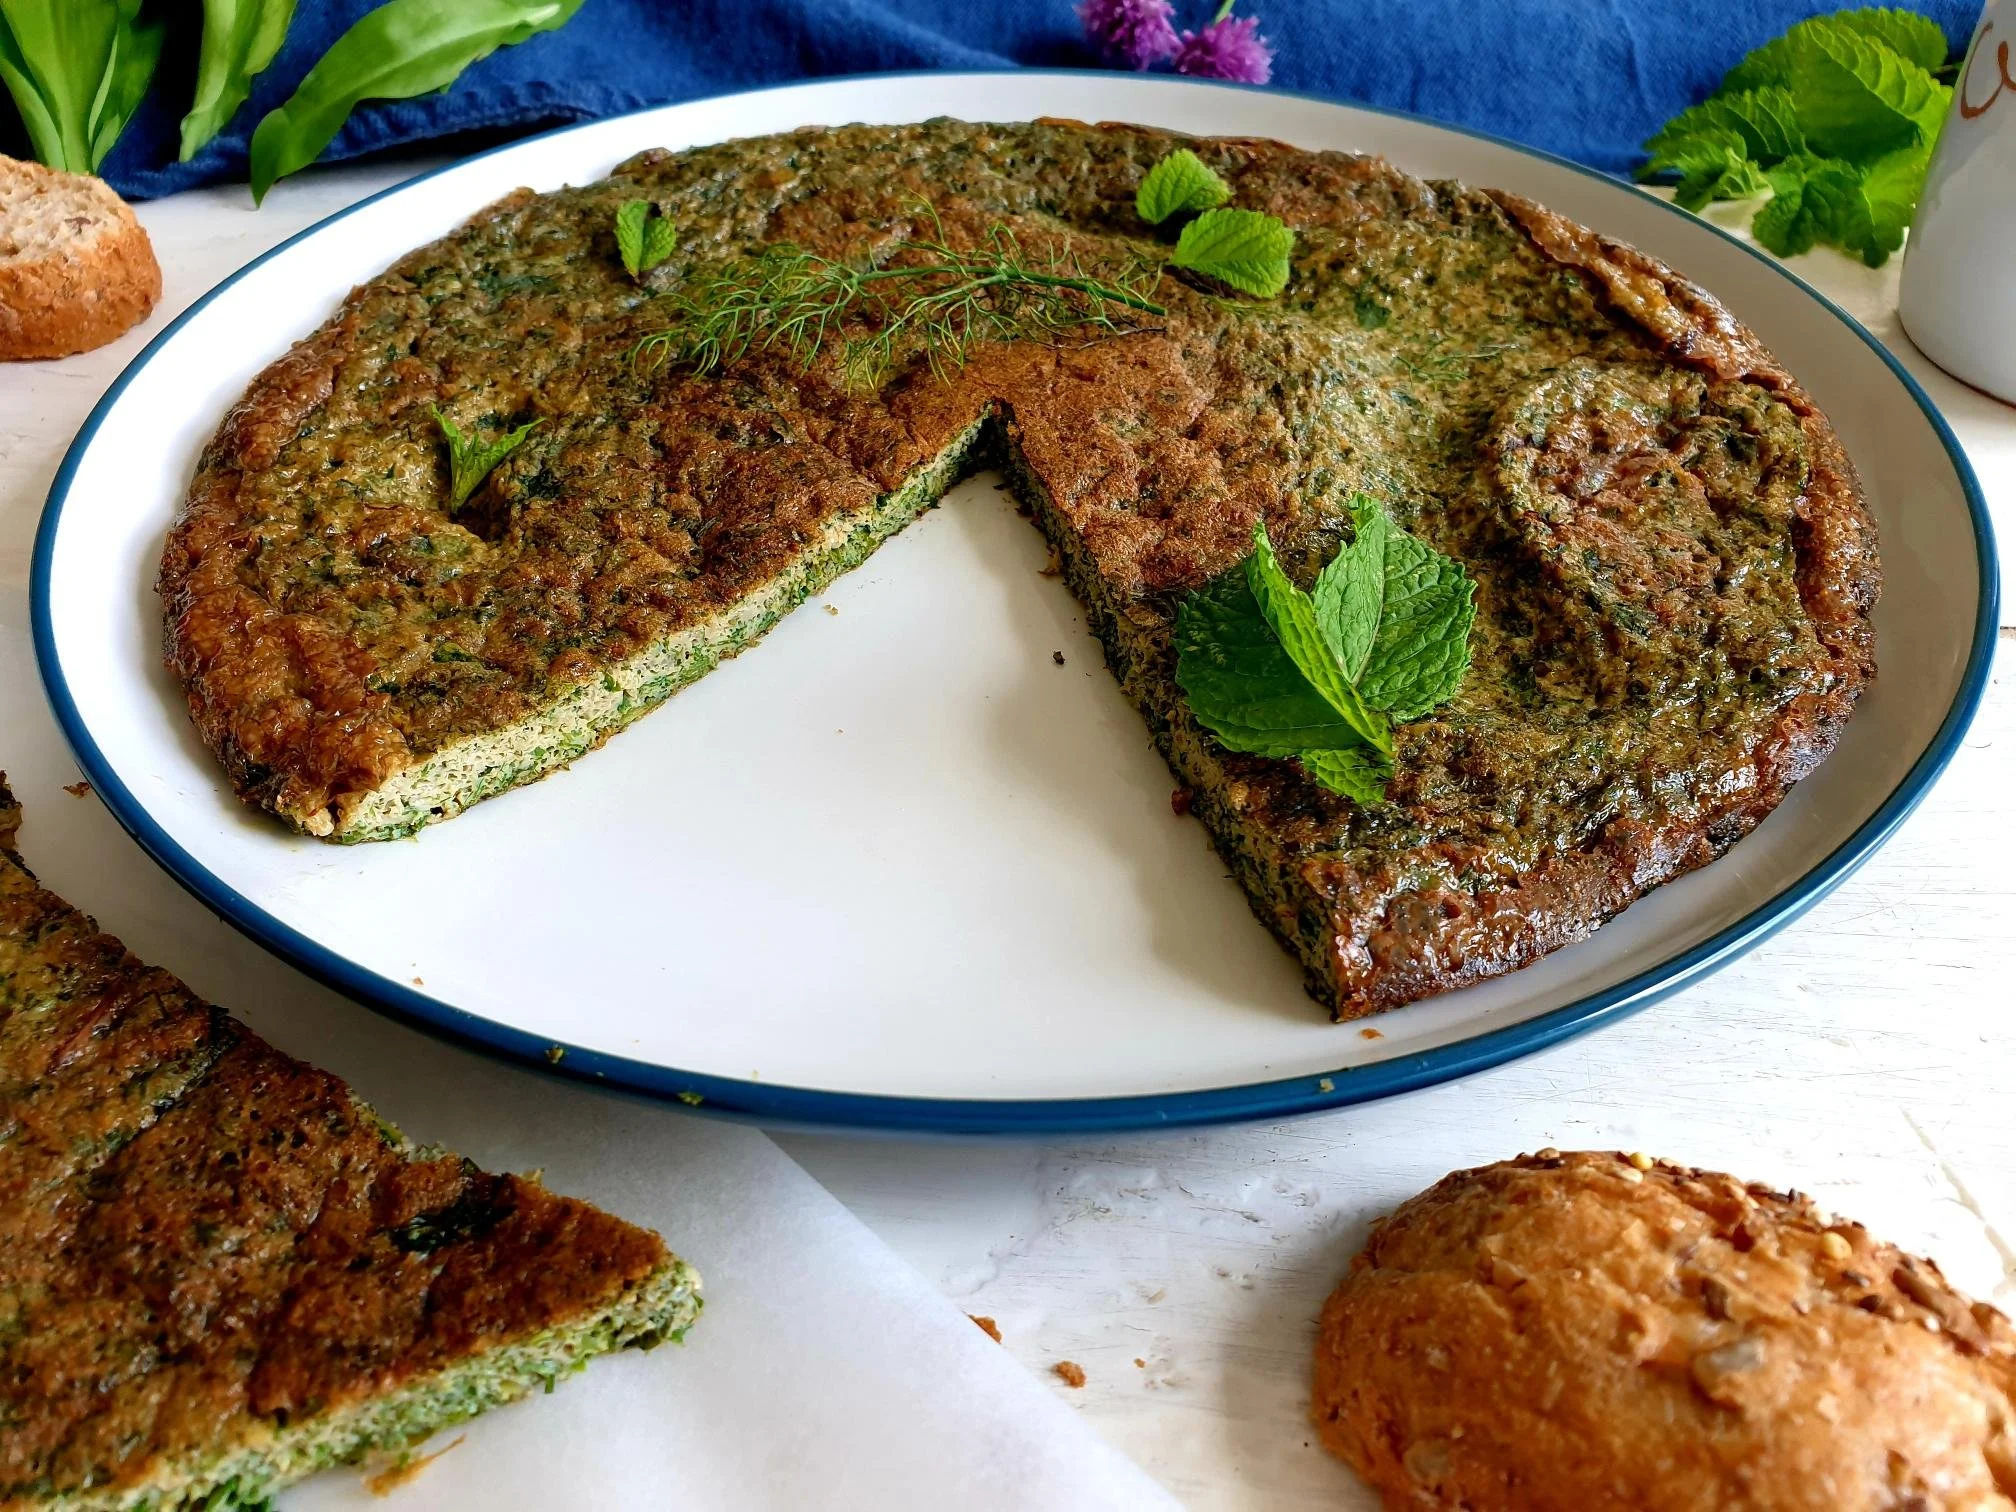
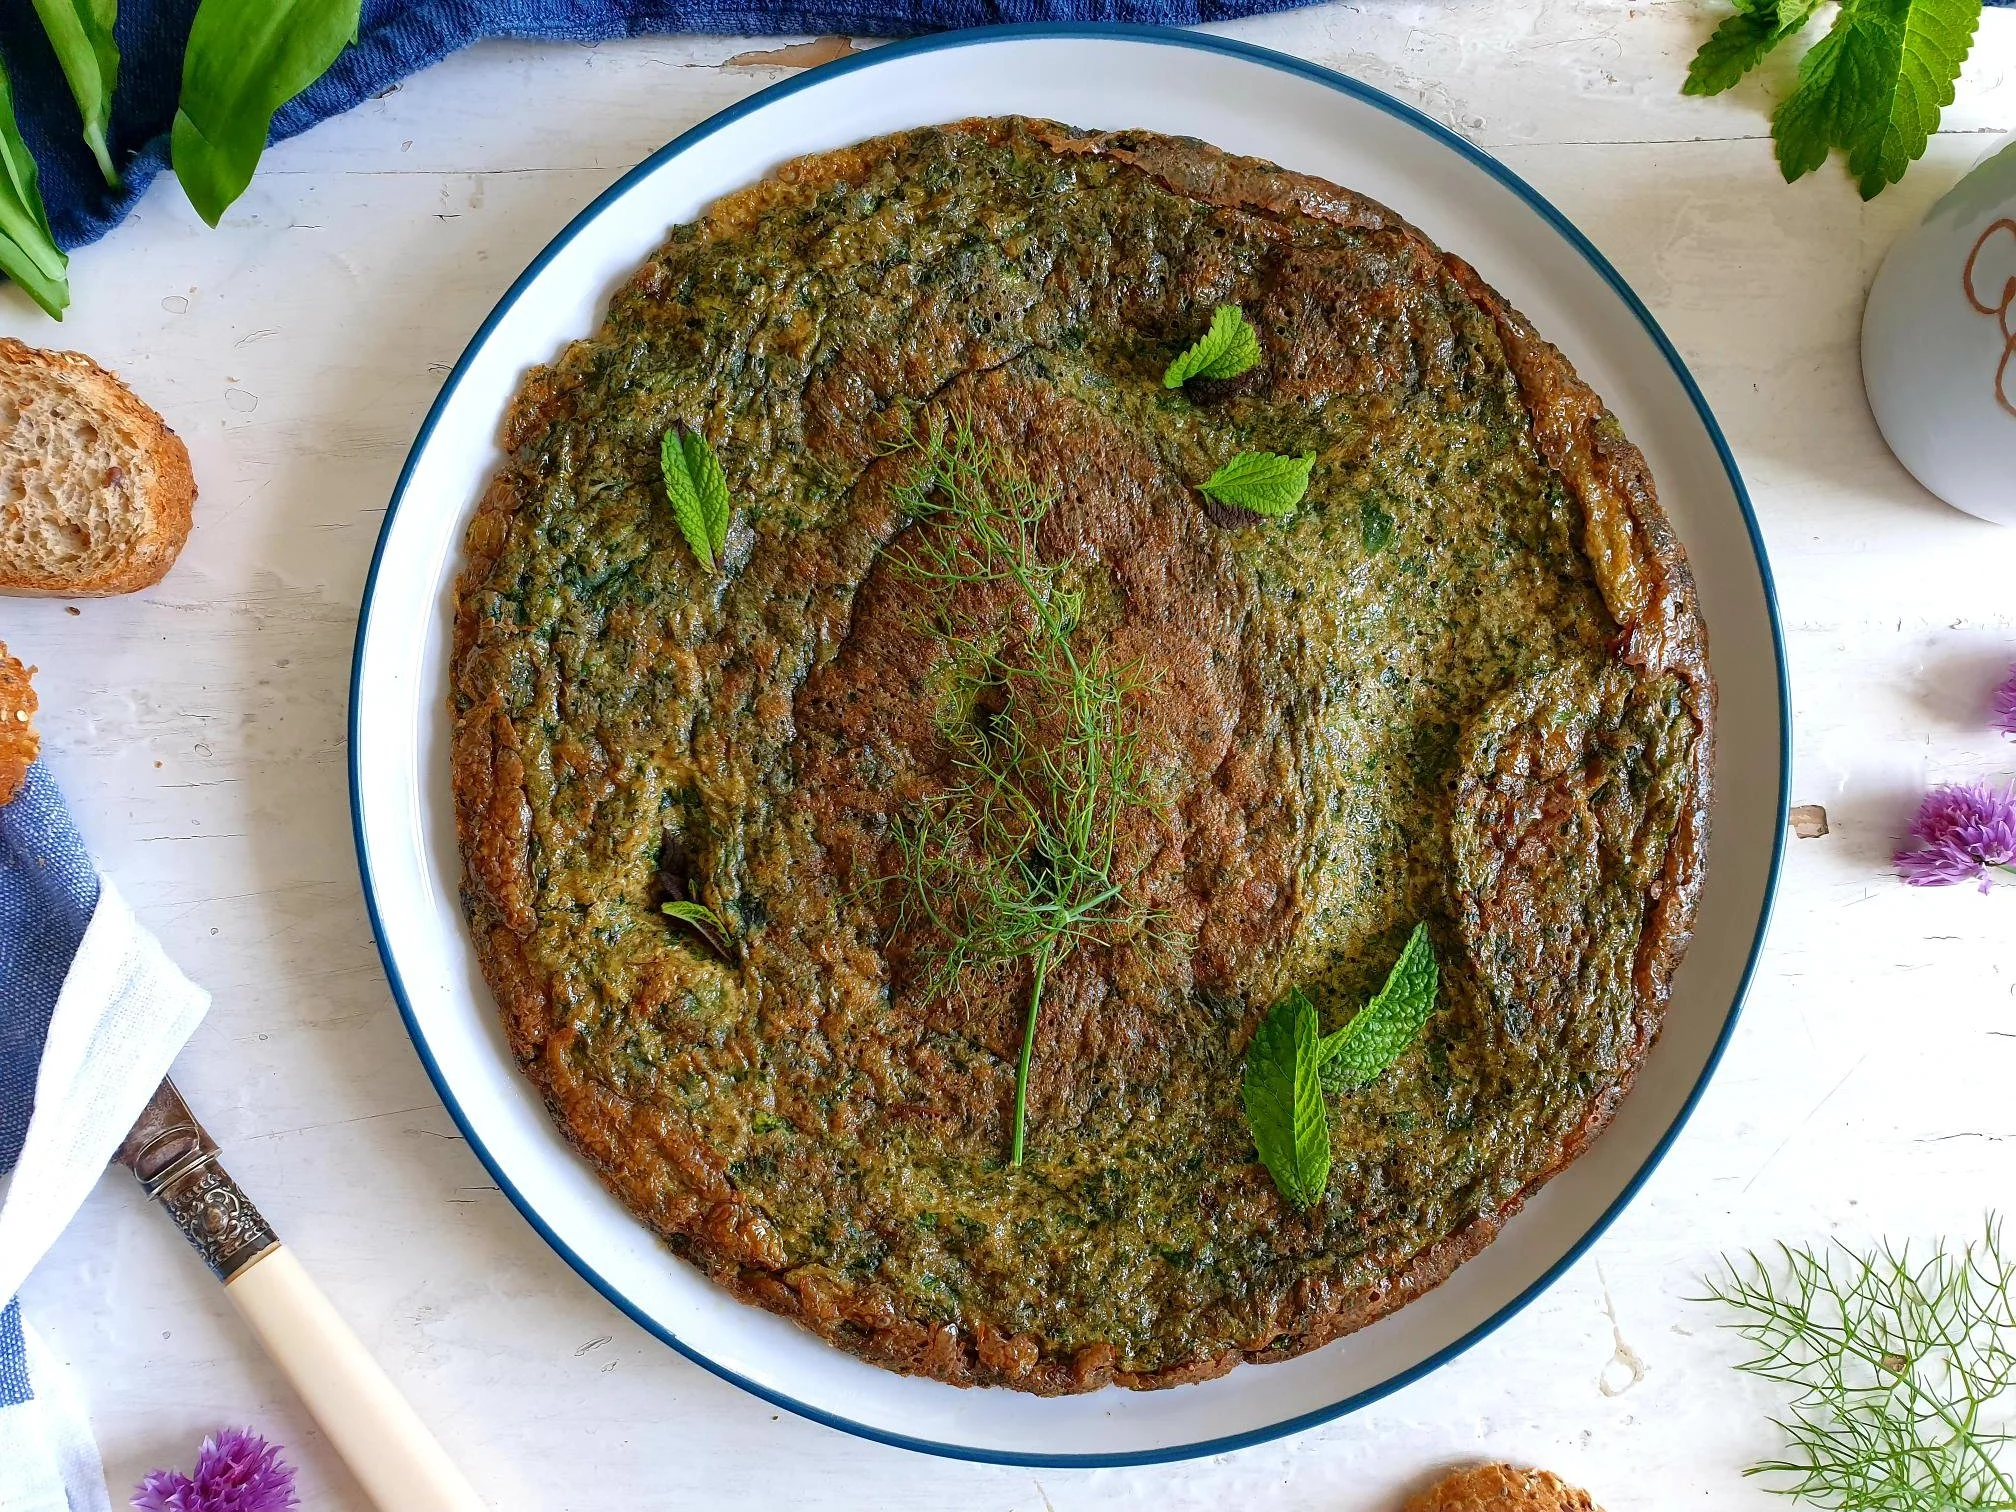
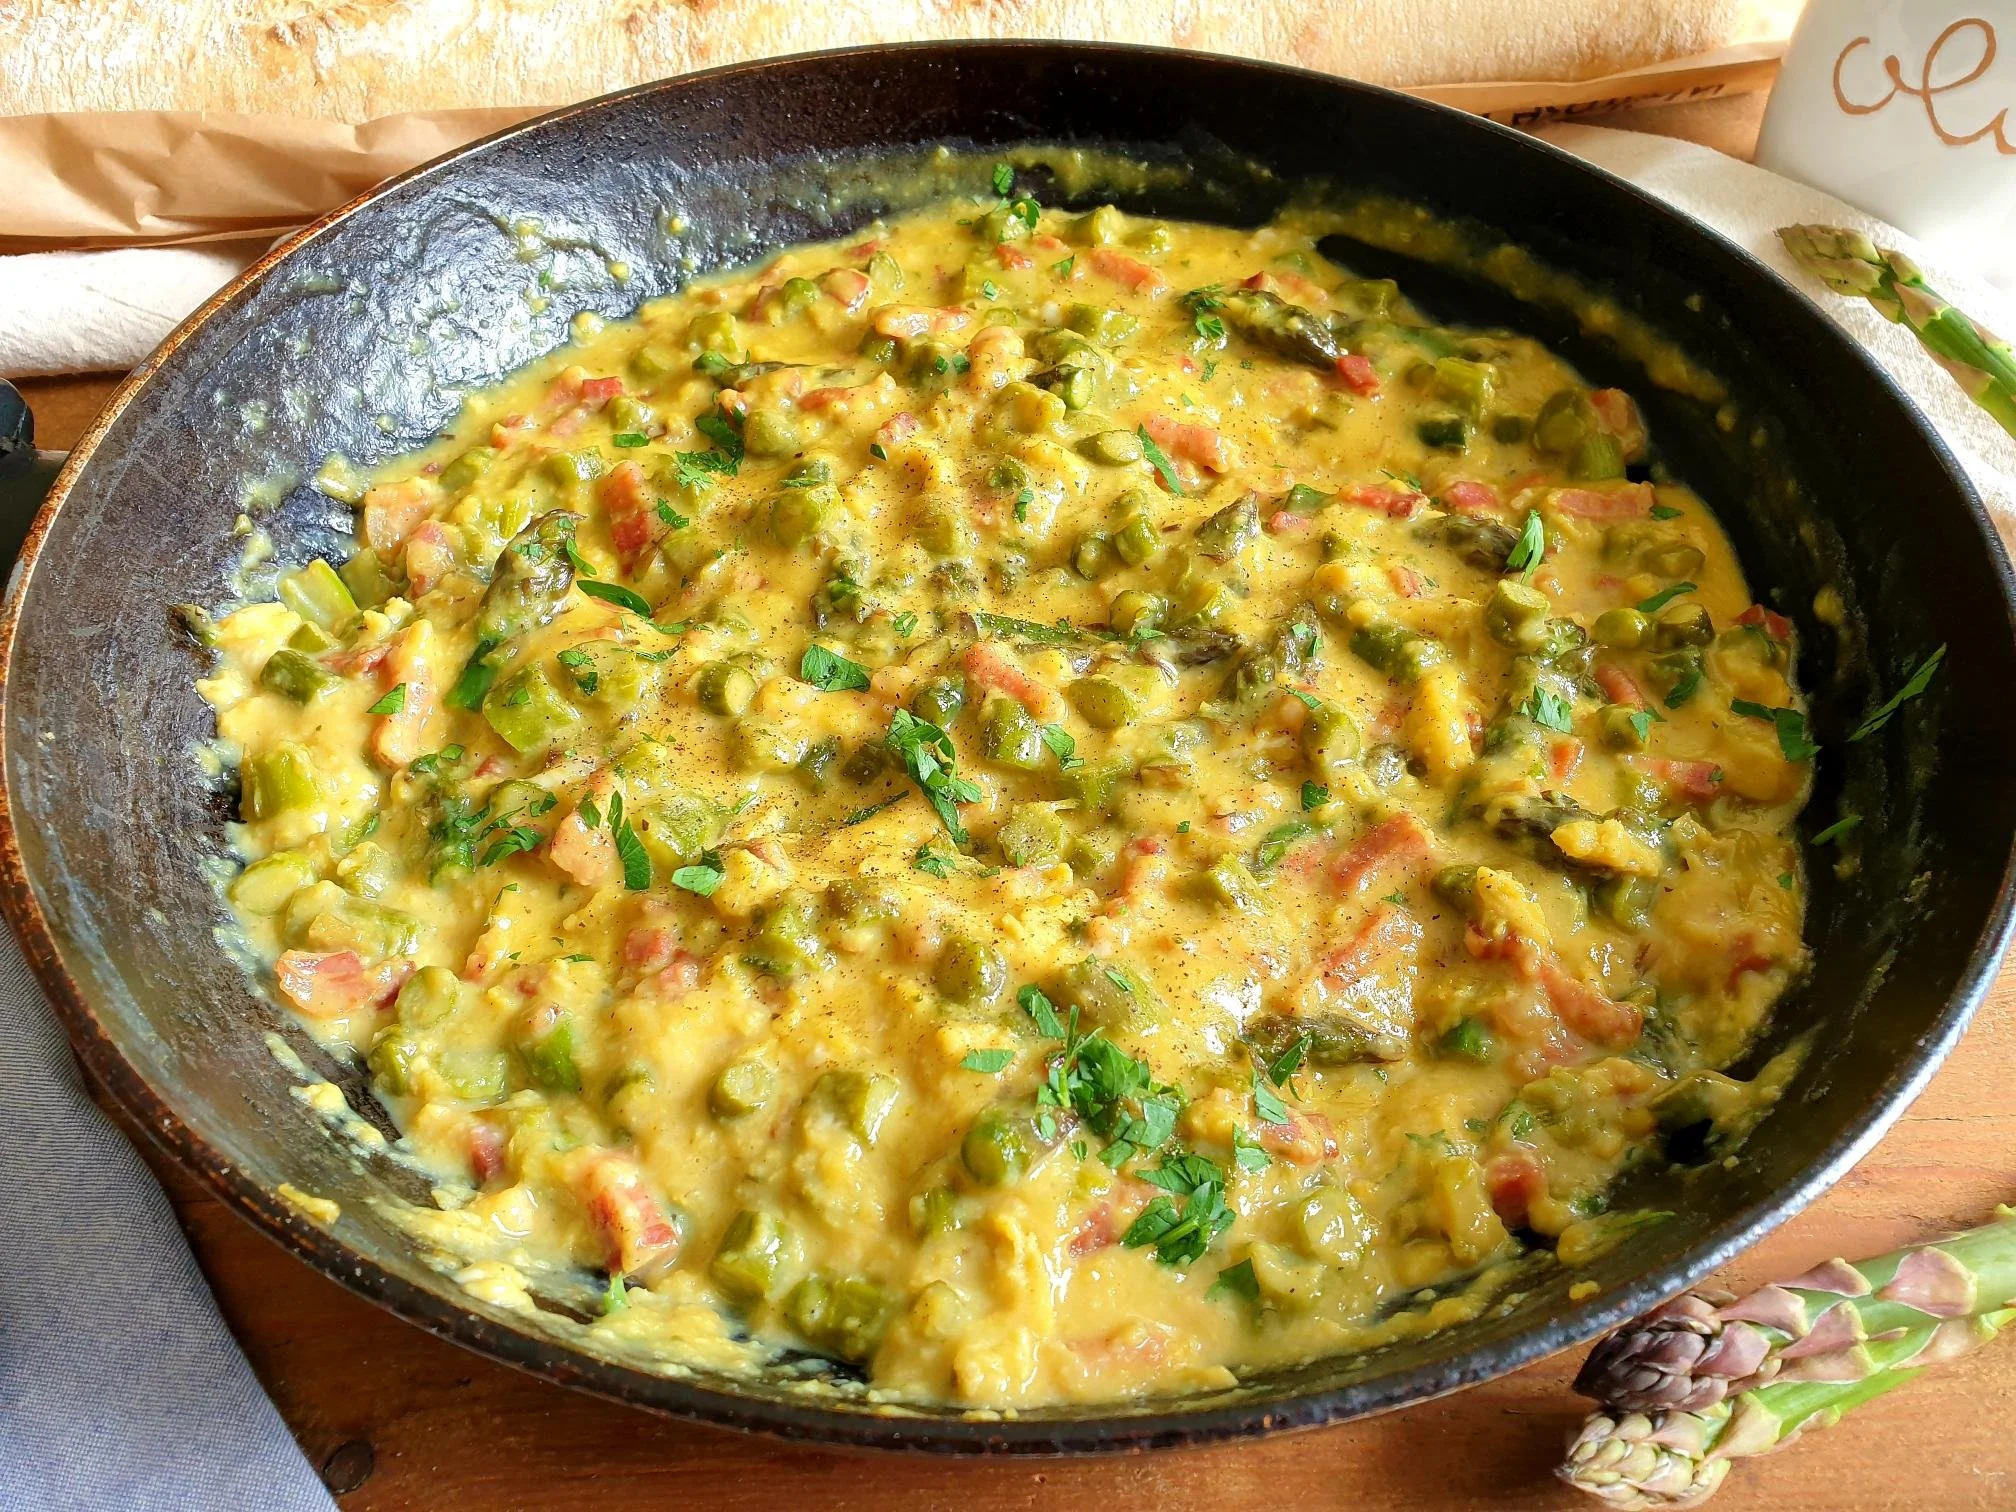
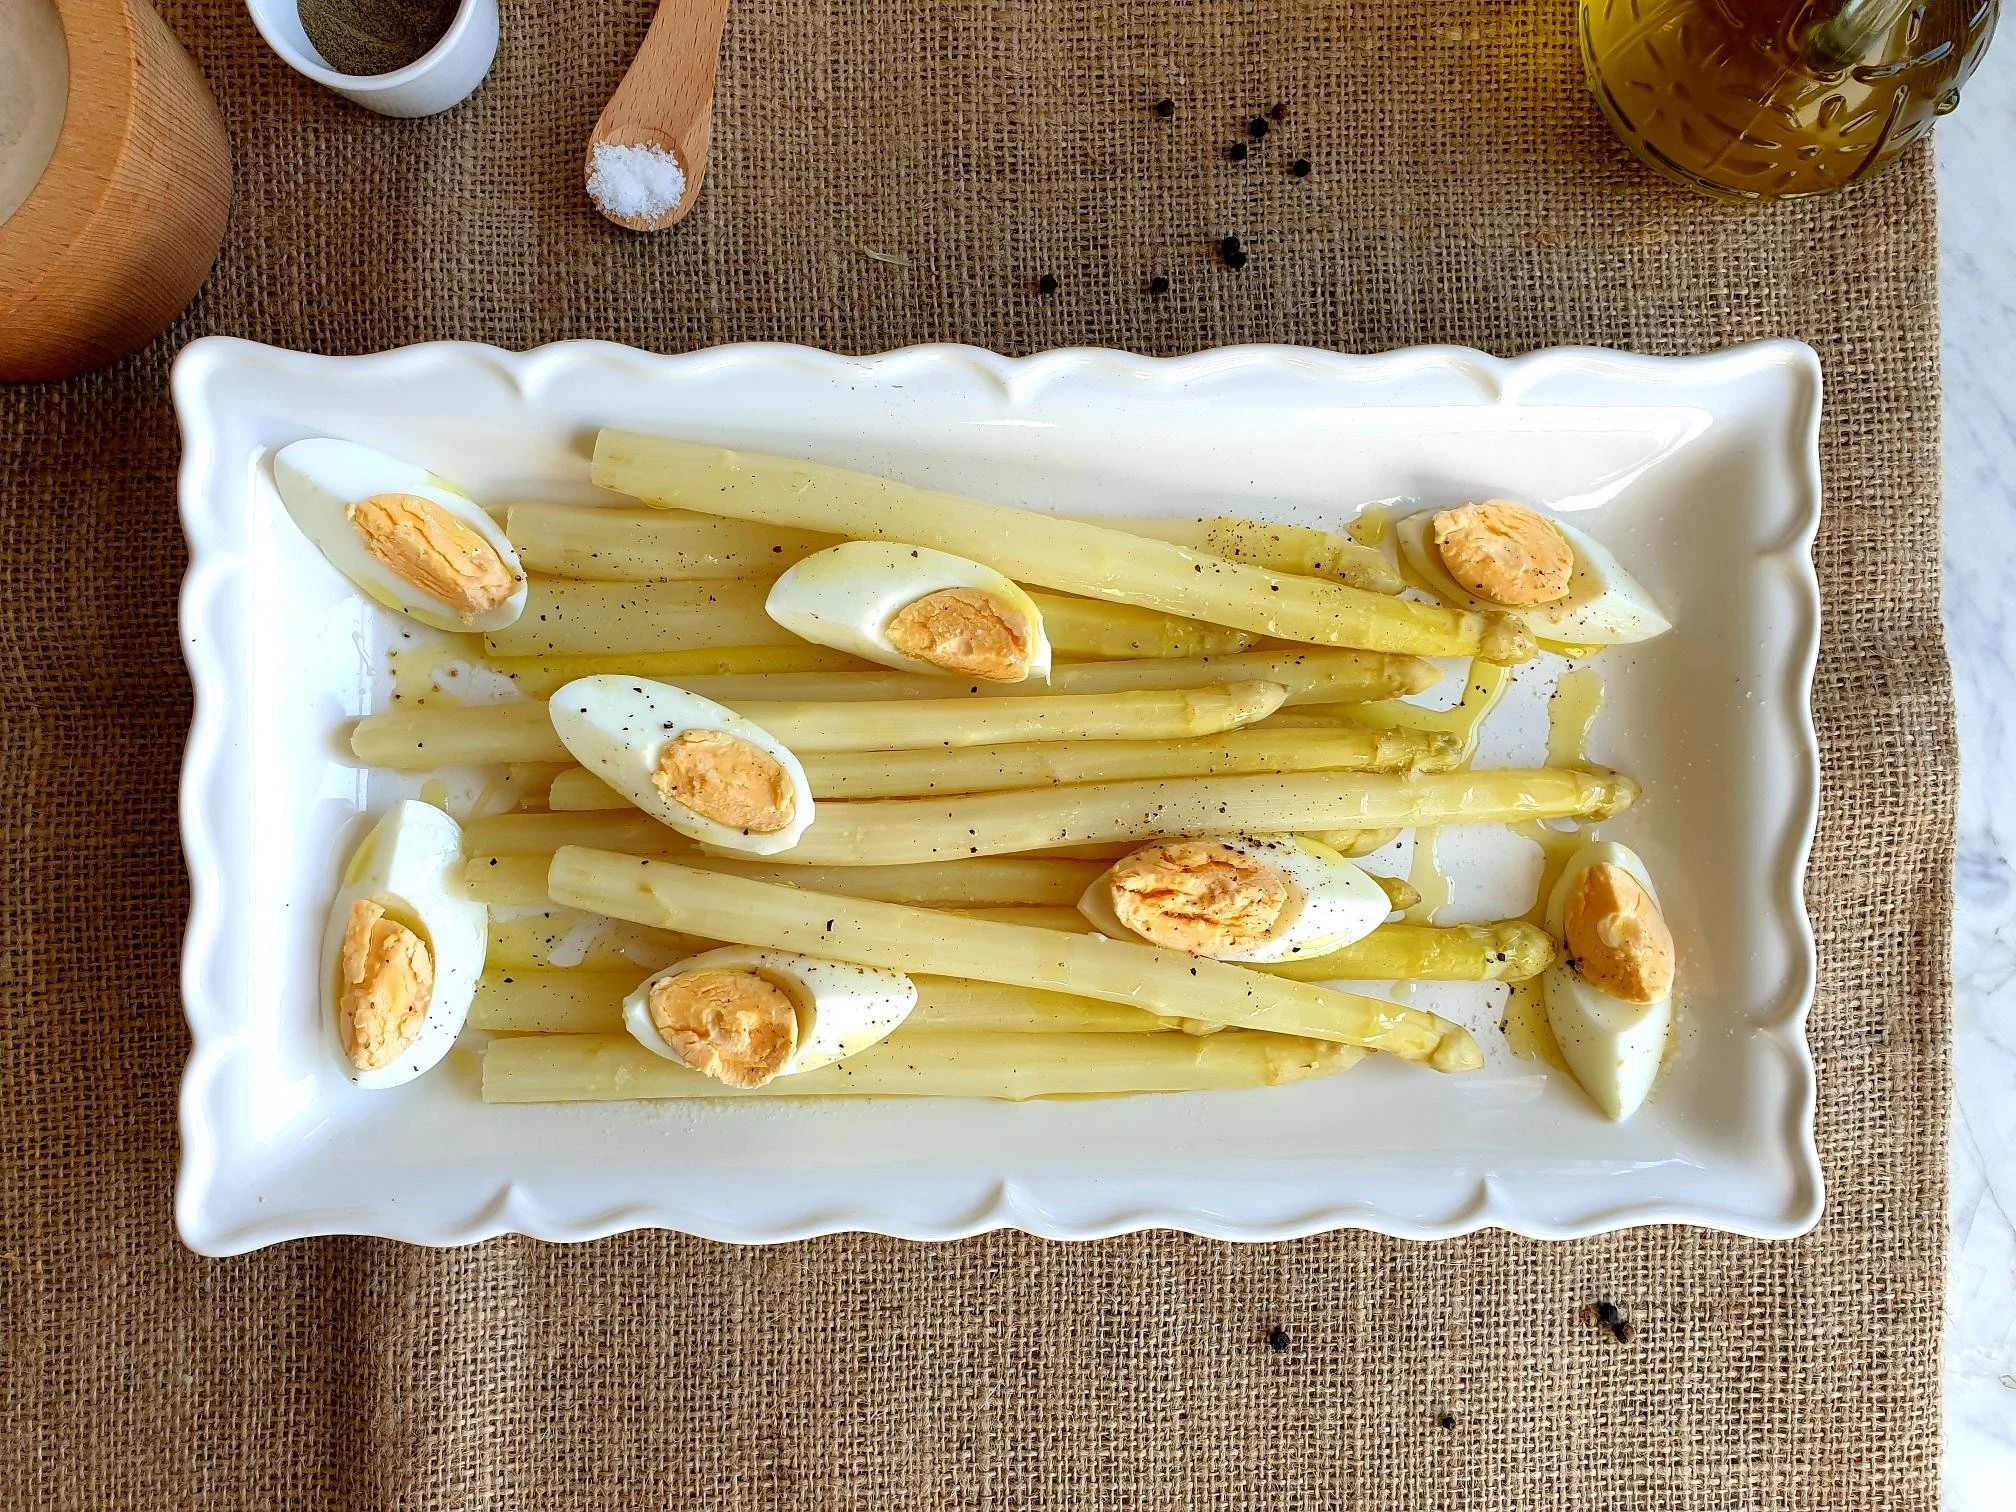
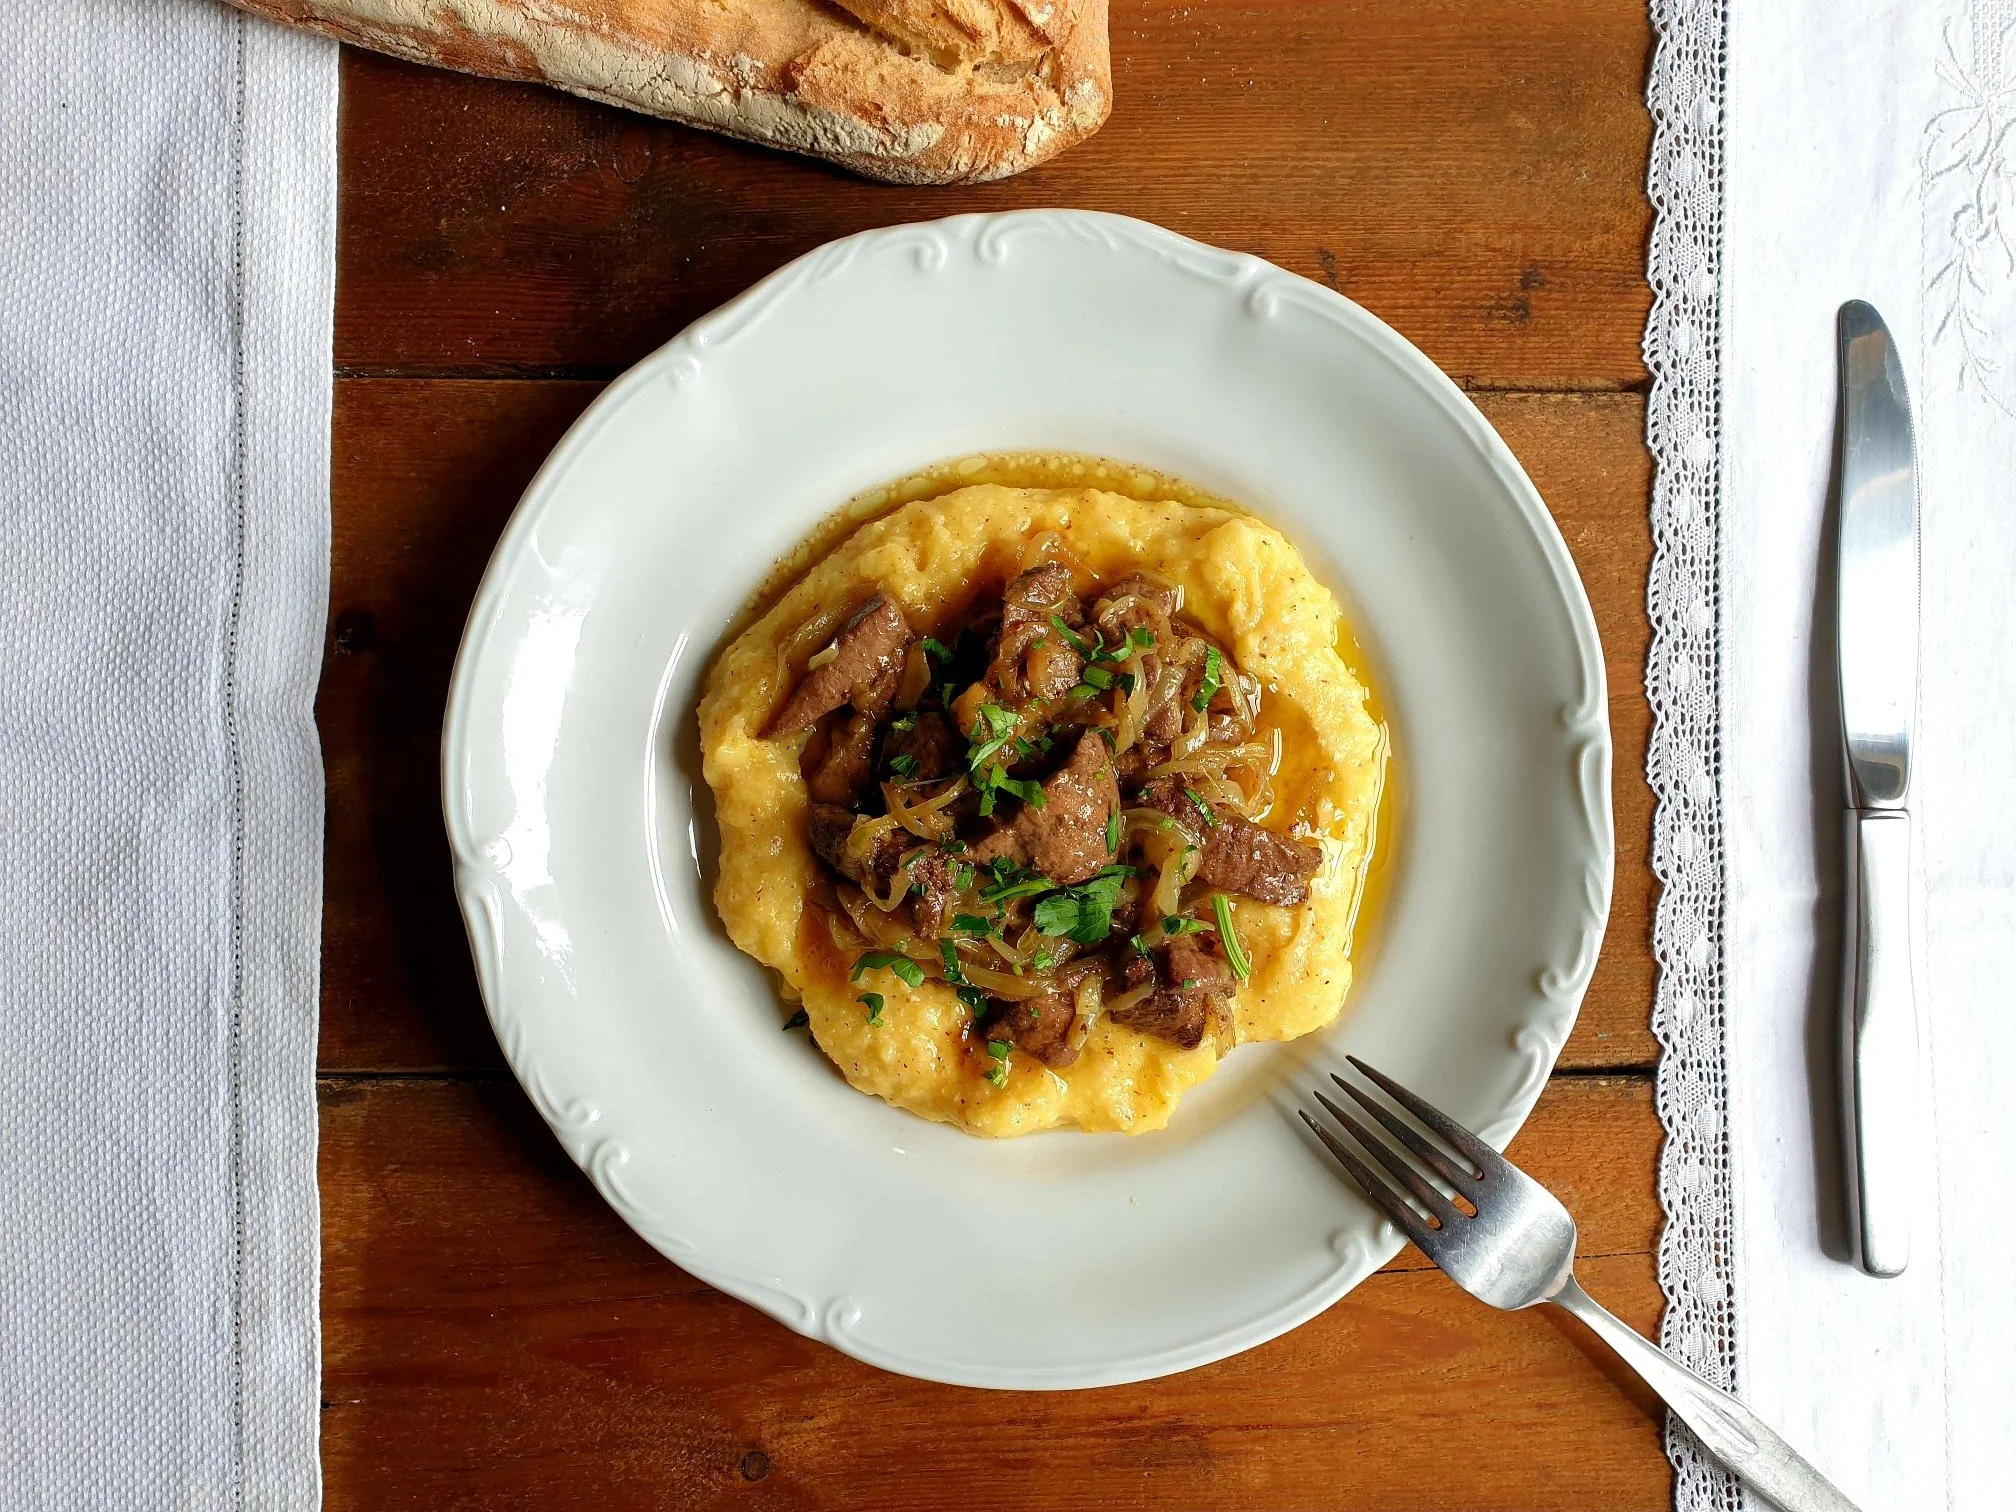
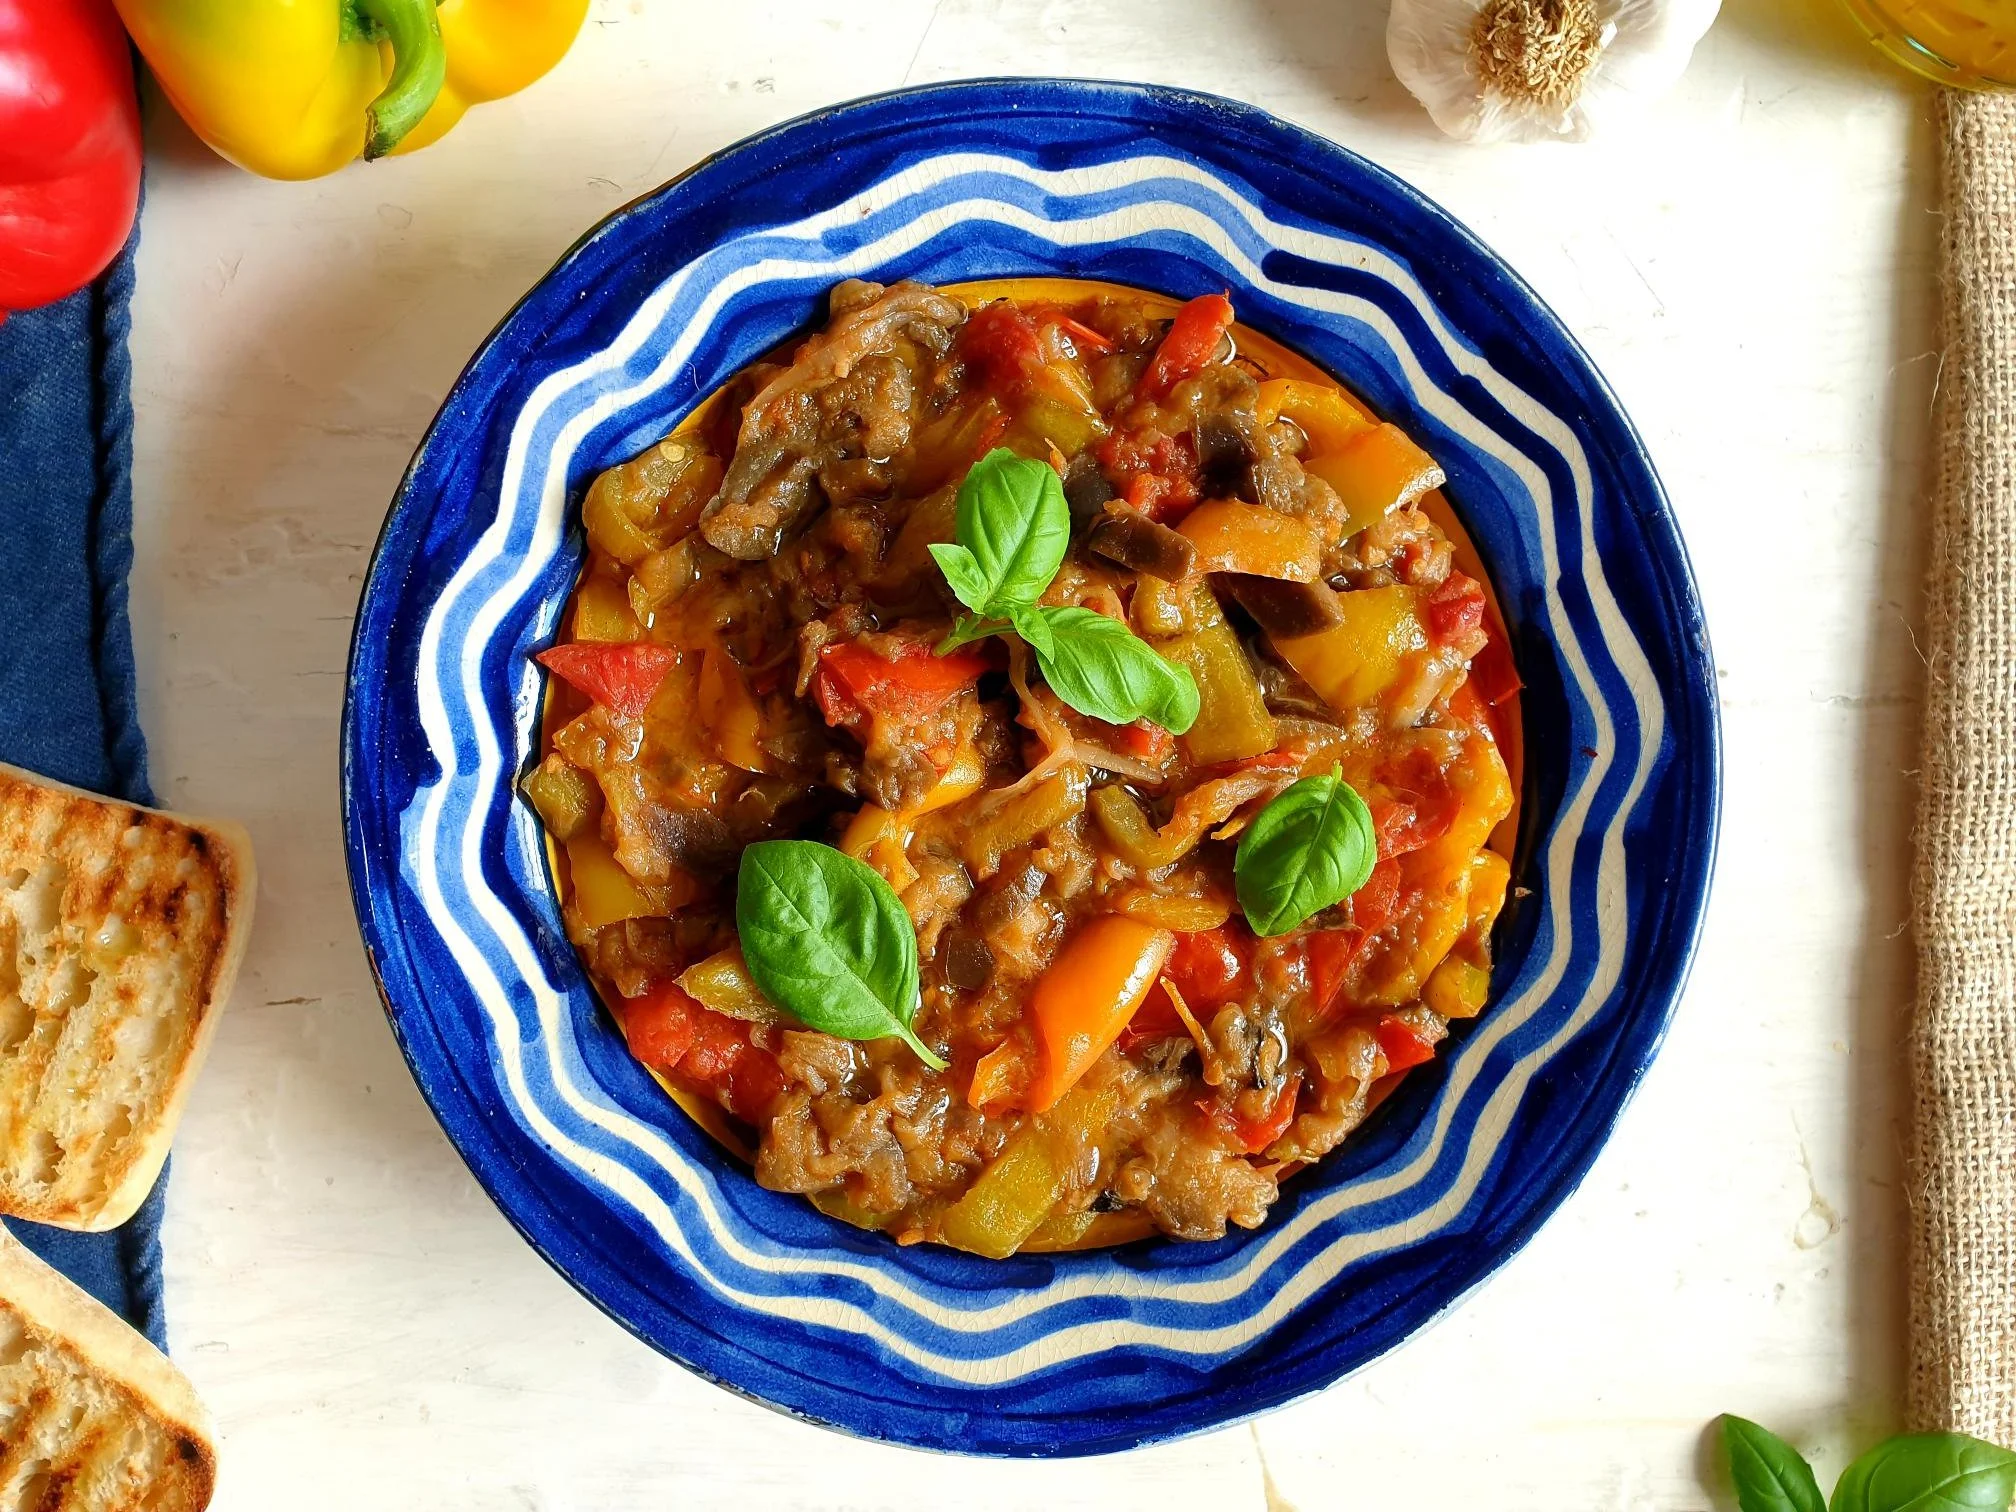
Peperonata is so delicious you can just eat it on its own with some fresh crunchy or toasted bread, it is great paired with grilled meats and fish, cheeses, cold meats, cooked rice, makes a great base for a risotto or a pasta dish and incredibly tasty spread on bruschetta.

I am sharing here my mother's recipe for Istrian style peperonata, which is different from the Venetian variety where a little white wine is added to the dish.

When I cook this dish, I get immediately transported back home, to the sound of cicadas, to the fragrance of salty air, and to the childhood memories of long summers that never seemed to end...
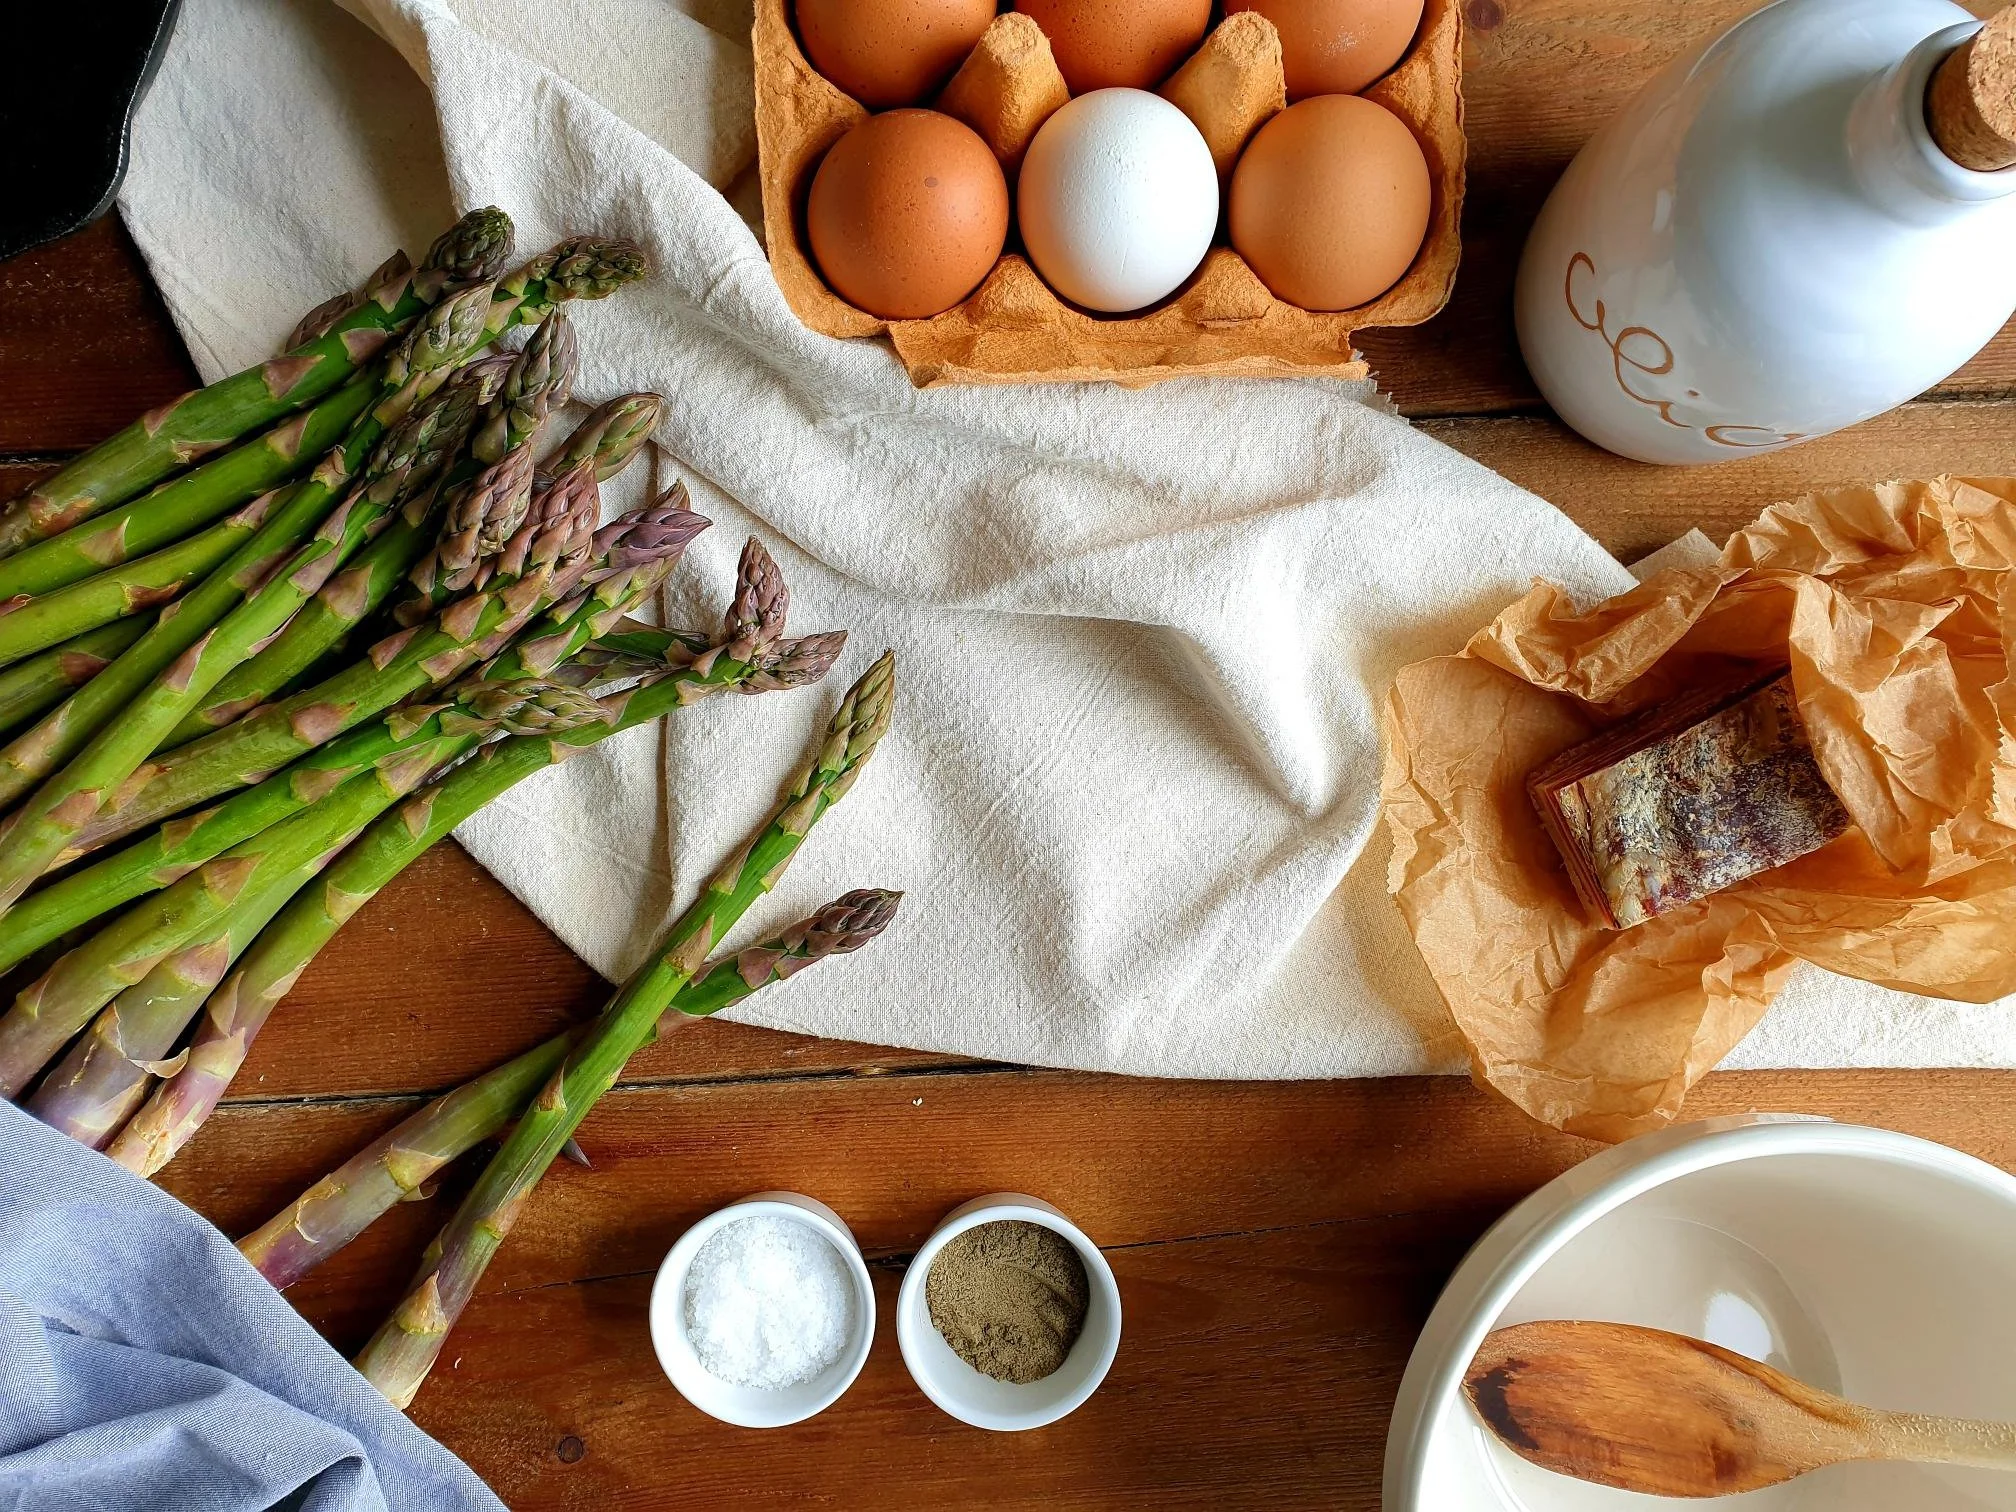
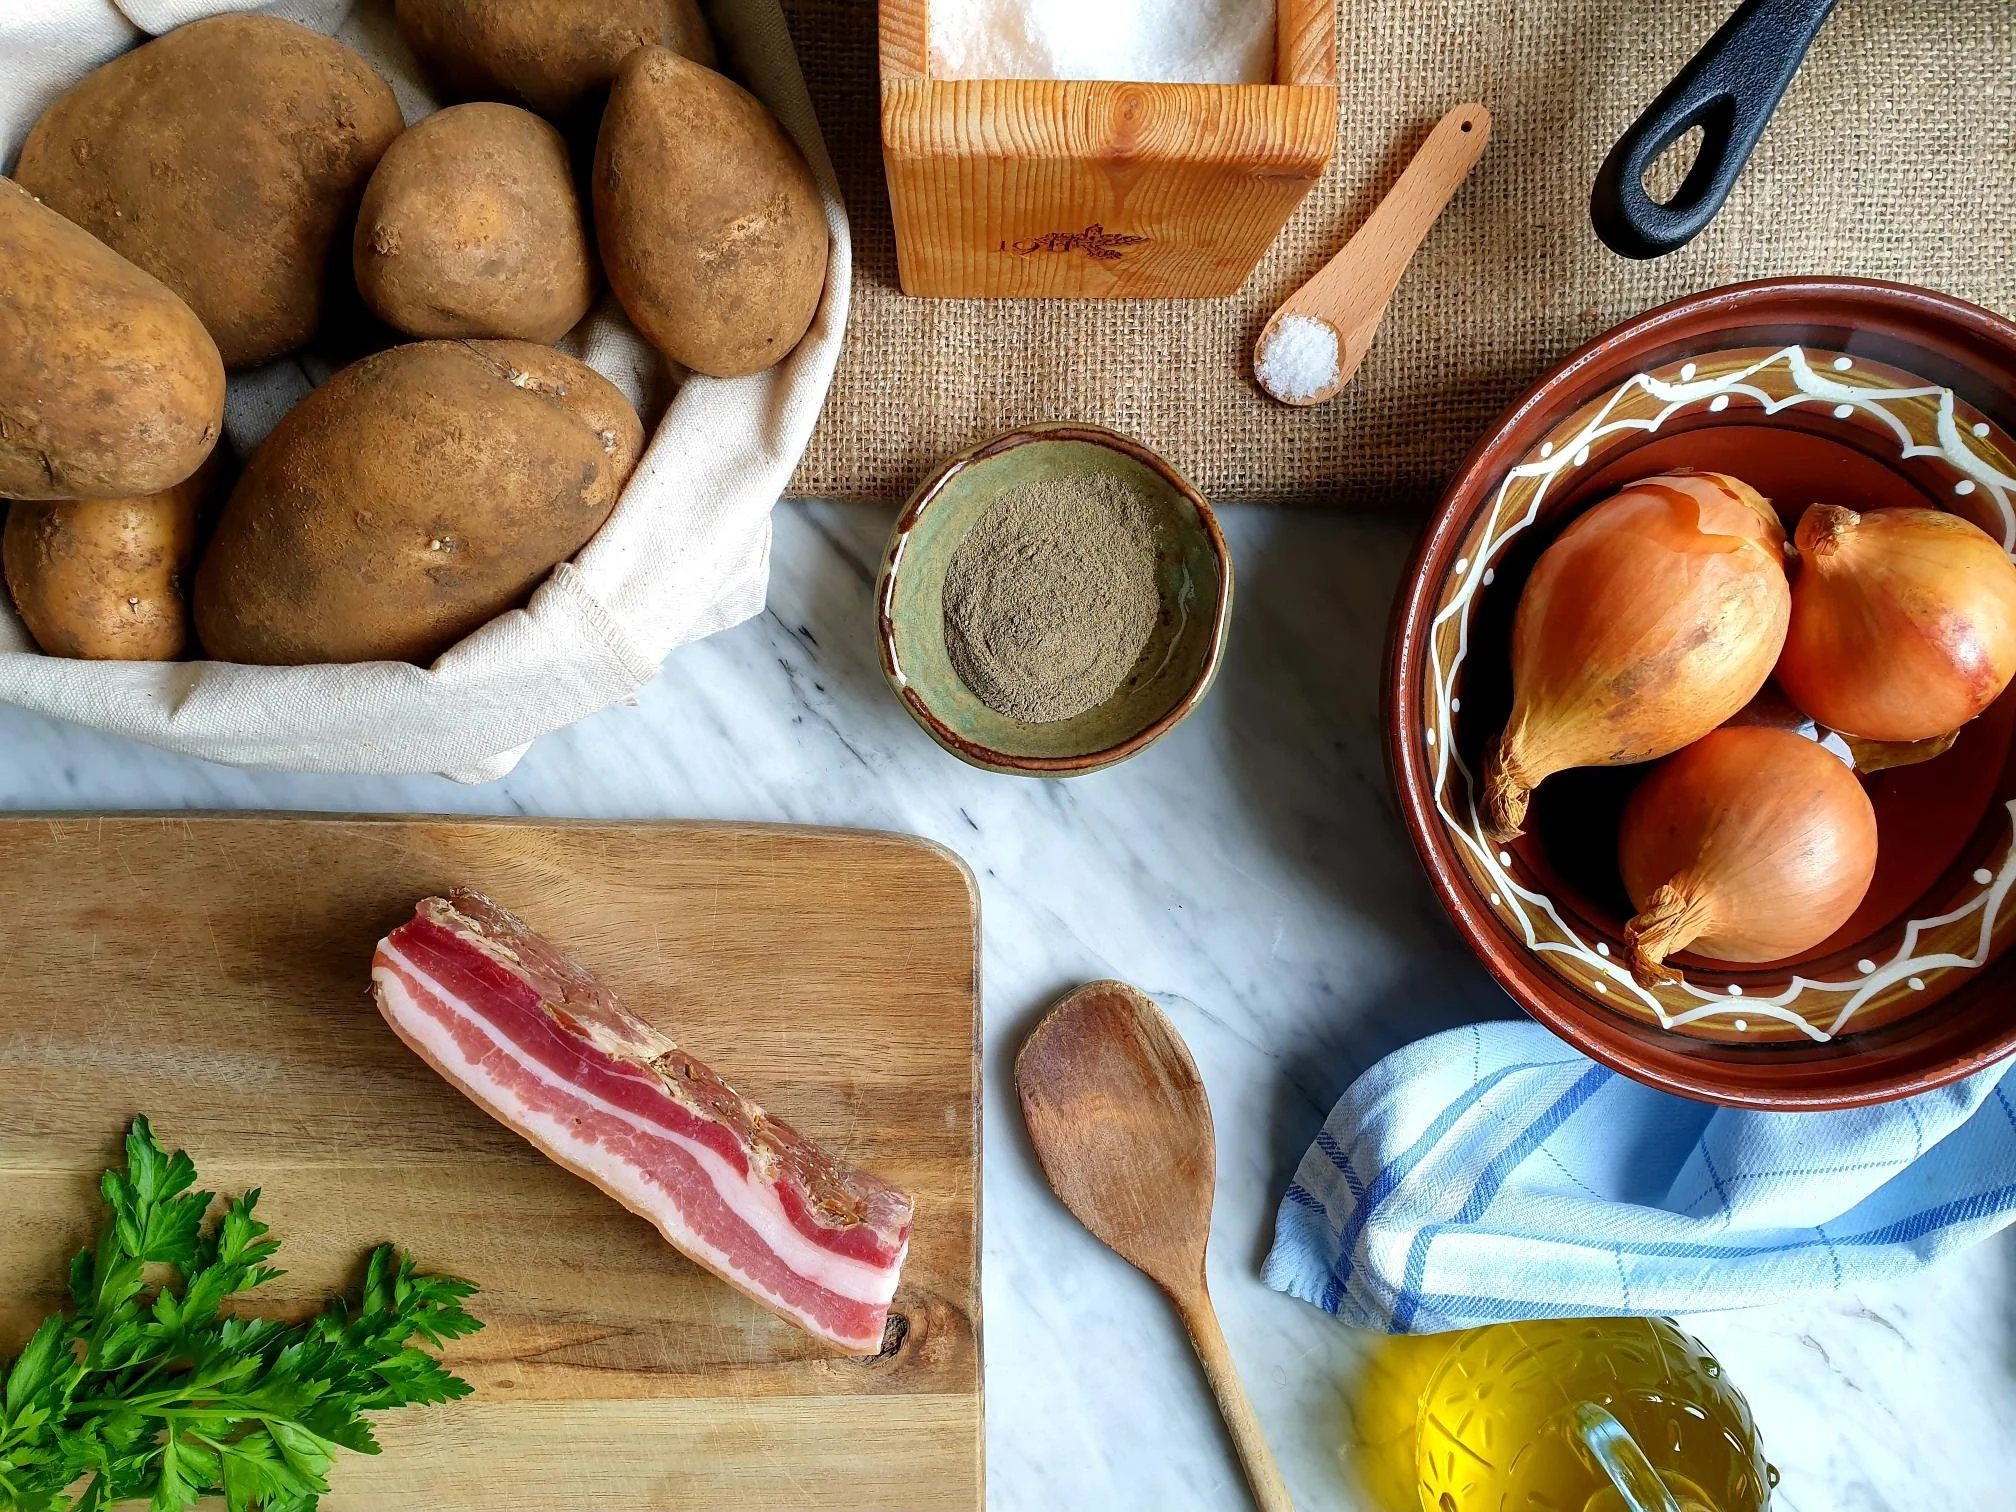
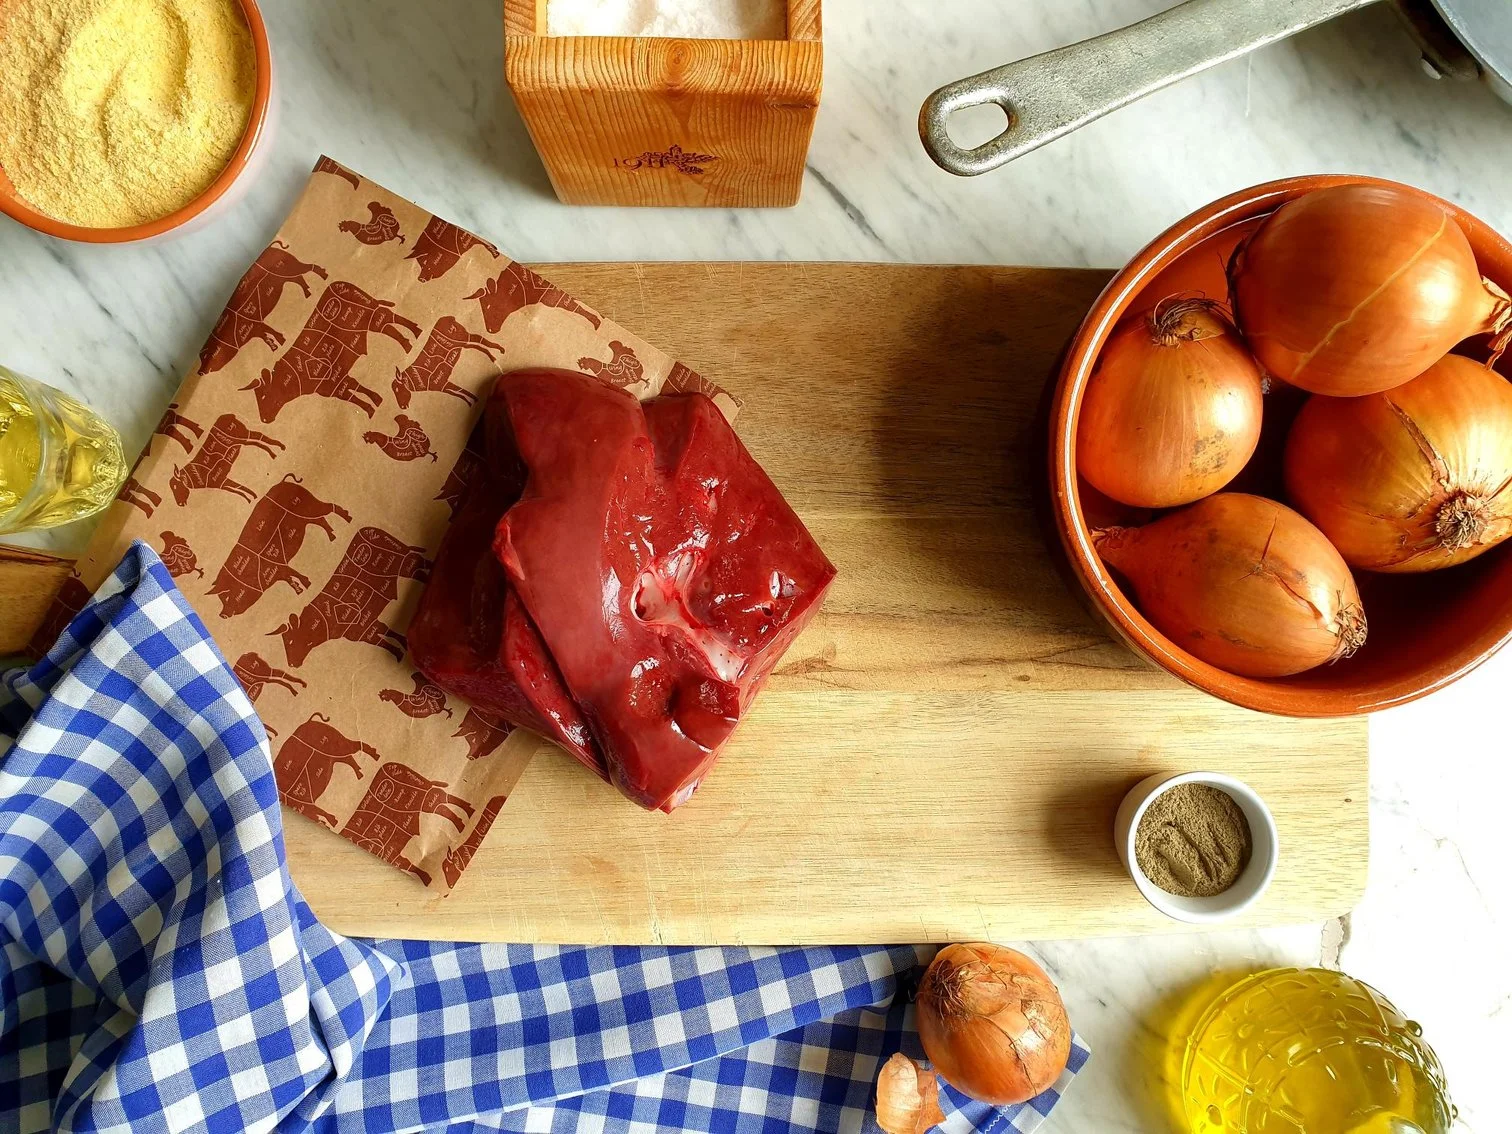
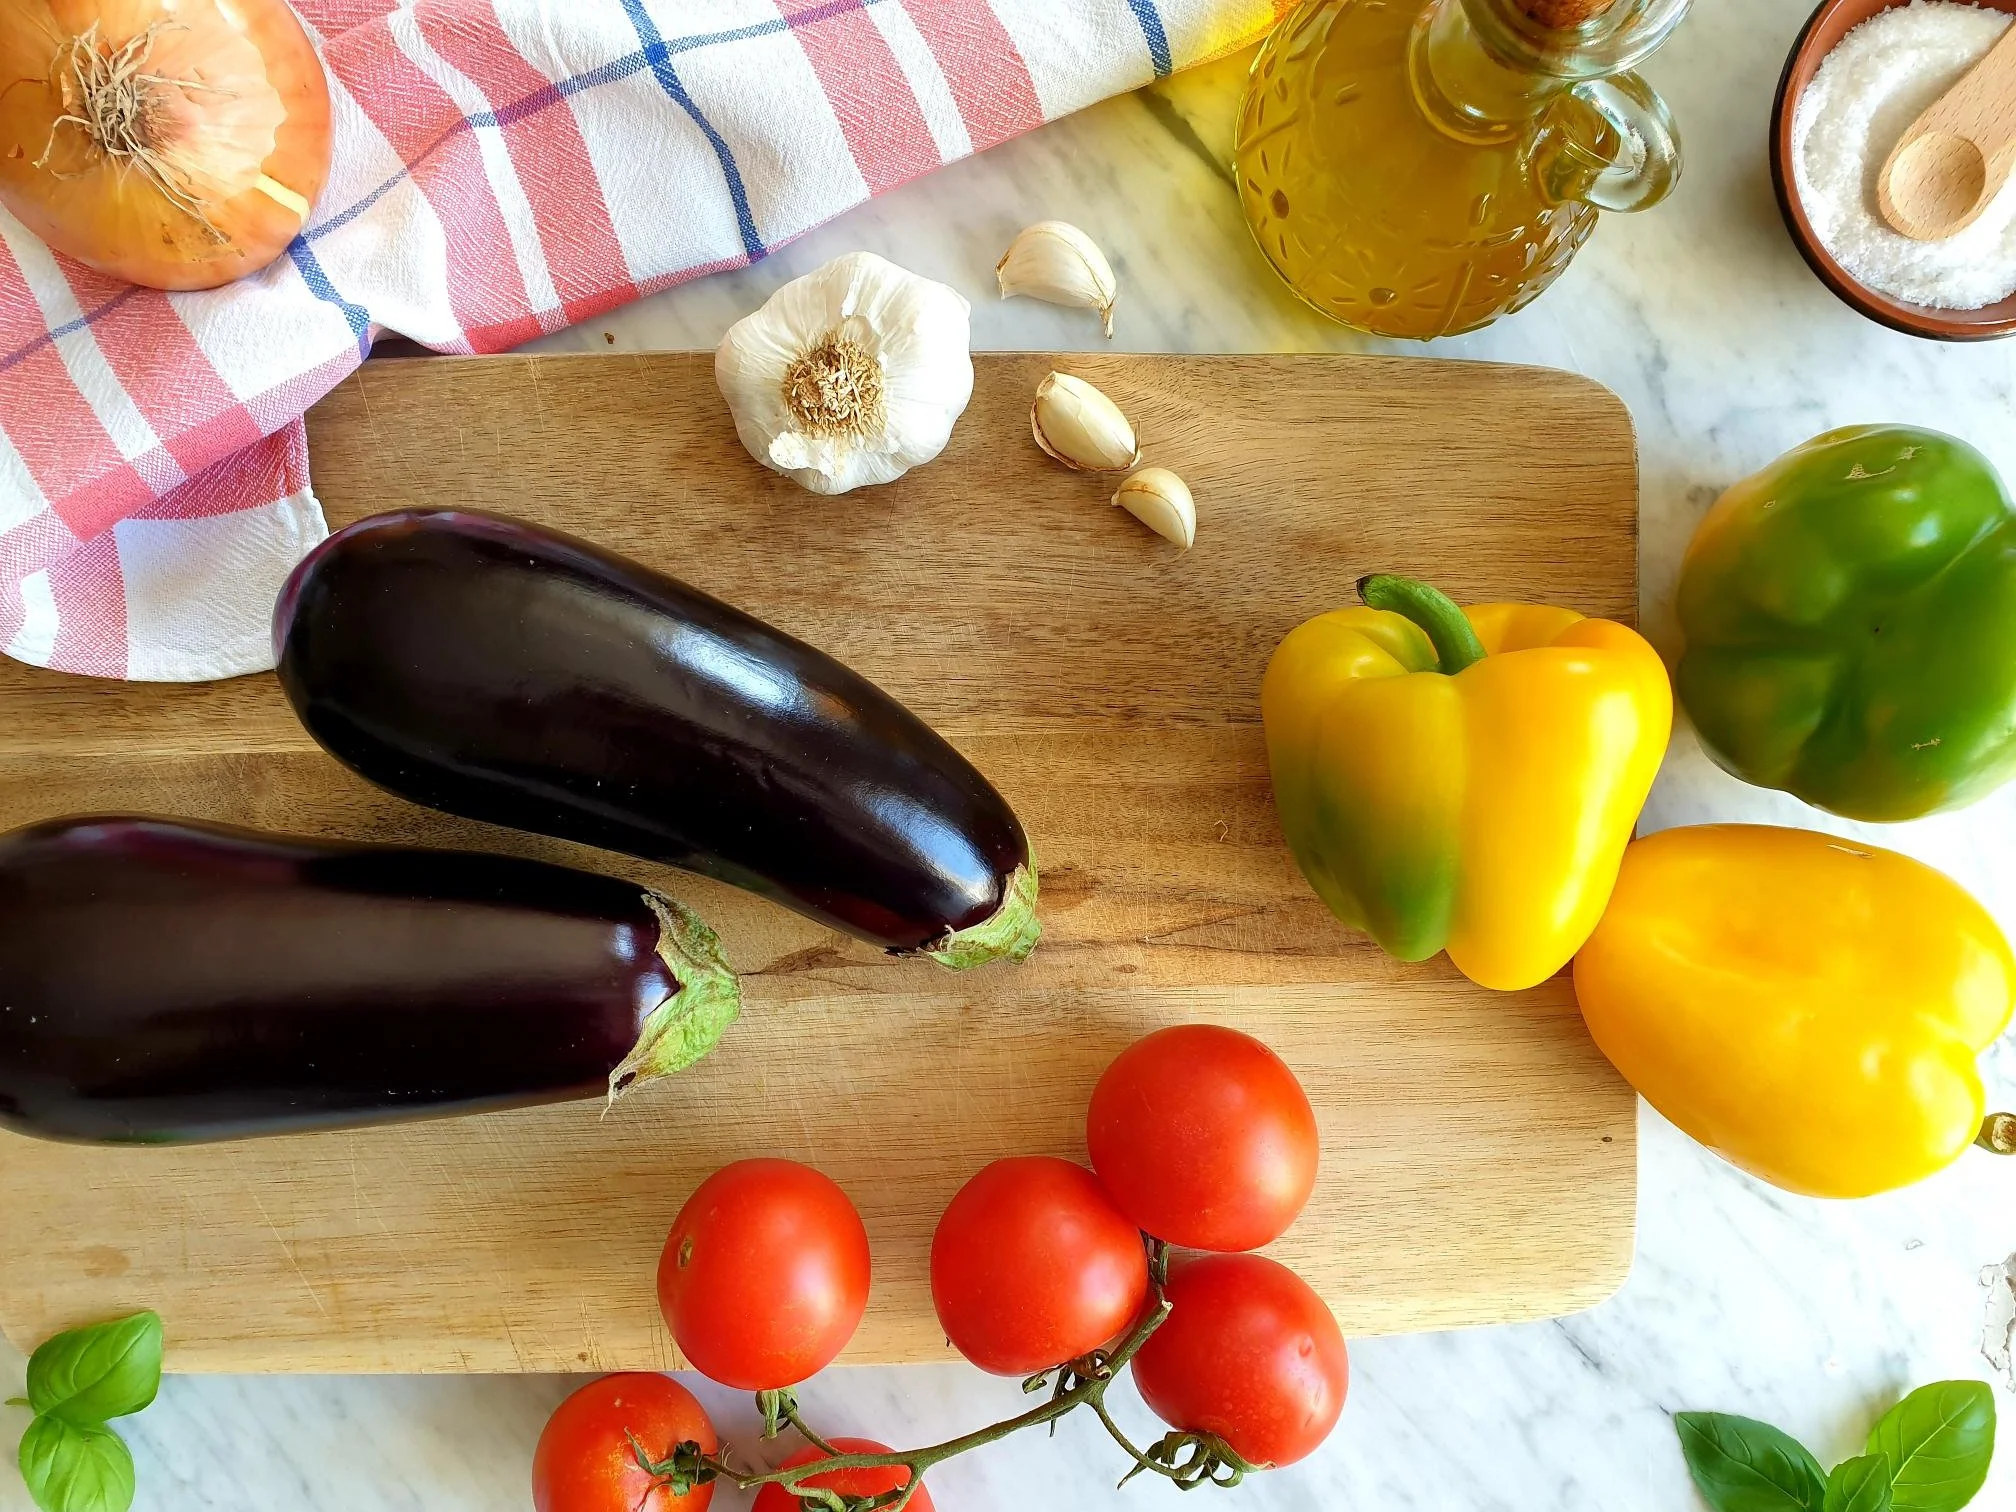
Ingredients

Serves 4

  • 1 clove of garlic, peeled and crushed

  • 5 Tbsp olive olive

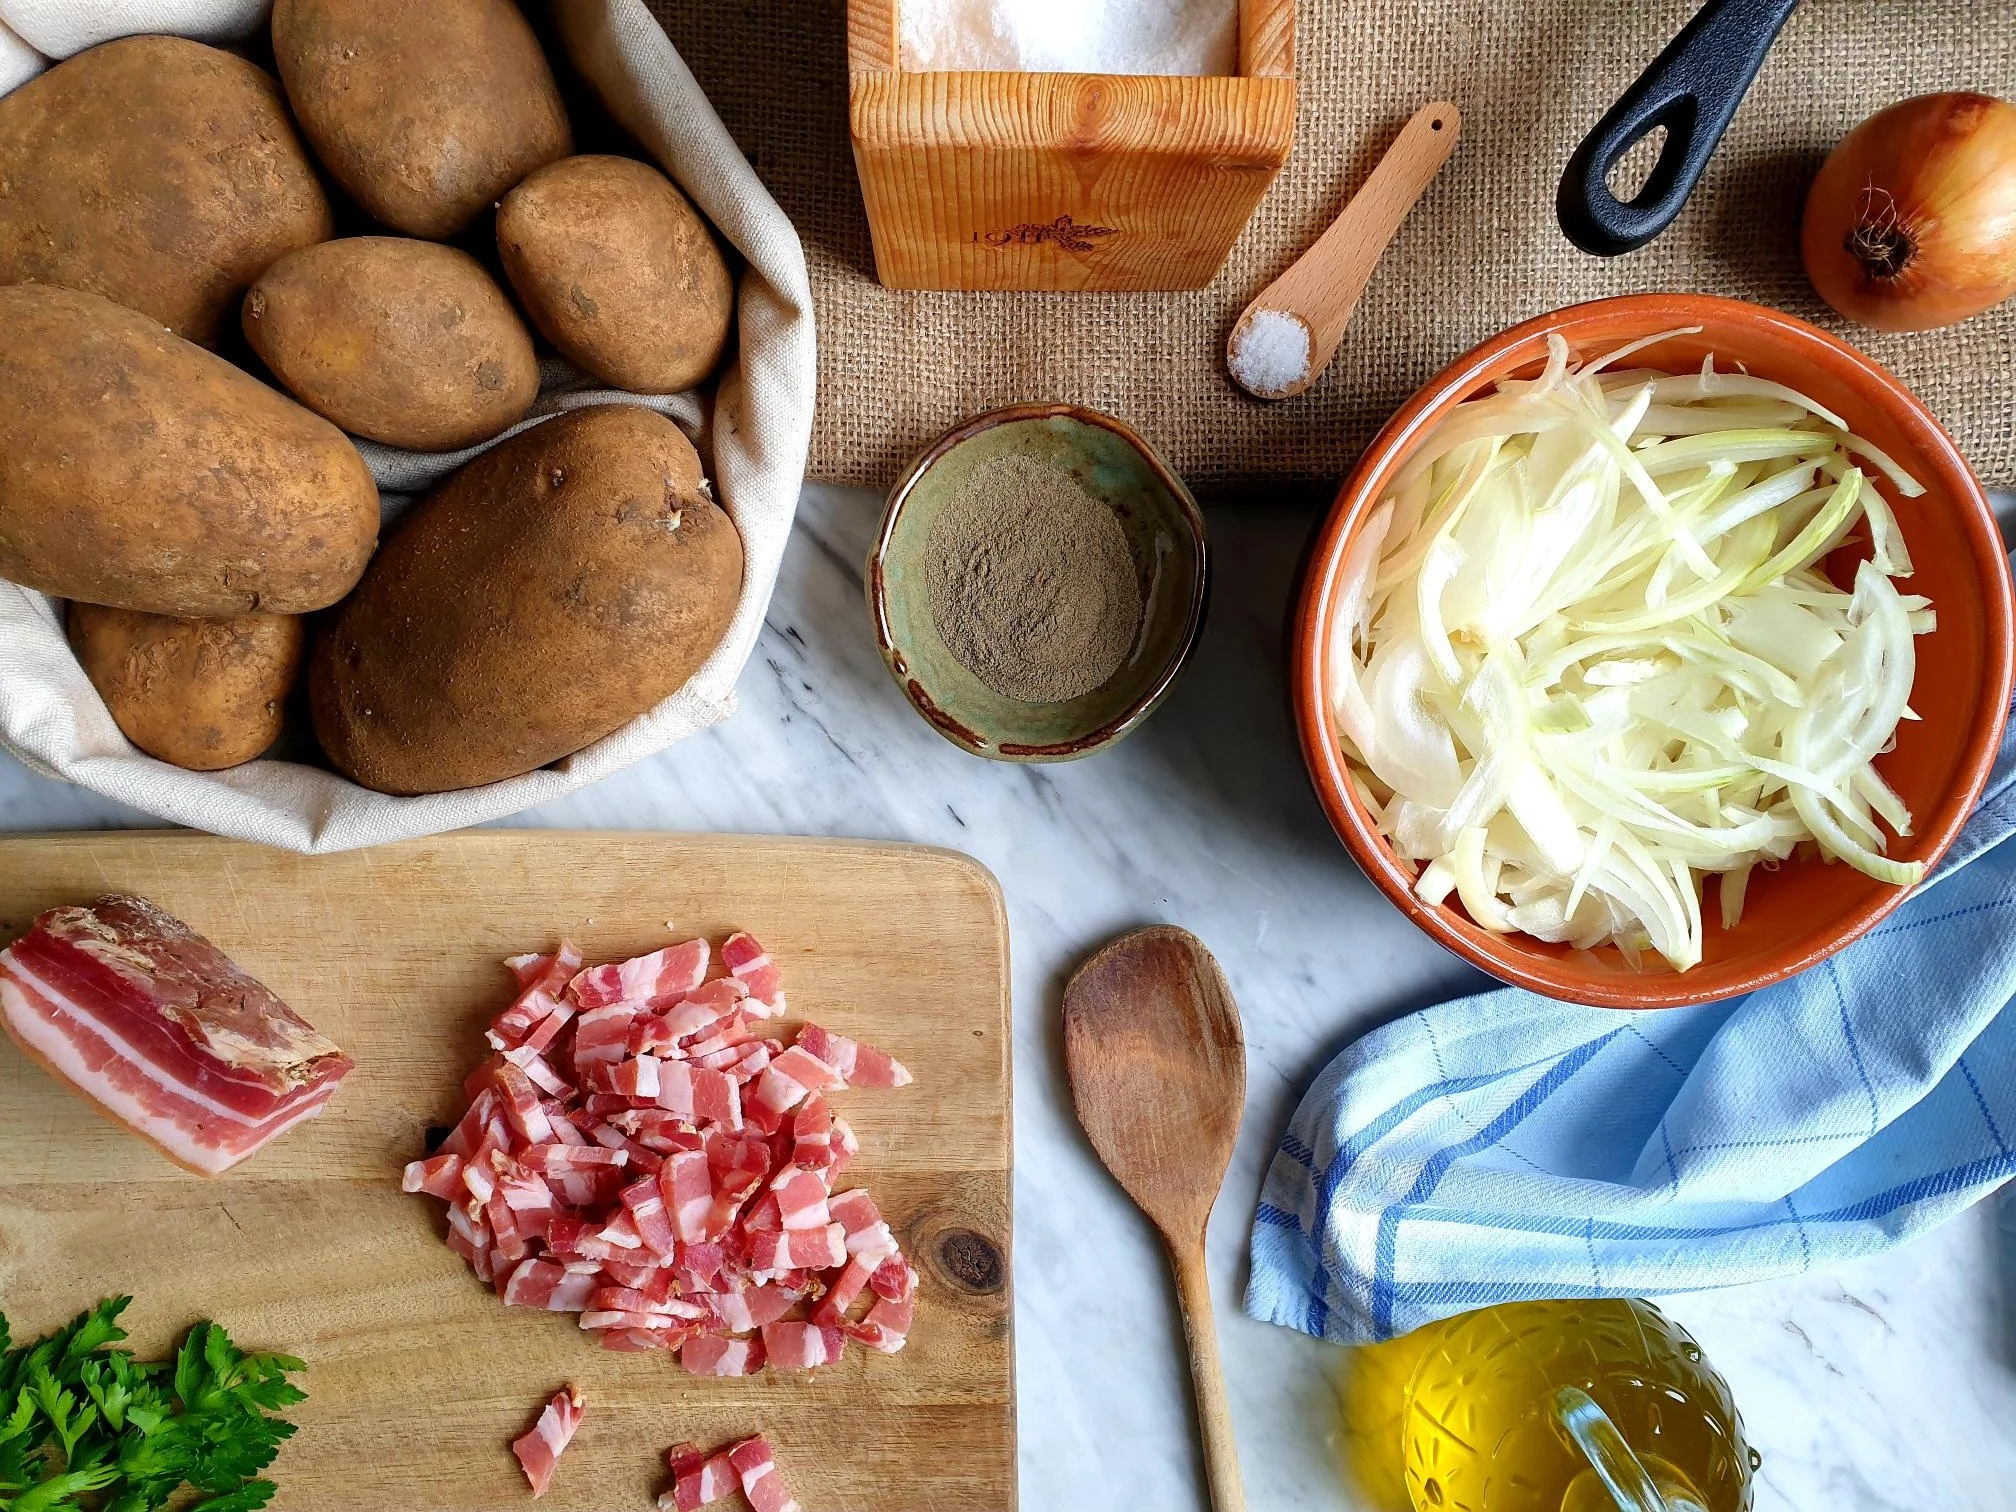
  • onions (about 300g) peeled and finely sliced

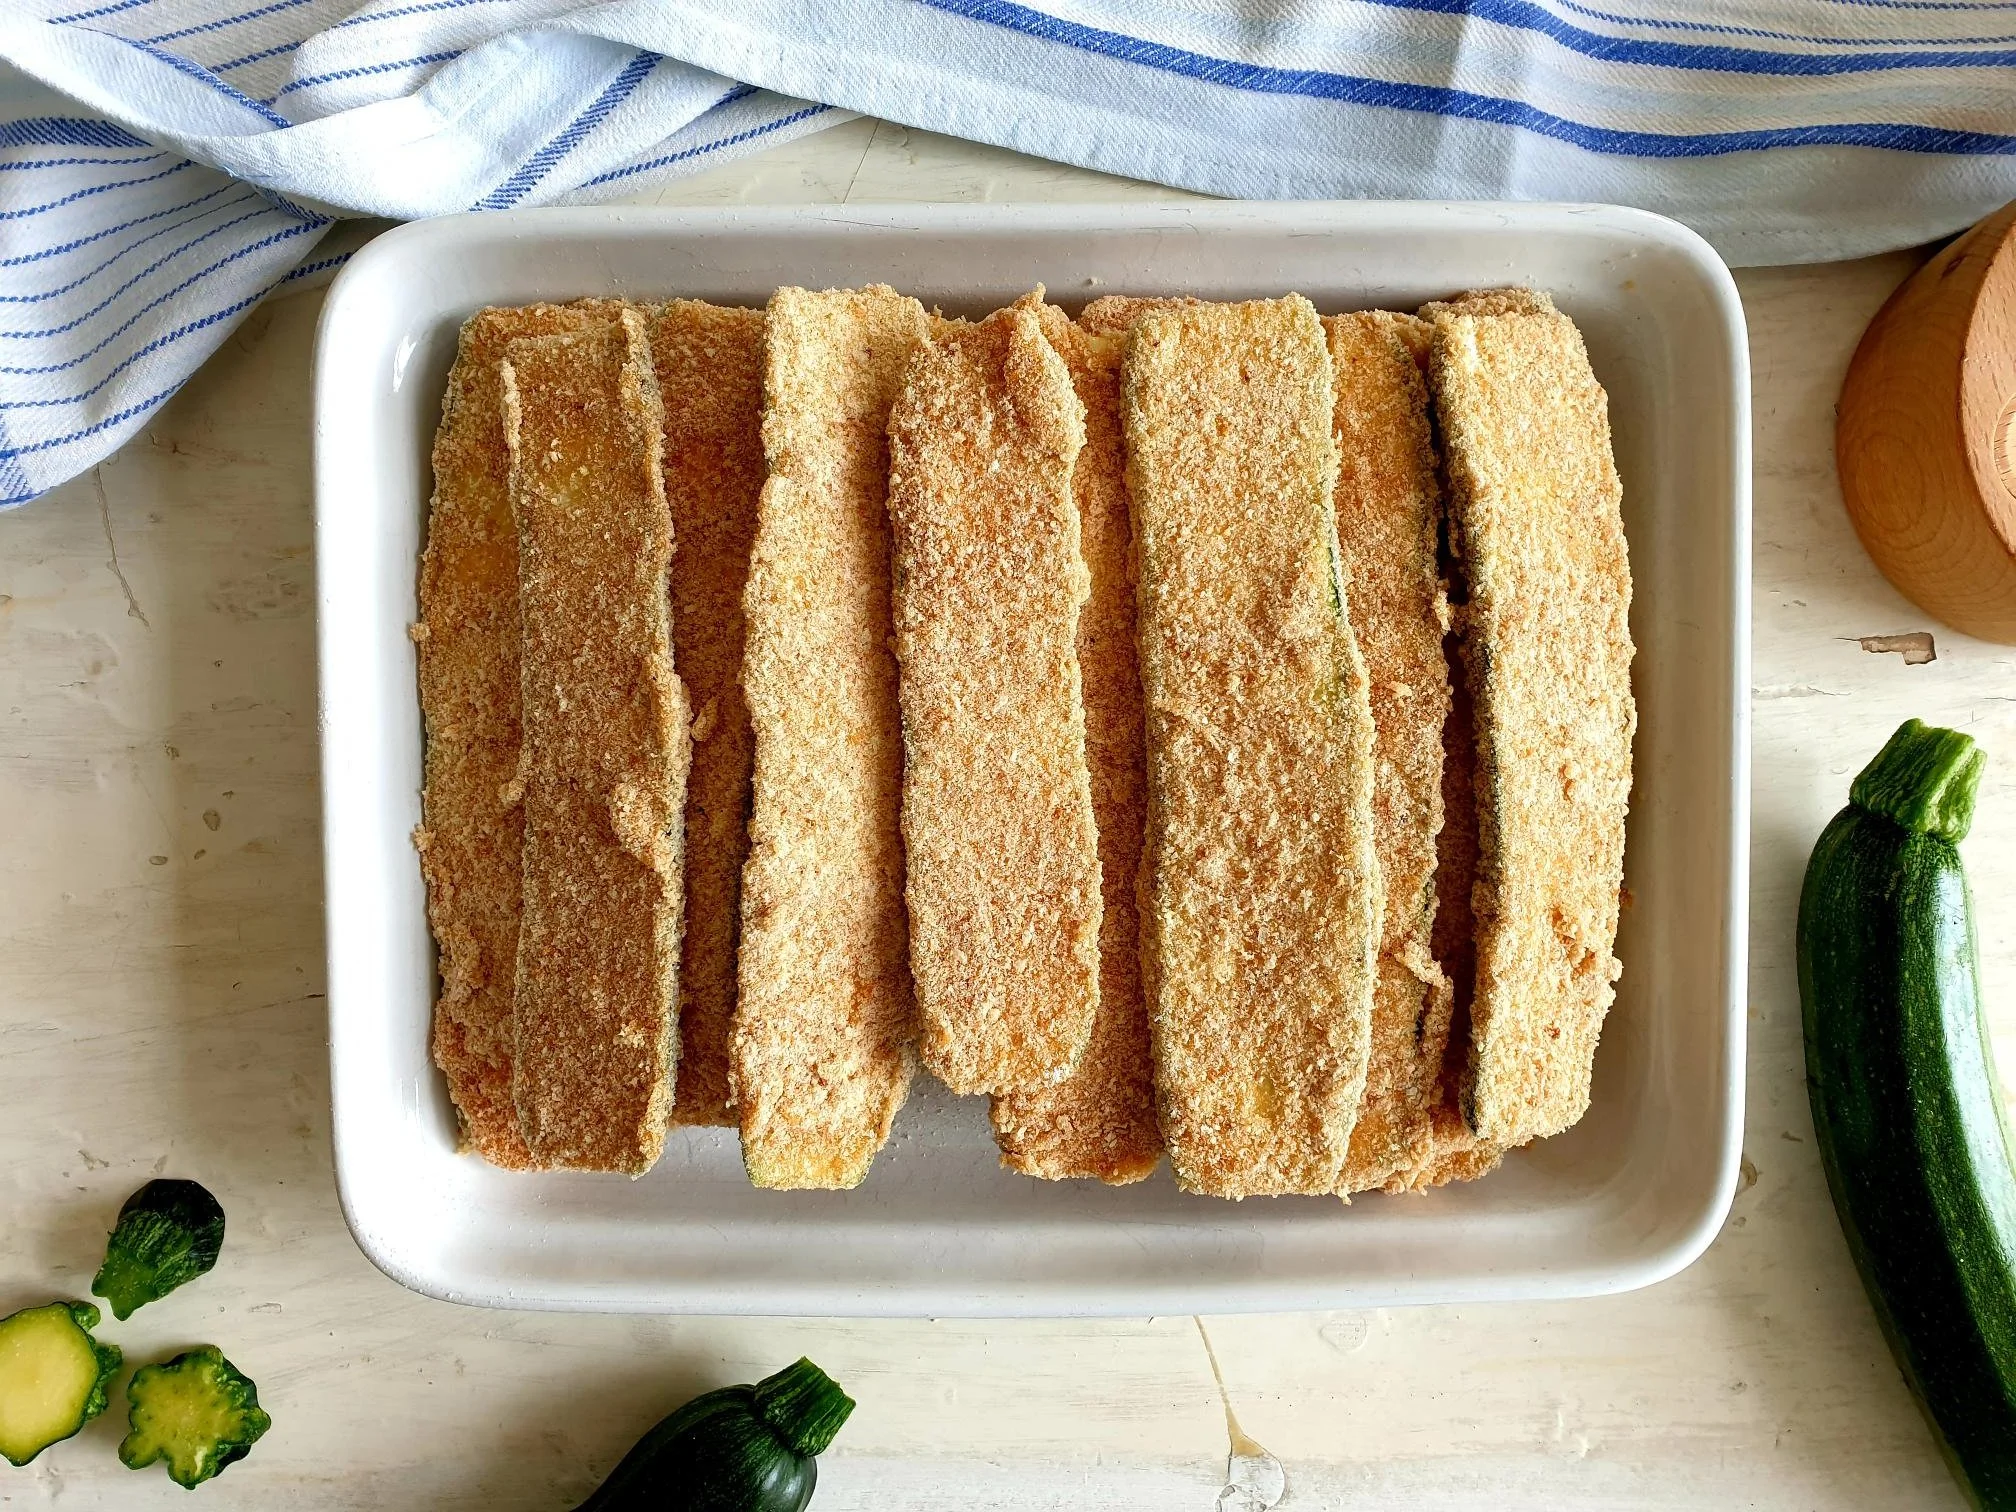
  • 400g aubergines, diced

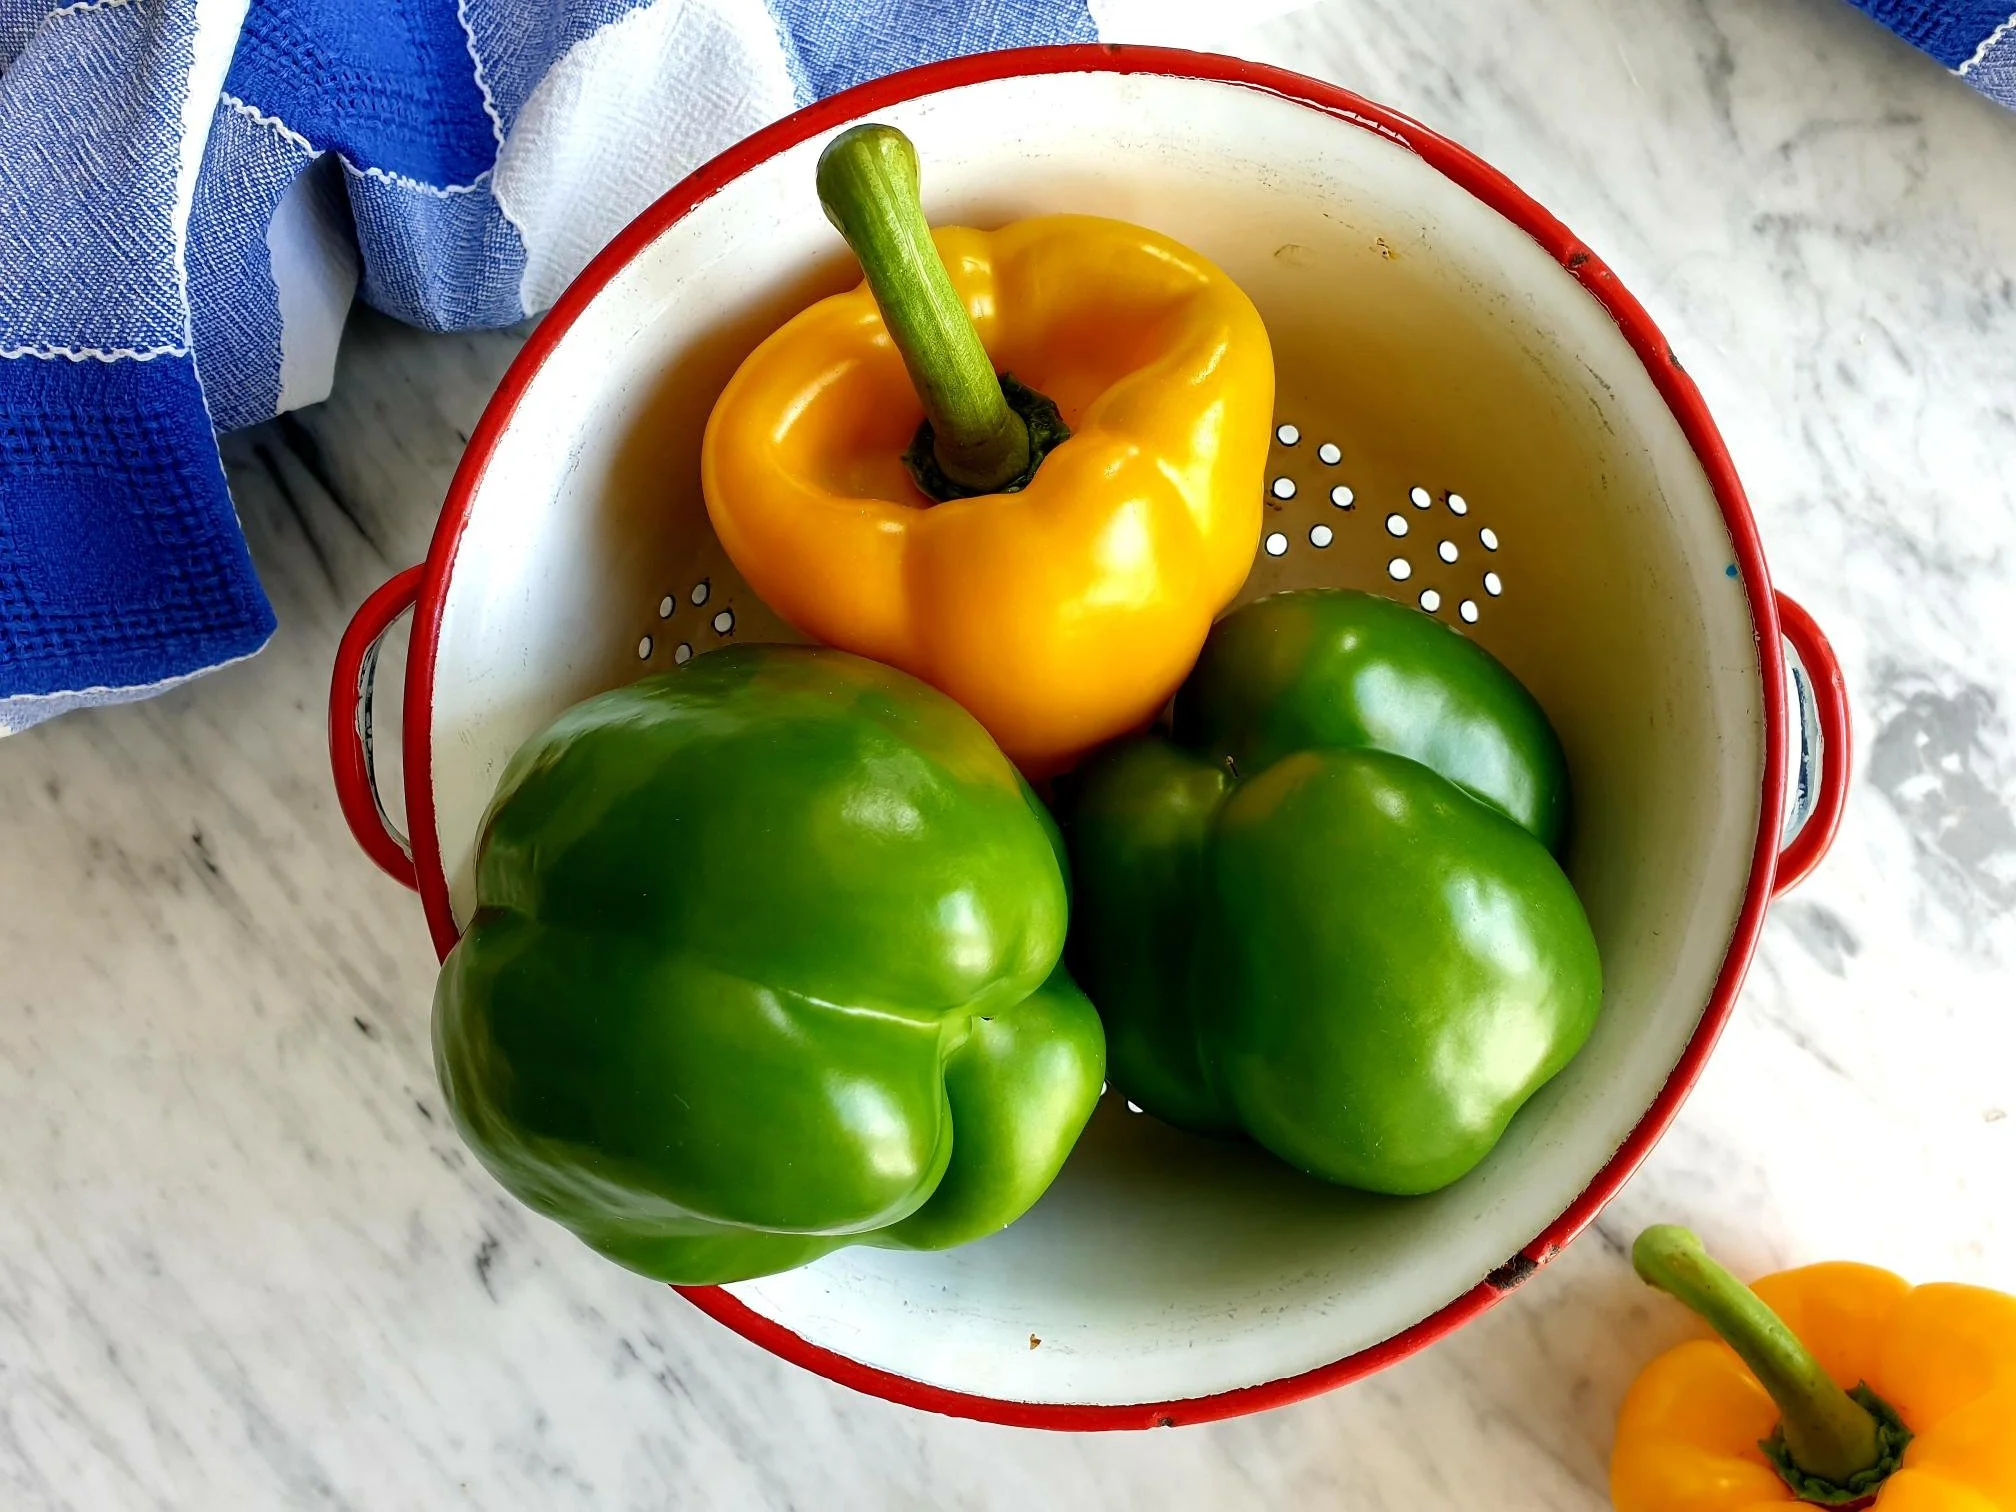
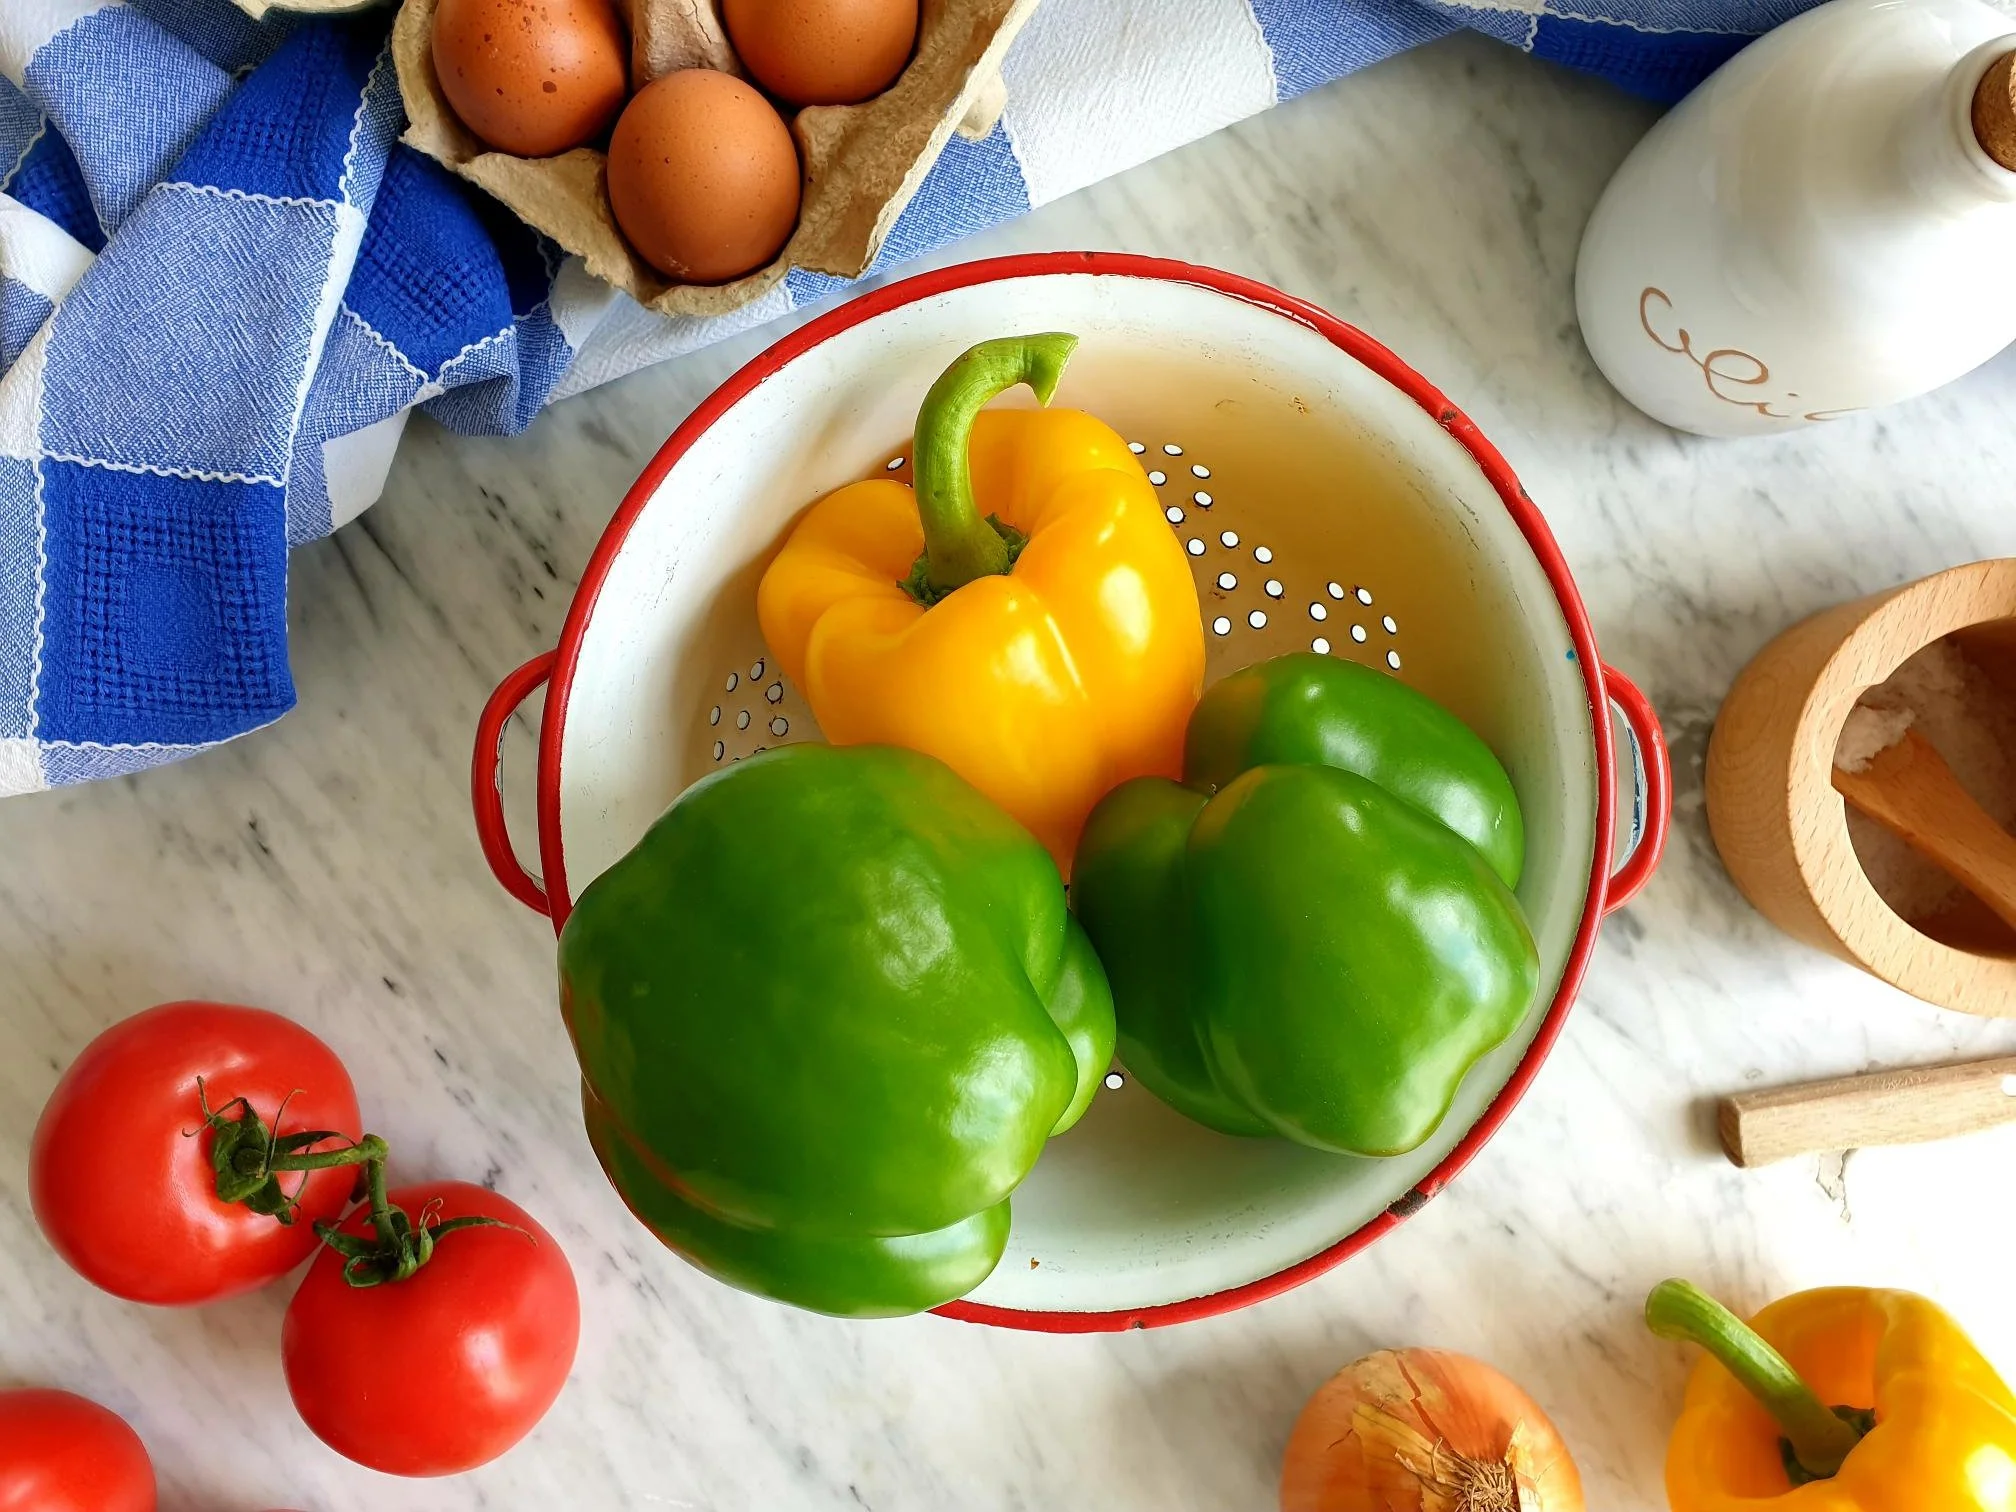
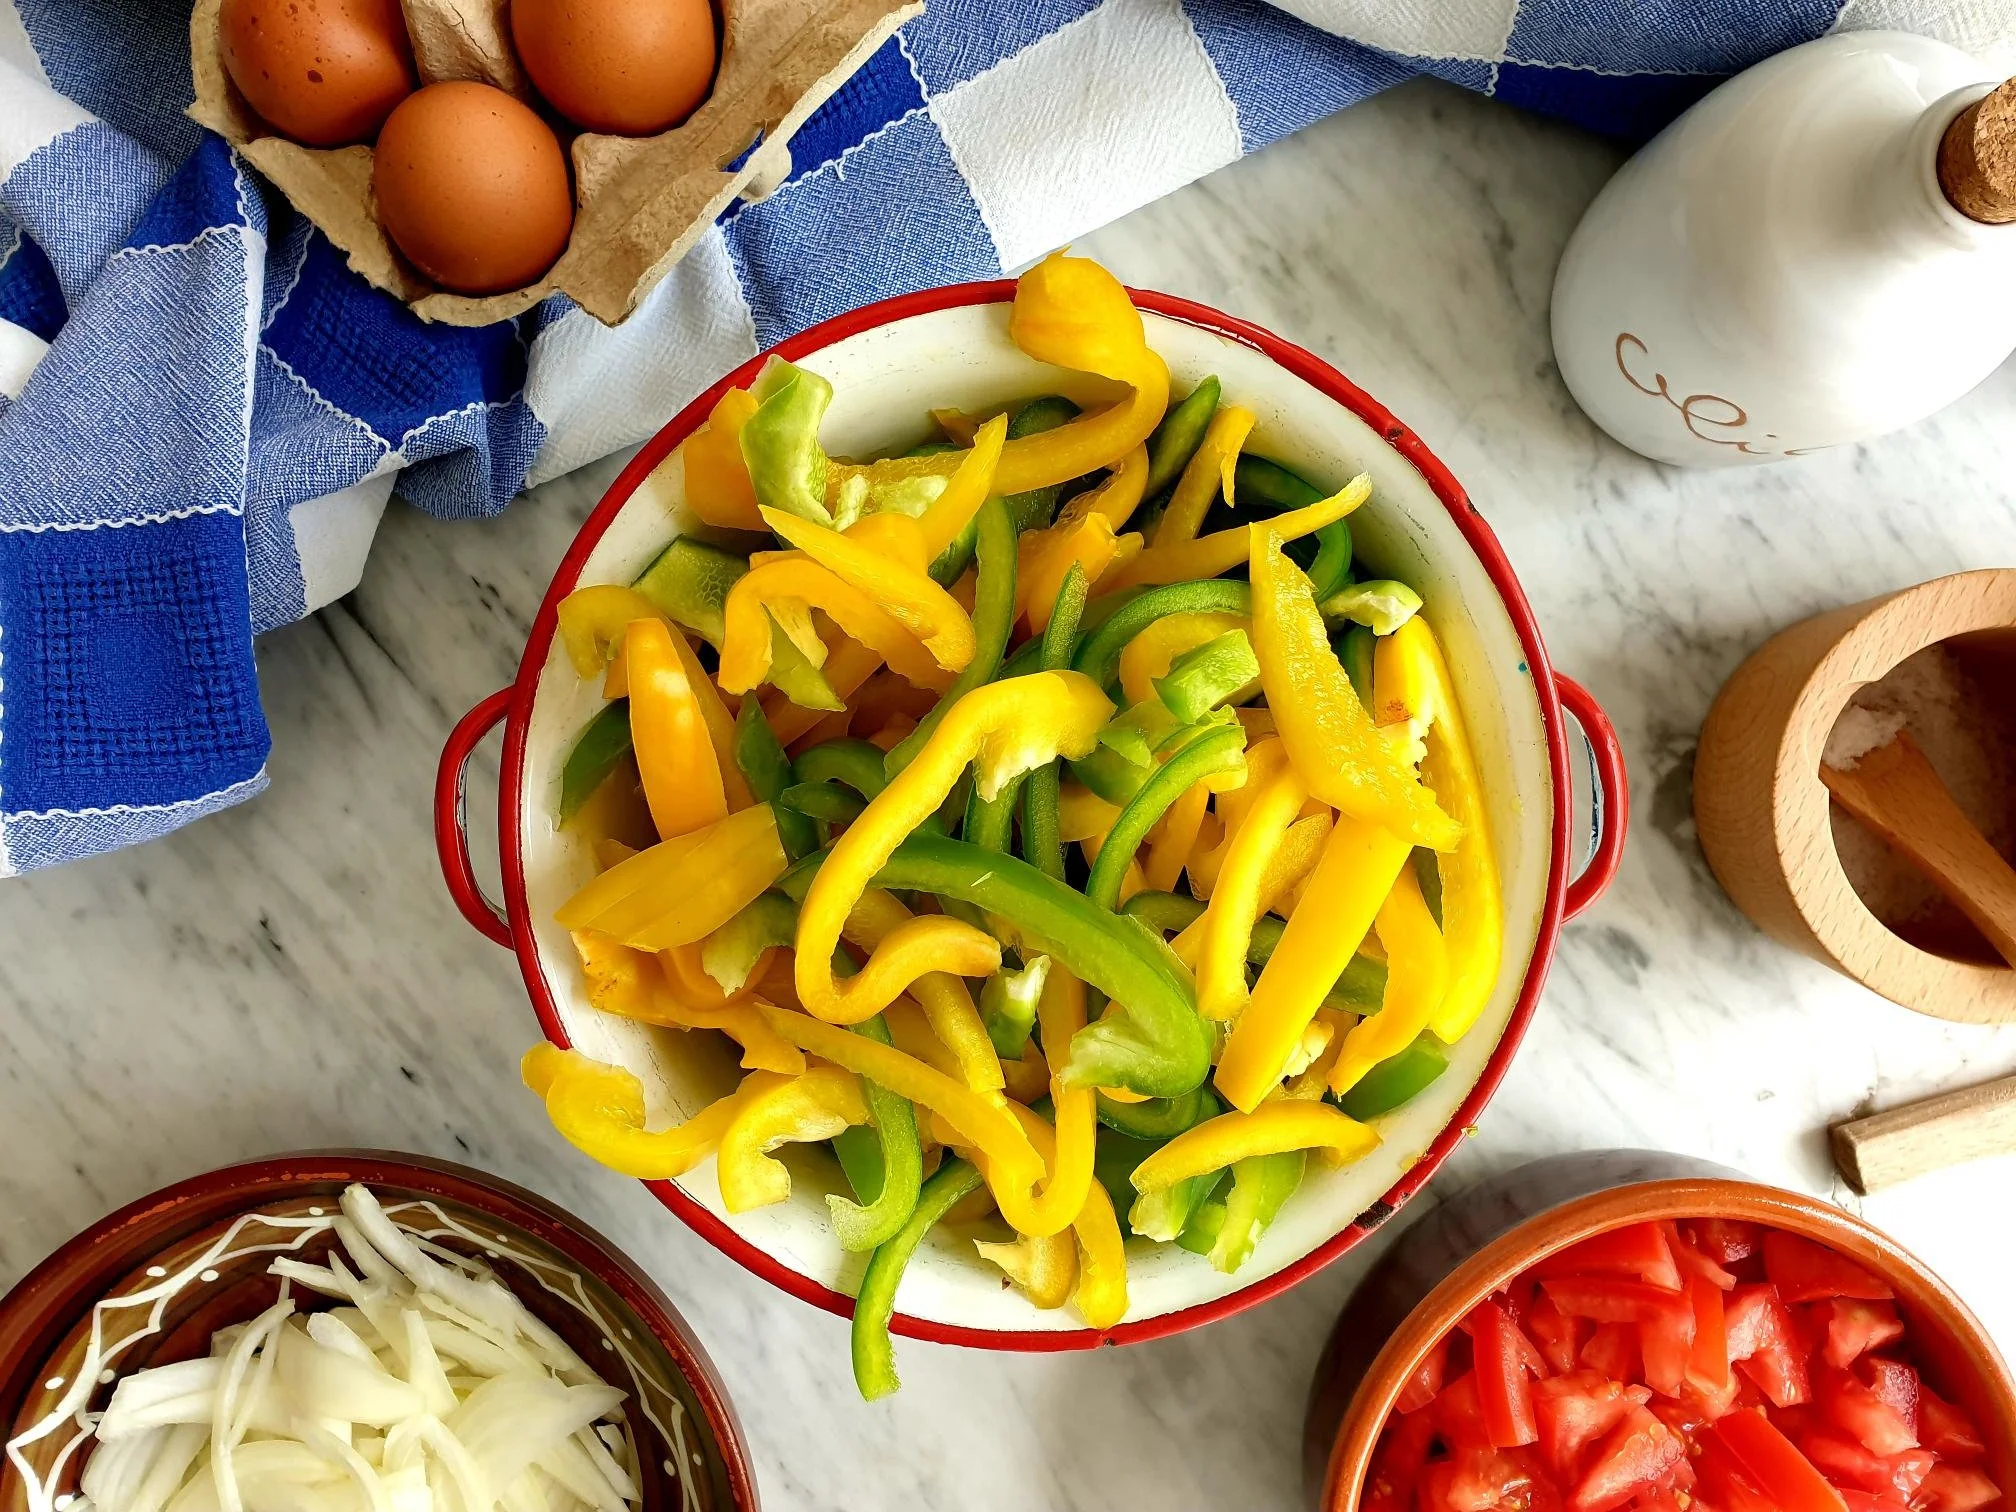
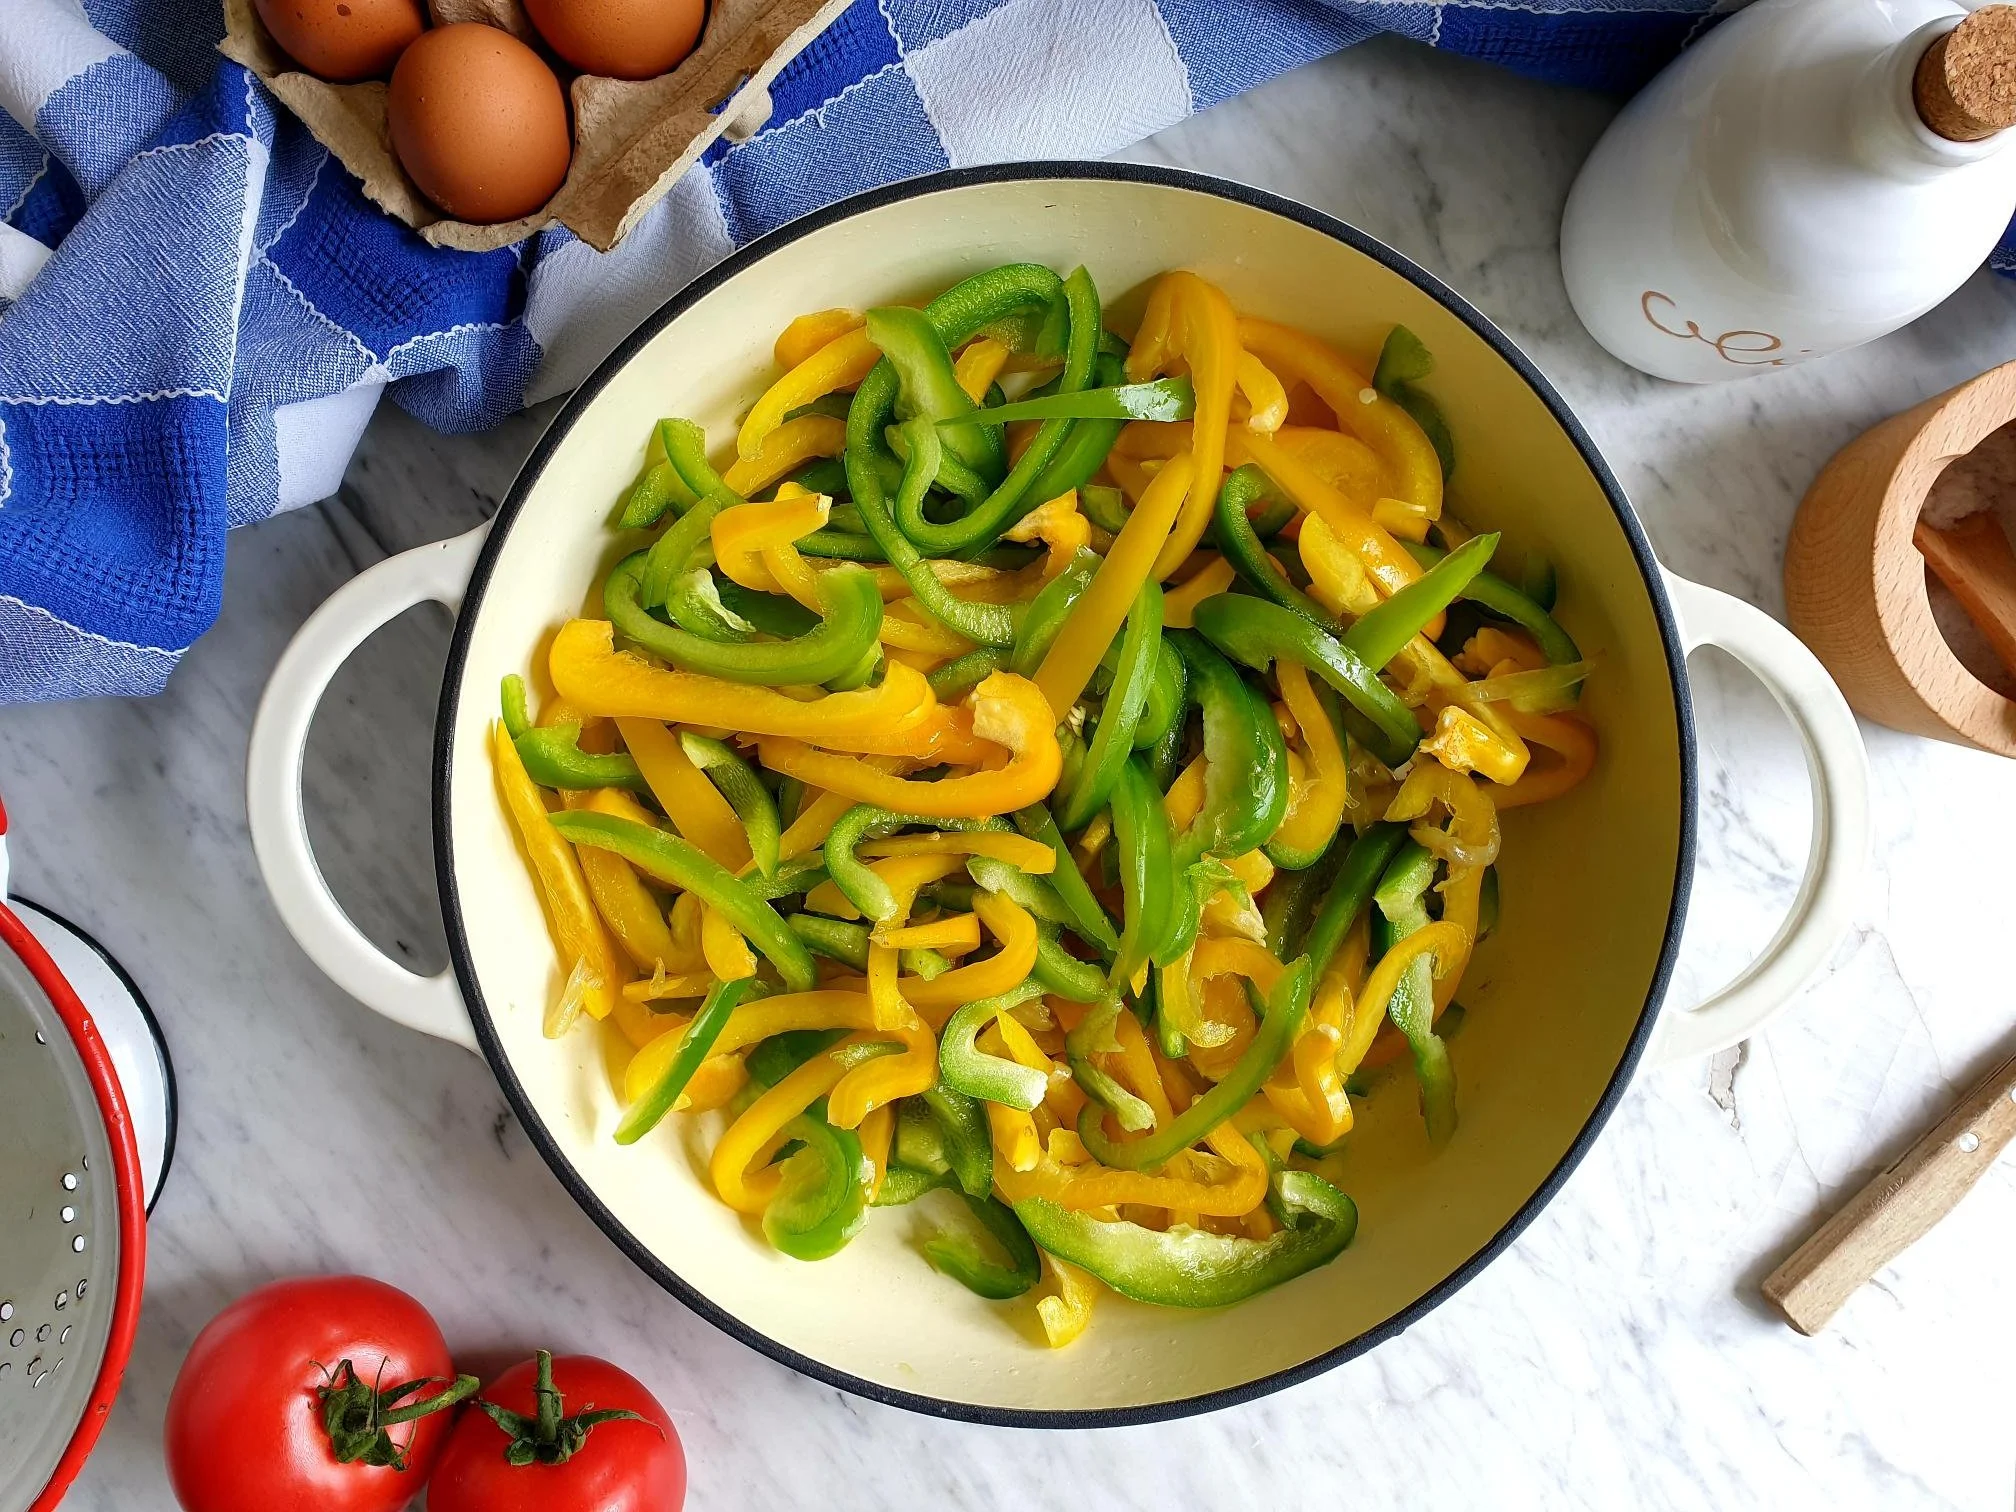
  • 500g yellow or green bell peppers, washed, deseeded and sliced into strips or cut into chunks)

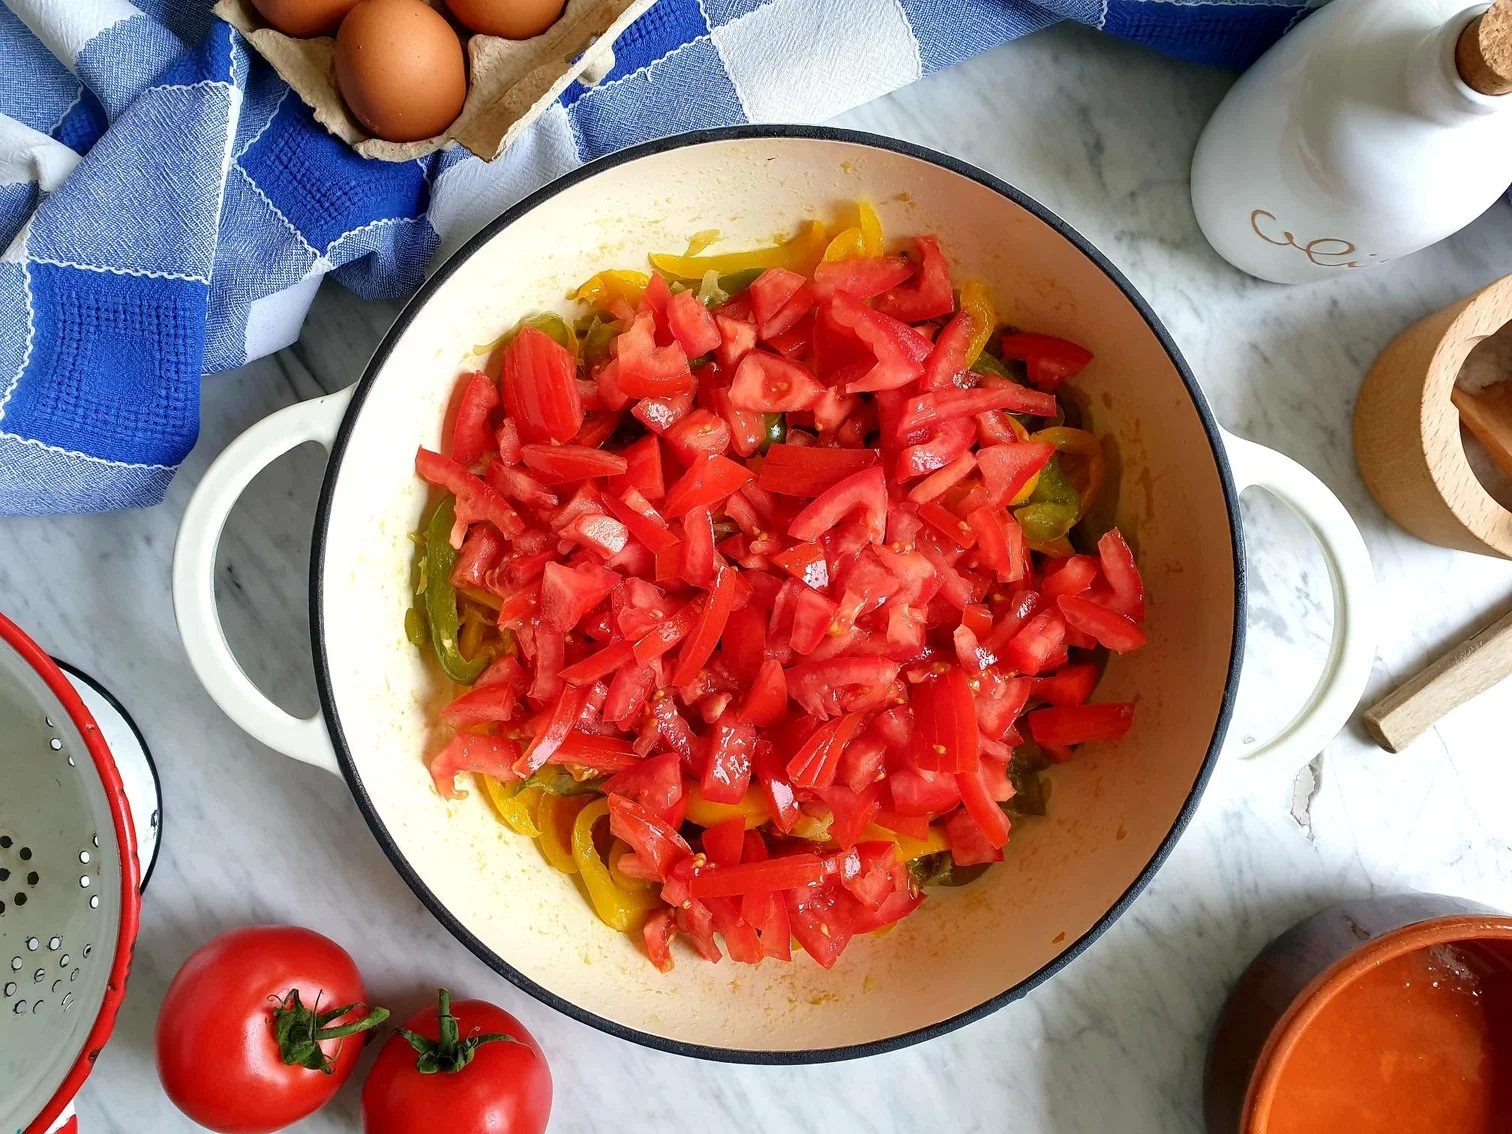
  • 300g tomatoes (juicy, ripe and sweet) roughly chopped

  • sea salt

  • few fresh basil leaves, optional

  • fresh flat leaf parsley, roughly chopped for garnish, optional

Method

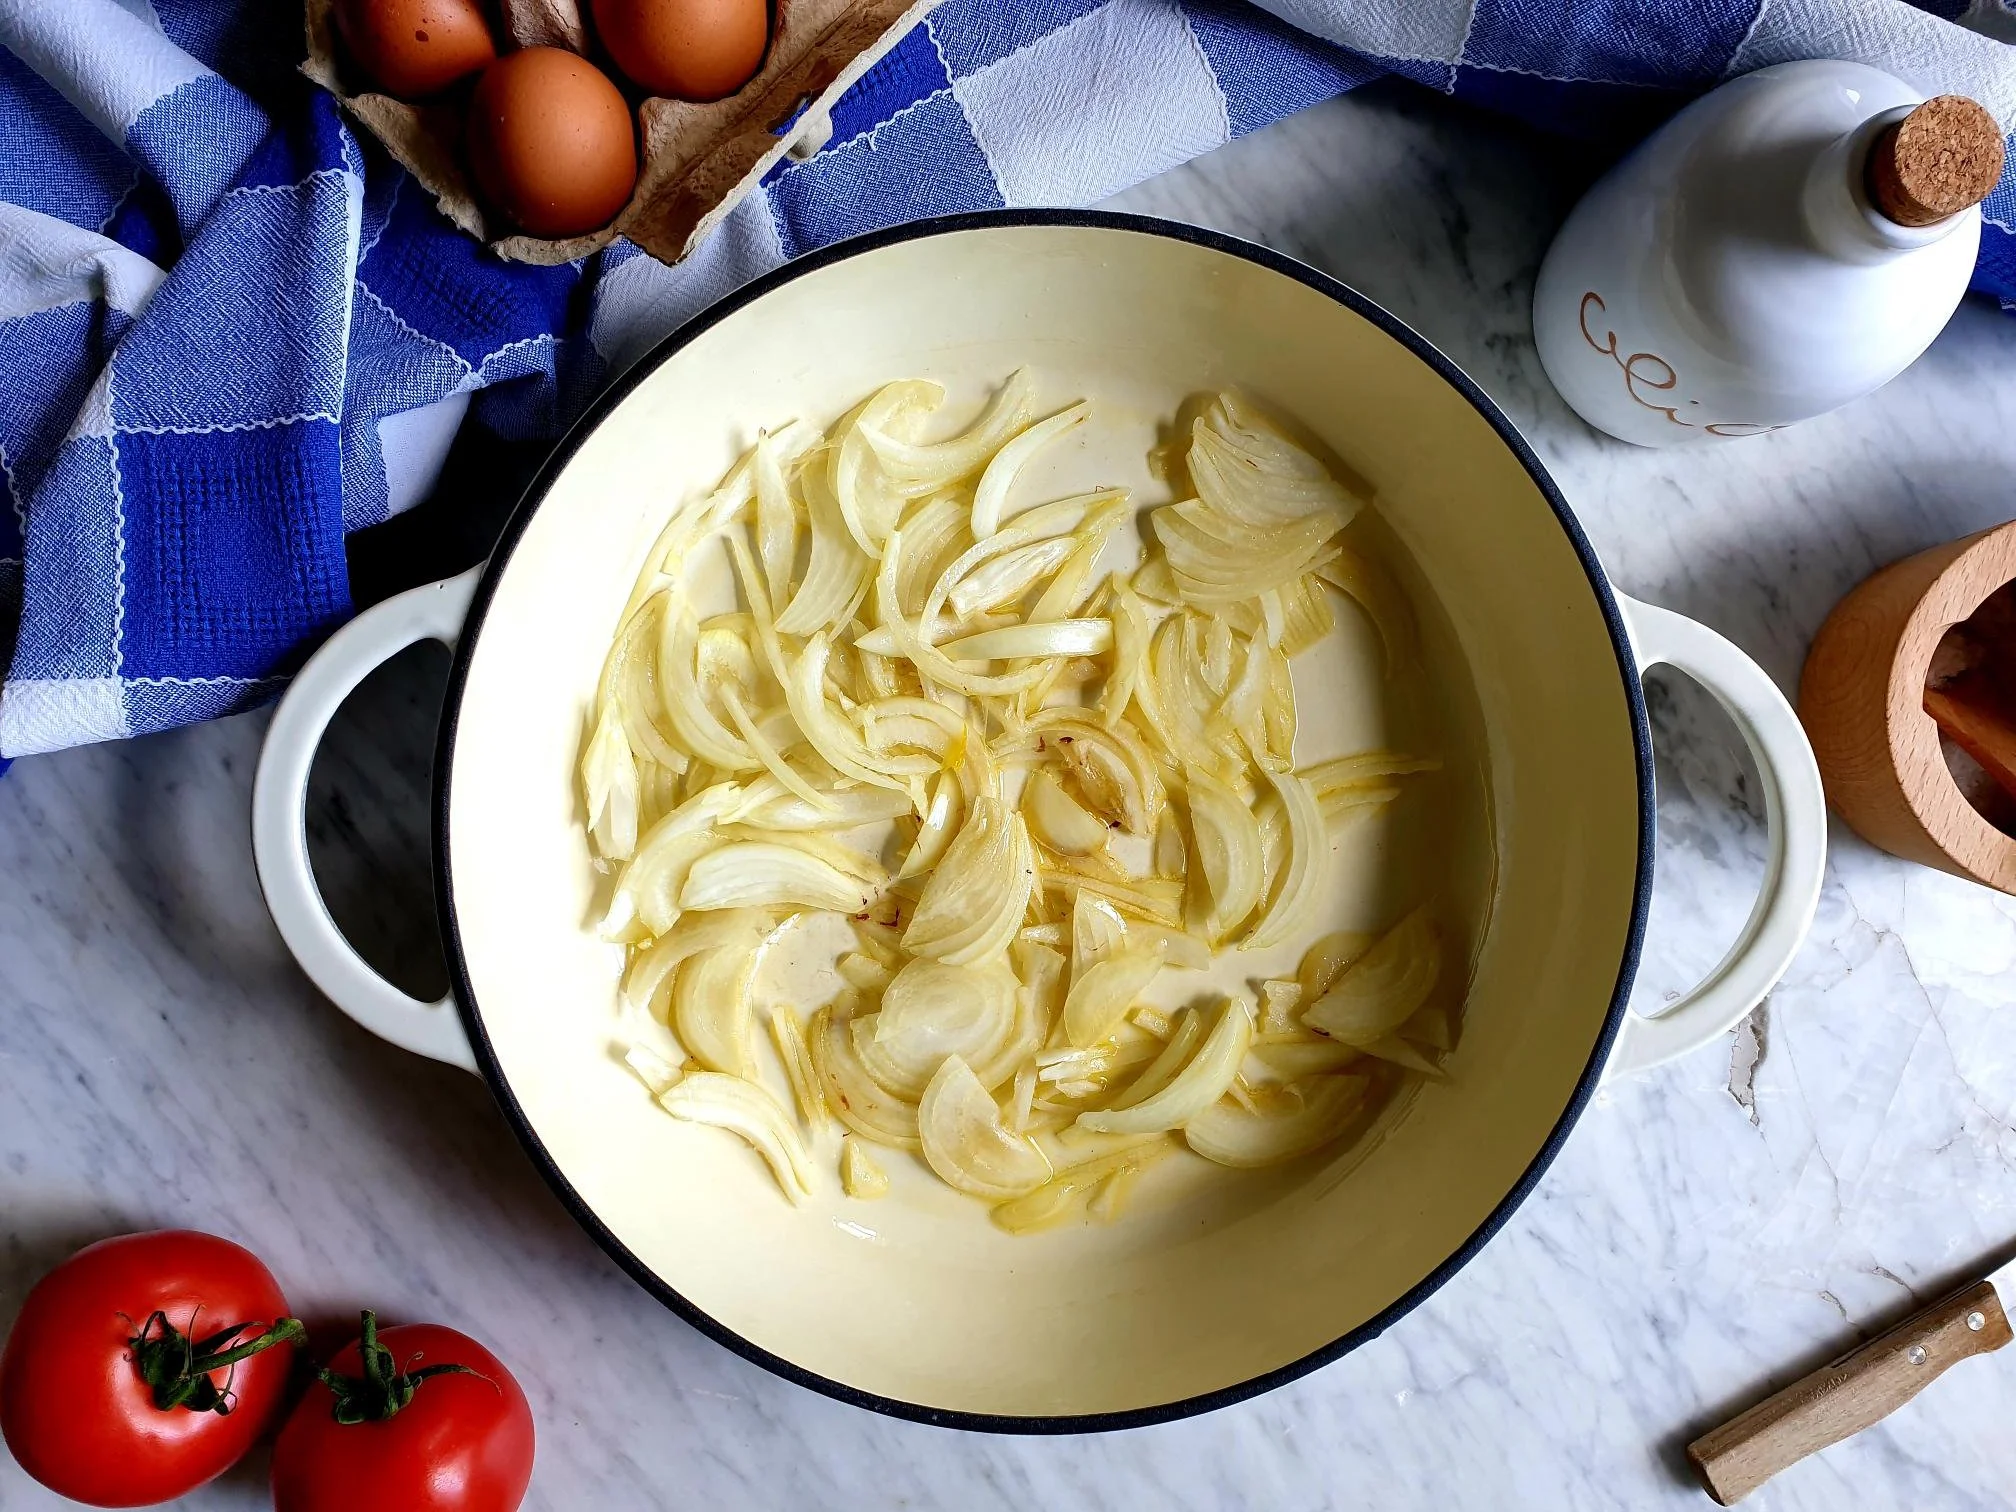
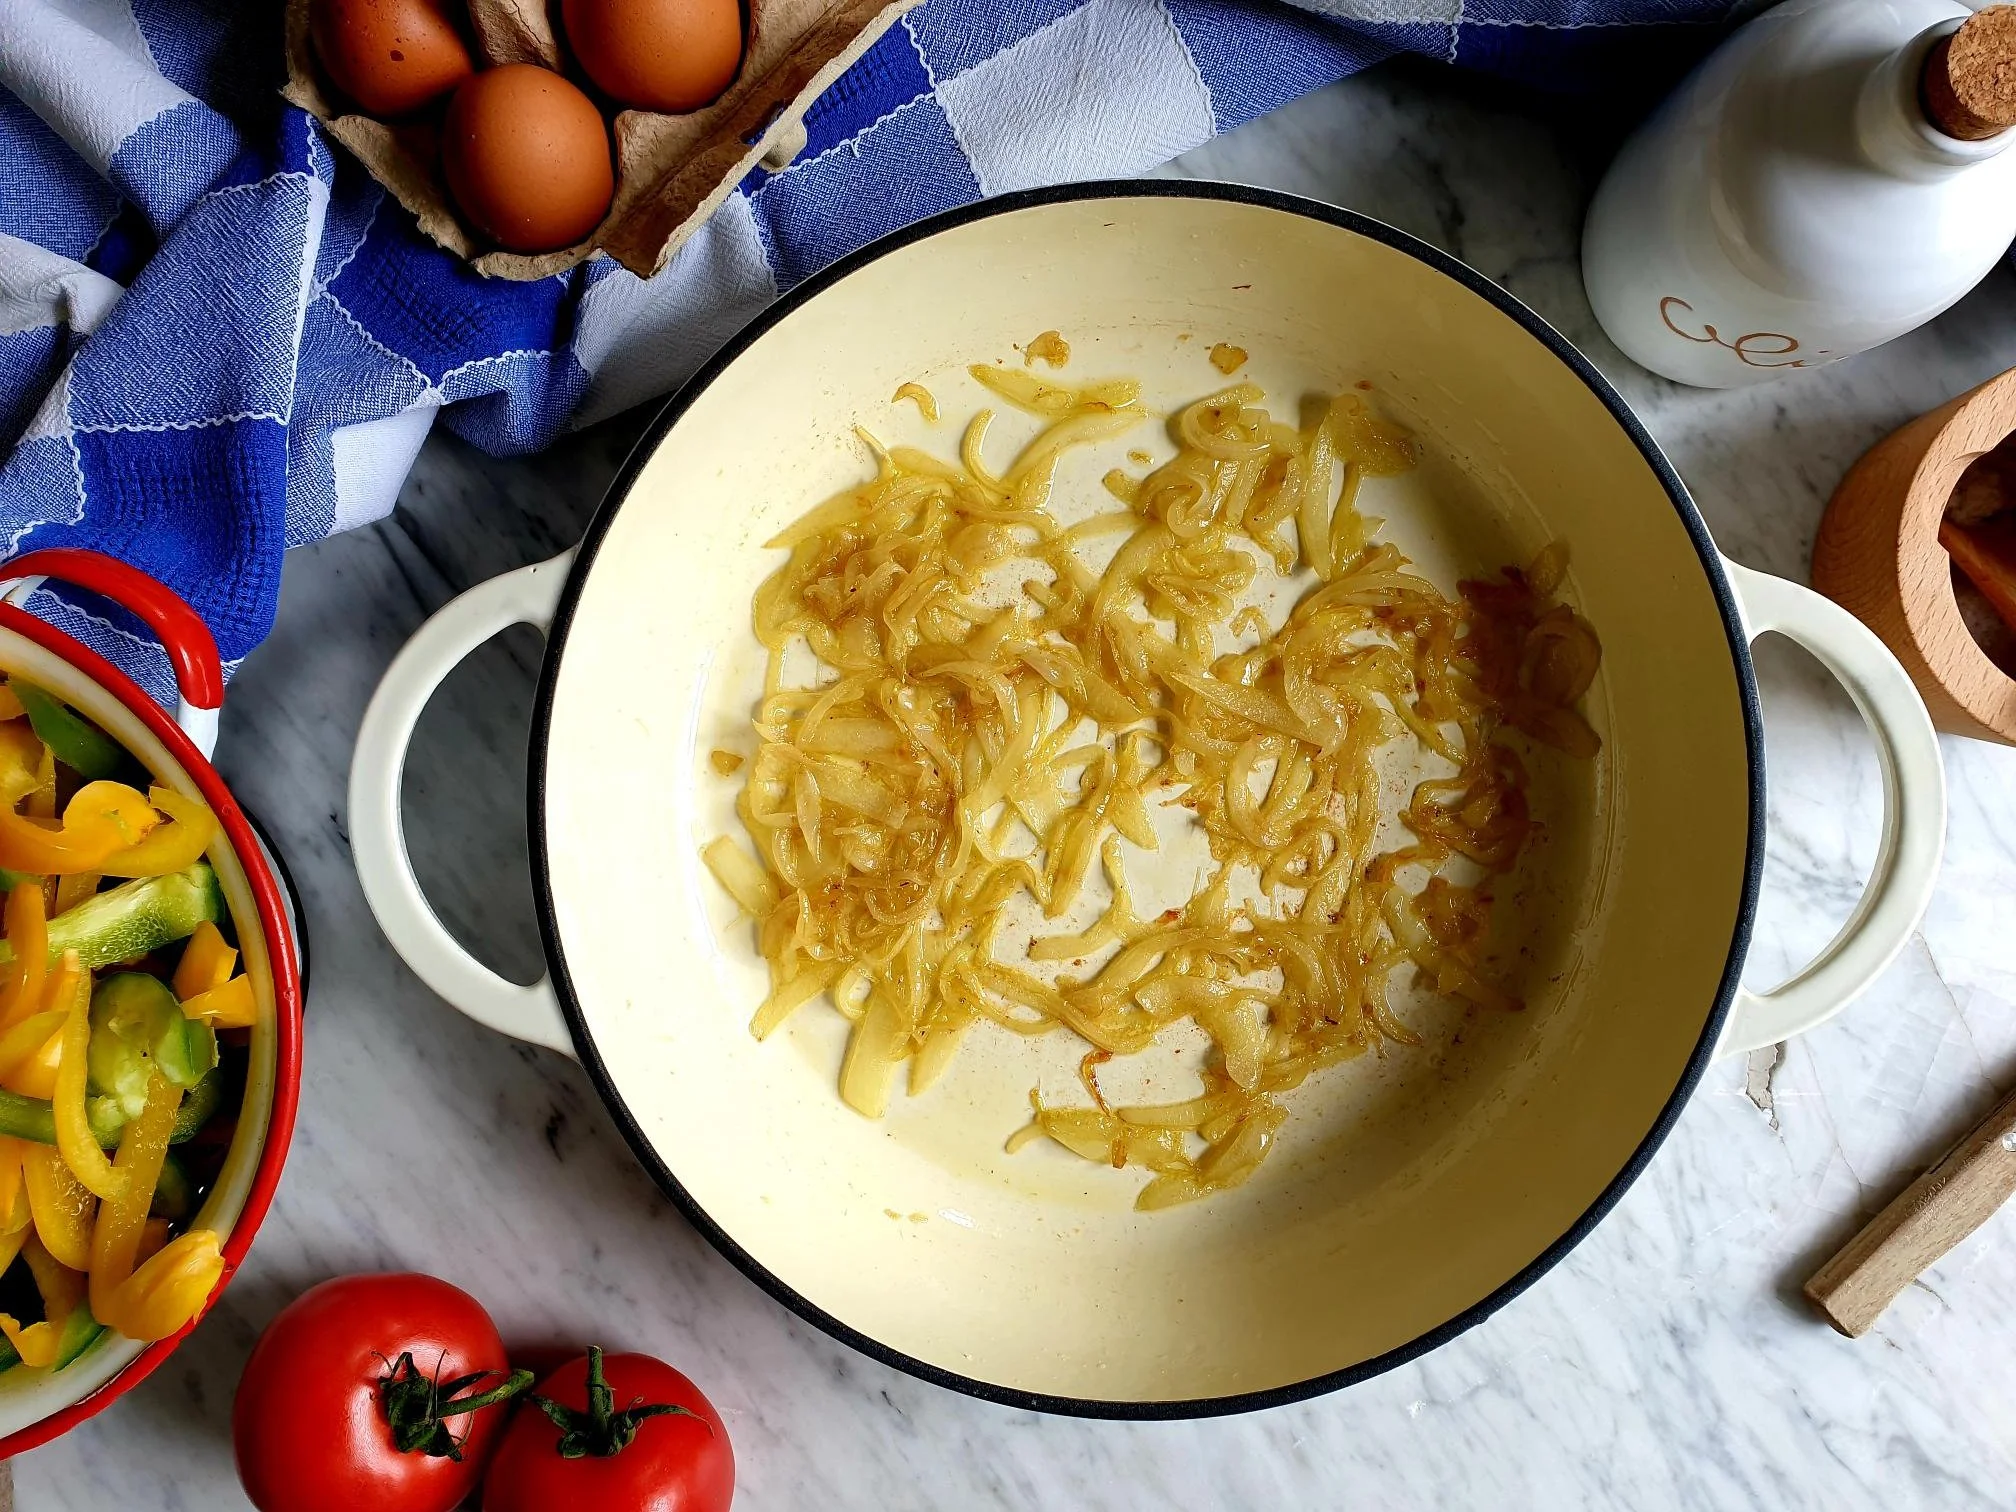
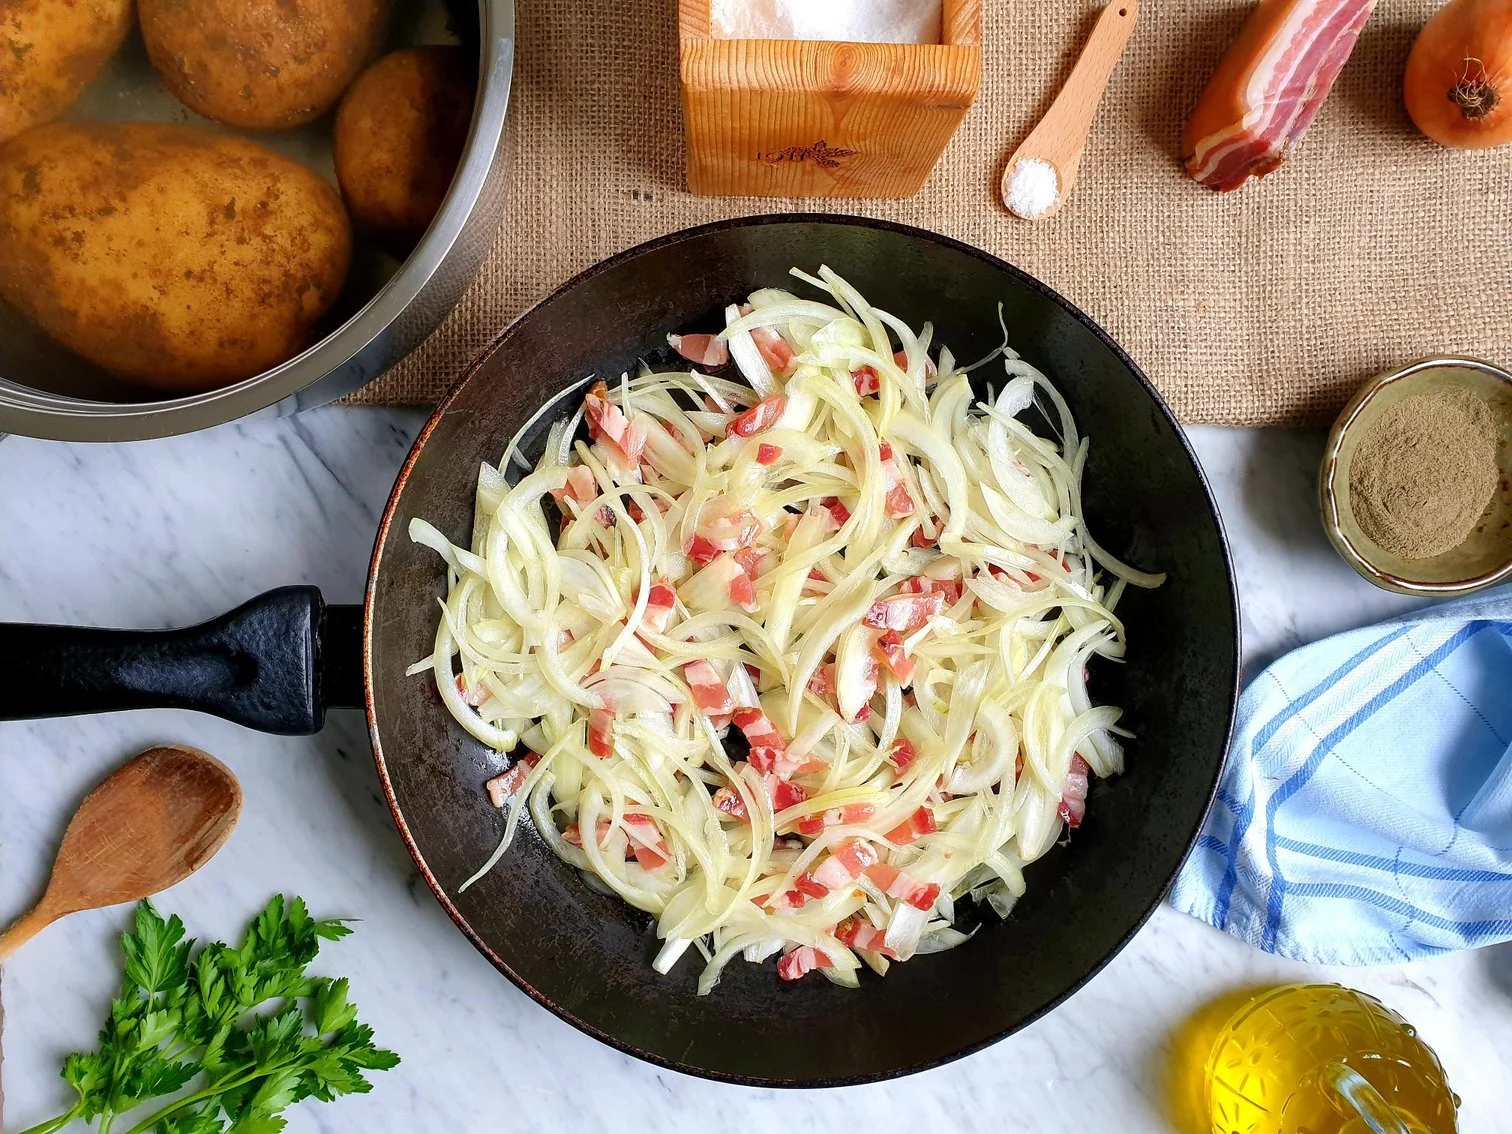
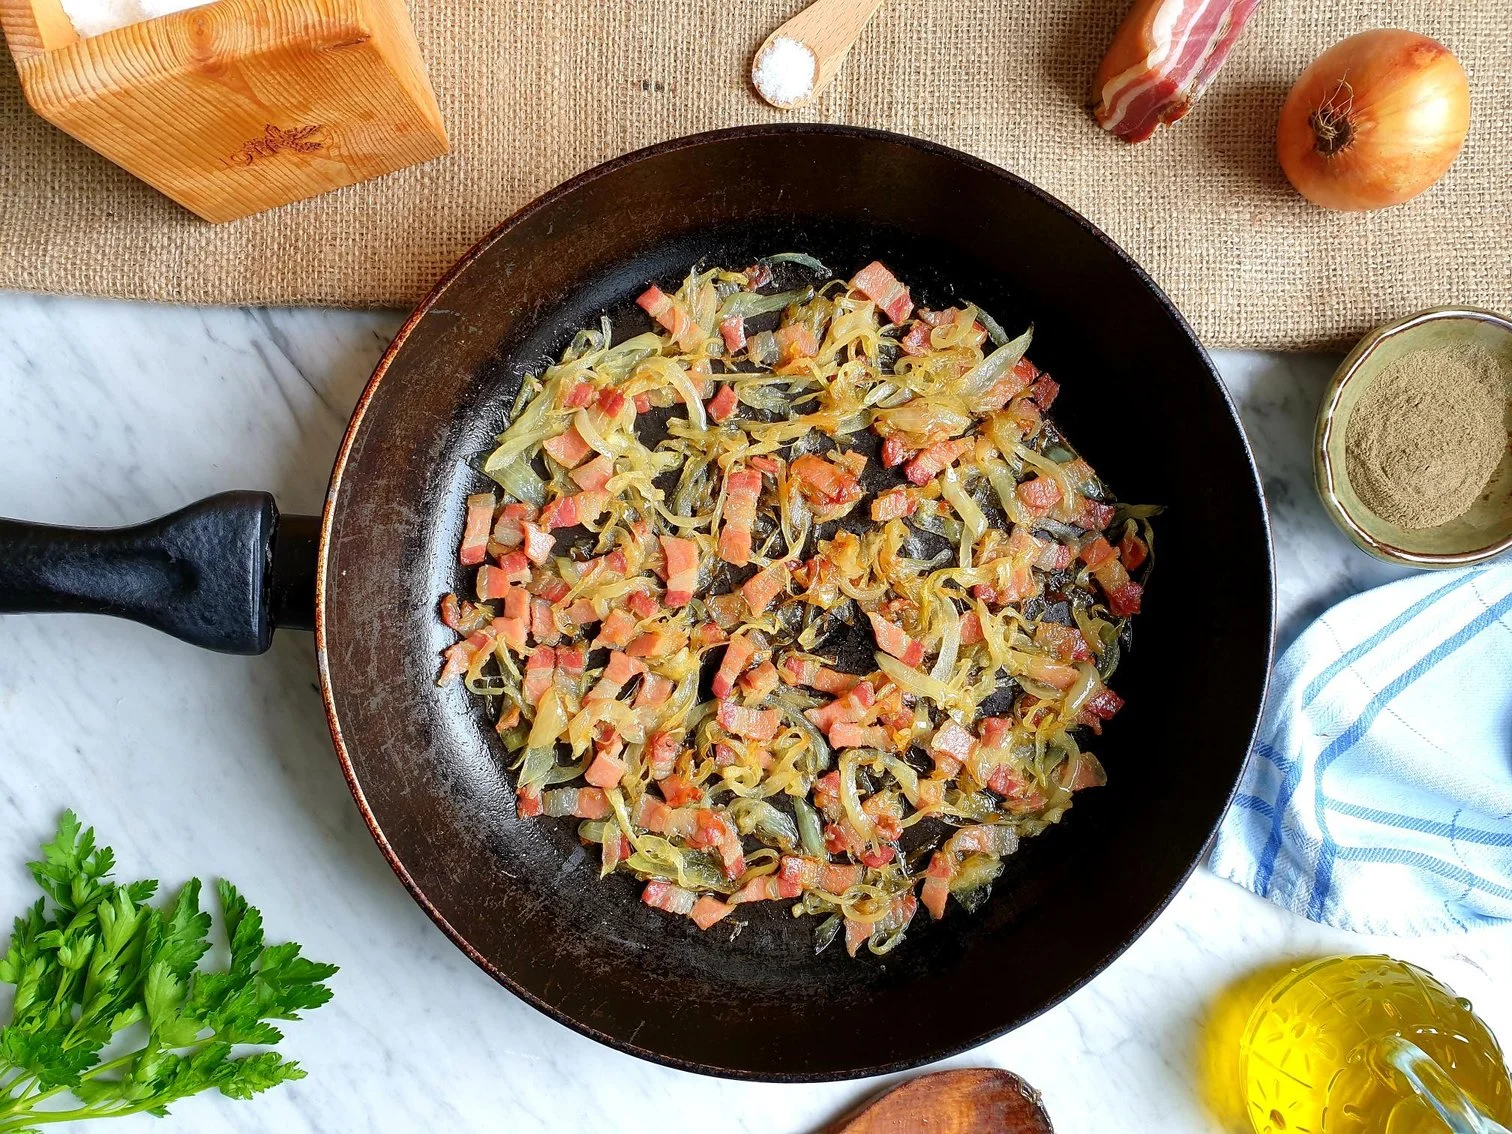
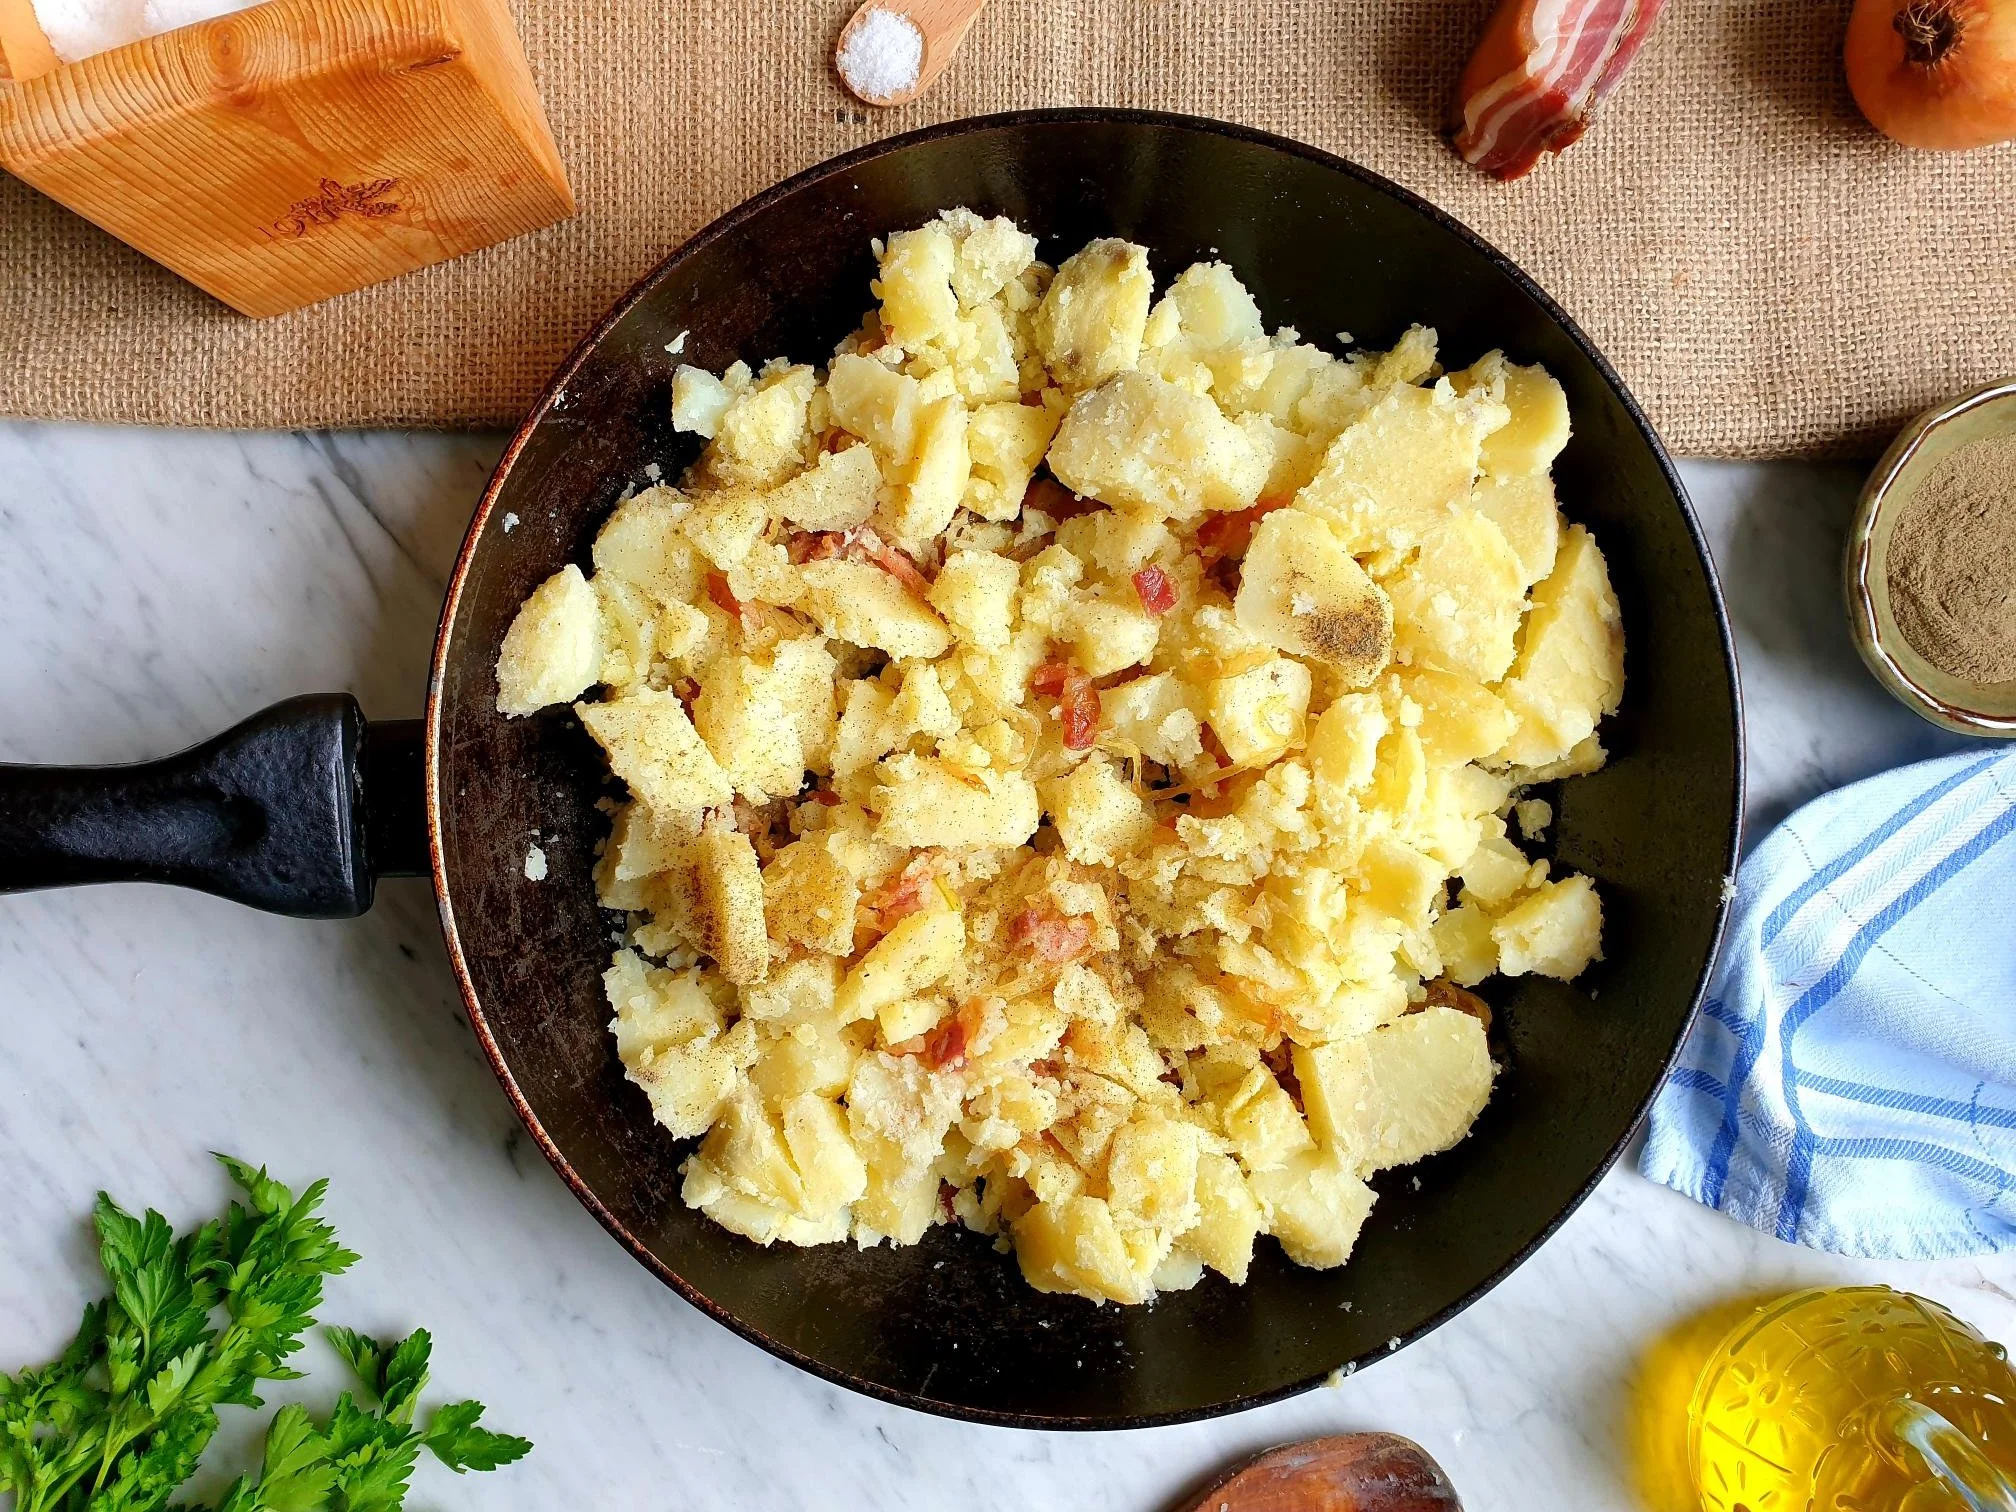
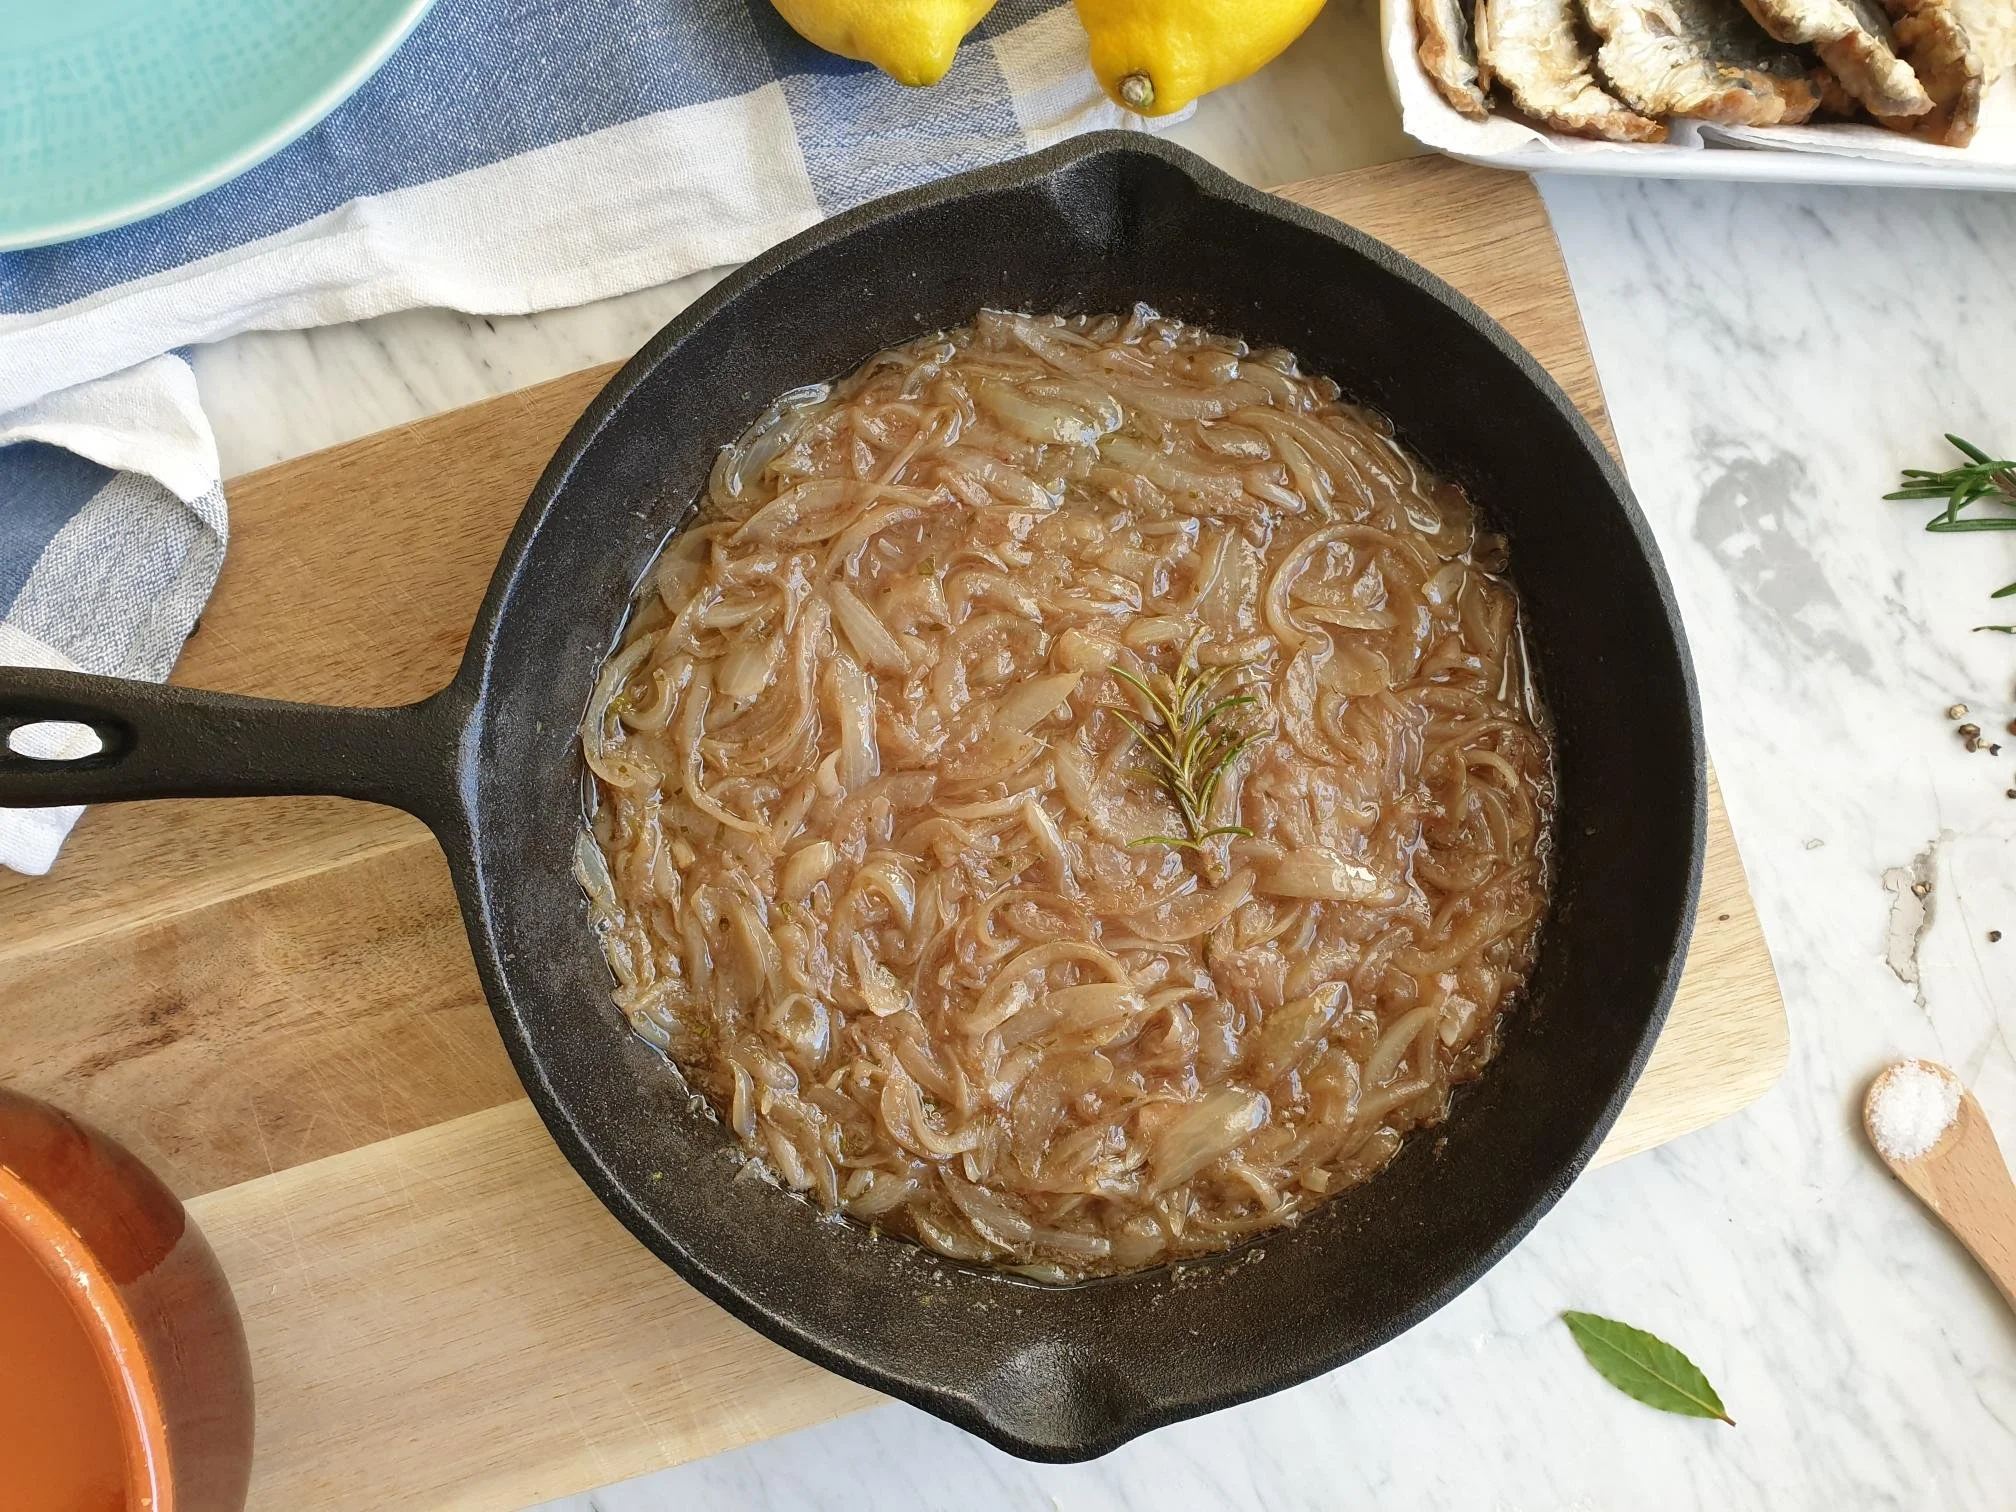
Place the oil in a fairly large pan, add sliced onions, crushed garlic, a generous pinch of sea salt and cook the onions on a gentle heat (for about 10 minutes) or until soft and translucent stirring now and again (do not rush this process as the slowly caramelized onions will add a final taste of the dish).

View fullsize Peperonata 6.jpg
View fullsize Peperonata 7.jpg

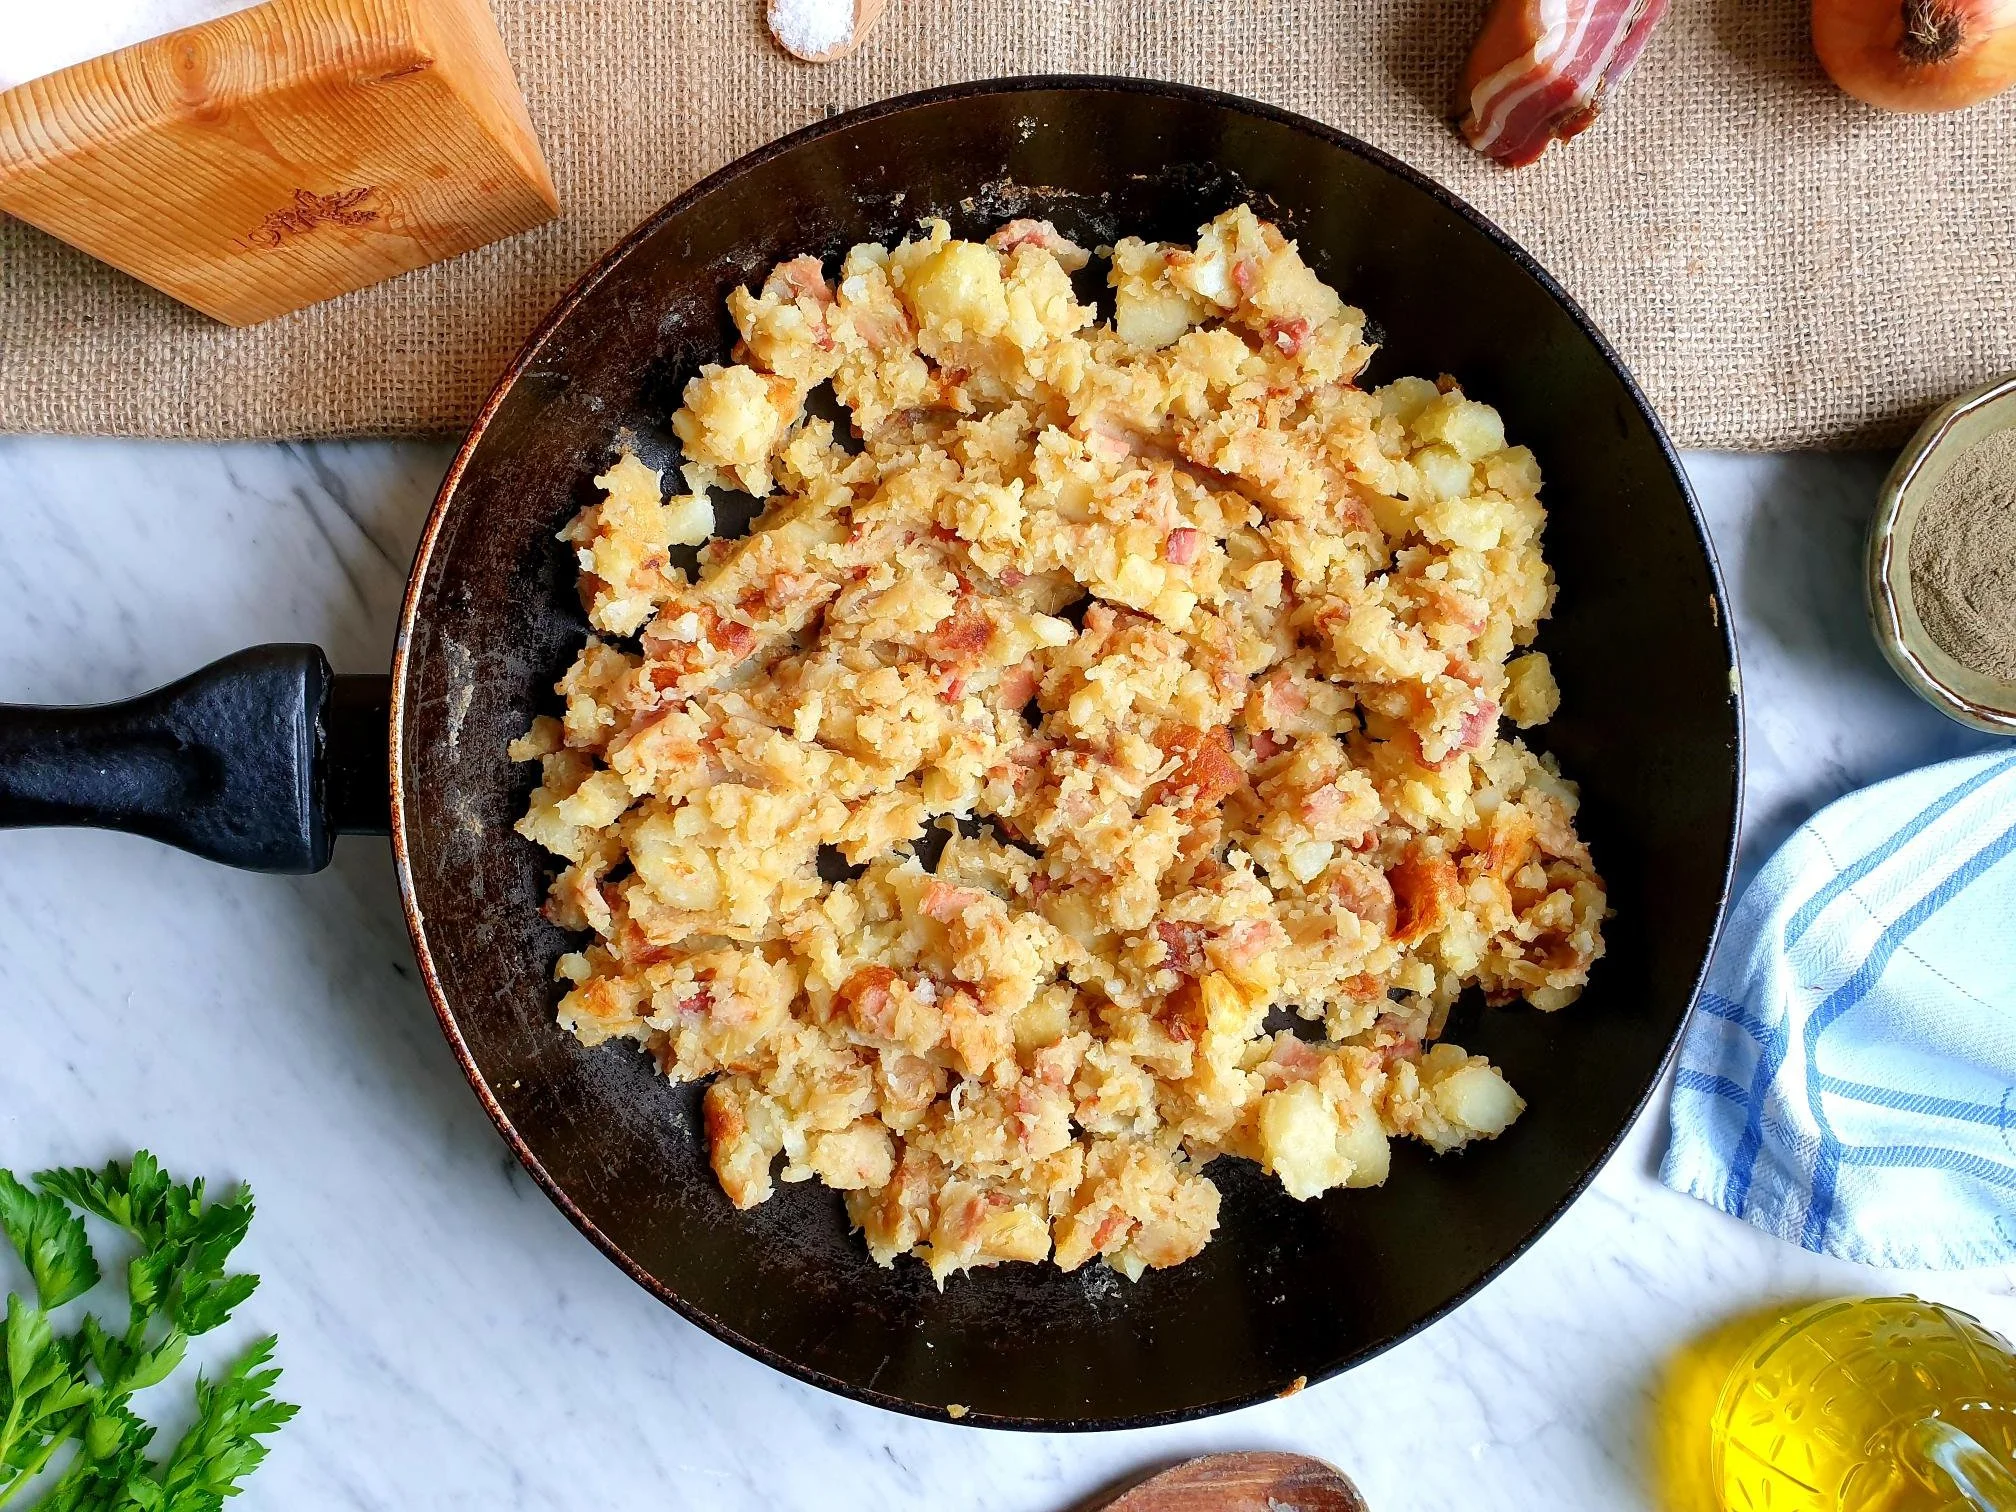
Add cubed aubergines and cook gently for about 10-15 minutes or until cooked down and soft, stirring occasionally, making sure they do not catch to the bottom of the pan.

View fullsize Peperonata 8.jpg
View fullsize Peperonata 9.jpg

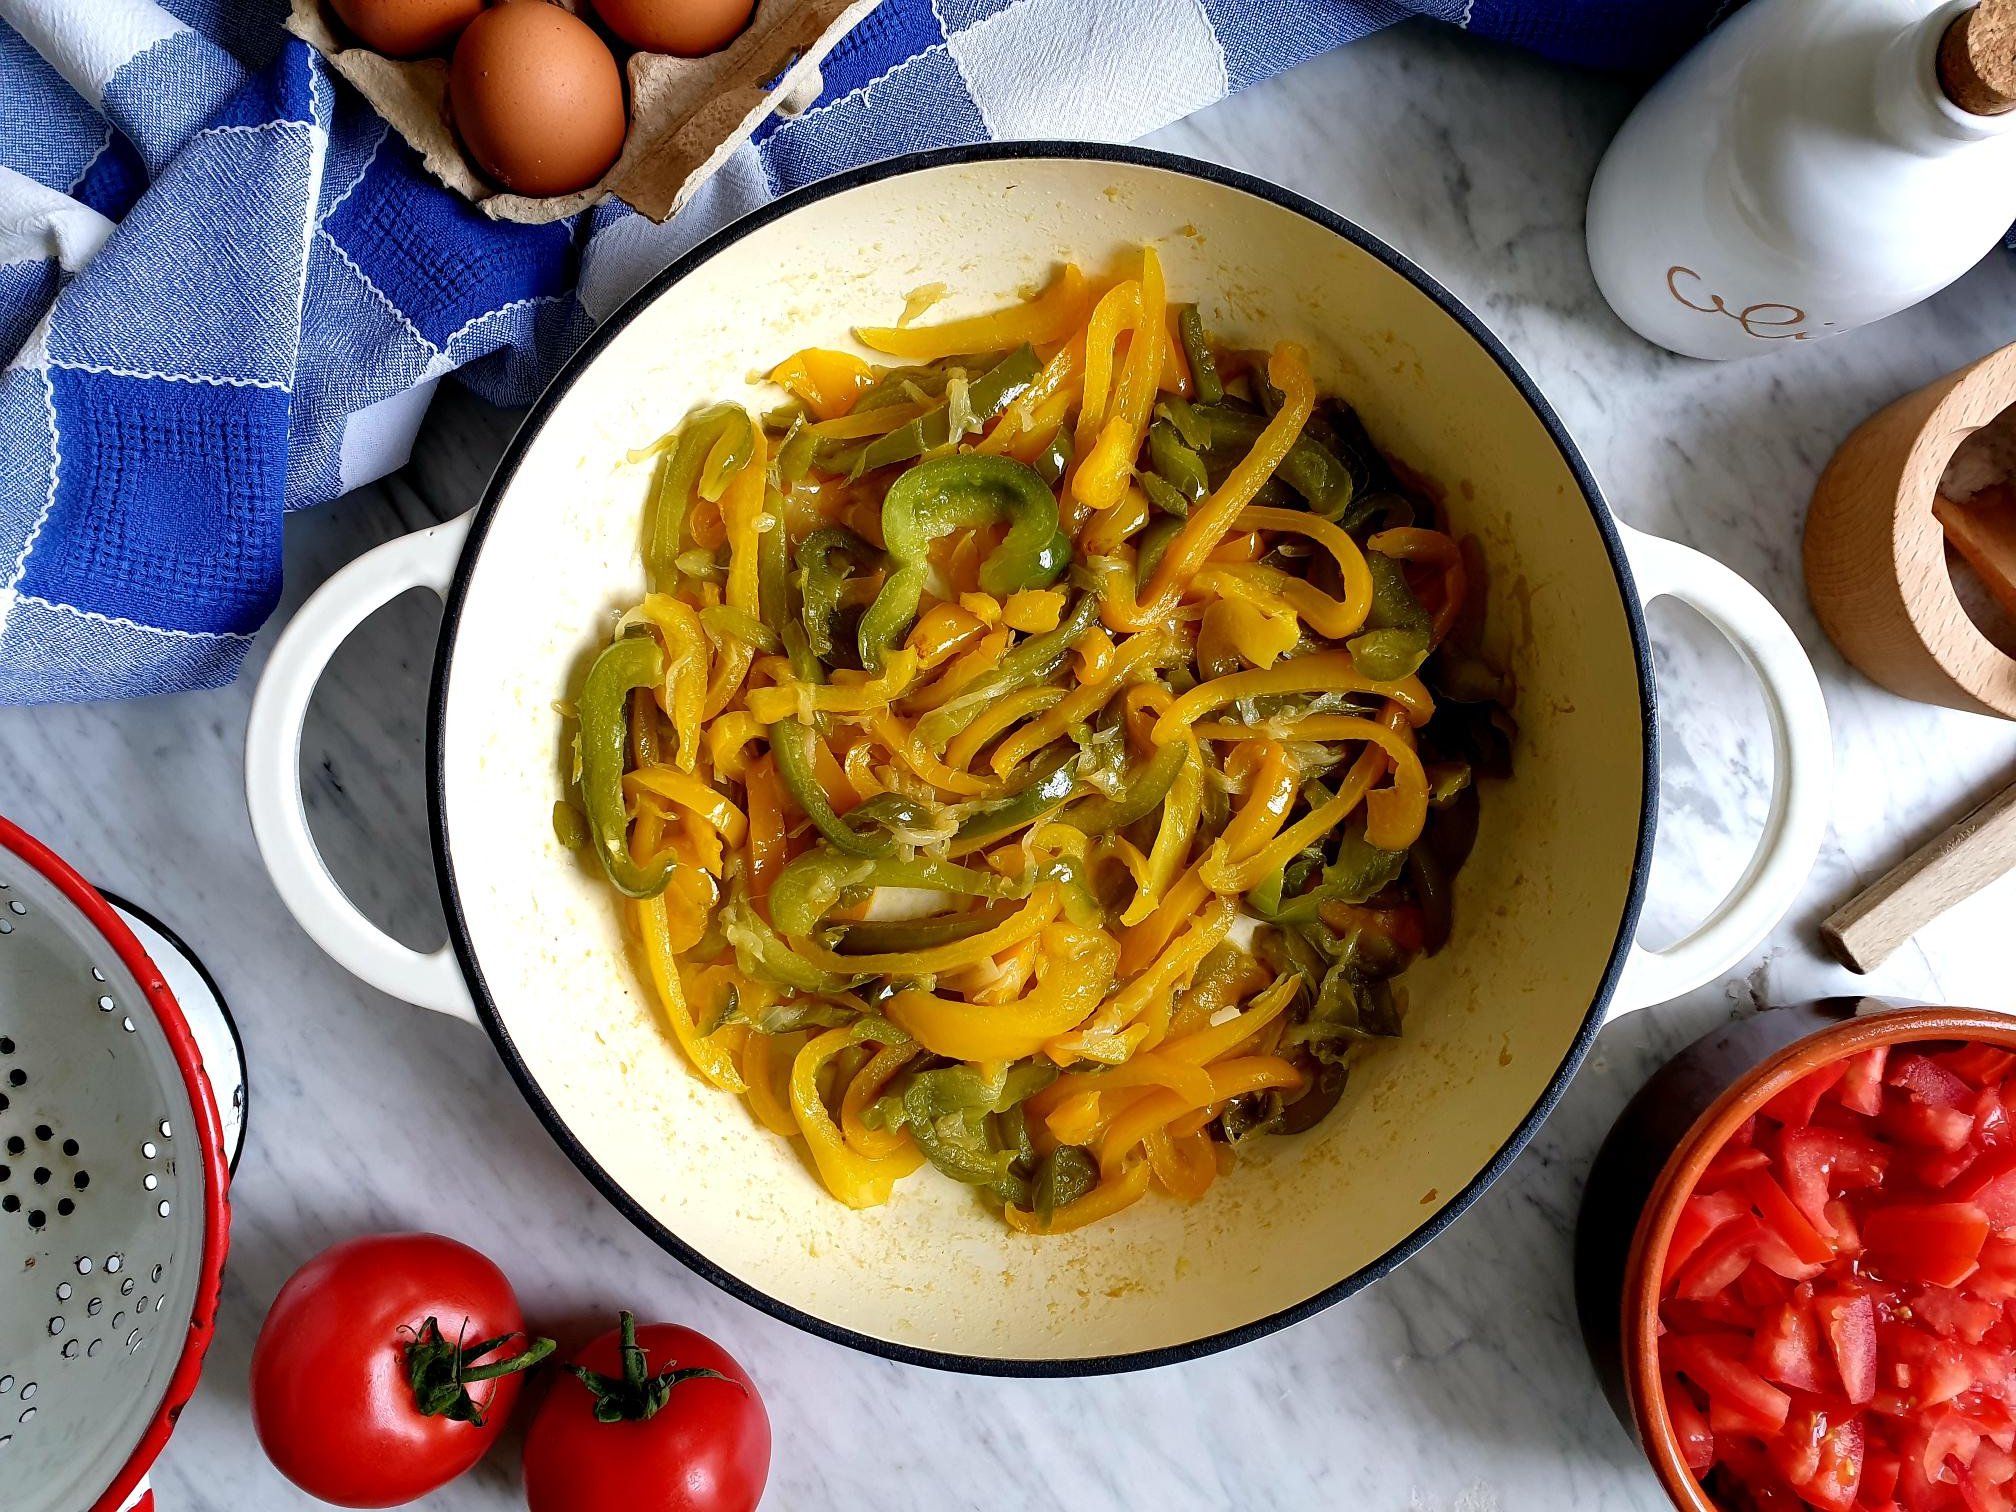
Transfer sliced bell peppers to the pan and cook together with the onions and aubergines for about 10-15 minutes or until softened a bit and cooked down, stirring now and again (if onion, aubergine and pepper mixture starts to catch at the bottom of the pan add a splash of water).

View fullsize Peperonata 10.jpg
View fullsize Peperonata 11.jpg

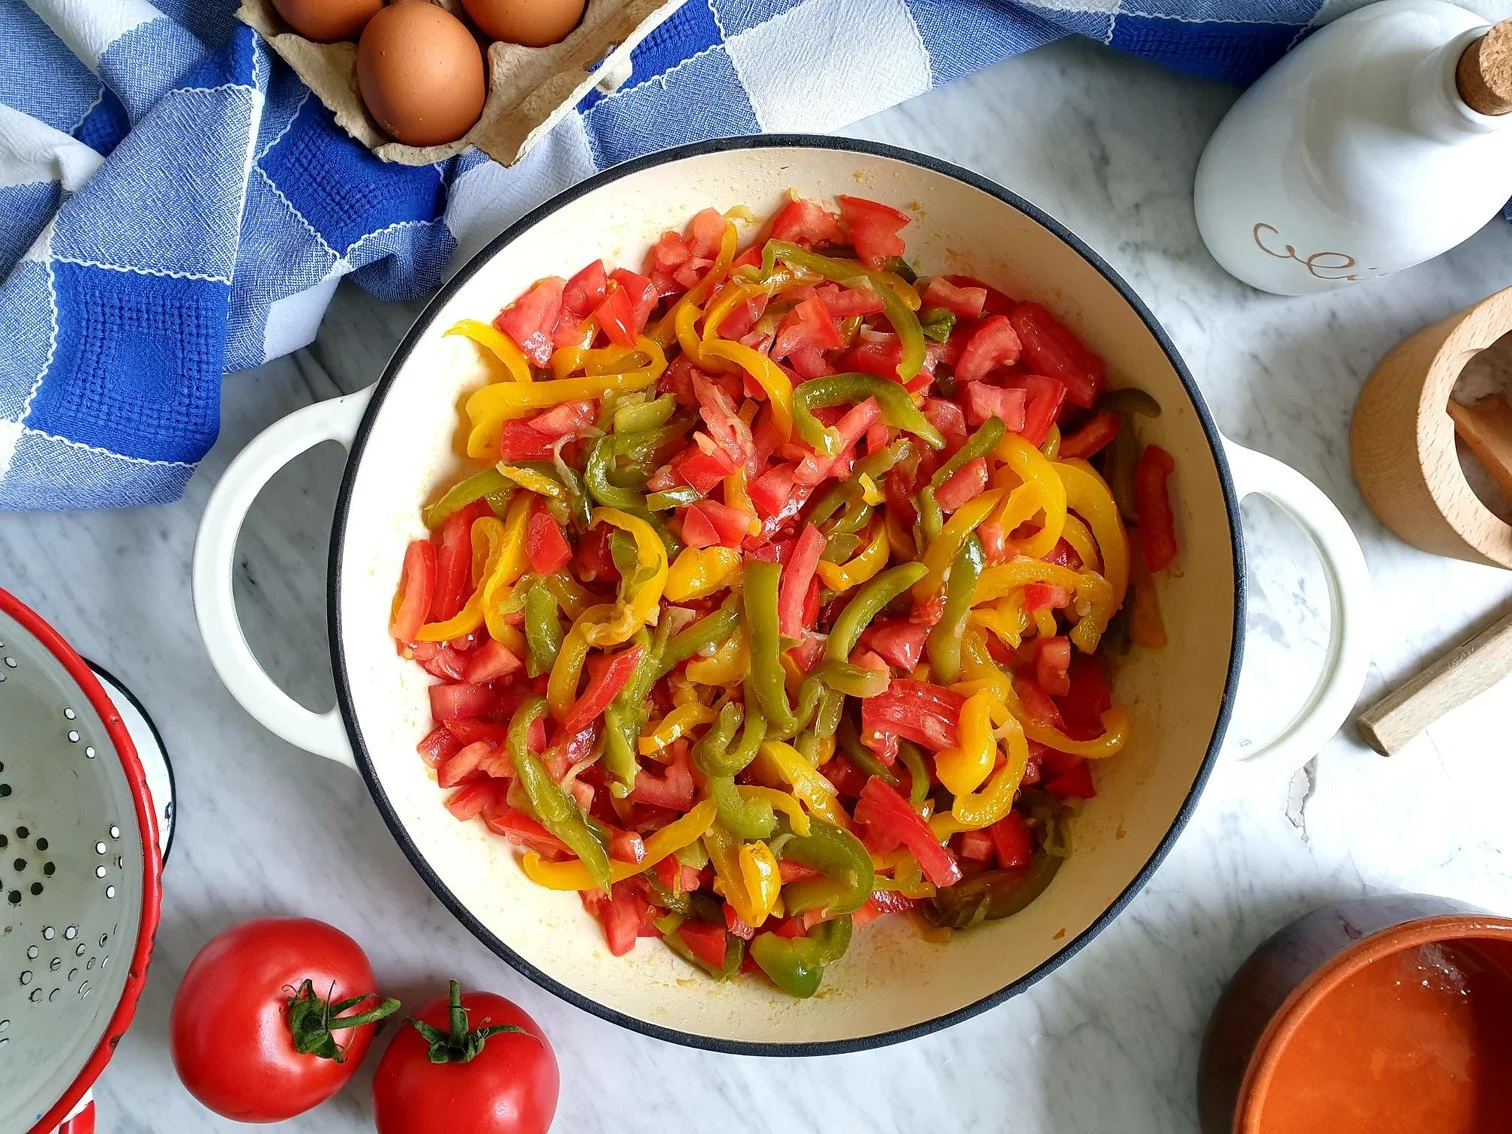
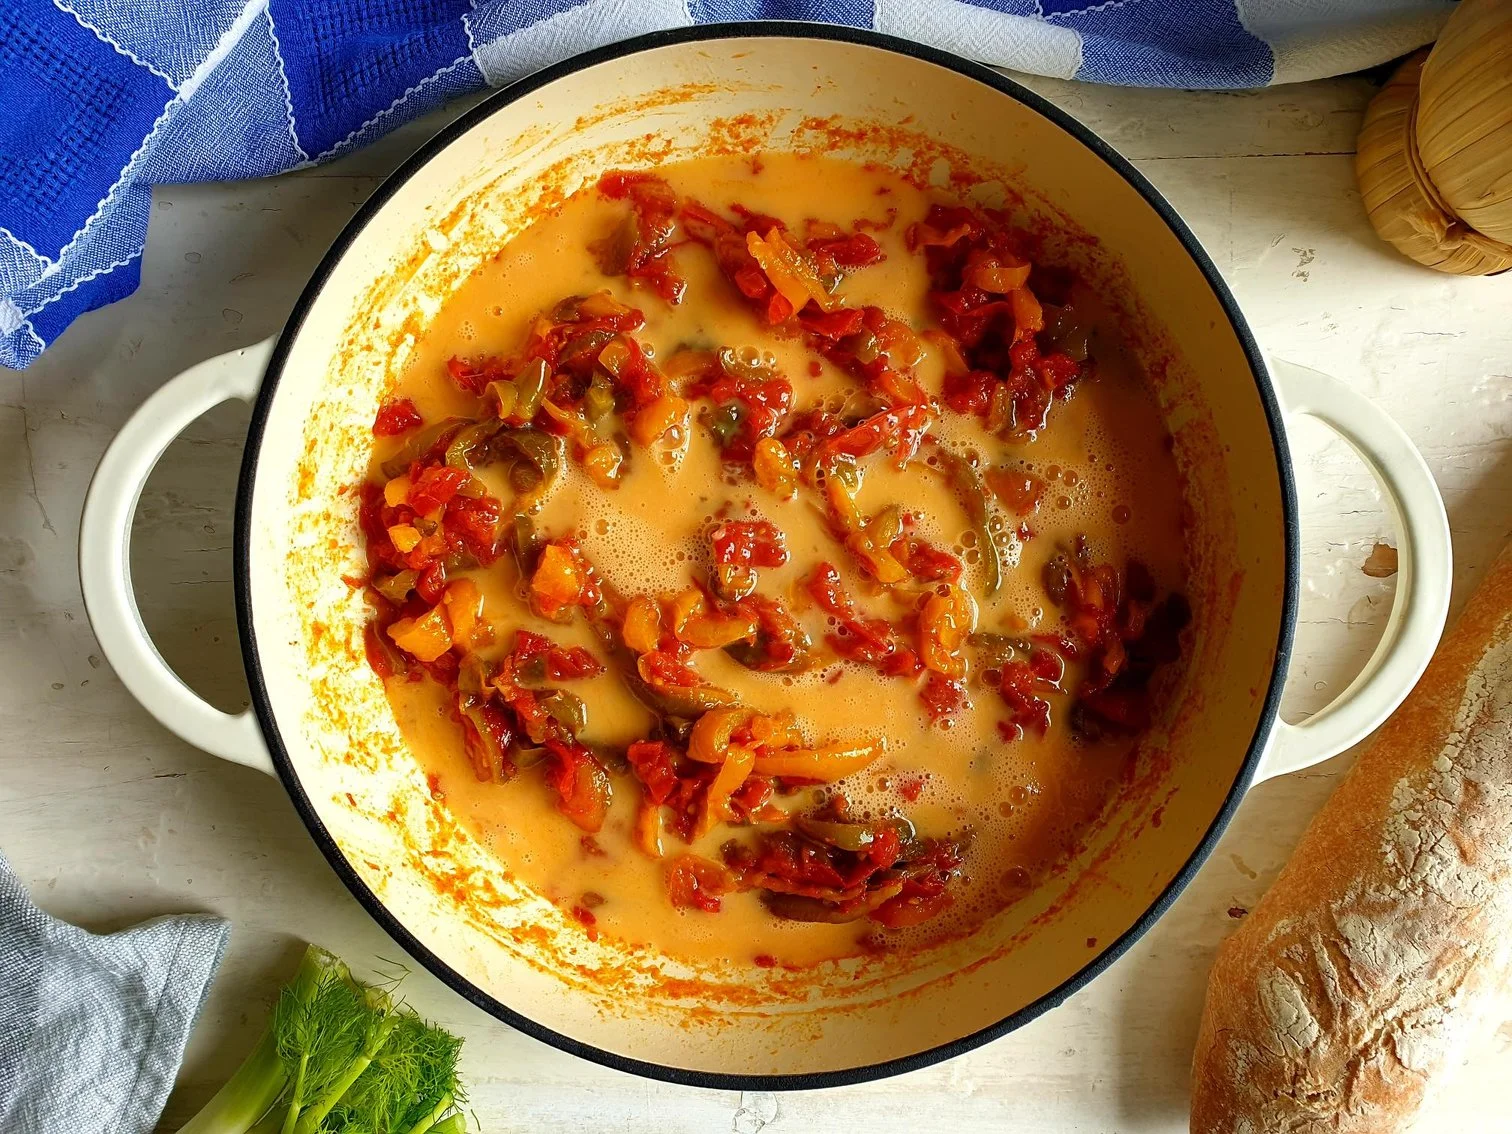
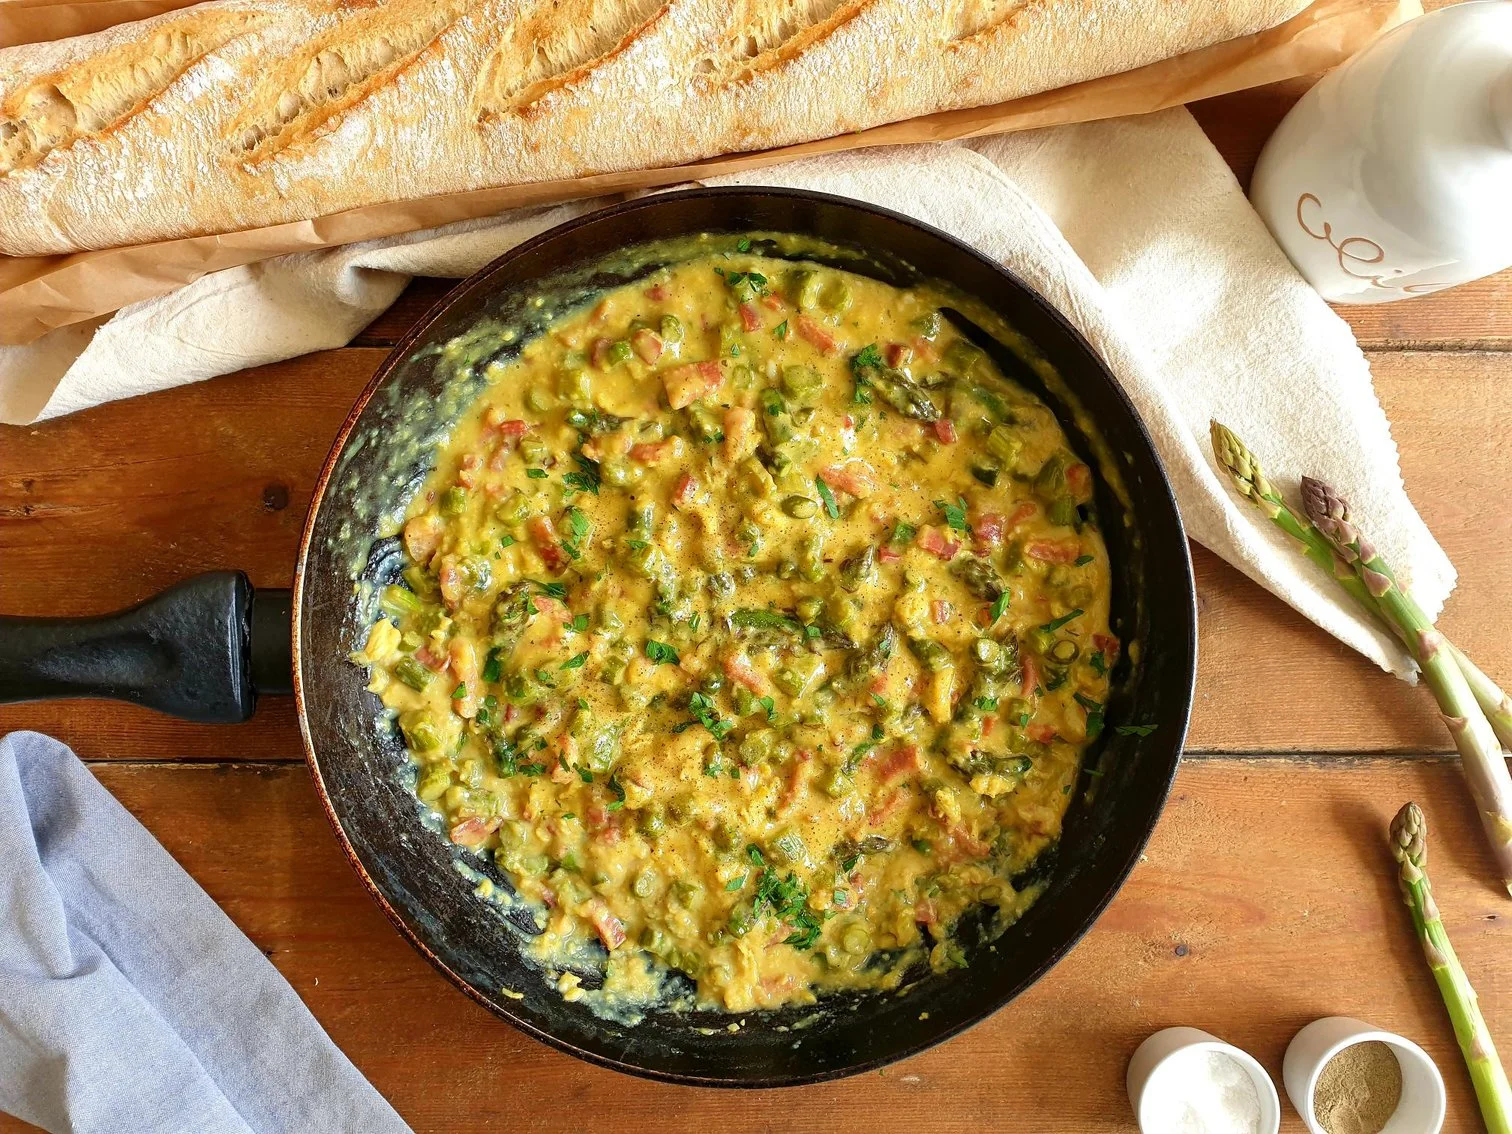
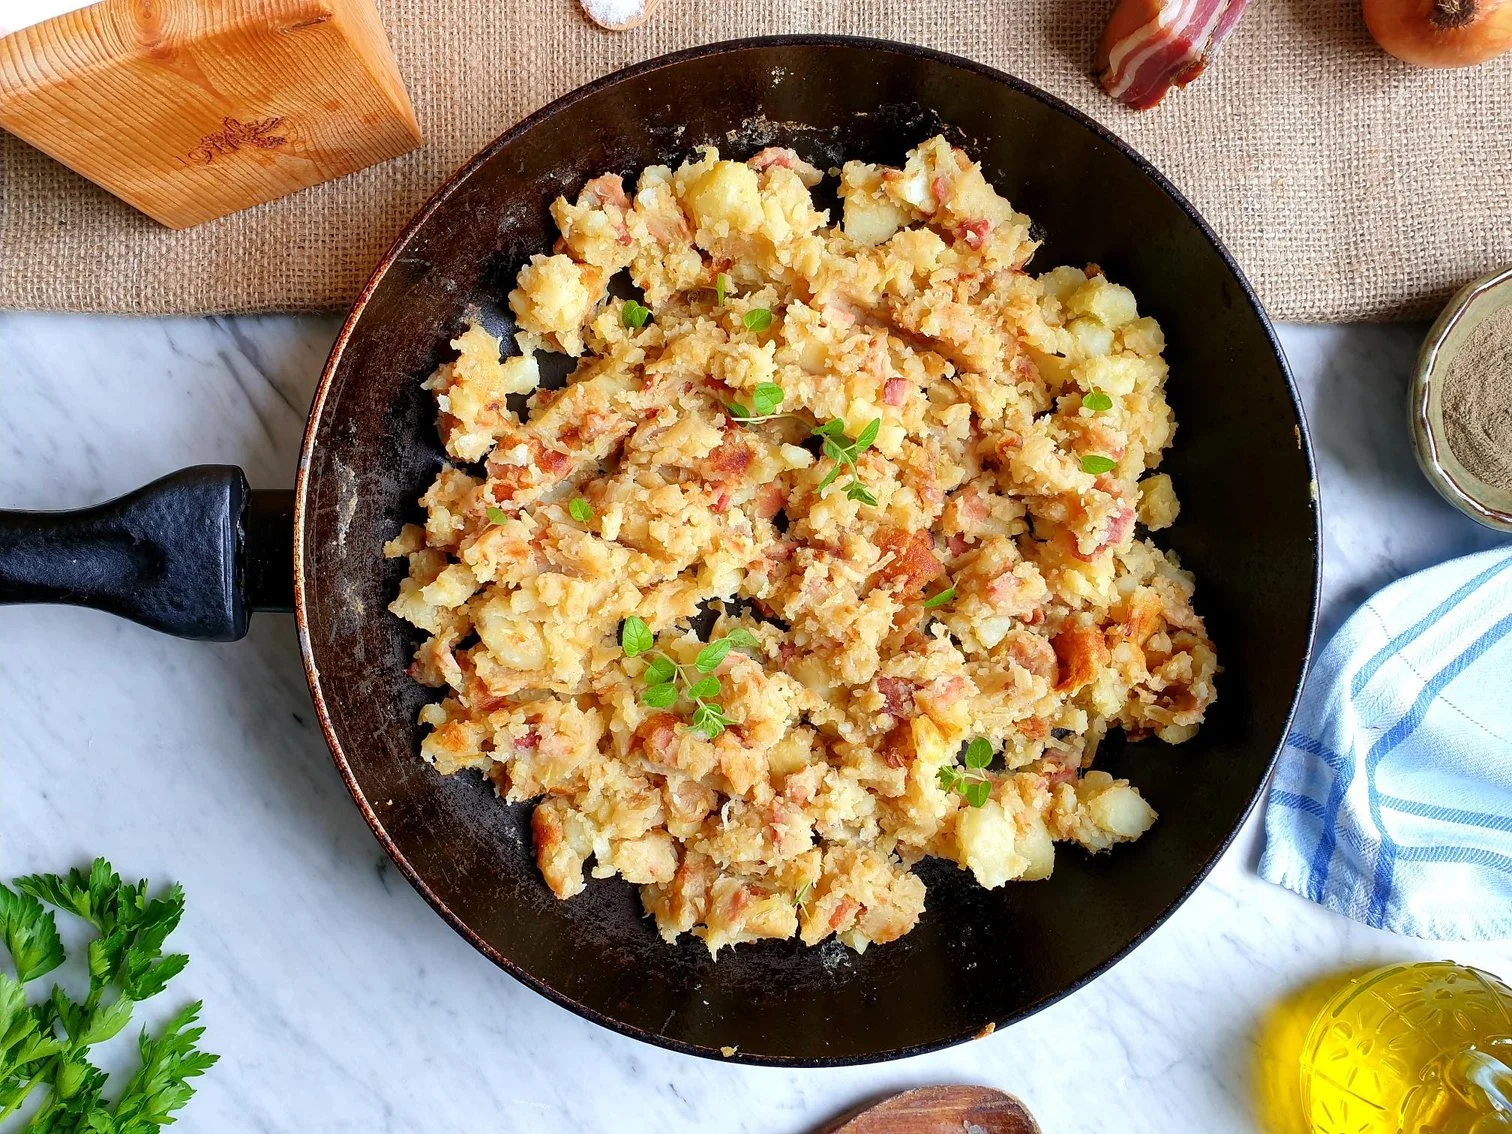
Add chopped tomatoes, a few fresh basil leaves, a splash of water and cover with the lid.

View fullsize Peperonata 12.jpg
View fullsize Peperonata 13.jpg

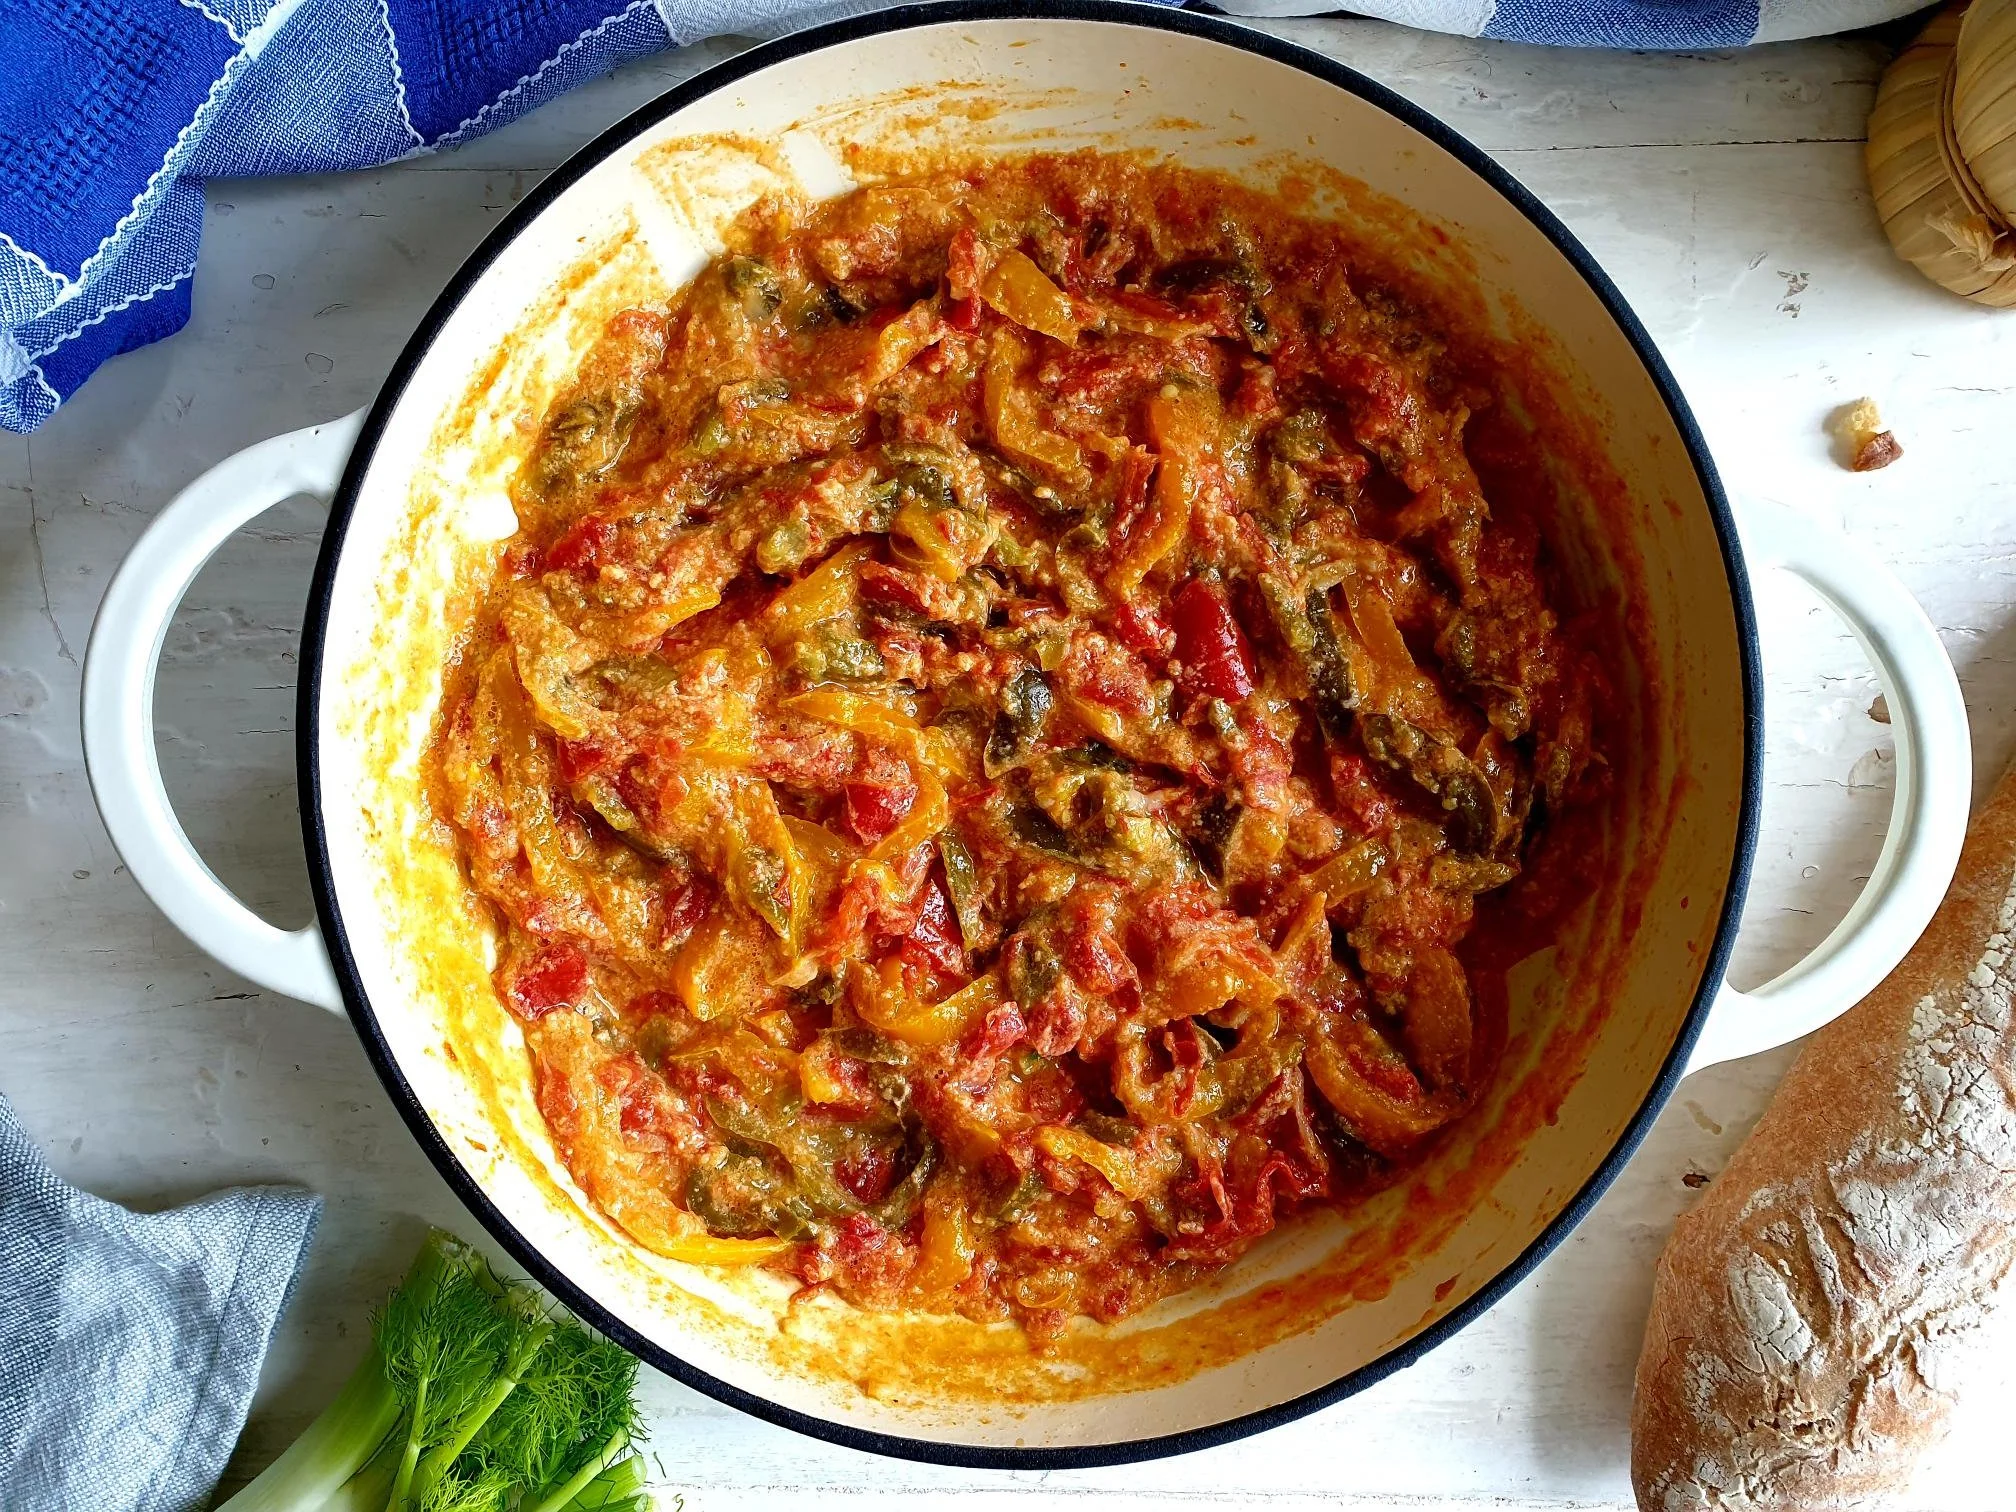
Simmer on a very gentle heat for about 40minutes, checking and stirring now and again making sure it does not stick to the bottom.

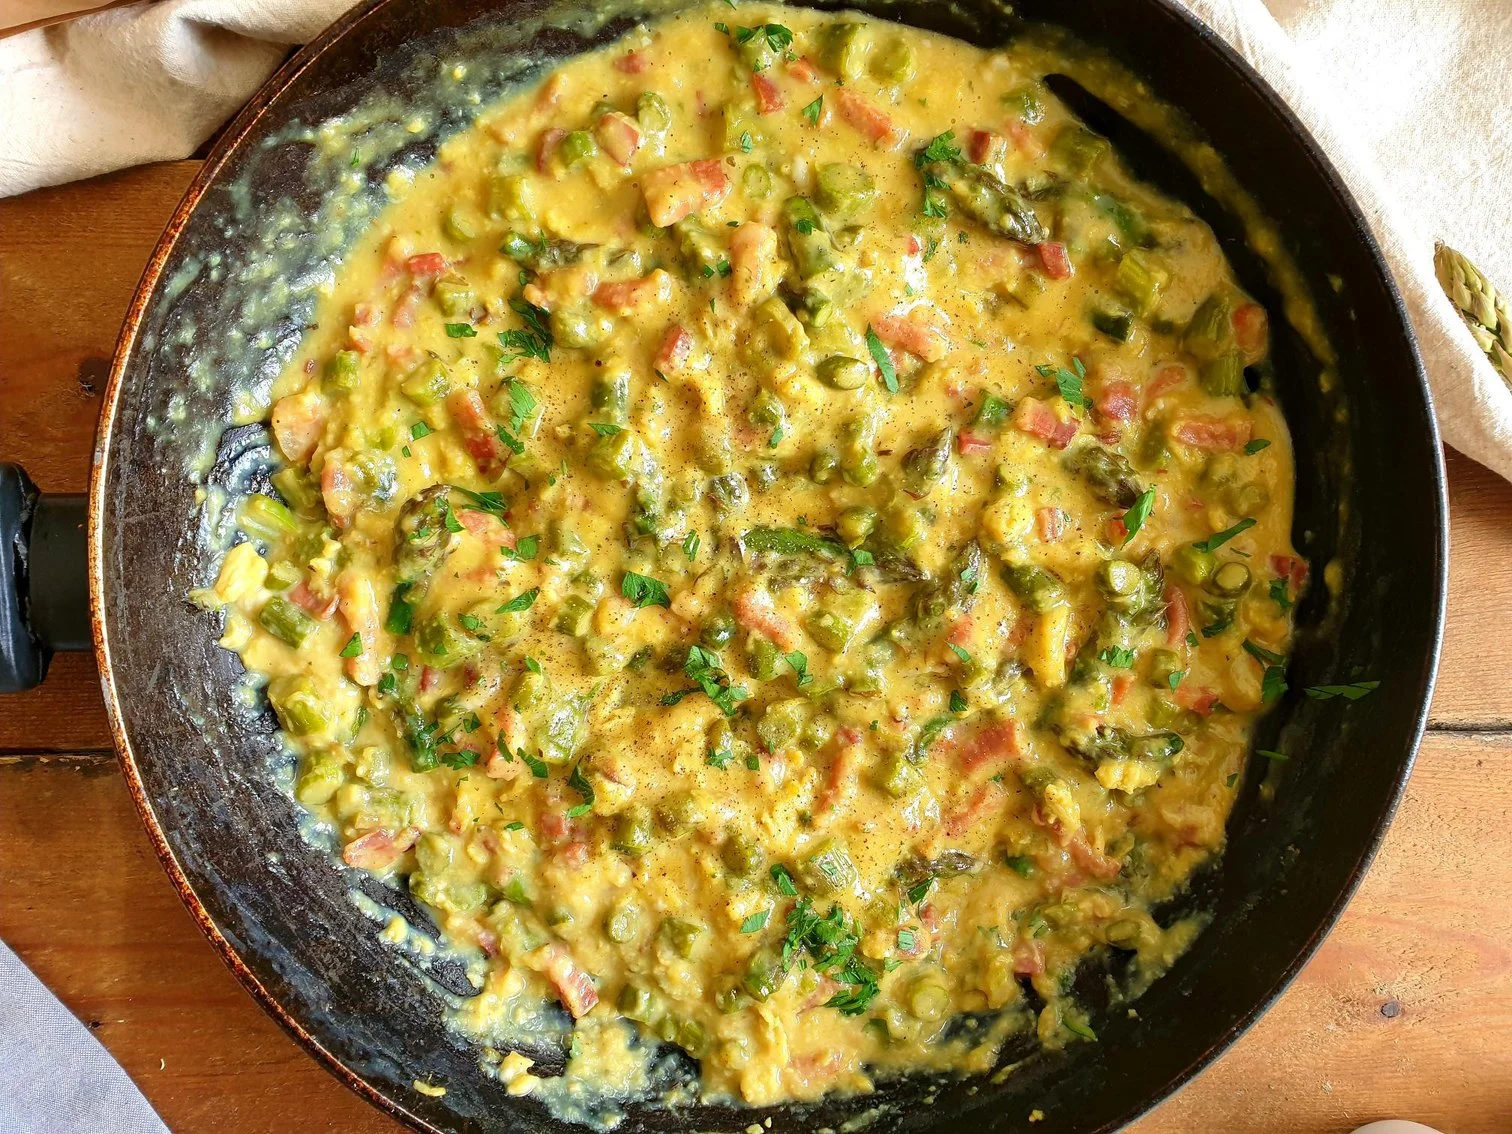
Taste and adjust the seasoning with sea salt.

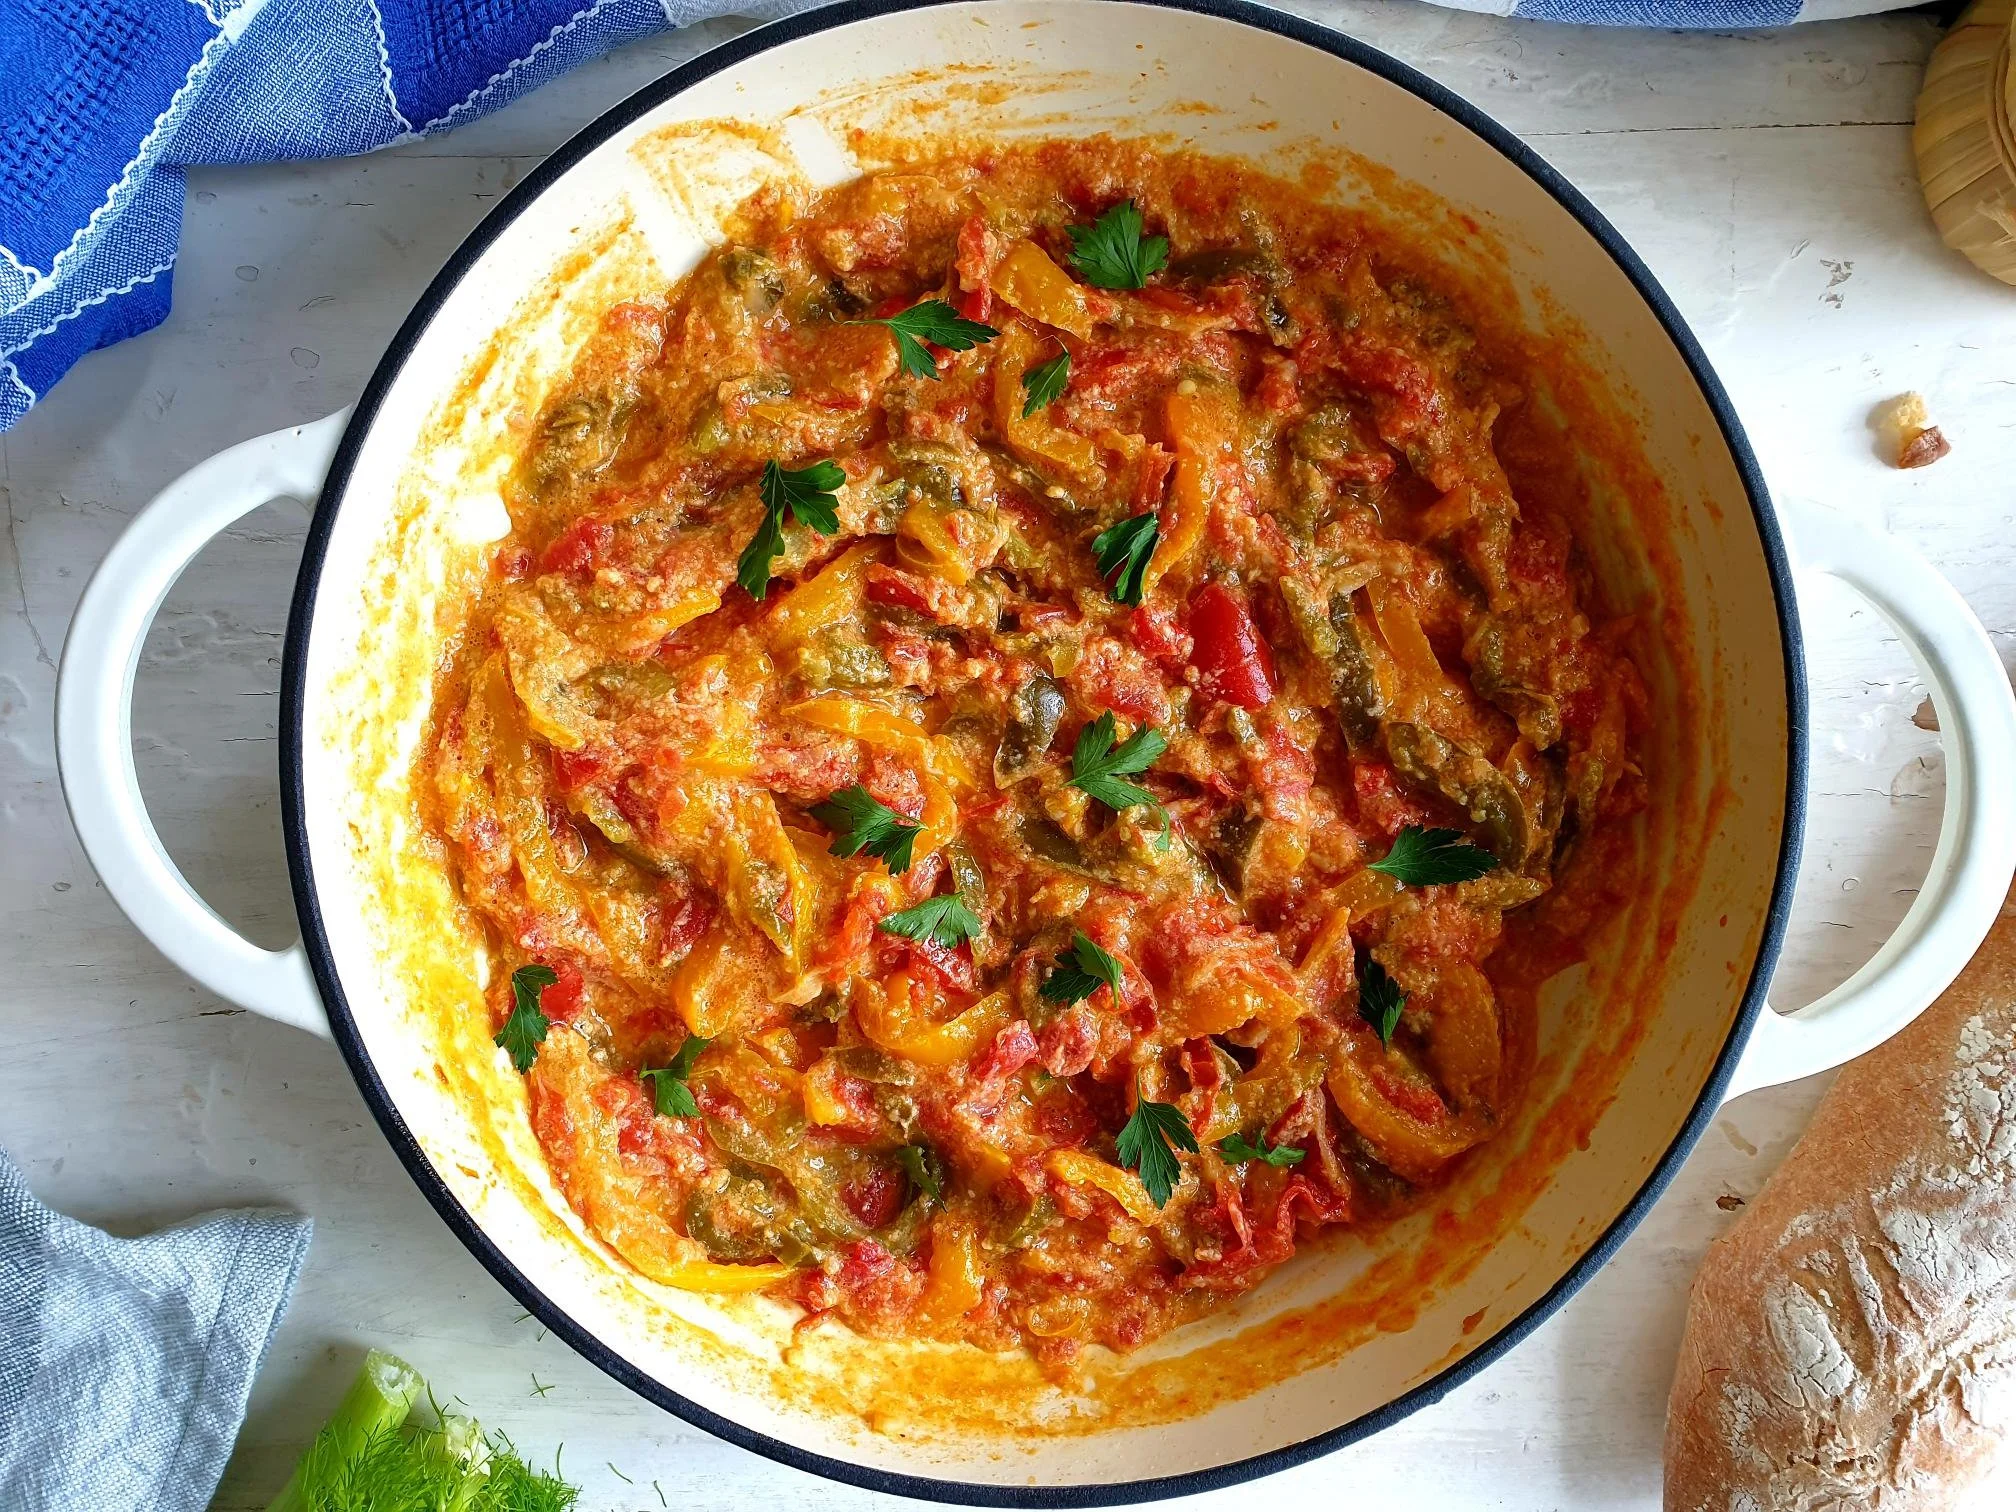
Let it cool, sprinkle with some roughly chopped fresh flat leaf parsley and some basil leaves (optional) and serve tepid, at room temperature or cold.

Just a thought

Peperonata will keep very well in a fridge in an airtight container for a few days and is suitable for freezing especially if you make a large quantity, and want to eat it again in the near future; or, indeed, you want to bring back summer memories in the middle of winter.

The traditional way of preparing this dish does not call for chill, however, if you wish to add a bit of a kick to this dish it is perfectly fine to do so during the cooking process.

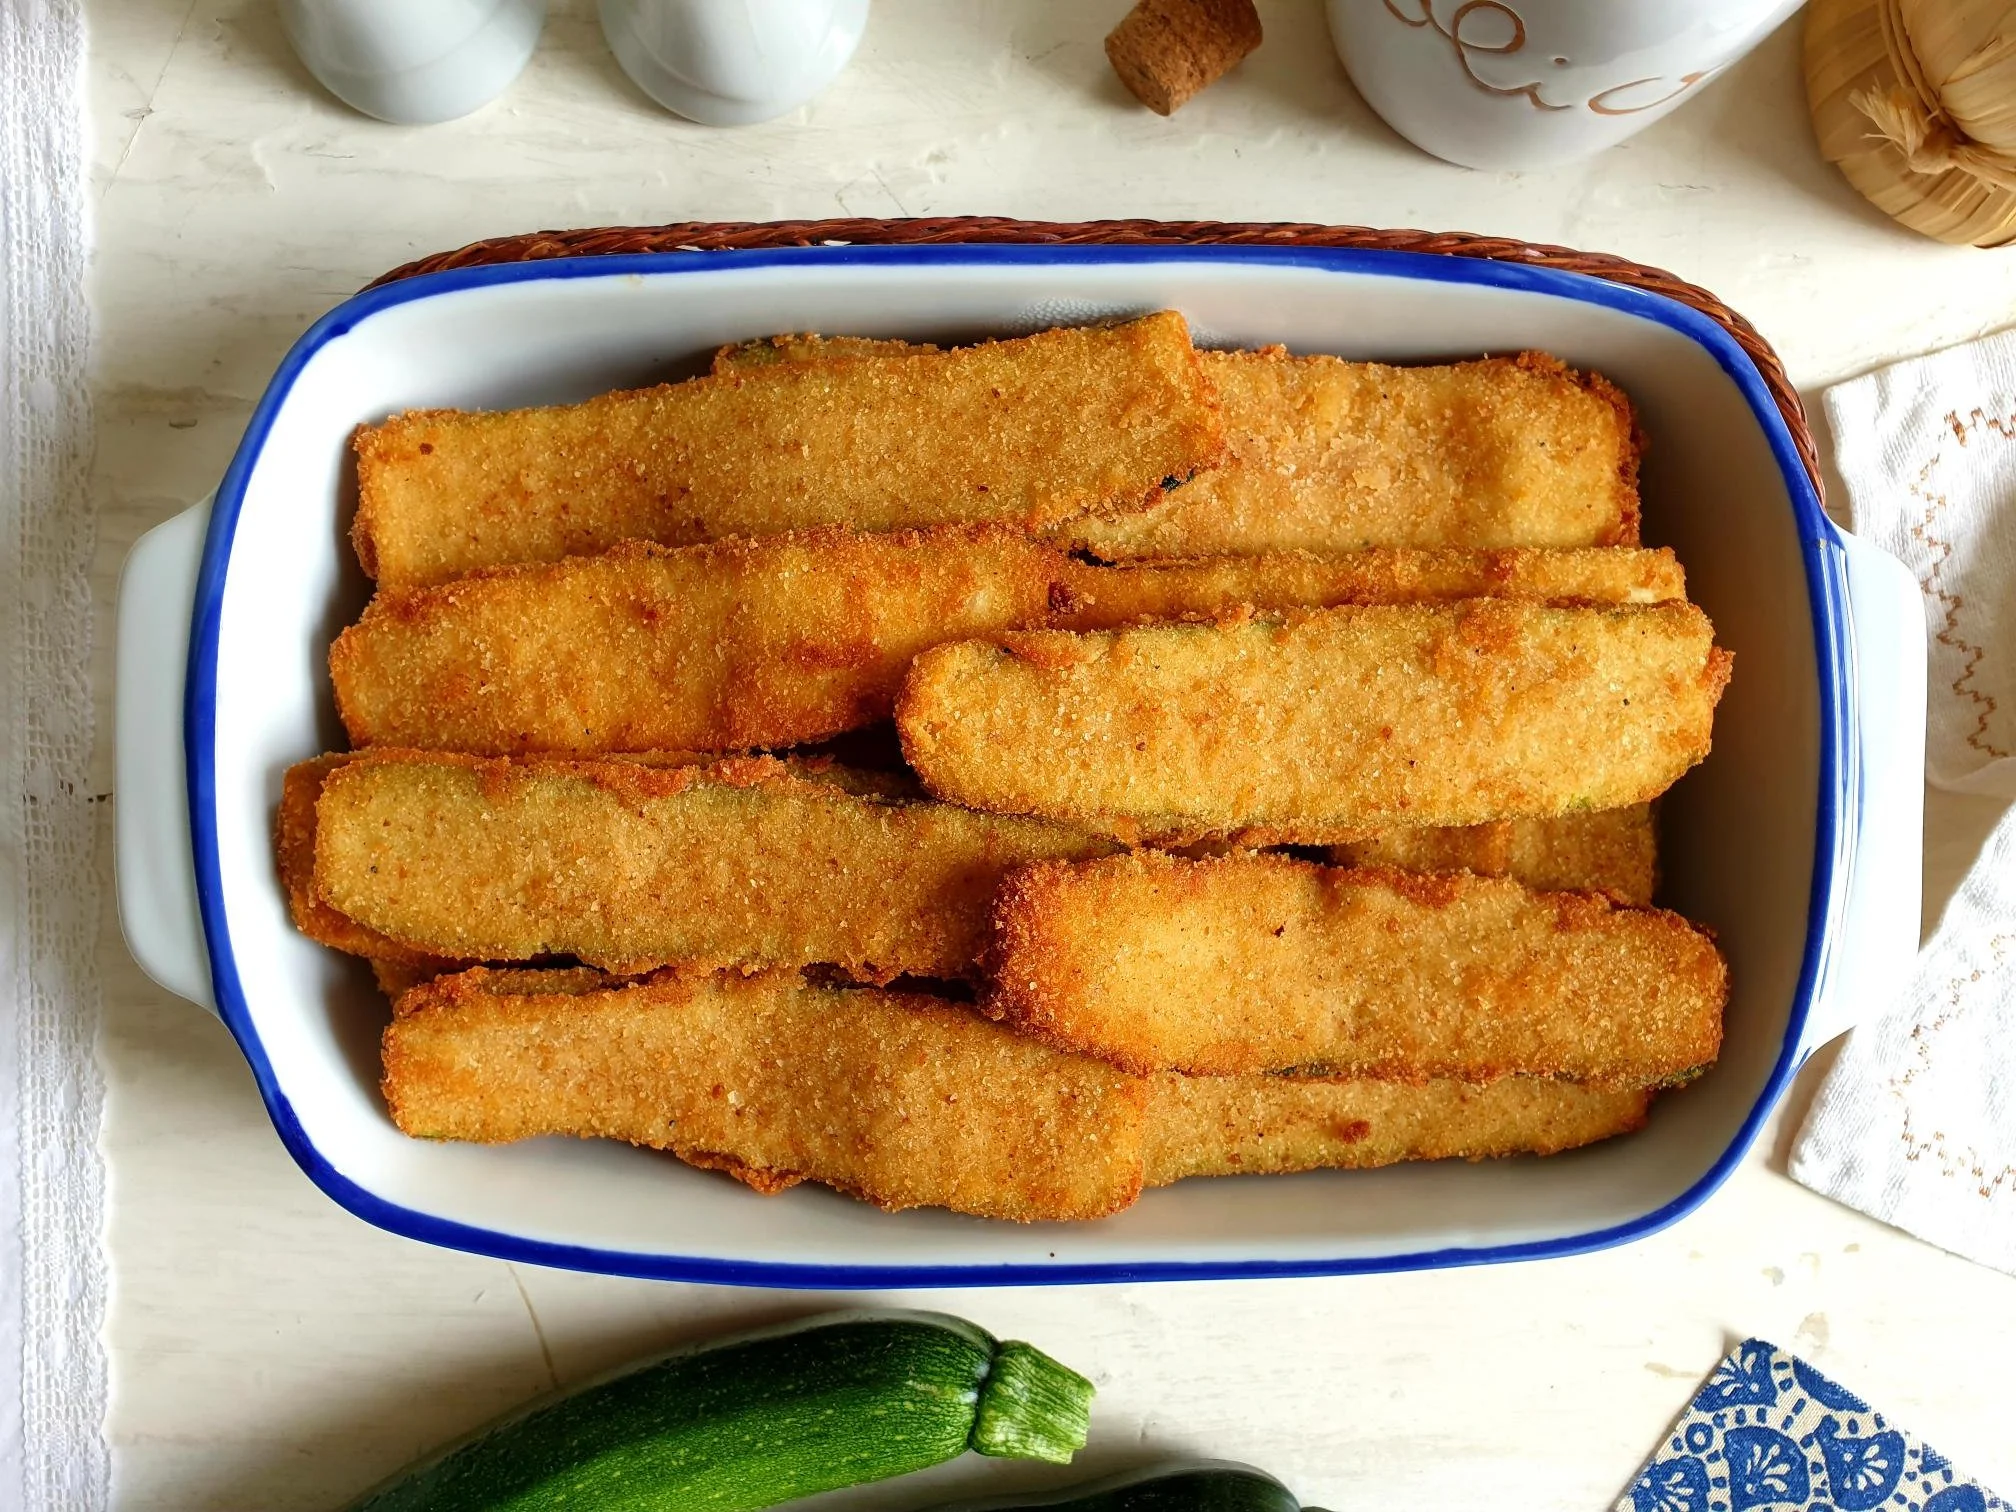
You can also add courgettes, some olives and capers to taste as a variation of this dish.

Wine suggestion

Calabria Rosato IGT "Terre Lontane" 2021 - Librandi

August 10, 2022 /tina oblak
bell peppers, yellow bell peppers, green bell peppers, aubergines, tomatoes, fresh basil, bell peppers summer stew
Adriatic Recipe, brunch, child friendly dish, child friendly meal, dinner, Easy recipe, entrée course, family friendly dish, family friendly meal, Healthy, healthy mael, Istrian cuisine, Istrian dish, Istrian food, Istrian gastronomy, light meal, main course, main dish, main vegetarian dish, main vegetarian meal, Nutritious, Nutritious dish, one pot meal, Rustic dish, Side Dishes, simple recipe, Slovenian cuisine, Slovenian food, Slovenian gastronomy, Starters, stew, summer dish, summer recipe, supper, Vegan, Vegetable side dish, Vegetables, Vegetarian, vegetarian summer stew, Venetian dish
Comment

Crispy Breaded Courgettes Istrian Recipe

Beans and Sardines
August 03, 2022 by tina oblak in Adriatic Recipe, Appetizers, bite-sized nibbles, brunch, child friendly dish, child friendly meal, dinner, Easy recipe, entrée course, family friendly dish, family friendly meal, Finger food, first course, first course dish, first course meal, Istrian cuisine, Istrian dish, Istrian food, Istrian gastronomy, main course, main dish, main vegetarian course, main vegetarian meal, main vegetarian dish, Rustic dish, Side Dishes, simple recipe, Slovenian cuisine, Slovenian food, Slovenian gastronomy, Small bites, Spring dish, Spring recipe, Starters, summer dish, summer recipe, supper, savory nibbles, Vegetable side dish, Vegetables, Vegetarian

Crispy breaded courgettes is one of the most most loved dishes and a total crowd pleaser. It consists of slicing the courgettes, dredging them into a flour, then dipping them into whisked eggs, coating them with breadcrumbs and quickly shallow fried them until golden and crispy, which makes them utterly delicious, irresistible and scrumptious, you just cannot stop eating them! This dish will become an instant hit and breaded courgettes will disappear from the serving plate in no time!

Try to prepare courgettes this way when they are in full season and abundant, I can almost guarantee you, that the most reluctant courgette eaters will be converted in eating this summertime vegetable with delight.

This dish is also fun to make, and if you have children, try to involve them in the breading process, they will absolutely love it, but make sure they are as far away as possible, in a nicest way, during frying.

Breaded courgettes are ideally eaten hot as soon as they are fried with some mashed potatoes, a seasonal salad, but also incredibly delicious at the room temperature and offered as a part of a buffet, great used as a filler in a sandwich (add a bit of fresh rocket salad and spread a slice of bread with a bit of mayonnaise, basil or vegetarian pesto, and you will have a sandwich that is to die for).

This dish can be made ahead and stored which makes it an ideal picnic food, you bring this dish with you on a picnic, and you will stand out from the crowd and have no chance to bringing back home any leftovers...

I am sharing here my mother's recipe for crispy breaded courgettes, one of whole family's absolute favourite plates of food.

I simply adored this dish as a child, and nothing much has really changed since...

Ingredients

Serves 4

  • fresh courgettes, medium size (approximately 700-800g)

  • 2-3 eggs (the number of the eggs needed depends on their size and on the quantity of the courgettes you are using)

  • dry breadcrumbs

  • plain flour

  • sea salt

  • black pepper, optional

  • oil for frying

Method

Wash the courgettes under cold running water and dry them with the kitchen paper or a clean kitchen towel.

Place the courgettes on a chopping board and cut off the ends.

With the knife or a mandolin slicer, slice the courgettes into a 4-5mm thick slices (if the courgettes are big, and you find them difficult to slice vertically, cut each courgette in half first, and then slice).

View fullsize Breaded Courgettes 6.jpg
View fullsize Breaded Courgettes 7.jpg

Prepare three dishes for flour, eggs and breadcrumbs.

Put the flour in a wide shallow bowl, dish or on a plate (I just use a piece of baking paper, fold it when I finish, and use it the next time)

Put the eggs in another shallow bowl or dish (big enough to accommodate one or two slices of courgettes at the same time) whisk lightly and season with sea salt and black pepper, if using. I suggest you use two eggs to start with, and crack another one, if two are not enough.

Put the breadcrumbs in a third shallow bowl, dish or plate.

Start the breading process.

Dredge each slice of courgettes into flour making sure everything is coated and gently shake off the excess.

View fullsize Breaded Courgettes 9.jpg
View fullsize Breaded Courgettes 10.jpg

Dip the floured slice of the courgette into a whisked egg, turn to coat, make sure all the sides are covered in egg, and let drip off excessive egg.

View fullsize Breaded Courgettes 11.jpg
View fullsize Breaded Courgettes 12.jpg

Coat in breadcrumbs and press a bit so the breadcrumbs adhere well and shake off gently the excess.

View fullsize Breaded Courgettes 13.jpg
View fullsize Breaded Courgettes 14.jpg

Repeat the process until you have used all the courgette slices.

Breaded courgettes can be shallow fried or baked in the oven.

Frying method

Pour oil into a large frying pan, about 1cm, and heat it over a medium heat (how much oil you need will depend on how big your frying pan is)

Once oil is hot, add breaded courgette slices, a few at time without overcrowding the pan (this will bring the oil temperature down)

Fry for about one minute on each side or until the breadcrumbs turn golden-brown in colour.

Transfer fried courgettes onto a dish lined with kitchen paper to allow excess oil to be absorbed.

If the slices are lined in layers, make sure you put a kitchen paper between every layer.

Baked in the oven method

Line large baking tray with a non stick baking parchment and place sliced bread courgettes on a tray, one next to each other, spray or drizzle with olive oil and bake in a preheat oven at 200 C static or equivalent for about 20 minutes or until golden-brown in colour.

Just a thought

I have shared here the basic recipe for crispy breaded courgettes, but if you wish to add additional flavour to the dish, you can add some fresh finely chopped flat leaf parsley in whisked egg and some grated Parmiggiano Reggiano cheese in breadcrumbs.

You can store crispy breaded courgettes in an airtight container in the fridge for about two days.

This dish is not suitable for freezing.

If you wish to prepare this courgette dish in advance, it is a good idea to store the uncooked and not fried breaded slices of courgettes in an airtight container in the fridge, and just before frying, “refresh” the breadcrumbs coating by covering the slices in breadcrumbs once again, this will give you a crunchy coating.

A vary tasty variation of this dish is using mushrooms or aubergines instead of courgettes.

Wine suggestion

Valdobbiadene Prosecco Superiore Brut - Nino Franco

August 03, 2022 /tina oblak
fresh courgettes, breaded courgettes, crispy breaded courgettes, fried breaded courgettes, zucchini, fresh zucchini, breaded zucchini, crispy breaded zucchini, fried breaded zucchini, zucchine impanate fritte, zucchine impanate al forno, pohane bučke, ocvrte pohane bučke
Adriatic Recipe, Appetizers, bite-sized nibbles, brunch, child friendly dish, child friendly meal, dinner, Easy recipe, entrée course, family friendly dish, family friendly meal, Finger food, first course, first course dish, first course meal, Istrian cuisine, Istrian dish, Istrian food, Istrian gastronomy, main course, main dish, main vegetarian course, main vegetarian meal, main vegetarian dish, Rustic dish, Side Dishes, simple recipe, Slovenian cuisine, Slovenian food, Slovenian gastronomy, Small bites, Spring dish, Spring recipe, Starters, summer dish, summer recipe, supper, savory nibbles, Vegetable side dish, Vegetables, Vegetarian
Comment

Šataraš - Bell peppers, onions and tomato Balkan inspired stew with scrambled eggs Recipe

Beans and Sardines
July 13, 2022 by tina oblak in Adriatic Recipe, Appetizers, Balkan dish, breakfast, brunch, child friendly dish, child friendly meal, dinner, Easy recipe, entrée course, family friendly dish, family friendly meal, first course, first course dish, first course meal, Healthy, healthy mael, hearty dish, Istrian cuisine, Istrian dish, Istrian food, Istrian gastronomy, main course, main dish, Nutritious, Nutritious dish, Rustic dish, simple recipe, Slovenian cuisine, Slovenian food, Slovenian gastronomy, Spring dish, Spring recipe, Starters, stew, Vegetable side dish, Vegetables, Vegetarian, summer recipe, summer dish, vegetarian summer stew

Šataraš (pronounced Satarash) is a stew like dish made with fresh bell peppers, ripe sweet tomatoes, onions, and scrambled eggs, it is similar to Shakshuka which has a sunny-side up eggs and makes a perfect main meal choice in the summer when the vegetables used for the dish are in full season. This dish is very well known in the Balkan regions but not so much to the rest of the world.

Eating šataraš just make you happy, and it feels like having a sunshine on a plate, as the addition of the eggs makes this dish colourful, extra flavourful and filling, it is also healthy and fresh.

This is one of my absolute favourite childhood dishes and if you like bell peppers this recipe is one of those you will come back to it time and time again as the recipe is very easy to make and the base can be cooked well in advance.

This dish is normally homemade and not found in the restaurants, it is typically served for lunch or dinner but it is also a great choice for breakfast or brunch.

Šataraš travelled from the neighbouring Balkans and stayed in Slovenian Istra, where it has been a very welcomed guest and has been enjoyed by the generations of locals in the area where gastronomy has been strongly shaped and enriched by the Balkan culinary traditions as well as Venetian and Austro-Hungarian.

I am sharing here my mother's recipe for šataraš with which she has delighted us during long hot summer months. If you do try it, then I think you will soon realize how delicious this dish truly is in its humble simplicity.

Ingredients

Serves 4

  • 4 bell peppers, a combination of yellow and green (each bell pepper weighing about 200g), wash, dry, remove the seeds and white filaments, and cut into strips (you can use more or less peppers according to your preference)

  • 4 vine tomatoes (each weighing about 150g) or other types of sweet and ripe tomatoes, washed and roughly chopped (use more or less tomatoes according your liking)

  • 1 onion (about 170g), peeled and finely sliced

  • 4 Tbsp extra virgin olive oil

  • 4 eggs

  • sea salt

  • black pepper

  • fresh flat leaf parsley, roughly chopped, for serving, optional

Method

Place extra virgin olive oil in a fairly large frying pan, add sliced onions, a pinch of sea salt and cook for about 10 minutes on a gentle heat until the onions become soft and translucent, stirring occasionally.

View fullsize Sataras 5.jpg
View fullsize Sataras 6.jpg

Add strips of bell peppers and stir in with the onions. Cover with the lid (the steam will help to cook down and soften the peppers) and cook on a gentle heat for up to about 30 minutes.

View fullsize Sataras 7.jpg
View fullsize Sataras 8.jpg

Add chopped tomatoes, cover with the lid, and cook on a gentle heat, stirring occasionally, for about 20-30 minutes, or until tomatoes are cooked down and soft.

If the mixture has too much liquid (this will depend on how watery the tomatoes you are using are) take the lid off and cook further for a few minutes or until all of the liquid evaporates.

View fullsize Sataras 9.jpg
View fullsize Sataras 10.jpg

In a small bowl crack the eggs, slightly whisk, add sea salt and pepper.

Pour the egg mixture over the pepper stew, mix and stir and cook until desired consistency.

View fullsize Sataras 11.jpg
View fullsize Sataras 12.jpg

Sprinkle with roughly chopped fresh parsley, optional, and serve immediately with plenty of rustic crunchy bread.

Just a thought

This dish is best served hot, equally delicious at room temperature.

You can prepare pepper, onion and tomato stew well in advance, keep it in a fridge in an airtight container for about 3 days, and pour the whisked eggs on a pepper base just before you want to complete the dish and ready to serve it.

The pepper stew (without the egg) is also great served with grilled and barbecued meats, a great base for a risotto or a pasta dish, and it can also be enjoyed with polenta or an egg frittata.

Pepper, onion and tomato base is suitable for freezing.

Wine suggestion

Salento Negroamaro Rosato IGT “Calafuria” 2021 - Tormaresca

July 13, 2022 /tina oblak
bell peppers, fresh bell peppers, yellow peppers, green peppers, tomatoes, scrambled eggs with peppers, peppers stew
Adriatic Recipe, Appetizers, Balkan dish, breakfast, brunch, child friendly dish, child friendly meal, dinner, Easy recipe, entrée course, family friendly dish, family friendly meal, first course, first course dish, first course meal, Healthy, healthy mael, hearty dish, Istrian cuisine, Istrian dish, Istrian food, Istrian gastronomy, main course, main dish, Nutritious, Nutritious dish, Rustic dish, simple recipe, Slovenian cuisine, Slovenian food, Slovenian gastronomy, Spring dish, Spring recipe, Starters, stew, Vegetable side dish, Vegetables, Vegetarian, summer recipe, summer dish, vegetarian summer stew
Comment

Egg frittata with wild herbs Istrian Recipe

Beans and Sardines
June 16, 2022 by tina oblak in Adriatic Recipe, All year round recipe, Appetizers, baked dish, bite-sized nibbles, breakfast, brunch, Canapés, dinner, Easy recipe, entrée course, family friendly dish, family friendly meal, Finger food, first course, first course dish, first course meal, foraging, Healthy, healthy mael, Istrian cuisine, Istrian dish, Istrian food, Istrian gastronomy, light meal, main course, main dish, Nutritious, Nutritious dish, Rustic dish, simple recipe, Slovenian cuisine, Slovenian food, Slovenian gastronomy, Small bites, Snacks, Spring dish, Spring recipe, Starters, supper, Vegetarian, Fresh herbs

Egg frittata with wild herbs is a very simple and rustic dish, quick to make and a perfect recipe choice for an easy and uncomplicated midweek or weekend lunch, dinner, brunch or breakfast.

It is delicious when eaten hot, but equally very tasty at room temperature or cold, it can be made ahead, providing a great picnic solution, and frittata cut into small bite size pieces will make a brilliant finger food feeding larger groups served together with some drinks.

This humble frittata is a very traditional dish in the Slovenian Istra where I grew up, it is similar to an omelette, it is Italian in origin (Italian word frittata roughly translates to “fried”) and to me, is more than just a quick meal solution.

This type of frittata together with other two most common variations (frittata with dry sausage and frittata with wild asparagus and pancetta) represent a real speciality in Slovenian Istra which, due to close geographical proximity to Italy, made this dish very popular and is referred by locals as Fritaia de erbe, Fritaja, Fritata or Frtalja, Fritaia, and all of these words derive from the Venetian word fritaia, given Venice's domination of the region.

Both my paternal and maternal grandfathers loved all variations of frittata and would have them for merenda (a dialect word, from Italian meaning snack) indicating in the past a quite substantial late morning breakfast (a slightly less sophisticated version of a “modern” brunch) for pheasants, farmers, fishermen and workers. They all started work at dawn, so by mid morning, when they finished working, and before returning home for lunch, they were all quite hungry, and more than ready to have some food to replenish the energy. Nowadays, merenda indicates a light mid morning or mid afternoon snack, that can be savoury or sweet, and of course, children always push for a sweet option...

Both my grandfathers would pick up wild herbs (spring providing the widest range) when returning home from spending a morning working in their vegetable gardens, orchards or olive groves, in which case egg frittata with wild herbs would be prepared for lunch or dinner.

Wild herbs frittata and other types of frittata were for a long time considered a dish for only the poorest people, but thanks to new gastronomic traditions, they are very proudly back on the menus of many homes and restaurants, and given the true dignity they deserve. They are quick and cheap to prepare, have low caloric intake, and are abundant with nutrients from freshly picked herbs in the local area.

I am sharing here a very easy family recipe for this modest frittata. All you need to do is take a nice walk in the natural world around you - forests, meadows etc., and pick some seasonal wild herbs. What can be easier than that?

Well, if you are mainly in an urban area, you can skip the walk and use store bought baby spinach, wild rocket, some fresh basil and flat leaf parsley and you are ready to go...

Ingredients

Serves 4

  • 100g-150g (about 4 full handfuls) fresh mixed wild herbs, washed and finely chopped

    In this recipe I used wild garlic leaves, wild fennel, stinging nettle, dandelion leaves, mint, chives, lemon balm, sage, marjoram, flat leaf parsley, basil.

    You can also use store bought baby spinach, wild rocket, any combination, proportion does not really matter as long as you have more or less the total amount of fresh herbs stated in the ingredients list.

  • 2 Tbsp extra virgin olive oil

  • 8 medium sized eggs (in this recipe I calculated 2 eggs per person)

  • sea salt

  • black pepper

Method

Wash thoroughly fresh mixed herbs, dry them using a salad spinner, if you have one.

Finely chop the herbs and set aside.

View fullsize Egg frittata with wild herbs 4.jpg
View fullsize Egg frittata with wild herbs 6.jpg

Crack the eggs into a mixing bowl and whisk well, add sea salt and black pepper.

Add finely chopped herbs into a mixing bowl and mix well with the egg mixture.

Put extra virgin olive oil in a fairly large non stick frying pan (28cm or 30cm) and heat it up a bit.

Pour the egg and wild herbs mixture into a pan, cover with a lid (glass lid with steam hole works very well if you have it) and cook on a gentle heat.

The frittata is ready and cooked when the underside is set and the egg mixture on the surface no longer has “runny and raw” consistency.

View fullsize Egg frittata with wild herbs 7a.jpg
View fullsize Egg frittata with wild herbs 10.jpg

Hold a plate upside-down over the pan and turn the two over together so that the frittata inverts on to the plate. Slide the frittata back into the pan and cook for a further minute or so.

Fresh herbs frittata can be eaten and enjoyed warm, room temperature or cold and will make a complete meal accompanied by some salad, fresh crunchy bread, soft cooked or grilled polenta and it also makes a great sandwich filler.

If you want to enjoy it Istrian style, pour yourself a small glass of red wine.

Just a thought

This type of frittata will keep in the fridge in an air tight container for about two days and is not suitable for freezing.

In this recipe, I have chosen to cook the frittata in a traditional way, on the stove with a lid, as my family has always used this method. However, if you are familiar cooking the frittata in the oven, and that is your preferred method, it is perfectly fine to do so.

Wine suggestion

Friuli Colli Orientali Ribolla Gialla DOC 2021 - Torre Rosazza

June 16, 2022 /tina oblak
fresh herbs, fresh wild herbs, wild herbs, fresh parsley, fresh basil, fresh sage, fresh wild dill, fresh wild garlic, stinging nettle, dandelion leaves, fresh mint, Frtalja z zelišči, Fritaia z zelišči, Fritaia de erbe, meadow herbs, edible plants, wild garlic leaves
Adriatic Recipe, All year round recipe, Appetizers, baked dish, bite-sized nibbles, breakfast, brunch, Canapés, dinner, Easy recipe, entrée course, family friendly dish, family friendly meal, Finger food, first course, first course dish, first course meal, foraging, Healthy, healthy mael, Istrian cuisine, Istrian dish, Istrian food, Istrian gastronomy, light meal, main course, main dish, Nutritious, Nutritious dish, Rustic dish, simple recipe, Slovenian cuisine, Slovenian food, Slovenian gastronomy, Small bites, Snacks, Spring dish, Spring recipe, Starters, supper, Vegetarian, Fresh herbs
Comment

Green asparagus with pancetta and scrambled eggs Istrian Recipe

June 01, 2022 by tina oblak in Adriatic Recipe, breakfast, brunch, child friendly dish, child friendly meal, dinner, Easy recipe, entrée course, family friendly dish, family friendly meal, first course, first course dish, first course meal, hearty dish, Istrian cuisine, Istrian dish, Istrian food, Istrian gastronomy, main course, main dish, Rustic dish, Slovenian cuisine, Slovenian food, Slovenian gastronomy, Spring dish, Spring recipe, Starters, supper, Vegetarian, Vegetables

This extraordinarily simple and humble dish is really easy to make and truly sublime. It consists of cooking down the asparagus with some crunchy pancetta and then adding whisked eggs and cooking them to a creamy and smooth consistency, and when served with some fresh crunchy bread, this dish becomes a perfect choice for breakfast, brunch, lunch or dinner.

Green asparagus with pancetta and scrambled eggs (Umešana jajca s šparglji) or Green asparagus frittata with pancetta, know locally as Fritaja s špargljo, Fritata s šparglji or Fritaia coi sparesi, are probably the two of the most representative dishes and part of a unique gastronomic offers of Slovenian Istra, so much so, that a Festival called Šparga Fest is dedicated to these two dishes, traditionally using exclusively wild asparagus (divji šparglji).

Wild asparagus, like store bought ones, have a fairly short season, but are more aromatic and they are ready to be picked around Easter period and one can commonly find them growing on the south facing pieces of land close to dry stone walls, on the edges of the forests, among the bushes, and although they are free in Slovenia to be foraged and enjoyed, there is a legal limit of how much wild asparagus someone can pick for personal use and consumption.

This is not quite the case in the United kingdom, where I currently live, as I found out, according to Janet Lister (Wildlife and Countryside Advisor for the National Trust). Wild asparagus, once a plentiful plant, is now a very rare coastal plant that only grows and can only be found in a handful of counties (Glamorgan, Pembrokeshire, Cornwall and Dorset). In fact, it is in decline and classed as an “endangered” species on the GB Red List.

Wild asparagus

In the olden days, along the coats in Slovenia, these green delicacies were only known to the locals who used to invent and create dishes that were born out of necessity, with the ingredients available only during a particular season. This, once again, is a testimony and a reminder of the great resourcefulness of local people, who proved time and time again the ability to find clever ways to overcome hunger.

Nowadays, this type of asparagus has reached such a popularity that the inhabitants from inland Slovenia make a special day trip to the coast to enjoy this truly seasonal speciality.

Green asparagus with pancetta and scrambled eggs is a very much loved dish in many households, and so it is made very often. However, since it can only be made during asparagus season, it is also during this time that it is found in many informal family run restaurants.

I am sharing here the family recipe I grew up with, made with wild asparagus, which was picked by the family during many enjoyable and very memorable walks in nature. In this recipe I have replaced wild asparagus for the cultivated alternative, and you can also transform this recipe into a vegetarian and vegan friendly variation by using and frying the onions instead of pancetta, bacon or lardons. For this recipe you can also use fresh white asparagus.

View fullsize Green Asparagus with pancetta and scrambled eggs Istrian Recipe 3.jpg
View fullsize Green Asparagus with pancetta and scrambled eggs Istrian Recipe 5.jpg

Ingredients

Serves 4

  • about 500g fresh green asparagus

  • 180g roughly, pancetta, bacon or lardons, finely sliced

  • 2 Tbsp extra virgin olive oil

  • 8 fresh eggs

  • sea salt

  • black pepper

Method

Wash the asparagus under cold running water and chop each asparagus into smaller sections.

Put extra virgin olive oil in a fairly large frying pan, add finely sliced pancetta, bacon or lardons and fry until fully cooked and slightly crispy.

Add chopped asparagus and cook for a few minutes together with pancetta, until they soften a bit and deepen in colour.

Add small amounts of water, about 50ml at a time, this will help to cook down the asparagus.

Cook the asparagus until they are fully cooked, deepen in colour, and tender but not overcooked and falling apart.

View fullsize Green Asparagus with pancetta and scrambled eggs Istrian Recipe 13.jpg
View fullsize Green Asparagus with pancetta and scrambled eggs Istrian Recipe 14.jpg

Cook the asparagus until they are fully cooked and tender but not overcooked and falling apart.

Crack the eggs into a bowl, add sea salt, black pepper and whisk.

View fullsize Green Asparagus with pancetta and scrambled eggs Istrian Recipe 10.jpg
View fullsize Green Asparagus with pancetta and scrambled eggs Istrian Recipe 12.jpg

Take the pan off the heat and pour the eggs over the asparagus mixture.

Put the pan back on the heat, stir and cook the eggs to the desired consistency stirring with a wooden spoon or spatula, lifting and folding the egg and asparagus mixture from the bottom of the pan.

Cook the eggs until they are softly set and slightly runny in places or cook further until they reach the desired consistency.

Taste and adjust the seasoning with sea salt and black pepper.

Sprinkle with roughly chopped fresh parsley, if desired, and serve hot immediately with fresh crunchy bread.

Just a thought

This dish is not suitable for freezing.

Cooked asparagus and pancetta mixture, without adding the eggs, makes a fantastic base for risotto.

You can also turn cooked asparagus and pancetta base into a scrumptious sauce for a pasta dish by simply adding a bit of single cream to it and dilute it, if it gets too thick, with a bit of water where you cooked the pasta.

Wine suggestion

Lugana DOC "Le Fornaci" 2021 - Tommasi

June 01, 2022 /tina oblak
green asparagus, cultivated green asparagus, wild asparagus, scrambled eggs with asparagus, scrambled eggs, pancetta, bacon, lardons, asparagi verdi con pancetta e uova strapazzate, Umešana jajca s šparglji, divji šparglji, Umešana jajca z divjimi šparglji
Adriatic Recipe, breakfast, brunch, child friendly dish, child friendly meal, dinner, Easy recipe, entrée course, family friendly dish, family friendly meal, first course, first course dish, first course meal, hearty dish, Istrian cuisine, Istrian dish, Istrian food, Istrian gastronomy, main course, main dish, Rustic dish, Slovenian cuisine, Slovenian food, Slovenian gastronomy, Spring dish, Spring recipe, Starters, supper, Vegetarian, Vegetables
Comment

Pan-fried potatoes with onions and pancetta Istrian Recipe

Beans and Sardines
May 25, 2022 by tina oblak in Adriatic Recipe, All year round recipe, Autumnal dish, Autumnal recipe, brunch, child friendly dish, child friendly meal, dinner, Easy recipe, family friendly dish, family friendly meal, Istrian cuisine, Istrian dish, Istrian food, Istrian gastronomy, Root vegetables, Rustic dish, Side Dishes, Slovenian cuisine, Slovenian food, Slovenian gastronomy, Spring dish, Spring recipe, supper, Vegetables, Winter dish, Winter recipe, hearty dish

If you are searching for a slightly different potato side dish from the usual and delicious mashed or roast potatoes, look no further.

This modest, simple and humble, but hearty and scrumptious potato side dish, pairs perfectly with just about anything, but it is the most loyal companion to meat or vegetable based dishes.

This recipe consists of boiling the potatoes, then cutting them into small pieces and pan-fry them together with salty and crispy bits of pancetta and caramelised, sweet and mellow onions. During this process the light crust will form at the bottom of the pan and when the mixture gets broken into pieces and mixed, you end up with the combination of smooth, creamy potatoes and brown crispy pieces of potato crust, heavenly texture! During this pan-frying phase, the stock gets gradually added for extra flavour and moisture.

You really cannot find a more Slovenian dish than this. It is cooked recurrently in every household and found regularly on the menus (Pražen krompir) in a family run restaurants, nurseries and school canteens up and down the country. Traditionally it is served with roasted meats, sausages and sauerkraut, boiled sheen of beef cooked in broth or simply eaten on its own with a salad or fried eggs.

I grew up with this dish and I am sharing with you my mum's recipe, a variation developed on the coastal part of Slovenia (Kromper v teći, Patate in tecia) where pancetta and olive oil is used instead of lard and pork cracklings, still a very popular choice, but most commonly perhaps ingredients used in inland Slovenia.

This potato dish really unites all the regions of Slovenia, it is a part of very strong gastronomic culture in Istria and Dalmatia (in Croatia) and stretches across and beyond the “borders” with Italy.

This very popular and very much loved potato side dish is traditional in the whole region of Friuli- Venezia Giulia in Italy, where the city of Trieste with its inhabitants particularly prides itself for exceptionally good Patate in tecia.

It is in the dialect of this region and the Veneto region that the word tecia has a double meaning; it can indicate a type of a pan that would normally be used to cook this dish and it can refer to a method of slow cooking on a fairly low heat.

Other recipes and dishes can have a word tecia in them, so for example you can have Zucchine in tecia (Pan- fried courgettes) or Verze in tecia (Pan-fried Savoy cabbage) etc.

This dish, made from scratch, is incredible in its simplicity, but it is also made and can be prepared using leftover boiled potatoes and no vegetarian or vegan friend or family member will be excluded from the dinner table as you can cook this dish by omitting the meaty element and using vegetable broth or stock.

Ingredients

Serves 4

  • 1kg of potatoes

  • 100g unsmoked pancetta or bacon, cut into small strips or finely diced, bacon lardons or pork cracklings

  • onions (about 240g), peeled and finely sliced

  • 2 Tbsp extra virgin olive oil or lard

  • sea salt

  • black pepper

  • 200ml meat or vegetable broth or stock (you can make a simple stock using a good quality instant vegetable or meat stock powder)

  • flat leaf parsley, roughly chopped, for garnish

Method

Wash whole unpeeled potatoes under the cold running water and put them in a big pot of boiling water.

Add sea salt and gently boil the potatoes until fully cooked, this will depend on the size of the potatoes you are using.

Drain cooked potatoes and allow to cool.

Peel the potatoes and slice or cut them into irregular shape smaller chunks, set aside.

Put the olive oil or lard, if using, in a fairly large frying pan.

Add finely sliced onions and pancetta and gently fry on a fairly low heat until the onions become golden brown in colour, soft and caramelised, and pancetta fully cooked and slightly crisp. This might take around 40 minutes but it is important not to rush this phase of the recipe as the onions might not get as sweet.

View fullsize Pan-fried potatoes with onions and pancetta Istrian Recipe 4.jpg
View fullsize Pan-fried potatoes with onions and pancetta Istrian Recipe 5.jpg

Turn the heat up a bit, add pieces of potatoes and season with sea salt and black pepper (bear in mind that the use of pancetta and broth in this recipe, will partially provide the seasoning).

Cook the potatoes with the onion and pancetta mixture and break down a bit bigger pieces of potatoes with the back of the wooden spoon or or a fork, avoiding to end up with mashed potatoes, you still want bits of potatoes in the texture.

Cook for a few minutes allowing the mixture to catch a bit at the bottom of the pan forming a light crust, but try and avoid to get it burnt (although if it does burn slightly it is not the end of the world).

Scrape the layer of golden brown bits and break the crust with the wooden spoon, stir the mixture.

Cook further for a few minutes until the crust forms again, break it and stir.

Repeat the process a few times adding small amounts of broth or stock to avoid potatoes getting too dry.

The whole idea behind repeating this process of allowing the crust to form, then breaking it and stirring the mixture is to end up with a final dish that will have a combination of crusty and crispy bits of potatoes that are stirred back, mixed with the rest of soft/mushy potatoes, caramelised onions and pancetta.

View fullsize Pan-fried potatoes with onions and pancetta Istrian Recipe 6.jpg
View fullsize Pan-fried potatoes with onions and pancetta Istrian Recipe 7.jpg

Taste, adjust the seasoning with sea salt and black pepper.

Sprinkle with roughly chopped fresh flat leaf parsley and serve hot.

Just a thought

This dish is not suitable for freezing.

When reheating this dish you will need to add some moisture back, as it gets quite dry when cooled down and kept in a fridge, adding more stock or broth.

You can cook this dish with leftover boiled potatoes or using left over mashed potatoes.

Wine suggestion

Friuli Venezia Giulia Friulano DOC "San Pietro" 2020 - I Clivi

May 25, 2022 /tina oblak
potato dish, rustic potato meal, potato side dish, Pan-fried potatoes with onions and pancetta, pan-fried potatoes woth onions and bacon, pan-fried potatoes with onions and bacon, Patate in tecia, Kromper v teći, Pražen krompir, potatoes, pancetta, bacon, lardons
Adriatic Recipe, All year round recipe, Autumnal dish, Autumnal recipe, brunch, child friendly dish, child friendly meal, dinner, Easy recipe, family friendly dish, family friendly meal, Istrian cuisine, Istrian dish, Istrian food, Istrian gastronomy, Root vegetables, Rustic dish, Side Dishes, Slovenian cuisine, Slovenian food, Slovenian gastronomy, Spring dish, Spring recipe, supper, Vegetables, Winter dish, Winter recipe, hearty dish
Comment

White asparagus with hard boiled eggs Venetian style Recipe

Beans and Sardines
May 11, 2022 by tina oblak in Adriatic Recipe, Appetizers, brunch, child friendly dish, child friendly meal, dinner, Easter dish, Easter recipes, Easy recipe, family friendly dish, family friendly meal, first course, first course dish, first course meal, Healthy, healthy mael, Istrian cuisine, Istrian dish, Istrian food, Istrian gastronomy, light meal, main course, main dish, Nutritious, Nutritious dish, recipe from Northern Ital, Rustic dish, Salads, Side Dishes, Slovenian cuisine, Slovenian food, Slovenian gastronomy, Spring dish, Spring recipe, Starters, Vegetable side dish, Vegetables, Vegetarian, Venetian dish

This exquisite recipe is so easy and quick to prepare you can hardly call it a recipe. It consist of gently boiling the asparagus and dress them with oil, sea salt and pepper to allow the delicate and mild sweet taste of white asparagus to be fully enhanced and appreciated. Asparagus prepared this way can be served as a starter, main course or as a side dish and is a great meal for vegetarians.

White asparagus grow with the absence of sunlight which prevents the photosynthesis to take place and therefore stops the asparagus turning green in colour.

Back home, where I come from, on the Slovenian coast, this dish, (Beli beluši s trdo kuhanimi jajci / Beli šparglji s trdo kuhanimi jajci) among other asparagus dishes, is very popular during the fairly short asparagus season and the locals make the best of it.

My nona shared with me a very touching story about white asparagus. She very modestly confessed to me that when she was a little girl, her father was the first farmer in the village (Marezige), and the first in the surrounding area to grow white asparagus. She also told me the story that when the asparagus were almost ready to be harvested, he would guard them during the night as these vegetables were very precious source of income for the family and were almost never consumed for domestic use. Only a very small amount of the asparagus, the ones that broke during the harvest, were used by the family for cooking, and this was a real treat for everyone.

White asparagus were, and still are, more difficult and more laborious to grow, therefore they fetch a higher price when they are sold on the market. The asparagus would be taken by my great grandmother to Trieste, just across the border, a big port city with Imperial style cafes, and important theatres where a fairly high number of wealthy noble families used to live, families that could easily afford to buy this type of vegetable and appreciate its gastronomic use.

My nona also told me that the locals used to say that the white asparagus were so cherished they were considered to be vegetable fit for the queen.

Even nowadays, white asparagus, although more accessible, are still pricier compared to the green ones, and they are enjoyed as a “festive food” especially around Easter celebrations when they are in season.

There is a very close geographical proximity between my home town and the Italian region of Veneto, where this flavoursome and elegant dish is typical, (Asparagi bianchi con uova sode alla Veneta) and where in the foothills of the town of Bassano, and along the whole stretch of the river Brenta, the best, renowned, plump white asparagus are produced in terms of size and flavour.

I am sharing here this simple and very much loved family recipe which traditionally calls for white asparagus, and is a very much anticipated vegetable in the spring season. However, if you have difficulty buying them, then just use green asparagus, the dish will be equally delicious.

Ingredients

Serves 4

  • 1kg white asparagus (you can use green asparagus)

  • 8 eggs, soft or hard boiled and quartered, sliced or chopped

  • extra virgin olive oil (sunflower oil or a neutral tasting oil of your preference)

  • sea salt

  • black pepper

  • red or white vinegar, optional

Method

First of all prepare the asparagus. Chop off the ends which are normally hard, woody and fibrous.

With the potato peeler, peel the asparagus starting from just underneath the tips.

View fullsize White asaparagus 4.jpg
View fullsize White asaparagus 6.jpg

Place the asparagus in a pan with a small amount of boiling water.

Gently boil for about 10-15 minutes or until just tender. Test by inserting the tip of a small sharp knife into the end of the asparagus as this part takes the longest to cook. The cooking times will vary according to the size and thickness of the asparagus.

With a slotted spoon gently remove the asparagus from the pan and place them, one next to each other, on paper kitchen towel. Allow the asparagus to drain and cool.While removing the asparagus be careful not to break the tips, they cook quicker than the ends and will be much softer, if they do break, however, it is not the end of the world, they will just not look quite as nice on the plate.

Alternatively, you can steam the asparagus or cooked them tied in a bundle and placed upright in a tall pot with two thirds of their length immersed in cold water. Bring the water to boil and cook for about 10-15 minutes (the steam will cook the tips). Remove and untie the bundle.

Transfer the cooked asparagus and lay them on a serving plate.

Place the soft or hard boiled eggs on the top or between the asparagus.

Dress liberally with oil, sea salt and black pepper.

Serve with crunchy bread to soak up the juices.

Just a thought

You can use the water in which you cooked the asparagus as a stock. Just add the ends you cut off the asparagus and the peels and add them to the water, gently boil for about half and hour and strain.

You will end up with a delicious and delicate asparagus flavoured stock to be used for asparagus risotto, minestrone primavera or asparagus soup.

If you are not using the stock straight away it is perfect for freezing.

Wine suggestione

Collio Sauvignon DOC 2020 - Schiopetto

May 11, 2022 /tina oblak
fresh white asparagus, fresh green asparagus, white asparagus, green asparagus, dressed white asparagus, dressed green asparagus, hard boiled eggs, soft boiled eggs, Asparagi bianchi e uova sode, Sparglji, Beli beluši s trdo kuhanimi jajci, Beli šparglji s trdo kuhanimi jajci, Asparagi bianchi con uova sode alla Veneta
Adriatic Recipe, Appetizers, brunch, child friendly dish, child friendly meal, dinner, Easter dish, Easter recipes, Easy recipe, family friendly dish, family friendly meal, first course, first course dish, first course meal, Healthy, healthy mael, Istrian cuisine, Istrian dish, Istrian food, Istrian gastronomy, light meal, main course, main dish, Nutritious, Nutritious dish, recipe from Northern Ital, Rustic dish, Salads, Side Dishes, Slovenian cuisine, Slovenian food, Slovenian gastronomy, Spring dish, Spring recipe, Starters, Vegetable side dish, Vegetables, Vegetarian, Venetian dish
Comment

Venetian-style Calf's liver with caramelised onions Recipe

Beans and Sardines
May 04, 2022 by tina oblak in Adriatic Recipe, All year round recipe, Appetizers, Autumnal dish, Autumnal recipe, bite-sized nibbles, brunch, Canapés, dinner, Easy recipe, family friendly dish, family friendly meal, Istrian cuisine, Istrian dish, Istrian food, Istrian gastronomy, main course, main dish, main meat course, Meat, recipe from Northern Ital, Rustic dish, Slovenian cuisine, Slovenian food, Slovenian gastronomy, Small bites, spreads, supper, Venetian dish, Winter dish, Spring dish, Spring recipe

Venetian style liver with onions, Fegato alla Veneziana, consists of thinly sliced liver cooked very quickly and combined with soft, mellow, sweet and caramelised onions, and gently sprinkled with fresh parsley, with white wine being sometimes added to balance the flavours.

It is nowadays acclaimed dish worldwide and it is one of the most classic and traditional Venetian dishes, but is has very humble and modest origins as it was created out of necessity and hunger which originally drove people to eat inner organs of fowls and beasts with great enjoyment.

If you ever had a chance to visit Venice and wondered around the calli (very narrow streets in Venice) you will be able to notice that just about every authentic family run restaurant will display on its menu Fegato alla Veneziana.

Venetian-style calf's liver is a recipe that not only is a staple dish in Venice, but also in the whole region of Veneto. It is also so popular “across the border” in Slovenian Istra, where I come from, that it has become part of a very strong gastronomic tradition there (Polenta z jetrci, Palenta z jetrci or Polenta e fegadini). This is quite understandable since its local recipes and eating habits were significantly shaped by the very lengthy presence of The Most Serene Republic of Venice in the region.

This dish, in its simplicity, when cooked properly, is simply divine, and might be enjoyed even by those who normally are not so keen on liver and thought they did not like it, and that is simply because organ meats unfortunately are very often not very well prepared and overcooked, a process which toughens the texture of the meat and accentuates the “mineral, or irony” taste of the organ meat.

Calf liver, compared to other types of liver, is delicate in flavour, tender and has a very high content of iron.

I am sharing here the recipe that has been in the family since forever - so, just try it, and I am sure that this dish will be nothing like any other liver dishes you might have had in the past and disliked. I encourage you to be brave and open minded, but if your aversion to organ meats is really strong you might just want to skip this post.

Ingredients

Serves 4

  • 500g very fresh calf's liver, trimmed and sliced into thin strips

  • 500g onions, peeled and thinly sliced

  • 8 Tbsp extra virgin olive oil (you can use neutral tasting oil of your choice or butter or a combination)

  • 100 ml white wine (optional)

  • handful of fresh flat leaf parsley (about 5-10g), roughly chopped

  • sea salt

  • black pepper

Method

If you are bothered by the slight bitter flavour from the liver a great way of reducing it, is to soak the liver in a dish or bowl of milk for about 1 hour, or overnight. Discard the milk after the soaking process.

Put extra virgin olive oil and thinly sliced onions in a fairly large frying pan and add a generous pinch of sea salt.

Slowly cook the onions on a gentle heat, stirring occasionally, until very soft, translucent, well wilted and caramelised. In order to prevent the onions getting too much colour and brown regulate the heat and maybe add a bit of water or wine to help the onions to wilt well and caramelize better. Be patient, this process might take up to 40minutes but it is crucial for the success of this dish.

View fullsize Venetian-style Calf's liver with caramelised onions Recipe 3.jpg
View fullsize Venetian-style Calf's liver with caramelised onions Recipe 4.jpg

When the onions are cooked completely and ready push them on the side of the frying pan and turn up the flame. Add the strips of liver and over high heat sauté and cook quickly just for a few minutes, mixing and turning liver strips regularly, until they loose their raw colour. Mix the onions and liver together.

View fullsize Venetian-style Calf's liver with caramelised onions Recipe 5.jpg
View fullsize Venetian-style Calf's liver with caramelised onions Recipe 6.jpg

Add finely chopped parsley, taste and adjust the seasoning with sea salt and black pepper.

Transfer cooked liver onto a serving plate, lightly sprinkle with roughly chopped fresh parsley and serve warm immediately.

If using white wine, deglaze the frying pan by pouring a good splash of wine and scrape up with the wooden spoon all the bits that have formed. Reduce the wine to the consistency of a syrup and pour over the liver.

Serve on soft cooked creamy polenta, grilled polenta, mashed potatoes or simply a nice crunchy bread to soak up the juices.

Just a thought

If you happen to have some left over cooked livers you can make a very delicious and economic liver pâté.

Simply weight the amount of left over livers, chop them very finely (if you like small bits in your pâté) and add the same same amount of very soft unsalted butter. Mix together and here is your Venetian style liver pâté, delicious spread on crostini (toasted bread).

If you prefer the pâté with a very smooth consistency place both livers and butter into a small food processor and mix until the mixture resembles smooth paste (you can also use a hand blender).

Wine suggestion

Valpolicella Ripasso Classico Superiore DOC 2019 - Speri

May 04, 2022 /tina oblak
Calf's liver, Venetian style calf's liver, Istrian style calf's liver, Fegato alla veneziana, Polenta e fegadini, Polenta z jetrci, Palenta z jetrci, Calf's liver with soft cooked polenta, Calf's liver with polenta
Adriatic Recipe, All year round recipe, Appetizers, Autumnal dish, Autumnal recipe, bite-sized nibbles, brunch, Canapés, dinner, Easy recipe, family friendly dish, family friendly meal, Istrian cuisine, Istrian dish, Istrian food, Istrian gastronomy, main course, main dish, main meat course, Meat, recipe from Northern Ital, Rustic dish, Slovenian cuisine, Slovenian food, Slovenian gastronomy, Small bites, spreads, supper, Venetian dish, Winter dish, Spring dish, Spring recipe
Comment

Cooked ham in bread dough Recipe

Beans and Sardines
April 06, 2022 by tina oblak in Adriatic Recipe, All year round recipe, Appetizers, baked dish, baking, breakfast, brunch, Celebratory dish, Central European recipes, child friendly dish, child friendly meal, Easter dish, Easter treats, easy baking, Easy recipe, Enriched dough, entrée course, family friendly dish, family friendly meal, festive bakes, Festive dish, Finger food, home baking, Istrian cuisine, Istrian dish, Istrian food, Istrian gastronomy, main course, main dish, Meat, Mitteleuropean cuisine, Mitteleuropean dish, Mitteleuropean food, Mitteleuropean recipes, Rustic dish, Slovenian cuisine, Slovenian food, Slovenian gastronomy, Starters, Easter, Easter recipes

Cooked ham in bread dough is a real show stopper and a crowd pleaser, this recipe goes back to medieval times when it was customary cooking various types of meats in bread dough.

This dish consists of a piece of ham being cooked first and then wrapped in bread dough and baked in the oven allowing the aroma and the flavours of the ham to travel into the dough during the baking process.

On the Slovenian coast, where I come from, there is no Easter without this dish. This baked delicacy is so deeply rooted in Slovenian gastronomic culture that it is traditionally cooked and eaten around Easter period (with freshly grated horseradish or horseradish cream and mustard) and served as part of Easter breakfast on actual Easter day, in just about every corner of the country, together with hard boiled eggs, Pinca (Easter sweet bread) and Potica (traditional Slovenian festive nut roll).

This dish is also typically found in Trieste, and province of Trieste in Italy, in local osterie (informal, usually family run eating places serving simple local specialities), on a daily basis and typically served with a a glass of wine or locally produced artisan beer.

I studied in Trieste and had this dish on my graduation day as part of the buffet.

This recipe is so popular and delicious that it is nowadays enjoyed all year round, it is also ideal for picnics, as it can be made ahead of time and travels well.

Ingredients

Serves

For the dough

  • 500g strong white bread flour

  • 7g (one sachet) fast-action dried yeast

  • sea salt, a pinch

  • 300ml lukewarm milk (full fat, semi skimmed or skimmed)

  • 25g butter, unsalted or slightly salted, melted

You also need

  • 1.4kg, roughly, unsmoked or smoked Gammon joint

  • 1 carrot, optional

  • 1 celery stick, optional

  • ½ onion, optional

  • 1egg, beaten

  • a bit of extra milk (about 2 Tbsp)

Method

Place the ham in a big pot and add enough cold water to completely cover the ham.

Add a whole carrot, celery stick and half an onion for extra flavour, if desired.

Bring to boil, lower the heat, cover with the lid and gently boil for required time, this will depend on the size of the ham. (Weight your meat to calculate and work out your cooking times, allow 20 minutes per 450g)

While the ham is cooking, make the dough. (You can cook the ham in advance and wrap it in aluminium foil to keep it moist, and use when needed.

Drain cooked ham in a colander and let it cool completely.

Pat dry the ham well with the kitchen paper.

Put the flour in a large mixing bowl, add dried yeast on one side of the bowl and sea salt on the other. Add the milk, melted butter and mix to combine well all the ingredients.

View fullsize Ham in bread dough 2.jpg
View fullsize Ham in bread dough 3.jpg

The dough at this point will be a bit sticky, but should not be soggy. The dough will become less sticky as you knead.

View fullsize Ham in bread dough 4.jpg
View fullsize Ham in bread dough 5.jpg

Transfer the mixture on to a lightly floured (or lightly oiled) work surface and knead for about 10-15 minutes until the dough is nice and smooth and has an elastic texture. Your hands should not stick to the dough, if they do add a bit of flour at a time.

Put the dough in a lightly oiled large bowl and cover with a cling film. Stand in a warm place, free of drafts, and let it rise for at least 1-1 ½ hours until the dough has doubled or tripled in size.

Turn the dough on to lightly floured surface and knock back by hand for few minutes. Flour well the surface and with the rolling pin roll the dough to about 2cm thick. At this point you can pinch a bit of dough for decorating if you wish (I made a little dough plait, as it is done traditionally).

View fullsize Ham in bread dough 10.jpg
View fullsize Ham in bread dough 11.jpg

Preheat the oven to 180C static or equivalent and line the baking tray with the non stick baking parchment.

In a small bowl mix the beaten egg with a bit of milk and brush the centre of the rolled dough.

Place the ham in the centre on the brushed area.

Brush the rest of the ham with egg and milk mixture.

Wrap the ham with the dough all around, a bit like a parcel. Seal well the edges to avoid the dough opening up during the baking.

View fullsize Ham in bread dough 8.jpg
View fullsize Ham in bread dough 9.jpg

Place your ham and dough parcel on a baking tray with the junctions facing downwards.

Glaze the ham and dough parcel on all sides with the egg and milk mixture.

Prick the ham and dough parcel with a toothpick.

If you created a small Easter themed dough decoration, place it on top of the dough parcel and brush with egg and milk mixture.

Put the ham dough parcel in the preheated oven and bake for 60 minutes. Half way the baking time cover with aluminium foil and bake further until golden in colour.

View fullsize Ham in bread dough 13.jpg
View fullsize Ham in bread dough 14.jpg

Take out of the oven, leave to cool on the baking tray for a few minutes, then remove from the baking tray and leave to cool on a wire rack.

Best served warm with horse radish sauce, freshly grated horse radish root or/and mustard.

Wine suggestion

Collio Pinot Bianco DOC 2020 - Doro Princic

April 06, 2022 /tina oblak
ham, cooked ham, gammon joint, unsmoked gammon joint, smoked gammon joint, Easter bread, cooked ham in bread dough, prosciutto in crosta, kuhana sunka v testu, Easter breakfast, Easter brunch
Adriatic Recipe, All year round recipe, Appetizers, baked dish, baking, breakfast, brunch, Celebratory dish, Central European recipes, child friendly dish, child friendly meal, Easter dish, Easter treats, easy baking, Easy recipe, Enriched dough, entrée course, family friendly dish, family friendly meal, festive bakes, Festive dish, Finger food, home baking, Istrian cuisine, Istrian dish, Istrian food, Istrian gastronomy, main course, main dish, Meat, Mitteleuropean cuisine, Mitteleuropean dish, Mitteleuropean food, Mitteleuropean recipes, Rustic dish, Slovenian cuisine, Slovenian food, Slovenian gastronomy, Starters, Easter, Easter recipes
Comment

Squid Risotto Adriatic style Recipe

Beans and Sardines
March 30, 2022 by tina oblak in Adriatic Recipe, Appetizers, All year round recipe, brunch, child friendly dish, child friendly meal, dinner, Easy recipe, family friendly dish, family friendly meal, Fish & Seefood, fish starter, Healthy, healthy mael, Istrian cuisine, Istrian dish, Istrian food, Istrian gastronomy, light fish course, light meal, main course, main dish, recipe from Northern Ital, Risotti, Rustic dish, Starters, first course, first course dish, first course meal

Squid or calamari risotto is very delicate in taste, yet flavoursome, hearty and filling, very quick and easy to make, which makes it a perfect choice for a light lunch or dinner and a staple mid-week dish.

Fresh squid (not cleaned yet)

This risotto is an absolute winner, it will delight the whole family, and it is very pleasant to eat with its creamy texture and sweet and tender squid. It is simply delicious, and it is packed with Mediterranean ingredients that recall holidays by the sea.

I grew up on this type of risotto, it has been made in my family since as long as I can remember. My mother told me I was partially weaned on this risotto, she obviously made sure the squid chunks were cut in miniscule pieces to make it safe for me to eat. I loved it, apparently, and I still do.

The frequency with which this risotto, among many other types of risotti, has been made should come as no surprise. The area where I was born and grew up, the Slovenian coast, it is just under two hours drive from northern region of Veneto in Italy, where the greatest number and variety of risotto recipes can be found.

Squid risotto is very often prepared and cooked in the households, and regularly printed on the menus in the local restaurants, where you will find it as Rižota s kalamari or Rižota z lignji.

I am sharing here my mother's recipe, and do not be put off by the task of cleaning the squid, ask your fishmonger to do it for you and try this fantastic risotto dish.

Ingredients

Serves 4

  • 500g roughly, fresh squid, cleaned and cut into smaller pieces or rings (keep the tentacles). For this recipe you can also use frozen raw already cleaned squid tubes available in most bigger supermarkets.

  • 1 small onion (about 80g), peeled and finely chopped

  • 1 clove garlic, peeled and crushed

  • 4 Tbsp extra virgin olive oil

  • 1 Tbsp tomato purée

  • 300g risotto rice (like Vialone Nano, Arborio or Carnaroli)

  • fresh flat leaf parsley, about a handful (roughly 8g), some extra for garnish

  • 1 litre hot vegetable stock or hot water

  • sea salt

  • ground black pepper

View fullsize Squid risotto 2.jpg
View fullsize Squid risotto 3.jpg

Method

Before starting making risotto, it is a good idea to have your boiling hot stock or hot water ready to hand for later.

Put extra virgin olive oil in a pan, add finely chopped onions and sauté on a gentle heat until soft.

Add crushed garlic and cook for about a minute together with the onions.

Place clean pieces of squid in a pan and cook for about three minutes or so, until opaque.

Add the rice, mix well with the onion, garlic and squid mixture, and toast it for few minutes stirring constantly to avoid sticking to the pan.

Add tomato purée, pour in the pan all the hot stock or hot water and add chopped parsley.

If you have made a risotto before and have a clear idea of how moist you like it to be, you can control the moisture of the risotto by gradually adding ladles of hot stock or water, one at a time, allowing the liquid to be absorbed before adding more, rather than pouring the whole quantity of liquid over toasted rice, like I did in this recipe.

Cook on a medium heat, stirring almost constantly, until the rice is cooked al dente (fully cooked but still firm when bitten). It will generally take about 15-18 minutes for a risotto to be cooked.

There should be enough liquid just to cover the risotto, the Italians say that risotto should be smooth and runny enough to be described as all'onda, on the wave. Quite right, eating dry risotto is not particularly enjoyable.

Taste and adjust the seasoning with sea salt and ground pepper.

Serve hot and garnish with roughly chopped fresh flat parsley.

Just a thought

You can add to the risotto a small amount of chilli to give it an extra kick, but in small amounts, as you do not want to overpower the delicate flavour of the squid and of the dish in general.

Wine suggestion

Colli di Luni Vermentino “Etichetta Nera” 2021 - Lunae

March 30, 2022 /tina oblak
fresh squid, frozen squid, fresh calamari, frozen calamari, squid risotto
Adriatic Recipe, Appetizers, All year round recipe, brunch, child friendly dish, child friendly meal, dinner, Easy recipe, family friendly dish, family friendly meal, Fish & Seefood, fish starter, Healthy, healthy mael, Istrian cuisine, Istrian dish, Istrian food, Istrian gastronomy, light fish course, light meal, main course, main dish, recipe from Northern Ital, Risotti, Rustic dish, Starters, first course, first course dish, first course meal
Comment

Whole baked Sea Bream with fresh rosemary Recipe

Beans and Sardines
March 02, 2022 by tina oblak in Adriatic Recipe, baked dish, brunch, fish spreads, Healthy, healthy mael, Istrian cuisine, Istrian dish, Istrian food, Istrian gastronomy, main course, main dish, main fish meal, main fish course, Slovenian gastronomy, Slovenian food, Slovenian cuisine, Rustic dish, light meal, light fish course, baked fish, roasted fish, oven baked fish

Whole baked sea bream in the oven with fresh rosemary is a simple and tasty main fish dish that takes little effort to prepare.

Cooking the whole fish on the bone gives it a better flavour, and this delicate white fish is best cooked simply and gently in order to give it the full respect it deserves.

Baked sea bream is a perfect choice for a light meal option, traditionally served with spinach or chard cooked with potatoes, garlic and extra virgin olive oil.

Sea bream is a great choice to include in your diet as is rich in iron and vitamins and easy to digest.

This fish as a main course is unpretentious and understated in its simplicity, but it is elegant, and full of flavour.

I am sharing here this incredibly simple way of cooking the fish, that also represents the most common method of preparing and eating the fish along the Slovenian coast in restaurants as well as in many households.

This recipe has been in the family, well, since forever. Give it a go, there is nothing complicated about it, and if you are slightly intimidated by the task of cleaning the fish, the fishmonger will be more than happy to do it for you. Give a fish a good rinse, pat dry it, and follow the easy preparation steps, and off it goes in the oven, how difficult can that be?

Ingredients

Serves 4-8

  • 4 fresh whole sea bream (each weighing between 300g – 400g), cleaned, scaled and gutted

  • extra virgin olive oil, generous drizzle

  • 4 small sprigs of fresh rosemary

  • sea salt

  • black pepper

Method

Preheat the oven to 200C static or equivalent.

Line a baking tray with non stick baking parchment and drizzle a bit of olive oil.

Wash the fish thoroughly inside and out under cold running water and pat dry well the fish with the kitchen paper.

With the sharp knife, slash the fish 3 to 5 times through the flesh, about 5mm deep, almost to the bone.

Place the fish on the oiled baking parchment, side by side.

Season with sea salt and black pepper and rub with the olive oil.

Put a small sprig of fresh rosemary into the body cavity of each fish and drizzle the fish with a little more oil.

View fullsize Sea Bream oven baked with fresh rosemary 5.jpg
View fullsize Sea Bream oven baked with fresh rosemary 7.jpg

Cover the baking tray with aluminium foil and place in the oven.

Bake for about 30 minutes then remove the aluminium foil and bake further for about 10-20 minutes until the fish is cooked through and comes away from the bone easily.

View fullsize Sea Bream oven baked with fresh rosemary 8.jpg
View fullsize Sea Bream oven baked with fresh rosemary 10.jpg
View fullsize Sea Bream oven baked with fresh rosemary 12.jpg
View fullsize Sea Bream oven baked with fresh rosemary 11.jpg

One way of checking that the fish is cooked thorough, insert a small knife into the thickest part of the sea bream, the flesh of the fish should be nice and white in colour.

Discard the skin, bones, rosemary (from the cavity) and serve.

Wine suggestion

Vermentino "Tuvaoes" di Sardegna DOC 2020 - Cantina Cherchi

March 02, 2022 /tina oblak
fresh sea bream, whole fresh sea bream, baked sea bream, oven baked sea bream, oven baked whole sea bream, Orata al forno con rosmarino fresco, Orada v pecici s svezim rozmarinom, baking whole sea bream
Adriatic Recipe, baked dish, brunch, fish spreads, Healthy, healthy mael, Istrian cuisine, Istrian dish, Istrian food, Istrian gastronomy, main course, main dish, main fish meal, main fish course, Slovenian gastronomy, Slovenian food, Slovenian cuisine, Rustic dish, light meal, light fish course, baked fish, roasted fish, oven baked fish
Comment

Braised Fennel Istrian Recipe

Beans and Sardines
February 09, 2022 by tina oblak in Adriatic Recipe, Autumnal dish, Autumnal recipe, brunch, Central European recipes, Easy recipe, Healthy, healthy mael, Istrian cuisine, Istrian dish, Istrian food, Istrian gastronomy, main dish, Nutritious, Nutritious dish, Rustic dish, Side Dishes, Slovenian cuisine, Slovenian food, Slovenian gastronomy, supper, Vegan, Vegetarian, Winter recipe, Vegetable side dish, Vegetables, Root vegetables

Braised fennel is made with fresh fennel bulbs, a humble and very often underrated and forgotten vegetable, and if you were ever put off by maybe a slightly “assertive” liquorice taste of a raw fennel, try this dish, it is like eating a completely different vegetable.

Fennel, during braising process, becomes mellow and sweet, very tender, and develops soft and mild aniseed and slightly caramelized flavour, sincerely gorgeous!

For this dish, perhaps, we can apply the famous saying “do not judge the book by its cover.”

With its appearance, maybe it does not belong to the privileged club of the most appealing looking dishes, but the taste of braised fennel is simply luxurious and elegant, worthy to be served as a part of Sunday roast.

Back home, on the Slovenian coast, where I come from, braised fennel is a very popular, very much loved dish and served with dignity for a simple midweek lunch or dinner.

Here I am sharing my mother's recipe for a traditional and regional braised fennel recipe. Try it, and next time you are shopping for your vegetables, you will be reaching out for fresh fennel...

Ingredients

Serves 4 as part of meal

  • few fresh fennel bulbs (1200g approximately)

  • 5 Tbsp extra virgin olive oil (the best you can afford)

  • sea salt

  • black pepper

  • fresh flat leaf parsley, roughly chopped

  • 100ml water or vegetable stock

Method

Wash fennel bulbs under cold running water and dry them with clean kitchen paper or towel. Place the bulbs on the chopping board and trim the hard hollow stalks which are quite tough and very fibrous. You can discard the stalks or put in the compost, or trim the stalks, cut them into pieces and use them instead of, or as an addition to the celery in soups and stews, or use them as a bed for roasted chicken, or other meats, and roasted fish.

Cut the feathery fronds from the stalks, you can use these as a garnish for this dish, or as a herb to make others dishes. Trim off the root end of the the bulb (the base of the fennel bulb) and cut it into wedges.

View fullsize Braised fennel 4.jpg
View fullsize Braised fennel 3.jpg

The layers may separate and fall apart, do not worry, this is normal.

Put extra virgin olive oil in a large frying pan, preferably non stick, and heat it up a bit.

Place the fennel wedges into a pan.

Add a pinch of sea salt and sauté for few minutes on a fairly high heat, stirring occasionally, until golden brown in colour.

View fullsize Braised fennel 7.jpg
View fullsize Braised fennel 8.jpg

Add 100ml of water, black pepper, lower the heat to fairly low, cover with the lid.

Cook on a gentle heat for about 40 minutes, then uncover the lid.

Turn the heat to medium and cook further uncovered until all the water evaporates.

At this stage the fennel might catch a bit and turn slightly mushy, oozy and creamy in the middle.

Taste and adjust the seasoning with sea salt and black pepper.

View fullsize Braised fennel 9.jpg
View fullsize Braised fennel 10.jpg

Add a sprinkle of fresh chopped parsley for extra flavour and some fennel fronds for garnish.

Serve hot or at room temperature.

Just a thought

This dish freezes very well, so it might be a good idea to cook in bigger quantities when the fennel is in season and freeze it.

February 09, 2022 /tina oblak
Fresh fennel, Fresh fennel bulb, Fennel bulb, Braised fennel, Slow cooked fennel, Fennel cooked in frying pan, Braised fennel with fresh parsley, Fennel fronds, Braised fennel garnished with fennel fronds
Adriatic Recipe, Autumnal dish, Autumnal recipe, brunch, Central European recipes, Easy recipe, Healthy, healthy mael, Istrian cuisine, Istrian dish, Istrian food, Istrian gastronomy, main dish, Nutritious, Nutritious dish, Rustic dish, Side Dishes, Slovenian cuisine, Slovenian food, Slovenian gastronomy, supper, Vegan, Vegetarian, Winter recipe, Vegetable side dish, Vegetables, Root vegetables
1 Comment

Venetian style Sardines in Savor (Marinated Fried Sardines)

Beans and Sardines
February 02, 2022 by tina oblak in Adriatic Recipe, Appetizers, bite-sized nibbles, brunch, Canapés, dinner, Easy recipe, entrée course, Fish & Seefood, fish starter, Healthy, healthy mael, Istrian cuisine, Istrian dish, Istrian food, Istrian gastronomy, main course, main dish, main fish meal, Nutritious, Nutritious dish, recipe from Northern Ital, Rustic dish, Slovenian cuisine, Slovenian food, Slovenian gastronomy, Small bites, Starters

Marinated sardines is a classic and quintessentially Venetian dish, where sardines are lightly fried and then marinated in onion and vinegar mixture. It is prepared and found on Venetian menus (Sarde in saòr) where typical humble dishes are served all year round The name of the dish comes from the Venetian word saòr, meaning sapore in standard Italian, which translates as flavour, and refers to the fact that the flavour of the marinated fish is elevated by the use of good quality wine vinegar.

This dish originated simply out of necessity, when the catch of the fish was particularly abundant and plentiful, people had to figure out how to preserve food to be able to eat it for days without going bad, as the refrigeration had not yet been invented.

This Venetian dish in origin is also very popular and became a staple dish along the coast of the Slovenian Istra, where local gastronomy was strongly shaped and influenced by the Venetian cuisine, and this is of no surprise, as this land was once part of The Republic of Venice who “left behind” the recipe for marinated sardines and enriched the food habits of the locals, who refer to this dish as Sardele in savor (Sardele na šavor in standard Slovenian) and serve it as a cold starter or sometimes as main. It is made all year round but particularly pleasant to eat cold during the hot summer months due to its refreshing taste.

Unlike the Venetian variety of this dish, Istrian marinated sardines do not include the use of pine nuts or raisins, testimony to the introduction of expensive and unusual ingredients in noble Venice due to a its strong trading activity with the East.

More humble and poorer Istrian variation, to offer extra flavour to this dish, introduced the use of fresh parsley and Mediterranean herbs like rosemary and bay leaves growing in abundance along the coast, instead of pine nuts and raisins, difficult to find and expensive, and therefore out of reach for most households. This variation also introduced the use of red wine vinegar, home made and produced in most households, instead of white wine vinegar, type of vinegar solely used in Venetian recipe.

This dish is customarily made with sardines (small ones are particularly suitable) but can be made with other types of fish like sprats, called papaline (Venetian word) by the locals and mackerel being most popular and most common alternative to sardines, and fillets of more prestigious fish like sea bream and sea bass can also be considered.

Once, this was food for the poor, nowadays is a delicacy and a speciality very much appreciated for their unique flavour and highly valued for nutritional content, especially in Slovenian Istra, where, unlike in Venice, this dish, although very traditional in the area, is not easily available in the restaurants, but almost exclusively made in the households.

My nona told me a lovely story, when she was only twenty two years old and got married she moved into the house, where she still currently lives, not very far away from the sea, and during the hot summer nights, the windows would be kept wide open in the hope to get some fresh breeze from the sea to cool the bedrooms to make it easier to sleep.

She could very clearly hear, in the middle of the night, the sound of very small fishing boats leaving the port and going out in the open sea to fish, this is the sound that she remembers as a very special and nostalgic one, and this is because she can no longer hear these sounds, as the majority of those small boats were replaced by only few commercial bigger fishing boats. These days they struggle for a few big catches since over the years the the sea has been depleted of fish. Sadly, fishing has become very difficult and complicated, and so is not very appealing to the younger generations.

I am sharing here my nona's recipe, this is the dish she grew up with, and the one she recalls was also made by her grandmother. This is a traditional, local and authentic family recipe for Istrian style marinated sardines. However, if you wish to “jazz up” this recipe a bit, and make it more “noble” and Venetian, you can add 50g of pine nuts and 50g raisins (previously soaked in lukewarm water for few minutes to help them become more plump).

Ingredients

Serves 4-6

  • 1 kg very fresh sardines, cleaned (scaled, gutted, heads and central bone removed and butterflied)

    (ask fishmonger to prepare them for you if uncomfortable with the task)

  • all purpose flour (quantity enough to flour the sardines)

  • 400 ml frying oil

  • 5 Tbsp extra virgin olive oil

  • 500 g onions, peeled and thinly sliced

  • 5 whole black peppercorns

  • 1 Tbsp white dry breadcrumbs

  • 100 ml white or red wine vinegar

  • 1 bay leaf, fresh or dry

  • 1 small fresh rosemary spring

  • very generous pinch of fresh flat leaf parsley (about 2g), finely chopped

  • sea salt

Method

Cut the heads of the sardines, gut them and remove the central bone. Butterfly the sardines, rinse them well under cold running water and pat dry thoroughly with the kitchen paper.

View fullsize Sarde in saor 4.jpg
View fullsize Sarde in saor 5.jpg

Coat them in flour and shake off flour in excess.

View fullsize Sarde in saor 6.jpg
View fullsize Sarde in saor 7.jpg

Place frying oil in a frying pan, heat it up and fry gently and quickly the sardines, 2 minutes on each side is sufficient. They should have a light, not very crunchy, coating coating.

Drain well on a kitchen paper.

Season well with sea salt and set aside.

Peel the onions and slice them thinly.

View fullsize Sarde in saor 10.jpg
View fullsize Sarde in saor 11.jpg

In a separate frying pan, ideally non stick, put extra virgin olive oil and heat a bit.

Add the onions and cook them on a very gentle heat until they become very soft and translucent, stirring often to avoid getting too brown.

View fullsize Sarde in saor 12.jpg
View fullsize Sarde in saor 13.jpg

Add black peppercorns, breadcrumbs, bay leaf, small fresh rosemary spring, finely chopped fresh flat leaf parsley.

Pour in wine vinegar and enough water to completely cover the onion mixture.

View fullsize Sarde in saor 14.jpg
View fullsize Sarde in saor 15.jpg

Cook the onion and vinegar mixture on a gentle heat for about 20 minutes. The sauce should slightly thicken and reduce a little, but you should still be left with quite a bit of liquid.

If too much liquid has evaporated during the cooking add a bit more water.

Take a serving dish and alternate layers of onions in the vinegar mix and fried sardines.

Repeat the process of layering until the dish is full. The number of layers will depend on the size of your serving dish but the last layer should be onion and vinegar mix.

If you are left with a bit of vinegary liquid from the onion mixture just pour it over the layers.

View fullsize Sarde in saor 17.jpg
View fullsize Sarde in saor 18.jpg
View fullsize Sarde in saor 19.jpg
View fullsize Sarde in saor 20.jpg

Place the dish in a fridge or a cool place for at least 24 hours or a couple of days, so the sardines marinate well and absorb all the flavours.

The longer you leave to marinate the better it will taste, but bare in mind that the fish will keep for up to a week.

Wine Suggestion

Collio Sauvignon Doc 2020 Draga

February 02, 2022 /tina oblak
Marinated sardines, sardines, papaline, mackerel, sprats, sea bream fillets, sea bass filets, marinated fresh fish, marinated fish, Sardele in Savor, Sardines in savor, Venetian sarde in savor, Sardele in savor, Sardele na šavor, Istrian sardines in savor, Istrian marinated fish
Adriatic Recipe, Appetizers, bite-sized nibbles, brunch, Canapés, dinner, Easy recipe, entrée course, Fish & Seefood, fish starter, Healthy, healthy mael, Istrian cuisine, Istrian dish, Istrian food, Istrian gastronomy, main course, main dish, main fish meal, Nutritious, Nutritious dish, recipe from Northern Ital, Rustic dish, Slovenian cuisine, Slovenian food, Slovenian gastronomy, Small bites, Starters
Comment

Home made Baked Beans Istrian Recipe

Beans and Sardines
January 26, 2022 by tina oblak in Adriatic Recipe, Appetizers, Autumnal dish, Autumnal recipe, brunch, Central European recipes, Eastern European recipes, Easy recipe, Healthy, healthy mael, Istrian cuisine, Istrian dish, Istrian food, Istrian gastronomy, main course, main dish, Nutritious dish, Nutritious, one pot meal, one pot meat recipe, Rustic dish, Side Dishes, Slovenian cuisine, Slovenian food, Slovenian gastronomy, Small bites, Starters, stew, Vegan, Vegetarian, Winter dish, Winter recipe, casserole

Home made baked beans is one of the most humble staple dishes in Slovenian Istra, the peninsula located at the head of the Adriatic Sea. This dish is nutritious, as full of fibre and protein, wholesome, super delicious, cheap and simple to make, and what it may lack in appearance it most certainly makes up in flavour.

This dish is classic comfort food, quintessentially rustic, a truly peasant food since it used to be made by farmers during colder months to help them to get warm, and to partially replenish their energy used up during the very hard, physical and laborious jobs required in the fields during the day.

This borlotti beans casserole is made with beautifully caramelized onions and sautéed pancetta and flavoured with garlic, bay leaf and a touch of tomato paste, it is typically served with polenta or crusty bread and a fantastic companion to grilled meats.

My nona grew up with this dish, as borlotti beans were consistently cooked as a part of the Mediterranean diet, the recipe was passed down to my father who adored baked beans and would prepare them regularly when there was a family barbecue, normally in such a huge quantities that we would eat them on a toasted bread for days to follow, nobody seemed to mind or complained about it, on the contrary...

This home made baked beans are known in standard Slovenian as Praženi Fižol, but the locals would refer to this dish simply in the dialect as Pražen Fežu.

This very traditional dish calls for dry borlotti beans, but you can use canned beans to cut down on time without compromising the deliciousness of the final dish, it can also be made with or without the meat component, in which case, this version makes an excellent vegetarian and vegan meal option.

I am sharing here the traditional, local family recipe which uses only few simple ingredients, however, you can take this dish slightly off the beaten track and jazz it up a bit by adding few chilli flakes or powdered sweet or smoked Hungarian paprika, which will give a more “Imperial” and “Balcanic” flavour. My father attempted this only once and was severely told off by his mother, my famous nona, for “corrupting” the traditional recipe making it too “exotic” for her to eat, this version of baked beans, although very delicious indeed, was never cooked again by my father in her presence...

Whether you go for a traditional or more exotic version of the recipe for home made baked beans, give it a go, a store bought tinned baked beans might just become a thing of a past...

Ingredients

Serves 6-8

  • 500g dry borlotti beans, (or other dry beans of your choice) soaked overnight or for about 8 hours

    For this recipe you can also use tinned borlotti beans or other tinned beans of your choice 4 x 400g)

  • 1 medium onion, (about 130g) finely chopped

  • 4 Tbsp extra virgin olive oil

  • 2 cloves of garlic, peeled and crushed

  • 100g pancetta, (smoked or unsmoked) thinly sliced and chopped

  • You can replace pancetta for smoked or unsmoked bacon or lardons

  • 1 Tsp white all purpose flour

  • 2 Tbsp tomato paste

  • 2 bay leaves (fresh or dry)

  • sea salt

  • black pepper

Method

Place dry borlotti beans, or other dry beans of your choice, in a big bowl, cover completely with plenty of cold water and soak for about 8 hours or overnight.

Drain soaked beans in a colander and rinse with cold running water.

View fullsize Baked borlotti beans 4.jpg
View fullsize Baked borlotti beans 5.jpg

Transfer soaked beans in a pot.

View fullsize Baked borlotti beans 6.jpg
View fullsize Baked borlotti beans 7.jpg

Add plenty of cold water, to completely cover the beans, a bay leaf and bring to boil.

Turn the heat down to medium-low and cook the beans for about 1 -1 ½ hour or until the beans are fully cooked and soft but not falling apart. Skim any foam if it rises to the surface. Towards the end of cooking time add sea salt.

Fish out the bay leaf and discard. Turn the heat off, leaving the pot with the beans in their liquid on the stovetop for later use.

View fullsize Baked borlotti beans 8.jpg
View fullsize Baked borlotti beans 11.jpg

Put extra virgin olive oil in a fairly large and deep skillet or casserole dish (both preferably non stick). Add finely chopped onion, crushed garlic, finely sliced and chopped pancetta or similar, if using, and sauté on a gentle heat, stirring occasionally, until the onions become soft and translucent.

Add the flour and stir well with the onion, garlic and pancetta mixture.

View fullsize Baked borlotti beans 10.jpg
View fullsize Baked borlotti beans 12.jpg

With the slotted spoon, (or a regular big serving spoon) transfer the beans to the skillet with the onion, garlic and pancetta mixture.

Pour the liquid from the beans into the skillet to completely cover the beans. If you are left with more liquid from the beans as needed at this stage, keep it aside and do not discard it. You might use it later on, if the beans during the cooking process get too dry. On the contrary, if you end up using all the liquid from the beans, and the beans get too dry, you can simply use water.

Add sea salt, black pepper, bay leaf, tomato paste and bring to a gentle boil.

View fullsize Baked borlotti beans 13.jpg
View fullsize Baked borlotti beans 14.jpg

Lower the heat and gently simmer for about 30 minutes stirring occasionally.

Taste and adjust the seasoning with sea salt and black pepper.

Serve hot or at room temperature.

Just a thought

Home made baked beans are suitable for freezing.

Wine suggestion

Schiava Alto Adige DOC "Kolbenhofer" 2020 - Hofstater

January 26, 2022 /tina oblak
borlotti beans, baked beans, baked borlotti beans, baked beans with pancetta, baked beans with lardons, baked beans with bacon, rustic baked beans, beaked beans on a hob, baked beans on stove, Stovetop baked beans, Skillet baked beans, baked beans in a frying pan, Praženi Fižol, Pražen Fežu, Istrian borlotti beans
Adriatic Recipe, Appetizers, Autumnal dish, Autumnal recipe, brunch, Central European recipes, Eastern European recipes, Easy recipe, Healthy, healthy mael, Istrian cuisine, Istrian dish, Istrian food, Istrian gastronomy, main course, main dish, Nutritious dish, Nutritious, one pot meal, one pot meat recipe, Rustic dish, Side Dishes, Slovenian cuisine, Slovenian food, Slovenian gastronomy, Small bites, Starters, stew, Vegan, Vegetarian, Winter dish, Winter recipe, casserole

Green Split Peas Soup Istrian Recipe

Beans and Srdines
January 19, 2022 by tina oblak in Adriatic Recipe, Appetizers, Autumnal dish, Autumnal recipe, brunch, dinner, entrée course, healthy mael, Istrian cuisine, Istrian dish, Istrian food, Istrian gastronomy, main course, main dish, Nutritious dish, one pot meal, Rustic dish, Slovenian cuisine, Slovenian food, Slovenian gastronomy, Soups, Starters, supper, Vegan, Vegetarian, Winter dish, winter soup

This comforting, filling and hearty soup is a perfect winter warmer, incredibly easy to make, super delicious in its simplicity, and once you try it, you will add it to your soups recipe collection!

Split peas are quite different from their fresh counterpart, they are a specific kind of field pea, which are dried in order to be stored for a longer period. They are called split peas because after the outer hull is removed the peas are then split in half along a natural seam.

This wonderful soup is protein packed and here I am sharing my nona's recipe. For her, this dish represents a good “old fashioned” basic recipe and is a real staple in the gastronomic repertoire since she learned to make this soup from her grandmother, and so this is a very old family recipe.

She told me that when she was a child, this soup was very often on the tables, as it is a a traditional and classic soup made in Slovenian Istra, where locals refer to it in dialect as Maneštra iz biži špakaj while in standard Slovenian is called Mineštra iz suhega graha.

My nona also shared with me that when she was small, most of the ingredients were home made but this is not the case for dried green split peas, they were bought at the local food market or in a small family run food shop, since for both types of local businesses it was a crucial time for the local microeconomy.

This soup is normally home made and not typically found on the menus in the restaurants.

Try this very tasty one pot soup, and you will think twice before you open a can of soup bought in the supermarket!

Ingredients

  • 500g green split peas, soaked for about 8 hours or overnight

  • 1 medium potato (about 200g), peeled and roughly diced

  • 1 medium onion (about 100g), peeled and roughly chopped

  • few celery leaves

  • fresh flat leaf parsley, a handful (about 10g), roughly chopped

  • 1 small carrot (about 50g), peeled and finely grated

  • tip of fresh or dry bay leaf

  • 4 Tbsp extra virgin olive oil

  • sea salt

  • ground black pepper

  • 2l cold water

Method

Place dried green split peas in a bowl, cover completely with plenty of cold water and soak for about 8 hours or overnight.

Drain soaked peas in a colander and rinse with cold running water.

Transfer soaked peas in a soup pot and add peeled and roughly diced potato, peeled and roughly chopped onion, few celery leaves, roughly chopped parsley, peeled and finely grated carrot, tip of fresh or dry bay leaf, extra virgin olive oil, pinch of sea salt and ground black pepper.

Add 2 litres of cold water and bring to boil.

View fullsize Green split peas soup 5.jpg
View fullsize Green split peas soup 6.jpg

Turn the heat down, partially cover with the lid and gently simmer for about 1 ½ - 2 hours or until the peas are completely tender and disintegrated. Stir occasionally to avoid peas sticking to the bottom of the pan.

Taste and adjust the seasoning with sea salt and black pepper and fish out the tip of bay leaf.

View fullsize Green split peas soup 7.jpg
View fullsize Green split peas soup 8.jpg

You can serve this soup as it is with a bit of texture or if you prefer a creamier texture purée the soup using an immersion blender (like I did for this recipe) or a regular blender.

For a smoother texture you can also use food mill or pass the puréed soup through a sieve which will result in an exceptionally smooth soup.

The soup should generally have a nice thickish consistency, but not too thick, in which case, dilute it adding a bit of water.

This soup is great served hot with some bread croutons, roughly chopped parsley and a drizzle of extra virgin olive oil.

Traditionally it is served with small shaped pasta (ditalini, stelline, orzo, ect.) or rice, both cooked previously and separately and then added to the soup.

Just a thought

This soup is great made in advance and freezes very well.

Wine suggestion

Alto Adige Valle Isarco Sylvaner DOC 2020 - San Michele Appiano

January 19, 2022 /tina oblak
green split peas, dried split green peas, dried split peas creamed soup, cream of green split peas soup, Maneštra iz biži špakaj, Mineštra iz suhega graha
Adriatic Recipe, Appetizers, Autumnal dish, Autumnal recipe, brunch, dinner, entrée course, healthy mael, Istrian cuisine, Istrian dish, Istrian food, Istrian gastronomy, main course, main dish, Nutritious dish, one pot meal, Rustic dish, Slovenian cuisine, Slovenian food, Slovenian gastronomy, Soups, Starters, supper, Vegan, Vegetarian, Winter dish, winter soup
Comment

Sautéed Savoy Cabbage with potatoes, garlic and olive oil Istrian Recipe

Beans and Srdines
December 27, 2021 by tina oblak in Adriatic Recipe, Autumnal dish, Autumnal recipe, brunch, Central European recipes, Christmas dish, dinner, Easy recipe, Festive dish, Healthy, healthy mael, Istrian cuisine, Istrian dish, Istrian food, Istrian gastronomy, Nutritious dish, Rustic dish, Side Dishes, Slovenian cuisine, Slovenian food, Slovenian gastronomy, supper, Vegan, Vegetarian, Winter dish, Winter recipe, one post fish recipe

Let's face it, not a lot of people I know will get particularly excited about the cabbage, but slowly cooked down and sautéed savoy cabbage with delicate boiled potatoes, fragrant garlic, excellent olive oil and seasoned well with sea salt, will most certainly made up in the taste for what maybe lacks in appearance. This comforting and rustic vegetable side dish is simply delicious, trusted and reliable gastronomic companion to just about any meat dish, very easy to prepare, healthy, nutritious and inexpensive.

When savoy cabbage is cooked well with just a few excellent quality and fresh ingredients tastes nothing like you imagine, and it might convert the most austere cabbage 'dislikers'. This recipe can become a new classic cabbage dish for your family, changing what they have in mind when thinking about cabbage - if they ever even think about cabbage! This recipe completely changes the taste and texture of the cabbage, and it becomes “sweet”, soft, and ever so slightly mushy and velvety in a pleasant way.

I have never thought about this aspect of the dish, nor have I ever been bothered about it, as I grew up with it and have always been fully aware of the reward you get on the palate when it is cooked properly.

This dish is deeply rooted in Slovenian Istra, and is one of the most traditional dishes to be cooked as part of everyday family meals during autumn and winter when savoy cabbage is in full season and is most full of flavour. When it tastes at its best, it takes nothing less than the central place on dining tables, and as tradition wants, especially on Christmas Eve, together with salted cod spread and fritole (Istrian small doughnuts).

It is during these colder months of the year that my mother and most other households would prepare this side dish. My brother and I have always found this dish somehow reassuring, we would eat it paired with breaded, pan fried chicken escallops or pork Wiener schnitzel, which is one of the most common ways of serving it.

If there were any leftovers, my mother would reheat them, and they would be served with fried eggs - no waste, no hassle, and another meal sorted, and so happy children, and also happy, or relieved mom!

This recipe is normally made with freshly cooked cabbage and potatoes but it is made, and it can be made, using left over cooked cabbage and boiled potatoes which is a fantastic way to reduce food waste.

If you are one of those cabbage non-lovers, and managed to read up to this point about my enthusiasm for this humble vegetable, I warmly invite you to try this recipe, you might have a revolutionary moment and convert, this dish might just become one of your favourite autumn/winter vegetable side dishes.

I am sharing here my family recipe, give it a chance to see how nice it tastes

Ingredients

Serves 4 as part of meal

  • 1 savoy cabbage, cored and roughly chopped

  • 2 medium size potatoes (about 380g), peeled and cubed

  • 2 cloves of garlic, peeled and cut lengthwise

  • 6 Tbsp extra virgin olive oil (the best quality you can afford)

  • sea salt

  • ground black pepper, optional

Method

Cut up the savoy cabbage into quarters, remove core, cut roughly into smaller pieces and wash thoroughly

Peel the potatoes, cut into cubes and wash under cold running water.

Place both cabbage and the potatoes in a fairly big pot and add water to completely cover.

Bring to boil, turn the heat down, add a pinch of salt and cook for about 8-10 minutes or until potatoes and cabbage are cooked but still a bit firm.

View fullsize Savoy cabbage 4.jpg
View fullsize Savoy cabbage 5.jpg

When cooked, drain in a colander and leave for a few minutes so the extra water can drain well.

Put the extra virgin olive oil and the garlic in a pan (you can use the same pan that you cooked the cabbage and potatoes in, just dry it well) or use a skillet.

Cook the garlic in the oil until golden in colour allowing to flavour the oil, then remove and discard the garlic.

Add potatoes and the cabbage to the pan or skillet and cook down for about 20 minutes on a gentle heat stirring occasionally until a nice soft and velvety consistency.

While cooking, break the potatoes a bit with a back of wooden spoon or a fork but do not mash it completely.

Taste and adjust the seasoning with sea salt and add ground black if using.

Serve hot immediately.

Just a thought

This side dish will keep very well in fridge in the airtight container for a few days. Reheat well before serving warm.

Not particularly suitable for freezing.

December 27, 2021 /tina oblak
savoy cabbage, royal cabbage, vrzota s krompirjem, verza e patate
Adriatic Recipe, Autumnal dish, Autumnal recipe, brunch, Central European recipes, Christmas dish, dinner, Easy recipe, Festive dish, Healthy, healthy mael, Istrian cuisine, Istrian dish, Istrian food, Istrian gastronomy, Nutritious dish, Rustic dish, Side Dishes, Slovenian cuisine, Slovenian food, Slovenian gastronomy, supper, Vegan, Vegetarian, Winter dish, Winter recipe, one post fish recipe
Comment

Creamed salted cod (or stockfish) Recipe

Beans and Sardines
December 16, 2021 by tina oblak in Adriatic Recipe, Appetizers, Autumnal dish, Autumnal recipe, bite-sized nibbles, brunch, Canapés, Celebratory dish, Central European recipes, Christmas dish, dinner, Easter dish, Easy recipe, entrée course, Festive dish, Finger food, Fish & Seefood, healthy mael, Istrian cuisine, Istrian dish, Istrian food, Istrian gastronomy, main course, main dish, Nutritious dish, recipe from Northern Ital, Rustic dish, Slovenian cuisine, Slovenian food, Slovenian gastronomy, Small bites, Snacks, spreads, Starters, Winter dish, Winter recipe, fish spreads, fish starter

Venetian in origin, this light and creamy, almost mousse like spread, it is one of the most loved dishes, due to its very mild fishy flavour and no bones to worry about, and so it covers the whole family from the youngest children to the oldest members.

Spread on fresh or toasted slices of bread or it can be eaten with polenta, and it is a very convenient dish since it is served cold and it is prepared in advance. Creamed salted cod is rustic but it can soon turn into very elegant canapé served with a pre dinner drink.

I think that this recipe is one of the greatest recipes ever invented! Quite frankly, it takes a bit of a genius to turn an uneatable dry stockfish, which looks utterly unappealing, and is as dry as a plank of wood, into the most luxurious and delicious dishes ever created.

Venetian creamed cod, known in Italy as Baccalà mantecato, is a real speciality and a staple dish in Venice, where it was created, and it is very much appreciated and well known in the rest of Italy. Slightly less known however in the rest of the world, creamed salted cod certainly deserves greater international praise and renown.

This dish is one of my absolute top favourites, one of those dishes I am most grateful to the Venetians to have brought with them during the time they ruled my homeland in the North Adriatic, period during which dried stockfish was first introduced in Istria in 15th century from Venetian cuisine.

In Slovenian it is called Bakala na belo or Polenovka na belo or simply called by the locals Bakala or Bakalar.

My paternal grandfather, or my nono as I called him, used to always buy stockfish at the beginning of December, I have this image in my head of the dry long stockfish sticking heavily out of the shopping bag, I knew very well that it was the start of the Christmas festivities.

This recipe is a real classic holiday and festive dish in Slovenian Istra, and holds a very special place among the locals. Dried stockfish was once a food for the poor but nowadays is a staple dish and considered a delicacy, taking central stage on household tables during Christmas and Easter as it is cooked on holy days during the fasting time and not eating meat.

Traditionally, creamed stockfish is home made and served as part of Christmas Eve dinner, together with sautéed Savoy cabbage and polenta, and Istrian fritole (small fried doughnuts), of course.

These days you can find creamed stockfish on the supermarket shelves all year round, and especially during the holiday season and Easter, but unfortunately, the sad reality is, that very often, the quality of commercially produced cod spread leaves much to be desired, as very common practice is to add lard or potatoes to increase the weight

I have very vivid memories about the process of soaking the stockfish, this huge restaurant size pot was left outside in the back garden during the night and when the temperatures plummeted below 0, the ice formed on the top, and I just loved finding the sheet of ice the following morning, and braking it into pieces. My son does the same...what is it with the children and the ice, and love for breaking it ...

My son Jakob (age 9) with his gran grandmother (age91) making creamed stockfish with the help of a standard mixer

My nono was in charge of stockfish, year, after year, after year, until he sadly passed away, then my father took over and now it is down to myself, my brother, my husband, and the children, since my father sadly is longer around. Back home, according to tradition, stockfish and the preparation of it is still a male affair, however, maybe it is time for this to change!

My nono would sit on the chair, place a big pot containing pieces of cooked cod between the legs, a bottle of olive oil would be kept very close to him for an easy and frequent reach and as tradition requests, the cooked cod would then be beaten with big and long wooden flat spoon like, known locally as polentar or bat which resembles very much a cricket bat, but in my research I have found no connection between the two types of bats!

In honour of my family but in particular in honour of my nono and my father I am sharing here this very special generational family recipe. Give it a go, you will love it!

Ingredients

Serves 4

  • 500g salted cod or 1 dry stockfish

  • 170ml extra virgin olive oil (the very best you can afford) plus a bit of extra as needed

  • 1-2 cloves of garlic, peeled

  • 1 bay leaf, fresh or dry

  • fresh flat leaf parsley (about 7g) finely chopped, optional

  • sea salt, to taste

Method

For this recipe you can use either salted cod or dry stockfish, both need to be soaked and rehydrated first.

If you are using salted cod (I used this type for the recipe) first you need to rinse well the salted cod under very cold running water and soak it. Place rinsed cod in an airtight container, fill it completely with freezing cold water, and with some ice, if you have it, so the fillets are completely submerged. Close the lid and put the container in the fridge. Change the water after 24 hours and place in the fridge for another day. After 48 hours, the cod will be completely soaked. Remove the cod from the container, rinse well with cold water and cut the fillet/s into portion size.

Place pre-soaked pieces of cod in a pan and fill it with plenty of cold water so the pieces of fish are completely submerged in the water. Add bay leaf and bring to boil.

View fullsize Creamed Salted Cod 3.jpg
View fullsize Creamed Salted Cod 4.jpg

Turn the heat down and cook further on a gentle heat for about 20 to 30 minutes and skim the foam on the surface as needed.

After the fish is cooked drain in the colander.

As soon as it is cool enough to handle carefully remove the skin and the odd bone.

With your fingers break the flesh into smaller pieces and place them in a pan or in a bowl of a standard mixer if you are using one.

View fullsize Creamed Salted Cod 5.jpg
View fullsize Creamed Salted Cod 6.jpg

If using a whole dried stockfish, this needs to be soaked and rehydrated first. Place the whole stockfish in a big stock pot and fill completely with cold water and soak for 2-3 days, changing the water every day. If you do not have a very big pot to fit the whole stockfish in, you can use a smaller pot, like a regular 5 litre stock pot, and then place the stockfish in a pot where half of it will probably stick out, and half will be submerged in the water. Soak the submerged part of stockfish for 24 hours and after this time the soaked part of the stockfish will get soft enough to bend, which will allow you to bend it in a such a way for the whole stockfish to be completely submerged into the water in order to get properly rehydrated. No need for rinsing as the dried stockfish is not salted.

Soaked and rehydrated cod needs then to be cooked. Place it in a stock pot, the same one you used for soaking, fill it with plenty of cold water (the whole fish needs to be completely submerged), add bay leaf and bring to boil. Lower the heat and cook further on a gentle heat until the fish is tender, for about 1 hour or just over.

Drain the fish and as soon as is cold enough to handle carefully remove the skin and all the bones.

With your fingers break the flesh into smaller pieces and place them back into in big pan or into a bowl of a standard mixer if you are using one.

Whether you have decided to use salted cod or stockfish you are now left with cooked cleaned small pieces of cod in a big pan or in a bowl of a standard mixer, again only if you are using one.

Place 5 Tbsp of extra virgin olive oil in a small frying pan, add the garlic previously peeled and cut in half lengthwise. Fry the garlic on a gentle heat until golden in colour to infuse the oil then discard the garlic.

Add garlic infused oil to the bowl.

Now the magic can begin.

Take a wooden spoon and start beating the pieces of fish quite vigorously. If using a standard mixer, put it on the lowest and slowest setting.

Keep beating and poring gradually the rest of the oil until you obtain a whitish paste and until the creamy mixture can no longer absorb any more oil.

This action of beating and adding very gradually small quantities of oil will eventually turn the pieces of cod into a light and fluffy cream, this process, in order to get the best result, can take up to 30 minutes.

View fullsize Creamed salted Cod 7.jpg
View fullsize Creamed salted cod 9.jpg

Add sea salt to your taste and very finely 1 chopped clove of garlic, although this optional, mix well, taste, and adjust the seasoning.

Transfer cod spread on a serving plate.

Serve it accompanied with slices of fresh rustic bread, toasted slices of bread (bruschetta) or slices of grilled yellow polenta.

Wine suggestion

Venezia Giulia Malvasia IGT 2019 - Skerk

December 16, 2021 /tina oblak
creamed salted cod, creamed stockfish, creamed salted cod mousse, baccala mantecato, Bakala na belo, Bakala, Bakalar, Istrian fish delicacy, Venetian fish specialty
Adriatic Recipe, Appetizers, Autumnal dish, Autumnal recipe, bite-sized nibbles, brunch, Canapés, Celebratory dish, Central European recipes, Christmas dish, dinner, Easter dish, Easy recipe, entrée course, Festive dish, Finger food, Fish & Seefood, healthy mael, Istrian cuisine, Istrian dish, Istrian food, Istrian gastronomy, main course, main dish, Nutritious dish, recipe from Northern Ital, Rustic dish, Slovenian cuisine, Slovenian food, Slovenian gastronomy, Small bites, Snacks, spreads, Starters, Winter dish, Winter recipe, fish spreads, fish starter
Comment
Spinach or chard with garlic and olive oil Istrian way 7.jpg

Spinach or chard with potatoes garlic and olive oil Istrian way Recipe

Beans and Sardines
October 02, 2021 by tina oblak in Adriatic Recipe, brunch, Central European recipes, Easy recipe, healthy mael, Istrian cuisine, Istrian dish, Istrian food, Istrian gastronomy, Nutritious dish, Rustic dish, Side Dishes, Slovenian cuisine, Slovenian food, Slovenian gastronomy, Vegan, Vegetarian

Spinach or chard with garlic and extra virgin olive oil is a peasant dish, hearty, rustic and nutritious. It is extremely easy to make, inexpensive and with its humble appearance it most certainly offers a lot more than meets the eye.

It is a perfect side dish to any grilled or fried fish, but equally delicious with pork, lamb or chicken and accompanied with fried egg makes a great vegetarian meal option.

Back home, on the Slovenian coast, this dish is a most frequent companion to grilled fish and grilled or deep fried squid, a bit like fish and chips and mushy peas in the United Kingdom.

Spinach or chard with garlic and olive oil is very popular in Dalmatia and on Dalmatian islands (Croatia) where it is believed it originated from. It is on this islands, where tomatoes, peppers, cucumbers and other summer vegetables are abundant during the summer, that chard would be the only green leaf vegetable that could grow during the scorching summer heat therefore it has been a very treasured vegetable containing a lot of vitamins and minerals and a lot of water make it very hydrating and easy to digest.

This dish travelled north along Dalmatian coastline to Istria where it has become as popular as in Dalmatia and is found on the menus in most restaurants and cooked in almost every household.

This is another dish that is part of my childhood and adulthood, it never came into the fashion, it never went out of the fashion, it has simply always been there...

I am sharing here my family recipe.

Spinach or chard with garlic and olive oil Istrian way 1.jpg

Ingredients

Serves 4-6 as part of meal

  • 1kg spinach, baby spinach or chard

  • 400-450g potatoes, peeled and cubed

  • 4 cloves of garlic, peeled

  • 5 Tbs extra virgin olive oil (the best you can afford)

  • sea salt

Method

Wash thoroughly spinach or chard, (no need to do so if bought already washed version) cut off the stalks and chop or just tear the leafs with your hands into smaller pieces. If you are not using the stalks for this recipe you can use them for vegetable minestrone, put them on a compost or simply discard.

If using chard remove tough centre stalks.

View fullsize Spinach or chard with garlic and olive oil Istrian way 2.jpg
View fullsize Spinach or chard with garlic and olive oil Istrian way 3.jpg

Place cubed potatoes in a pan, add water, a pinch of salt and boil until just tender, for about 10 minutes. Drain and set aside.

Fill a large pot with ¼ of hot water, add spinach or chard and cook only for few minutes until wilted.

Drain very well in a colander. When the spinach is in a colander, press down with a back of a wooden spoon to remove a bit of excess water. You can use a big colander to drain both potatoes and chard.

Spinach or chard with garlic and olive oil Istrian way 4.jpg

Rinse quickly and dry the pot where you cooked the spinach, add extra virgin olive oil and garlic.

Fry the garlic on a gentle heat until it becomes softer and golden in colour. The oil will be nicely infused with the garlic.

Remove and discard the garlic.

Add spinach and potatoes to the pan with garlic infused oil and sautéed on a medium heat for about 15 minutes, stirring occasionally or until you get a nice velvety consistency and you loose most of the water from the spinach.

Adjust the seasoning with sea salt and serve hot or at the room temperature.

View fullsize Spinach or chard with garlic and olive oil Istrian way 5.jpg
View fullsize Spinach and chard with garlic and olive oil 6.jpg

Just a thought

This vegetable side dish has a delicate garlicky flavour. If you are a big fan of garlic and keen on stronger garlicky taste, add crushed garlic to extra virgin olive oil without removing it instead of adding the whole garlic and removing it after the oil has been infused like suggested in the recipe.

You can also prepare this dish by cooking the potatoes and the spinach or chard in one big pot together rather then separately. Use one big pot, boil cubed potatoes first until just tender then add spinach or chard and cook until wilted, drain both in big colander.

October 02, 2021 /tina oblak
sautéed baby spinach with potatoes, easy spinach recipe, sautéed spinach with potatoes, fresh baby spinach, baby spinach in a skillet, quick spinach recipe, potatoes and spinach
Adriatic Recipe, brunch, Central European recipes, Easy recipe, healthy mael, Istrian cuisine, Istrian dish, Istrian food, Istrian gastronomy, Nutritious dish, Rustic dish, Side Dishes, Slovenian cuisine, Slovenian food, Slovenian gastronomy, Vegan, Vegetarian
Comment
Green beans with tomatoes 13a.jpg

Green Beans with tomatoes Istrian style Recipe

Beans and Sardines
September 22, 2021 by tina oblak in Adriatic Recipe, Appetizers, brunch, Easy recipe, healthy mael, Istrian cuisine, Istrian dish, Istrian food, Istrian gastronomy, Nutritious dish, Rustic dish, Side Dishes, Slovenian cuisine, Slovenian food, Slovenian gastronomy, Vegan, Vegetarian

This comforting, rustic, vegetable side dish is super delicious and super easy to make, perfect to accompany just about any grilled or roasted meats or fish.

I am sharing with you the recipe my nona and my mother have made this dish very often when fresh green beans were in season and tasting at their best.

Green beans with tomatoes 1.jpg

This is a very popular dish during the summer and end of summer.

My maternal grandfather grew green beans at his vegetable garden, they got picked and enjoyed all the way through the summer, but somehow it would be the very last batch, at the end of the summer, that tasted the best. Did it really, or is this just an impression stored in my nostalgic box of memories? As a child I was aware that eating that last few green beans meant that the summer would very soon drew to a close...

Traditionally green beans in tomato sauce are eaten with soft polenta or just with some bread. It can also be served with cooked rice, fried eggs or on bruschetta.

Ingredients

Serves 4 as part of meal

  • 500g fresh green beans, washed and trimmed

  • 1 medium onion (about 140g), finely chopped

  • 250g tomatoes, washed and roughly chopped (I used fresh mini San Marzano tomatoes but you can use other varieties or good quality tinned tomatoes of your choice.) If using fresh tomatoes make sure the tomatoes are nicely ripe and sweet. You can change the quantity of the tomatoes according to your preference.

  • a bunch of fresh flat leaf parsley, stalks included (about 16g), finely chopped

  • 3 generous Tbsp extra virgin olive oil

  • 1 clove garlic, peeled and crushed

  • sea salt

  • 150ml water

Green beans with tomatoes 2.jpg

Method

Wash and trim green beans.

View fullsize Green beans with tomatoes 3.jpg
View fullsize Green beans with tomatoes 4.jpg

Cut them in three or four pieces.

View fullsize Green beans with tomatoes 5.jpg
View fullsize Green beans with tomatoes 6.jpg

Peel the onion and chop it finely then peel and crush the garlic.

In a fairly big pan, ideally non stick, put extra virgin olive oil.

Add the onions, a pinch of sea salt and sauté on a gentle heat for few minutes, stirring frequently, until they become soft and translucent.

Add the garlic and mix well with the onions.

Place green beans in a pan, mix well with onions and garlic and cook for about 10 minutes, stirring quite frequently.

Add chopped tomatoes, mix well with green beans and cook for further 10 minutes or until tomatoes start to break down a bit.

View fullsize Green beans with tomatoes 7.jpg
View fullsize Green beans with tomatoes 8.jpg
View fullsize Green beans with tomatoes 9.jpg
View fullsize Green beans with tomatoes 10.jpg

Season with sea salt, add fresh chopped parsley and add water.

Partially cover the pan with the lid and cook on a gentle heat for about 60minutes, stirring occasionally. After this simmering time the beans should be nice and soft.

If at any point during the cooking you feel the beans are getting too dry add a splash of water.

Season to taste and serve hot, at room temperature or cold.

Green beans with tomatoes 12.jpg

Just a thought

The quantity of the tomatoes for this recipe is a guideline only and you can adjust it according to your taste, liking and preference.

For this recipe you can use frozen green beans as well.

This is a great dish to be made ahead and refrigerated overnight.

September 22, 2021 /tina oblak
fresh green beans, green beans, frozen green beans, green beans with tomatoes, Braised green beans with tomatoes, Fagiolini al pomodoro in umido
Adriatic Recipe, Appetizers, brunch, Easy recipe, healthy mael, Istrian cuisine, Istrian dish, Istrian food, Istrian gastronomy, Nutritious dish, Rustic dish, Side Dishes, Slovenian cuisine, Slovenian food, Slovenian gastronomy, Vegan, Vegetarian
Comment
Plum Dumplings 18.jpg

Plum Dumplings Recipe

Beans and Sardines
September 16, 2021 by tina oblak in Adriatic Recipe, Appetizers, breakfast, brunch, Central European recipes, dessert, dinner, Easter treats, Eastern European recipes, Easy recipe, entrée course, Istrian cuisine, Istrian dish, Istrian food, Istrian gastronomy, main course, main dish, Mitteleuropean recipes, pudding, Rustic dish, Slovenian cuisine, Slovenian food, Slovenian gastronomy, Starters, supper, sweet course, Sweet Things, Vegetarian, Dumplings

This is a great dish for Autumn that originated in the Austro-Hungarian Empire. It is made with potato gnocchi dough in which you stuff the plums, simmer them in water, and then coat them with breadcrumbs, sugar and cinnamon mixture.

These rustic plum dumplings will become a real treat in the family since they are super delicious and easy to make! This dish is traditionally offered as a dessert, however, it is very common as a main course for lunch or dinner.

Plum dumplings are very well known and common throughout the countries that were once part of the Austro-Hungarian Empire. This dish is therefore very popular in Eastern and Central Europe as well as in Trieste and the province of Trieste in Italy.

This historical influence made plum dumplings a very appreciated meal in Slovenia, and is referred to in Slovenian as češpljevi cmoki or slivovi cmoki (češplje and slive meaning plums and cmoki meaning dumplings). They are widely available to buy frozen in bags in the supermarkets, but nothing is comparable to making them at home with this simple recipe.

This dish is very familiar to me, I grew up with it, and it was prepared frequently in the late summer and early autumn when plums are in peak season, in abundance, and with the right level of sugar and sweetness in them.

In Slovenia, where I come from, plum trees are very common to have in the back garden or in a near by orchard and the sight of these beautiful, humble, bluish purple colour fruits, almost like jewels hanging from the branches, is simply heart warming. Plums are popular to use not only for plum dumplings but also for other desserts like bake trays, tarts, jams, and compotes.

Damsons plums, being oval and small, therefore easy to handle, are the preferred and most frequently used type of plums for this recipe. Other types of plums work very well too and fresh apricots are also used frequently to make the dumplings.

If you decide to offer plum dumplings as a dessert, I would suggest to serve 2, if you decide to prepare them as a main meal then 3 or 4 depending on the size.

Plum Dumplings 1.jpg

Ingredients

Serves 6- 8 (you will get about 16 dumplings)

Ingredients for the plum dumplings

  • 16 fresh plums, Damsons plums and prune plums most commonly used, you can use other variety (plums should be sweet, ripe and fairly firm to the touch, avoid overripe with soft pulp as it gets quite difficult and messy to pit them). You can use fresh apricots instead.

  • 1kg floury, yellow-fleshed potatoes, e.g. King Edward, Maris Piper, (avoid new potatoes). I use red skin potatoes.

  • 300g all purpose flour (plus extra for flouring the board and working surface)

  • 1 egg, slightly beaten

  • sea salt, a pinch

Ingredients for the breadcrumb coating

The ingredients stated here are to coat all the dumplings, if you wish to half the quantity of dumplings half the ingredients for the breadcrumb coating

  • 100g unsalted butter

  • 5 Tbsp natural dry breadcrumbs

  • 5 Tbsp caster sugar

  • 1 Tsp cinnamon

Method

Start this recipe by making a basic potato gnocchi dough. (For more details refer to my full step by step recipe for Potato gnocchi dough)

Wash the potatoes, with the skin on, under cold running water.

Place the potatoes in a saucepan or a pot, cover with cold water and bring to boil. After the water has come to a boil, cook for about 20 minutes or until tender. Cooking time will obviously vary depending on the size of the potatoes you are using.

Don't pierce them during cooking and don't overcook them allowing the skin to burst as they will absorb too much water, alternatively you can steam them.

Remove from the pot, drain them in a colander and let them cool enough to handle, then remove the skin. If the potatoes are still quite warm to handle, the best way to remove the skin is to stick the fork though the potato and peel it using a knife.

Put the flour on a working surface, add salt and mix with the fork.

Make a well in the middle and pass the potatoes through a potato ricer while still warm as they become stickier when cooler. Allow riced potatoes to cool for few minutes and then add the egg.

With your fingers work the flour into the potato and egg, bringing the dough together, until it becomes a soft, pliable dough and do not overwork it. If the dough is too sticky, wet and soft add a bit more flour. Make sure your working surface is always well floured.

When the dough is the right consistency it should not stick to your fingers.

Shape the potato dough into a log.

Plum Dumplings 4.jpg

Prepare your plums by washing them and pat dry them. Then cut each plum lengthwise all the way round in order to get two halves and remove the pits.

View fullsize Plum Dumplings 2.jpg
View fullsize Plum Dumplings 3.jpg

Flour well your working surface and divide and cut the potato dough log roughly into 16 portions.

With your hands slightly floured, flatten and shape each portion into a round circle.

View fullsize Plum Dumplings 4a.jpg
View fullsize Plum Dumplings 5.jpg

Place one half of the plum in the centre and fill it with half Tsp of sugar, then place the other half of the plum on top of it.

If your plums are quite big in size, you might want to use only one half, as you will end up with very big dumplings which are more difficult to handle and not looking particularly elegant on a serving plate.

View fullsize Plum Dumplings 6.jpg
View fullsize Plum Dumpling 7.jpg

Wrap the dough tightly around the plums.

Seal the edges properly and tightly and shape it into a ball, roughly the size of a peach.

If the edges do not stick properly, dampen the edges with your fingers previously dipped in a bit of water, this will act a bit like a glue.

This step is quite important to prevent the dumplings from bursting and losing the juices during cooking.

Make sure you place each dumpling on a well floured surface to avoid sticking.

View fullsize Plum dumplings 8.jpg
View fullsize Plum Dumplings 9.jpg

It is quite crucial, when making dumplings, that you start and finish the process without interrupting for too long, as the sauce from inside the dumplings (the sugar inside the plum starts dissolving) will start leaking from the dumplings making it quite a mission to rescue them, and this is from the first hand experience!

Repeat the process until you use all the dough.

View fullsize Plum Dumplings 10.jpg
View fullsize Plum Dumplings 11.jpg
Plum Dumplings 12.jpg

Fill a large pot with water, add a generous pinch of salt and bring to boil.

Place gently each plum dumpling in a pot making sure they do not stick to the bottom.

Cook the plum dumplings in simmering water for about 12 minutes (not strong boiling as that can damage the dumplings).

They are fully cooked when they float on the surface.

While the plum dumplings are simmering, make the breadcrumbs sauce.

In a large pan, ideally non stick, melt gently the butter, add the breadcrumbs and toast for few minutes on a medium-low heat until slightly darker in colour.

Add sugar and cinnamon and mix until all the ingredients are well combined. Remove the pan from the heat to avoid burning the breadcrumbs mixture.

View fullsize Plum Dumplings 13.jpg
View fullsize Plum Dumplings 14.jpg

With a slotted spoon, remove plum dumplings from the simmering water.

Transfer them and place them in a pan with breadcrumbs mixture.

View fullsize Plum Dumplings 15.jpg
View fullsize Plum Dumplings 16.jpg

Shake the pan gently so the dumplings can roll around and get fully coated in the breadcrumbs mixture.

Plum Dumplings 17.jpg

Place on the serving plate, dust them with a bit of extra icing sugar and serve immediately. They are best eaten hot but equally delicious at room temperature.

Plum Dumplings 19.jpg

Just a thought

If you decide to only make half a batch of plum dumplings, you can use half of the potato dough for the plum dumplings and the other half for potato gnocchi. (see my full recipe step by step for potato gnocchi).

You can store cooked plum dumplings for up to three days in a airtight container.

If you need and desire to warm them up, putting them in a microwave is a good option as they retain the moisture.

The great thing about plum dumplings is also that they freeze very well. It is very important that you spread the uncooked dumplings in a single layer, leaving a bit of space between each dumpling, so they don't stick together, on a well floured wooden board, baking sheet, serving tray laid with baking parchment or with well floured kitchen cloth or similar.

Put the tray with the freshly made dumplings into a freezer, for at least 20- 30 minutes, and once frozen, put them into a freezing bag.

When you want to cook them just drop them frozen directly into a boiling salted water without defrosting them first, bearing in mind that the cooking time will be slightly longer, around 15 minutes. They are ready when they are floating on the surface.

Wine suggestion

Moscato Rosa delle Venezie IGT 2014 - Foffani

September 16, 2021 /tina oblak
Autumn Recipe, autumnal recipe, plums, plum puddings, plum desserts, potato gnocchi dough, češpljevi cmoki, slivovi cmoki, sweet dumplings
Adriatic Recipe, Appetizers, breakfast, brunch, Central European recipes, dessert, dinner, Easter treats, Eastern European recipes, Easy recipe, entrée course, Istrian cuisine, Istrian dish, Istrian food, Istrian gastronomy, main course, main dish, Mitteleuropean recipes, pudding, Rustic dish, Slovenian cuisine, Slovenian food, Slovenian gastronomy, Starters, supper, sweet course, Sweet Things, Vegetarian, Dumplings
Comment
  • Newer
  • Older